
AQUOS 50802 V04
AQUOS Haswing 2.4G Remote Control User Manual
Model: 50802 V04
Introduction
This user manual provides detailed instructions for the AQUOS Haswing 2.4G Remote Control. This remote is specifically designed for use with compatible Haswing electric trolling motors. Please read this manual thoroughly before operating the device to ensure proper function and longevity.
Compatibility
The AQUOS Haswing 2.4G Remote Control is ONLY compatible with the following Haswing electric trolling motor versions:
- Haswing 50700-V18
- Haswing 50718D-V08
- Haswing 50706-V03
It is crucial to verify your trolling motor's serial number before purchasing or attempting to use this remote. The serial number for bow mount trolling motors (50700/50718D) is located on the inside of the side door in the mounting position or on the back of the gearbox. For transom trolling motors (50706), the serial number is located on the mounting bracket.
Note: If your trolling motor version is not one of the models listed above, particularly if it is not a 2.4G version, please choose the 433HZ wireless remote control instead. This remote is not compatible with GPS motors or other models not explicitly listed.

Figure 1: Compatibility Guide. This image illustrates the difference between the 2.4G remote and the 433Hz remote, showing the corresponding light board colors on the trolling motor (orange for 2.4G, grey for 433Hz) to help identify the correct version.
Setup
1. What's in the Box
Upon opening the package, you should find the following items:
- AQUOS Haswing 2.4G Remote Control
- USB Charging Cable (x1)
- Lanyard/Slings (x1)

Figure 2: Package Contents. This image displays the AQUOS Haswing 2.4G Remote Control along with its included USB charging cable and lanyard.
2. Charging the Remote Control
Before first use, or when the battery is low, charge the remote control using the provided USB charging cable.
- Locate the USB charging port on the remote control. This port is protected by a waterproof plug.
- Carefully open the waterproof plug.
- Connect the small end of the USB charging cable to the remote control's charging port.
- Connect the other end of the USB charging cable to a 5V 500mA USB charger (charger not included).
- The indicator light on the remote will be red during charging.
- The indicator light will turn green when the remote is fully charged.

Figure 3: Charging the Remote. This diagram illustrates how to connect the USB charging cable to the remote control's charging port and the type of charger recommended (DC 5V 500mA).
3. Pairing the Remote to the Motor
After replacing a new remote control, it is necessary to pair it with your trolling motor. The "Pairing" button on the 2.4G wireless remote is the same as the "Turtle" (speed down) button.
- Ensure your trolling motor is powered on.
- Locate the "magnifying glass" button below the power status lights on the trolling motor.
- On the remote control, identify the "Turtle" (speed down) button, which also functions as the pairing button.
- Simultaneously press and hold the "magnifying glass" button on the motor and the "Turtle" button on the remote control.
- Continue holding both buttons for approximately 3 seconds, or until you hear three beeps from the motor.
- Release both buttons. The remote and motor are now successfully paired.

Figure 4: Pairing Process. This diagram highlights the location of the pairing buttons on both the remote control and the trolling motor, essential for establishing a connection.
4. Re-pairing the Wireless Foot Control (If Applicable)
If you use a wireless foot control with your trolling motor, you must re-pair it via the newly paired 2.4G remote control after pairing the remote to the motor. Refer to your foot control's specific instructions for its pairing procedure, which typically involves using the new remote as an intermediary.
Operating Instructions
1. Remote Control Button Functions
The AQUOS Haswing 2.4G Remote Control features several buttons for intuitive control of your trolling motor:

Figure 5: Remote Control Layout. This diagram provides a clear overview of each button on the remote control and its corresponding function.
- ON Button: Powers on the remote control.
- OFF Button: Powers off the remote control.
- Left Arrow Button: Steers the motor to the left.
- Right Arrow Button: Steers the motor to the right.
- Rabbit Icon Button (Speed Up): Increases the motor speed. (Click press)
- Turtle Icon Button (Speed Down / Pairing): Decreases the motor speed. (Click press) Also used for pairing (Long press).
- Fan Icon Button (Motor On/Off): Toggles the motor's propulsion on or off.
- Mode Signal Light: Indicates the current operating mode or status.
2. General Usage
The remote control is designed for convenient operation of your trolling motor from a distance of up to 164 feet (50 meters). Its compact size makes it easy to hold, and it can also be worn with the included lanyard for hands-free access.
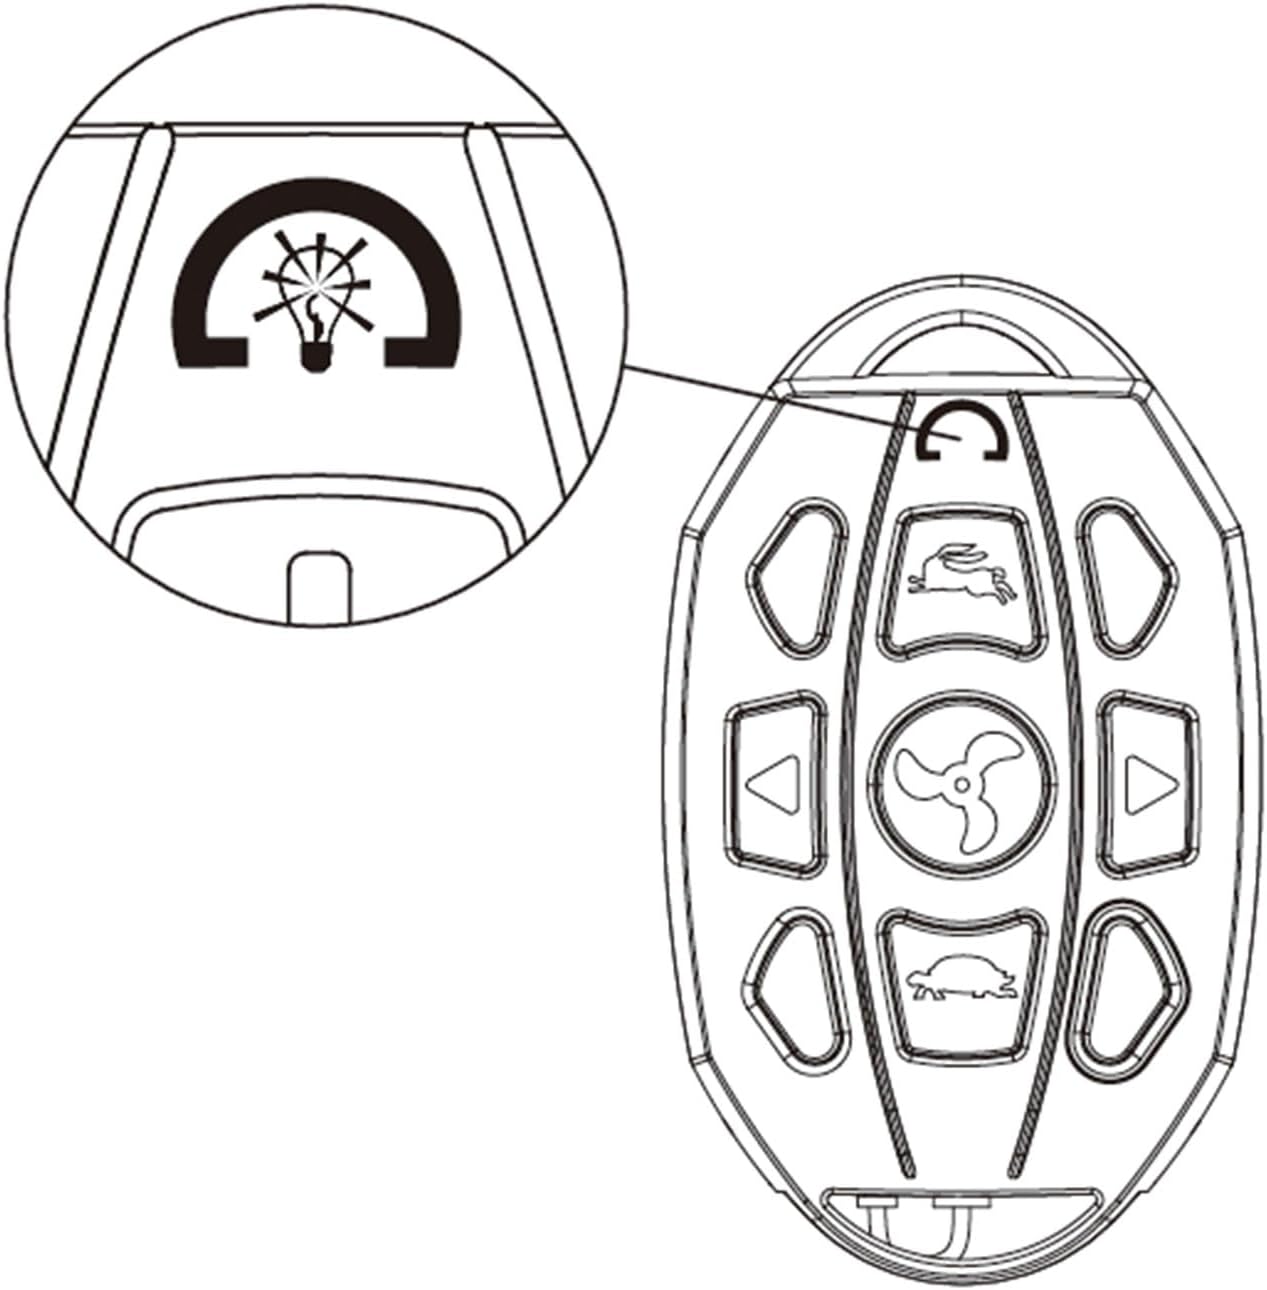
Figure 6: Mode Signal Light. This image highlights the location and icon for the mode signal light on the remote control, which provides visual feedback on the remote's status.
Maintenance
- Charging: Always use a 5V 500mA charger for optimal battery life. Avoid using chargers with higher voltage or current outputs, as this may damage the remote's internal components.
- Storage: Store the remote control in a dry place away from direct sunlight and extreme temperatures when not in use.
- Cleaning: Wipe the remote with a soft, damp cloth. Do not use harsh chemicals or abrasive cleaners. Ensure the waterproof plug for the charging port is securely closed when not charging to prevent water ingress.
- Battery Care: For long-term storage, it is recommended to charge the remote control to approximately 50% every few months to maintain battery health.
Troubleshooting
| Problem | Possible Cause | Solution |
|---|---|---|
| Remote control does not respond. | Battery is low or depleted. | Charge the remote control using the provided USB cable. Check if the indicator light turns red during charging and green when full. |
| Remote control does not pair with the motor. | Incorrect pairing procedure. Remote is not compatible with the motor version. |
|
| Wireless foot control stops working after pairing new remote. | Foot control needs to be re-paired. | Re-pair the wireless foot control with the trolling motor via the new 2.4G remote control. Refer to your foot control's manual for specific instructions. |
| Limited range or intermittent connection. | Obstructions between remote and motor. Interference from other devices. | Ensure a clear line of sight between the remote and the motor. Move away from other electronic devices that might cause interference. |
Specifications
| Feature | Detail |
|---|---|
| Brand | AQUOS |
| Model Number | 50802 V04 |
| Connectivity Technology | Radio Frequency (2.4G) |
| Compatible Devices | Haswing 50700-V18, 50718D-V08, 50706-V03 Electric Trolling Motors |
| Max Number of Supported Devices | 1 (per remote) |
| Special Feature | Rechargeable |
| Item Weight | 5.3 ounces |
| Package Dimensions | 3.2 x 2.4 x 1.6 inches |
| Maximum Operating Distance | 164 feet (50 meters) |
Warranty and Support
For warranty information, technical support, or any inquiries regarding your AQUOS Haswing 2.4G Remote Control, please contact AQUOS customer service. Refer to the product packaging or the official AQUOS website for the most up-to-date contact details.
You may also find additional resources and FAQs on the AQUOS brand store page on Amazon: AQUOS Store.
Related documents50802 V04


Ask a question about this manual
Ask about setup, troubleshooting, compatibility, parts, safety, or missing instructions. Manuals+ will review the question and use this page’s manual context to help answer it.