maXpeedingrods NZ50EZ
maXpeedingrods Rear Air Suspension Bags Kit User Manual
Model: NZ50EZ
1. Product Overview
This manual provides detailed instructions for the installation, operation, and maintenance of your maXpeedingrods 5000 lbs Rear Air Suspension Bags Kit. Designed to enhance the stability and comfort of your vehicle, this air helper spring kit is an essential upgrade for hauling and towing heavy loads.
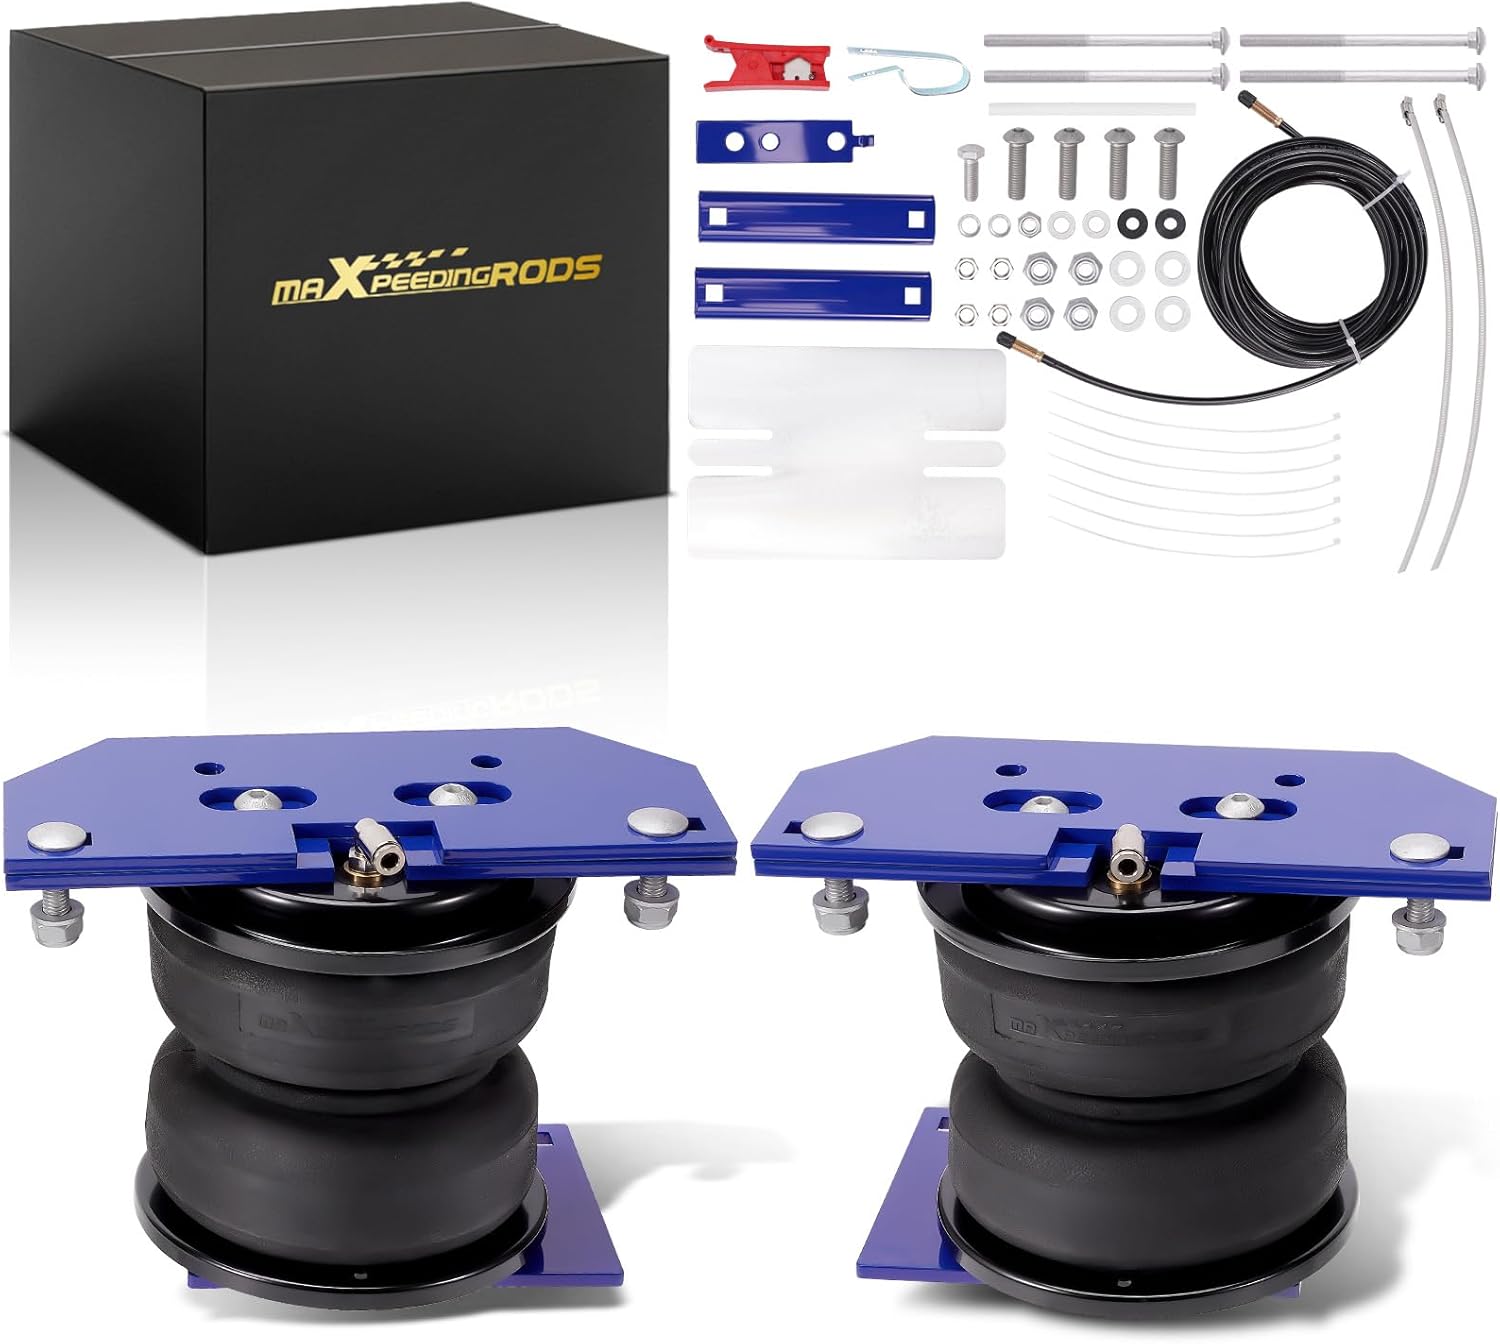
Figure 1: Complete maXpeedingrods Rear Air Suspension Bags Kit and components.
2. Application and Compatibility
This air suspension kit is specifically designed to fit the following vehicle models:
- Dodge Ram 4500 (2007-2024)
- Dodge Ram 5500 (2007-2024)
Important Note on Modified Vehicles:

Figure 2: Compatibility guidelines for modified vehicles.
- If the rear of your vehicle is lifted, an additional spacer may be required to support the kit.
- If only the front of your vehicle is lifted, the kit will fit.
- If both the front and rear of your vehicle are lowered, this kit will not fit.
3. Key Features
3.1. Enhanced Stability and Comfort
The air helper spring kit significantly improves vehicle stability and handling, especially when hauling or towing. It achieves this by reducing wear and tear on suspension components, eliminating vehicle squat, minimizing trailer sway, and preventing bottoming out.

Figure 3: Visual comparison of vehicle leveling before and after loading with the air suspension kit.

Figure 4: Benefits of the air suspension kit including stable performance, reduced noise, and decreased tire wear.
3.2. Adjustable Load Leveling Capability
The system offers up to 5,000 pounds of load leveling capability. Air pressure can be adjusted from 5 to 100 PSI, allowing you to customize the ride based on varying road conditions and load requirements for a safe and comfortable experience.

Figure 5: The air spring's maximum load leveling capacity.
3.3. Internal Jounce Bumper for Extra Protection
An internal jounce bumper is integrated within the air spring. This feature prevents damage when driving with an empty air spring and provides additional stability when towing or hauling heavy loads, acting as a secondary suspension component.

Figure 6: Illustration of the internal jounce bumper within the air spring.
3.4. Durable Construction Materials
The air springs are constructed with high-quality, multi-ply rubber sleeves and robust seals to ensure longevity and prevent leaks. Key components include high-strength ST12 steel end caps, thicker rubber air sleeves, and a multi-ply rubber structure.

Figure 7: Components contributing to the durability of the air spring.

Figure 8: Detailed view of the durable multi-ply sleeve construction.
3.5. Bolt-On Installation
The kit is designed for a straightforward bolt-on installation, simplifying the setup process.

Figure 9: Example of bolt-on installation on a vehicle chassis.
3.6. Reliable Mounting Accessories
The kit includes premium Q235 steel brackets and bolts with Dacromet anti-rust surface treatment, ensuring secure and long-lasting mounting.

Figure 10: Mounting accessories included with the kit.
3.7. Rigorous Fatigue Testing
The air springs undergo extensive fatigue testing, exceeding 5,000,000 cycles, to ensure durability, driving comfort, and safety under various conditions.

Figure 11: Air spring undergoing fatigue testing.

Figure 12: Quality control tests including burst pressure, fatigue, and airtightness.
4. Setup and Installation
Installation of the maXpeedingrods air suspension kit is designed to be a straightforward bolt-on process. While specific steps may vary slightly depending on your vehicle's exact configuration, the general procedure involves mounting the air springs and connecting the air lines.
4.1. General Installation Steps (Consult Vehicle-Specific Manual for Details)
- Safely lift and support the rear of the vehicle.
- Remove existing suspension components as necessary to access the mounting points.
- Position the air springs and mounting brackets according to the vehicle's frame and axle.
- Securely fasten all bolts and nuts. Ensure all connections are tight.
- Route the air lines from the air springs to an accessible inflation point. Avoid sharp bends or kinks.
- Connect the air lines to the air springs using the provided fittings.
- Lower the vehicle and inflate the air springs to a low pressure (e.g., 5-10 PSI) to check for proper seating.
- Perform a leak test (see Section 6.1).
- Adjust air pressure to desired level (see Section 5).
5. Operating Instructions
The maXpeedingrods air suspension kit allows for adjustable air pressure to optimize your vehicle's ride height and load support.
5.1. Adjusting Air Pressure
- The air springs are adjustable from 5 PSI (minimum recommended pressure for an empty vehicle) to 100 PSI (maximum pressure for heavy loads).
- Use an air compressor and a pressure gauge to inflate or deflate the air springs via the inflation valves.
- For an empty vehicle, maintain a minimum of 5 PSI to prevent damage to the air springs.
- When carrying a load or towing, gradually increase the air pressure until the vehicle achieves a level stance and the desired ride quality. Do not exceed 100 PSI.
- Adjust pressure as needed based on load weight and road conditions to ensure optimal stability and comfort.
6. Maintenance
Regular maintenance ensures the longevity and optimal performance of your air suspension kit.
6.1. Preventing and Checking for Leaks
Proper installation is crucial to prevent air leaks. Follow these guidelines and checks:

Figure 13: Key steps to prevent and detect air leaks.
- Ensure Smooth and Tight Seals: When cutting air lines, make sure the cut is perfectly smooth and straight to ensure a tight seal with the fittings. An uneven cut can lead to leaks.
- Proper Air Line Routing: Verify that the air line is properly placed and routed, avoiding sharp bends, kinks, or contact with moving parts or hot surfaces.
- Soap and Water Test: To check for leaks, fill a spray bottle with a mixture of soap and water. Spray down all fittings and the air bag itself. Bubbles forming indicate an air leak. Tighten connections or re-seat air lines as necessary.
6.2. General Maintenance Tips
- Periodically inspect the air springs, brackets, and air lines for any signs of wear, damage, or corrosion.
- Ensure all mounting hardware remains tight.
- Maintain recommended air pressure levels; avoid driving with completely deflated air springs.
7. Troubleshooting
7.1. Common Issues and Solutions
| Problem | Possible Cause | Solution |
|---|---|---|
| Air Leakage | Improperly cut air line, loose fitting, damaged air line/bag. | Perform soap and water test (Section 6.1). Re-cut and re-seat air lines. Tighten fittings. Replace damaged components if necessary. |
| Vehicle Not Leveling Properly | Incorrect air pressure, overloaded, air leak. | Adjust air pressure within recommended range (5-100 PSI). Reduce load if exceeding kit capacity. Check for leaks. |
| Kit Does Not Fit Modified Vehicle | Vehicle lowered front and rear. | This kit is not compatible with vehicles lowered at both front and rear. Refer to Section 2 for compatibility. |
| Excessive Bottoming Out | Insufficient air pressure, extremely heavy load. | Increase air pressure. Ensure load is within 5000 lbs capacity. |
8. Specifications
| Specification | Detail |
|---|---|
| Product Model | NZ50EZ |
| Load Leveling Capacity | Up to 5,000 lbs |
| Adjustable Air Pressure | 5 PSI to 100 PSI |
| Vehicle Position | Rear |
| Item Weight | 29.7 pounds |
| Product Dimensions | 17.17 x 14.57 x 8.31 inches |
| Country of Origin | China |
| Materials | High-Strength ST12 Steel End Caps, Multi-Ply Rubber Air Sleeves, Q235 Steel Brackets, Dacromet Anti-Rust Bolts |

Figure 14: Different air spring load capacities. This kit provides 5000 lbs capacity.
9. Warranty and Support
maXpeedingrods is committed to providing high-quality products and excellent customer service.
9.1. Warranty Information
maXpeedingrods warrants its products against manufacturing defects under normal use for 1 year from the date of purchase. Replacement is available within 12 months for quality issues.
9.2. Customer Support
For technical support, customer service, or warranty claims, please contact maXpeedingrods customer support. They offer 24/7 customer service and lifetime technical support.

Figure 15: maXpeedingrods customer support and warranty details.
Related Documents - NZ50EZ
 |
MAXPEEDINGRODS Air Spring Kit Installation Guide for Dodge Ram 2500/3500 Comprehensive installation guide for the MAXPEEDINGRODS Rear Air Helper Spring Leveling Kit, designed for Dodge Ram 2500 and 3500 models. Includes a detailed parts list and step-by-step instructions for proper assembly and mounting. |
 |
MAXpeedingRODS Air Spring Kit Installation Guide for Dodge Ram 3500 A comprehensive installation guide for the MAXpeedingRODS Air Spring Kit, designed as a rear air helper spring leveling kit for Dodge Ram 3500 (2019-2023). This guide details the parts list, pre-installation instructions, and step-by-step assembly procedures. |
 |
Maxpeedingrods Air Spring Kit Installation Guide for Dodge Ram 2500/3500 A comprehensive installation guide for the Maxpeedingrods Rear Air Helper Spring Leveling Kit designed for Dodge Ram 2500 and 3500 vehicles. This guide details the parts list, pre-installation instructions, and step-by-step assembly procedures for installing the air spring kit. |
 |
YITAMOTOR Headlight Assembly Installation Guide for Dodge Ram 1500/2500/3500 (2009-2018) Step-by-step installation guide for YITAMOTOR Quad Headlamp Assemblies (OEM Part Numbers 55277409AG, 55277410AG) for 2009-2018 Dodge Ram 1500, 2500, and 3500 trucks. Includes before installation warnings and warm tips for alignment. |
 |
MAXPEEDINGRODS Air Spring Kit Installation Guide for RAM/Dodge 2500 Detailed installation guide for the MAXPEEDINGRODS Rear Air Helper Spring Leveling Kit for RAM/Dodge 2500 vehicles. Learn how to install the air spring kit step-by-step. |
 |
SR1 Running Board Installation Guide for Dodge Ram 1500/2500/5500 (2009-2024) Comprehensive installation instructions for SR1 Running Boards (Part #WB-DA208M), compatible with 2009-2024 Dodge Ram 1500, 2500, and 5500 Crew Cab models. Includes parts list, required tools, and detailed step-by-step guidance with textual descriptions of diagrams. |
Ask a question about this manual
Ask about setup, troubleshooting, compatibility, parts, safety, or missing instructions. Manuals+ will review the question and use this page’s manual context to help answer it.