
Important Safety Instructions
Always wear eye protection, long sleeves, and sturdy shoes. Keep children and pets away from the operating area. Ensure hands and feet are kept clear of the cutting area at all times.
- Read all instructions carefully before operating the tool.
- Do not operate the trimmer in wet conditions or in tall, dense grass that may cause the motor to strain.
- Inspect the work area for debris, rocks, or other objects that could be thrown by the trimmer.
- Ensure the battery is securely seated before operation.
- Always disconnect the battery before performing any maintenance or changing accessories.
Product Overview
The MtiolHig 3-in-1 Cordless String Trimmer is a versatile tool designed for various lawn care tasks, including trimming, edging, and light mowing. It features a brushless motor for enhanced efficiency and is compatible with Milwaukee 18V batteries.
Key Features
- 3-IN-1 Functionality: Easily converts between string trimmer, edger, and lawn mower modes.
- Adjustable Head and Handle: Head tilts 75° and handle tilts 90° for versatile use on sloped terrain and hard-to-reach areas.
- Brushless Motor: Enhances efficiency, extends tool life, and reduces maintenance.
- Milwaukee 18V Battery Compatibility: Designed for seamless use with Milwaukee 18V batteries (battery not included).
- Lightweight and Portable: Weighs only 5.5 lbs with a folding design for easy maneuverability and storage. Adjustable height from 50" to 60".
- Adjustable Spacer Guard: Provides protection for plants and landscaping during trimming.
- Power Display: Equipped with a battery level display for monitoring remaining runtime.
- Versatile Cutting: 11" cutting diameter, 4800 rpm no-load speed, suitable for grass, weeds, and light brush.

Figure 1: The MtiolHig 3-in-1 Cordless String Trimmer, showcasing its compact design and included tools for assembly.
Setup
Unboxing and Initial Inspection
Upon opening the package, verify all components are present and undamaged. The trimmer is designed for compact shipping and requires some assembly.
Video 1: This video demonstrates the installation and disassembly process of the Cordless String Trimmer, showing how to attach the cutting head, guard, and handle, and how to fold the unit for storage.
Assembly Instructions
- Attach the Protective Guard: Secure the protective guard to the trimmer head using the provided screws. This guard prevents debris from being thrown towards the user.
- Install Trimmer Lines: Insert the square-tipped trimmer lines into the designated slots on the cutting head. Ensure they are firmly seated.
- Connect the Shaft: Align the two sections of the shaft and secure them together. The folding mechanism allows for compact storage.
- Attach the Auxiliary Handle: Slide the auxiliary handle onto the shaft and adjust its position for comfortable operation. Tighten the clamp to secure it.
- Install the Edger Wheel (Optional): If using the edger function, attach the edger wheel assembly to the trimmer head as shown in the diagram.

Figure 2: The adjustable head and handle allow for precise trimming and edging, adapting to various terrains and user preferences.
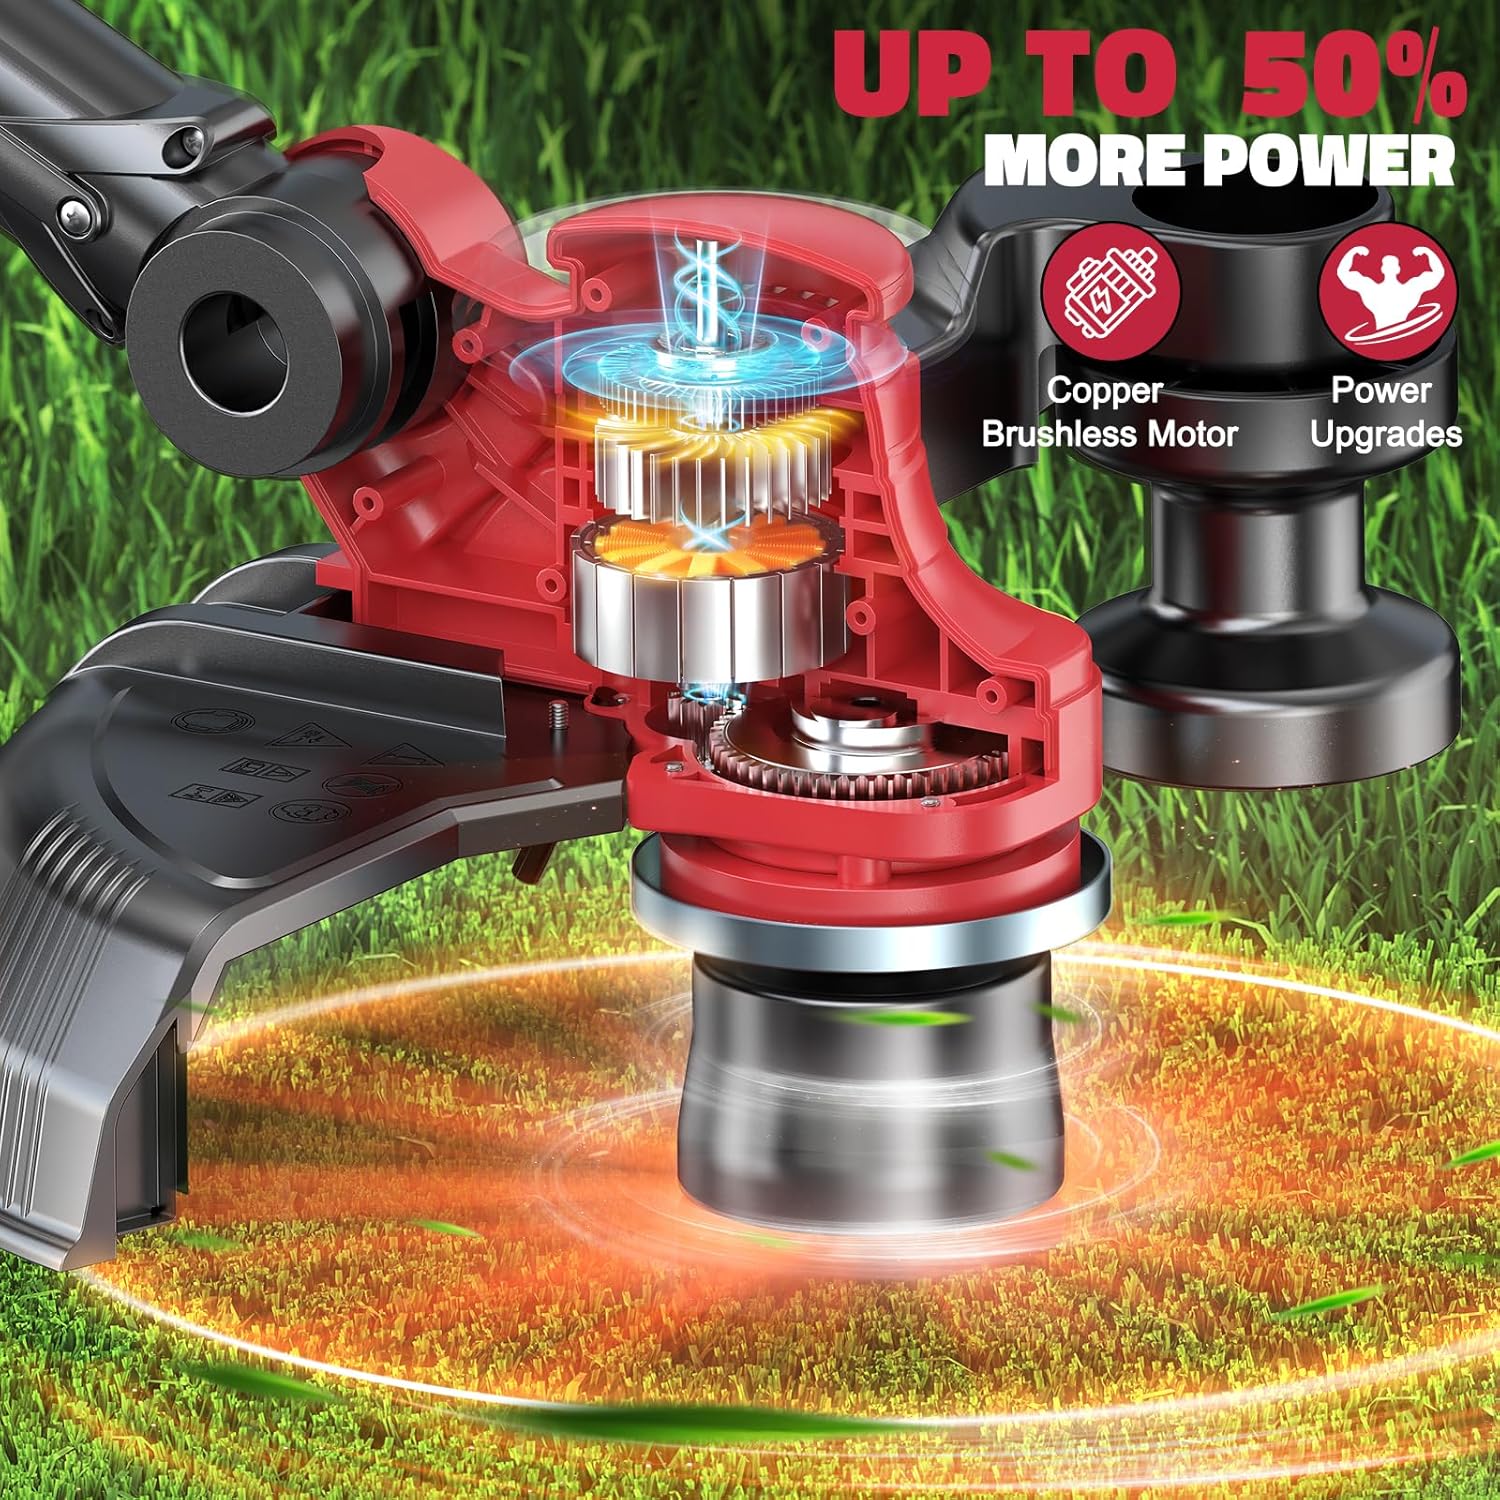
Figure 3: The brushless motor technology provides efficient power delivery and extended tool lifespan, reducing maintenance needs.

Figure 4: The folding design allows the trimmer to be reduced to 28 inches in length, significantly saving storage space.

Figure 5: The trimmer is designed for seamless compatibility with Milwaukee 18V batteries, featuring a convenient battery level display.
Operating Instructions
Attaching the Battery
Ensure the battery is fully charged. Slide the Milwaukee 18V battery into the battery slot on the trimmer handle until it clicks securely into place. The power display will illuminate to show the current charge level.
Starting the Trimmer
To start the trimmer, press the safety lock button located on the handle, then squeeze the trigger. Release the trigger to stop the trimmer.
Trimmer Mode
For general grass trimming, hold the trimmer with the cutting head parallel to the ground. Use a sweeping motion to cut grass evenly. The adjustable shaft length (50" to 60") allows for comfortable use by various heights.
Edger Mode
To convert to edger mode, press the black button near the trimmer head to rotate the head 90 degrees. Engage the edger wheel (if installed) to guide the trimmer along sidewalks, driveways, or flower beds for clean, precise edges.
Mower Mode
For light mowing tasks, the trimmer can be used by holding it at a consistent height above the ground, similar to a traditional lawn mower. The 11" cutting diameter is suitable for smaller areas or touch-ups.
Video 2: This video demonstrates the 3-in-1 functionality of the trimmer, showcasing its use as a weed wacker, edger, and lawn mower for various yard maintenance tasks.

Figure 6: The lightweight and portable design of the trimmer reduces user fatigue, making it easy to handle for extended periods.

Figure 7: The trimmer's versatile design allows for wide use in different garden and yard scenarios, from precise edging to general grass maintenance.
Maintenance
Replacing Trimmer Line
When the trimmer lines become worn or break, replace them with new square-tipped lines. Ensure the trimmer is off and the battery is removed before attempting replacement. Simply thread the new lines through the designated holes on the cutting head.
Cleaning
After each use, clean the trimmer head and protective guard to remove grass clippings and debris. Use a damp cloth to wipe down the exterior. Do not use harsh chemicals or abrasive cleaners.
Storage
Store the trimmer in a dry, cool place away from direct sunlight and moisture. Utilize the folding feature to minimize storage space. Remove the battery if storing for extended periods.
Troubleshooting
| Problem | Possible Cause | Solution |
|---|---|---|
| Trimmer does not start | Battery not inserted correctly or discharged. Safety lock not engaged. | Ensure battery is fully charged and properly seated. Press safety lock before squeezing trigger. |
| Reduced cutting performance | Worn or broken trimmer lines. Debris wrapped around the head. | Replace trimmer lines. Clear any debris from the cutting head (ensure battery is removed first). |
| Excessive vibration | Damaged or unbalanced cutting head/lines. | Inspect trimmer lines for even wear. Replace if necessary. Check for any damage to the cutting head. |
| Battery drains quickly | Battery not fully charged. Operating in very dense material. | Ensure battery is fully charged before use. Avoid prolonged operation in extremely thick vegetation. Consider a higher Ah battery for longer runtime. |
Specifications
| Attribute | Value |
|---|---|
| Brand | MtiolHig |
| Model Number | cordless string trimmer |
| Power Source | Battery Powered (Compatible with Milwaukee 18V) |
| Item Weight | 6 Pounds |
| Cutting Width | 11 Inches |
| Product Dimensions | 27"L x 18"W (Folded) |
| Speed | 4800 RPM (No-load) |
| Assembly Required | Yes |
| Cordless | Yes |
| Recommended Uses | Mower, Edging, Trimming |
| Line Diameter | 0.11 inches |
Warranty and Support
This product is sold by Pappylife and fulfilled by Amazon. For specific warranty details, please refer to the product listing on Amazon or contact the seller directly. Standard return policy allows for returns or replacements within 30 days of purchase.
Protection Plans
Extended protection plans are available for purchase separately:
- 2-Year Protection Plan: Available for $8.99 (one-time payment).
- 3-Year Protection Plan: Available for $11.99 (one-time payment).
- Complete Protect: A monthly plan covering all eligible past and future purchases for $16.99/month.
For further assistance or technical support, please contact MtiolHig customer service through the Amazon platform.