1. Introduction
Welcome to the user manual for the TOWODE 5MP 8-Channel Security Camera DVR System. This system is designed to provide comprehensive surveillance for your property, featuring high-definition cameras, efficient video compression, and remote access capabilities. Please read this manual thoroughly before installation and operation to ensure proper use and optimal performance.
2. Package Contents
Verify that all items listed below are included in your package:
- 1x 8-Channel DVR Recorder
- 4x 5MP HD Surveillance Cameras
- 1x 1TB Hard Disk Drive (Pre-installed)
- 4x 15-meter Integrated Video/Power Cables
- 4x 12V2A Power Supplies (for cameras)
- 1x DVR Power Adapter
- 1x USB Mouse
- 1x User Manual

Image: Overview of the TOWODE 8-Channel DVR System components, including the DVR unit, four 5MP cameras, and a 1TB hard drive.
3. System Overview and Key Features
The TOWODE 5MP 8-Channel Security Camera DVR System offers advanced surveillance capabilities. Key features include:
- 8-Channel DVR: Supports up to 8 cameras with AHD/TVI/CVI/CVBS/IP camera 5-in-1 access mode.
- 5MP Ultra HD Cameras: Capture video at 25fps with 2592*1944 HD resolution, featuring a 3.6mm lens and 80-foot infrared night vision.
- IP66 Weatherproof Cameras: Durable metal aluminum construction suitable for both indoor and outdoor use in various weather conditions.
- H.265+ Video Compression: Efficiently saves storage space (up to 80% compared to H.264) and improves image quality.
- Intelligent Alarm System: Mobile detection triggers alarms and sends notifications via email or mobile phone.
- Remote Access: View real-time surveillance and video playback via mobile phones, computers, and other devices.
- Pre-installed 1TB HDD: For immediate recording, expandable up to 14TB with an external HDD.
- 24/7 Non-stop Recording: Continuous recording for comprehensive security.

Image: Detailed diagram illustrating the connections and features of the TOWODE 5MP Hybrid 5-IN-1 Security Camera System, including DVR ports and camera specifications.
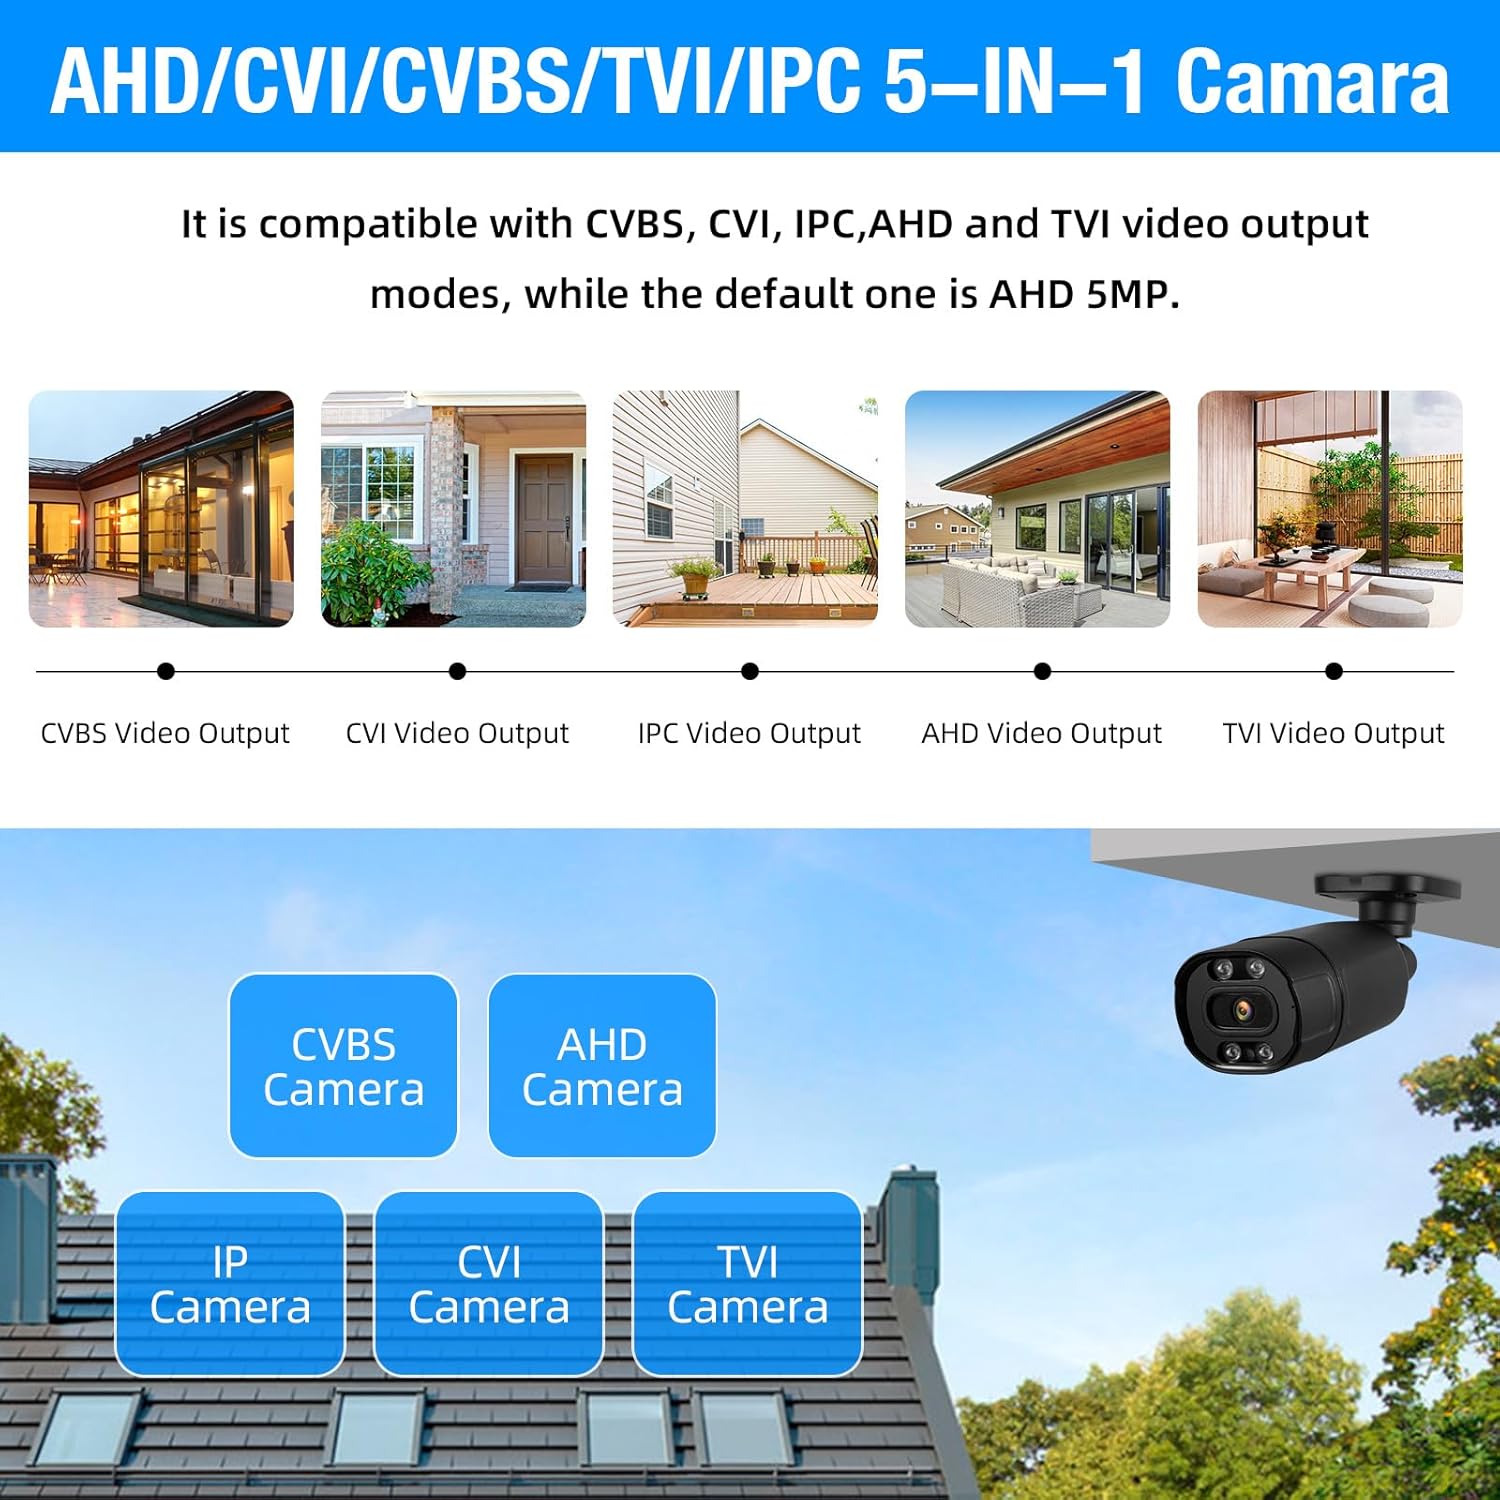
Image: Visual representation of the DVR's compatibility with multiple camera types: CVBS, CVI, IPC, AHD, and TVI, highlighting its 5-in-1 capability.
4. Setup Guide
4.1 Unpacking and Initial Inspection
Carefully unpack all components and verify them against the package contents list. Inspect for any visible damage to the DVR or cameras.
4.2 Connecting the Hard Drive (if not pre-installed)
The 1TB hard drive is typically pre-installed in your DVR. If it is not, open the DVR casing, connect the SATA data and power cables to the HDD, and secure the HDD within the DVR chassis using the provided screws.

Image: The DVR unit highlighting the pre-installed 1TB hard drive and its capability to support up to 14TB of external storage.
4.3 Connecting Cameras to the DVR
Connect each 5MP camera to the DVR using the provided 15-meter integrated cables. These cables transmit both video signals and power. Connect the BNC connector to the 'VIDEO IN' ports on the back of the DVR and the power connector to the camera's power input.
4.4 Connecting the DVR to a Monitor
Connect the DVR to a monitor using either the VGA or HDMI (HD-port) output. Ensure the monitor is powered on and set to the correct input source.
4.5 Connecting Power and Network
Connect the DVR to a power outlet using the provided power adapter. Connect an Ethernet cable from the DVR's 'NET' port to your router or network switch for remote access functionality.
4.6 Initial Power On and Configuration
Power on the DVR. Follow the on-screen prompts for initial setup, including setting up an administrator password, date/time, and network settings. It is recommended to format the hard drive during the initial setup if prompted.
5. Operating Instructions
5.1 Live View
After initial setup, the system will display a live view from all connected cameras on the monitor. You can switch between single-camera view and multi-camera grid view using the DVR controls or a connected USB mouse.

Image: An 8-channel live view displayed on a monitor, demonstrating continuous recording and simultaneous monitoring of multiple areas.
5.2 Recording
The system is configured for 24/7 continuous recording by default. You can adjust recording schedules, enable motion-triggered recording, or initiate manual recording through the DVR's menu interface. The H.265+ video compression technology optimizes storage usage.
5.3 Remote Access (Mobile App)
To access your system remotely, download the XMEye or ICSee app from the App Store or Google Play. Register an account, add your DVR device by scanning the QR code or entering the device ID, and configure network settings on the DVR to enable remote viewing.

Image: A smartphone screen showing the XMEye application, demonstrating remote monitoring capabilities for checking home or business security from anywhere.
5.4 Smart Playback
Access the playback function through the DVR menu or mobile app. You can search for recorded footage by date, time, or event (e.g., motion detection). The H.265+ compression ensures efficient storage and smooth playback of recorded events.

Image: An illustration of the smart playback feature, allowing users to easily navigate through recorded footage on a timeline to review specific events.
5.5 Motion Detection and Alarms
Configure motion detection zones and sensitivity settings in the DVR menu. When motion is detected, the system can trigger an alarm, record footage, and send push notifications or email alerts to your registered devices.

Image: Depiction of the AI motion detection system, showing how it identifies human movement and sends instant notifications to a mobile device via the XMEye app.
6. Maintenance
- Regular Cleaning: Periodically clean camera lenses and DVR vents to ensure optimal performance and prevent overheating. Use a soft, dry cloth.
- Firmware Updates: Check the manufacturer's website for firmware updates for your DVR. Keeping the firmware updated can improve system stability and add new features.
- Hard Drive Health: Monitor the health of the pre-installed 1TB HDD through the DVR's system information. Back up important footage regularly.
- Cable Inspection: Periodically inspect all cables for wear and tear, especially outdoor cables, to ensure secure connections and prevent signal loss.
- Password Security: Regularly change your DVR and remote access app passwords to maintain system security.
7. Troubleshooting
- No Video Display on Monitor:
- Check power connections for both the DVR and the monitor.
- Verify the VGA/HDMI cable connection between the DVR and monitor.
- Ensure the monitor input source is correctly selected (e.g., HDMI1, VGA).
- Try a different monitor or video cable to rule out hardware issues.
- No Camera Image:
- Check camera power supply and cable connections to the DVR.
- Ensure the camera is compatible with the DVR's input mode (AHD/TVI/CVI/CVBS/IP).
- Test the camera on a different channel or with a known working cable.
- Remote Access Not Working:
- Verify the DVR is connected to the internet (check network cable and router status).
- Ensure network settings (DHCP, port forwarding if necessary) are correctly configured on the DVR.
- Check if the mobile app is updated to the latest version.
- Confirm the correct device ID/QR code is used for adding the device to the app.
- Recording Issues:
- Check if the hard drive is properly installed and formatted.
- Verify hard drive status in DVR settings; it might be full or faulty.
- Ensure recording schedules are correctly set.
- Motion Detection Not Triggering:
- Adjust motion detection sensitivity and detection zones in the DVR settings.
- Ensure the camera view is not obstructed.
- Check if alarm actions (recording, notification) are enabled.
8. Specifications
| Feature | Detail |
|---|---|
| Brand | TOWODE |
| Model Number | A6508L2 |
| Connectivity Technology | Wired |
| Video Capture Resolution | 5MP (2592*1944) |
| Special Features | App Control, Audio Recording, Human Detection, Motion Sensor |
| Number of Channels | 8 |
| Memory Storage Capacity | 1 TB (Pre-installed), expandable up to 14 TB |
| Power Source | Corded Electric |
| Item Dimensions (L x W x H) | 7 x 7 x 1.5 inches |
| Frame Rate | 25 fps |
| Hardware Interface | Ethernet, VGA, HDMI, USB |
| Video Input Modes | AHD, TVI, CVI, CVBS, IP (5-in-1) |
| Camera Lens | 3.6mm |
| Night Vision Range | Up to 80 feet (Infrared) |
| Weatherproof Rating | IP66 |
9. Warranty and Support
9.1 Warranty Information
TOWODE products are covered by a limited warranty. Please refer to the warranty card included with your product or visit the official TOWODE website for detailed warranty terms and conditions. Keep your purchase receipt as proof of purchase for warranty claims.
9.2 Customer Support
For technical assistance, troubleshooting, or any questions regarding your TOWODE Security Camera DVR System, please contact TOWODE customer support. Contact information can typically be found on the product packaging, the official TOWODE website, or within the mobile application.
When contacting support, please have your product model number (A6508L2) and purchase details readily available.


