1. Introduction
The johgee 2-Zone WiFi Sprinkler Timer with RF Gateway is designed to automate garden and lawn watering. It features two independent outlets, remote control via a smartphone application, and an RF gateway for extended wireless range. This device supports both timed irrigation and spray modes, includes a rain delay function, and allows for manual operation.
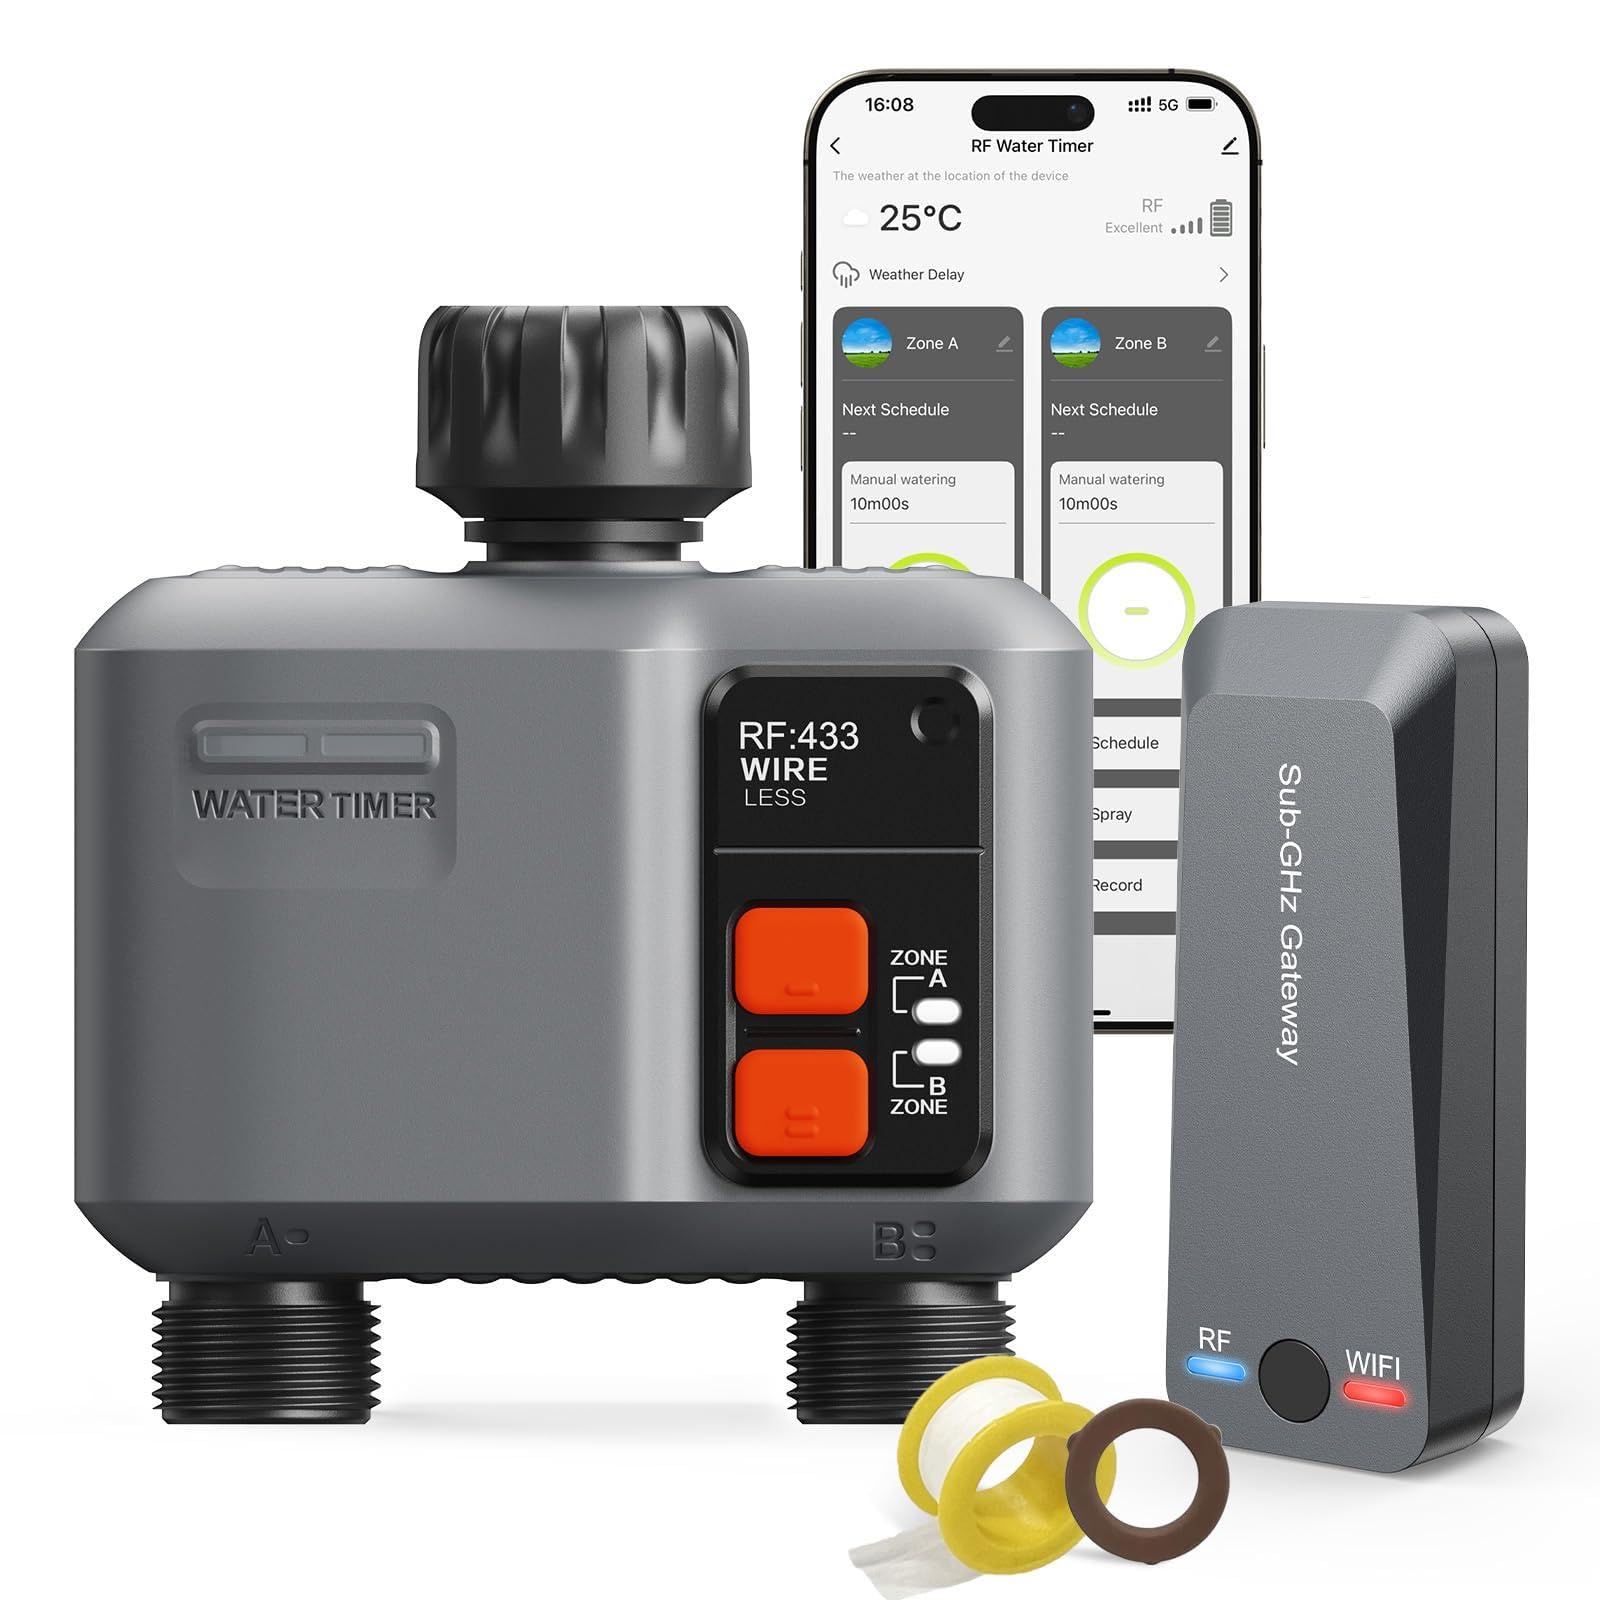
The johgee 2-Zone WiFi Sprinkler Timer in operation, showing its connection to a water source and control via a smartphone app.
2. Package Contents
Verify that all items are present in the package:
- 1 x 2-Zone Wireless Water Timer
- 1 x RF Gateway (Sub-GHz Gateway)
- 1 x User Manual
- 2 x O-Rings (Spare)
- 1 x Raw Tape (Thread Seal Tape)

Illustration of the package contents, showing the water timer, gateway, and accessories.
3. Setup
3.1. Battery Installation
The water timer requires two AA batteries (not included). Open the battery compartment on the timer, insert the batteries according to the polarity markings, and securely close the compartment.
3.2. App Download and Gateway Connection
- Download the "Smart Life" application from your smartphone's app store (available on Google Play and Apple App Store).
- Plug the RF Gateway into a power outlet within range of your 2.4GHz WiFi network. The WiFi indicator light on the gateway will flash red, indicating it is ready for connection.
- Open the "Smart Life" app, register or log in, and follow the in-app instructions to add the Sub-GHz Gateway. Ensure your phone's Bluetooth is enabled for easier discovery.
- Once the gateway is connected, its WiFi indicator light will turn solid blue.
Video demonstrating the connection process of the johgee WiFi Sprinkler Timer and RF Gateway to the smartphone application.
3.3. Timer Connection and Installation
- With the gateway connected, press and hold the RF button on the water timer for a few seconds until its blue light flashes, indicating it is waiting for connection.
- In the "Smart Life" app, navigate to the gateway and add the sprinkler timer as a sub-device. The timer's blue light will double flash upon successful connection.
- Attach the water timer to your outdoor faucet. Ensure a tight seal to prevent leaks, using the provided raw tape and O-rings if necessary.
- Connect your garden hoses to the two independent outlets (Zone A and Zone B) on the timer.

The water timer installed on a faucet, ready for operation.
4. Operating Instructions
4.1. Manual Watering
You can manually start or stop watering directly from the device by pressing the Zone A or Zone B buttons, or remotely through the "Smart Life" app. Manual watering can be set for a duration of up to 11 hours and 59 minutes.

Manual watering in progress, controlled by the timer.
4.2. Timed Irrigation Mode (Scheduling)
Each of the two zones can be programmed independently with up to 5 customized watering procedures. Set the start time, duration, and frequency (daily, specific days of the week, or every few days) for each zone within the app.

Setting up a watering schedule using the smartphone application.
4.3. Spray Mode
The spray mode allows for flexible adjustment of runtime and interval time, supporting weekly cycle frequencies. This mode is suitable for specific watering needs that require intermittent spraying.
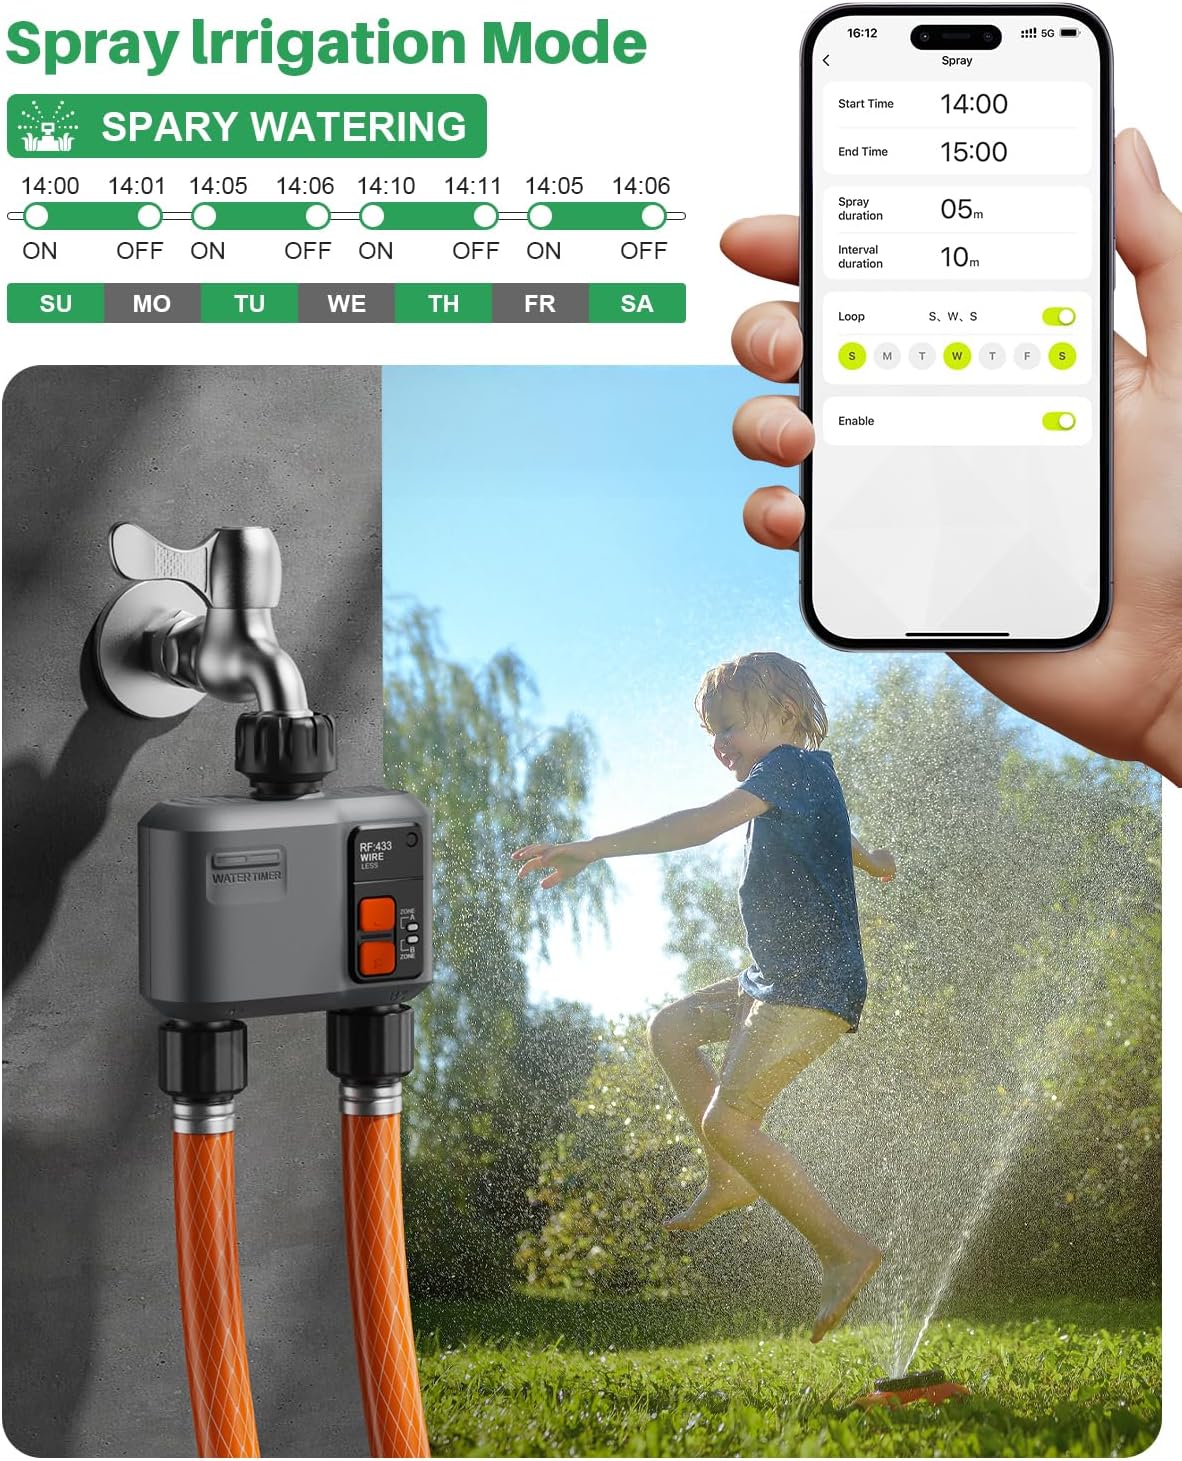
Configuring the spray irrigation mode via the app.
4.4. Rain Delay
The smart hose timer features a rain delay function, allowing you to pause watering for 1-7 days to avoid unnecessary water usage during rainfall. The system can also intelligently detect rain and automatically stop watering.

Setting a rain delay through the application.
4.5. Irrigation Records
The app provides a dedicated watering log page that details the start time, duration, and end time of each watering session, allowing you to monitor your irrigation history.

Viewing past irrigation records in the app.
5. Maintenance
- Battery Replacement: Replace AA batteries in the water timer as needed. Low battery indicators will appear in the app.
- Waterproofing: The device has an IP55 waterproof rating, ensuring stable operation in outdoor weather conditions. However, ensure all connections are tight to prevent leaks.
- Winterization: Before freezing temperatures, disconnect the water timer from the faucet, remove batteries, and store the device indoors to prevent damage.
6. Troubleshooting
- Connection Issues: Ensure the RF Gateway is within 984 feet (300 meters) of the water timer and connected to a 2.4GHz WiFi network. If connection is lost, try restarting the gateway and re-pairing the timer via the app. Placing the gateway closer to the WiFi router can improve stability.
- Leaks: Check all hose connections for tightness. Use the provided raw tape on threaded connections and ensure O-rings are properly seated to prevent water leakage.
- Timer Not Activating: Verify battery levels in the water timer. Check the app for any active rain delays or conflicting schedules. Ensure the faucet is fully open.
7. Specifications
| Feature | Detail |
|---|---|
| Brand | johgee |
| Model | B0DSP9K3XM |
| Color | Gray |
| Material | Plastic |
| Product Dimensions | 4.7"D x 4.3"W x 4.3"H |
| Item Weight | 0.52 Kilograms |
| Number of Settings | 11 |
| Smart Home Compatibility | Smart Home Compatible (Alexa, Google Voice Control) |
| Wireless Range | Up to 984 feet (300 meters) via RF Gateway |
| WiFi Frequency | 2.4GHz (for Gateway connection) |
| Waterproof Rating | IP55 |
8. Warranty & Support
For warranty information and technical support, please refer to the contact details provided in your product packaging or visit the official johgee website. Keep your purchase receipt for warranty claims.


