
1. Important Safety Information
Please read all instructions carefully before assembly and use. Retain this manual for future reference.
- Caution: Assemble the chair following the provided instructions. Do not use the chair until assembly is complete.
- Keep the chair on a stable, level surface during use to prevent tipping.
- Do not exceed the maximum weight capacity of 120 kg (approximately 265 lbs).
- Avoid standing on the chair or using it as a step stool.
- Keep children and pets away from the chair during assembly.
- Regularly check all bolts and screws to ensure they are tightened.
2. Setup and Assembly
The Hbada E3 Air chair requires assembly. Please follow the detailed instructions provided in the separate assembly guide included with your product. Ensure all components are present before beginning assembly.

Image: All components of the Hbada E3 Air chair, ready for assembly.
General Assembly Steps (Refer to detailed guide for specifics):
- Unpack all components and verify against the parts list.
- Attach the casters to the chair base.
- Insert the gas lift cylinder into the chair base.
- Assemble the seat mechanism to the seat cushion.
- Attach the backrest to the seat mechanism.
- Mount the armrests to the seat.
- Attach the headrest to the backrest.
- Place the assembled seat and backrest onto the gas lift cylinder.
- Ensure all screws are securely tightened before use.
3. Operating and Adjustments
The Hbada E3 Air chair offers multiple adjustment options to customize your seating experience for optimal ergonomic support.
3.1. Seat Height Adjustment
To adjust the seat height, locate the lever on the right side beneath the seat. While seated, pull the lever up to lower the seat. To raise the seat, stand up slightly and pull the lever up. Release the lever at the desired height.
3.2. Dynamic 3-Zone Lumbar Support
The chair features an 8D adjustable lumbar support system designed to adapt to your back's natural curve.
- Lateral Wings Rotation: The side wings can rotate up to 40° to cradle your lower back.
- Front-Back Adjustment: Adjust the lumbar support forward or backward by 2.5 cm for personalized depth.
- Vertical Adjustment: Move the lumbar support up or down by 4 cm to align with your lumbar curve.
- Dynamic Support: The system provides dynamic support with a 14° adaptive movement, responding to your posture changes.

Image: Illustration of the 8D adjustable lumbar support, showing lateral, vertical, and depth adjustments.

Image: Visual guide to customizing the lumbar support for personalized comfort.
3.3. 3D Headrest Adjustment
The biaxial 3D headrest provides comprehensive cervical support.
- Height Adjustment: Adjust the headrest height by 4.5 cm to support your neck and head.
- Rotation: The headrest can rotate up to 70° for optimal positioning.

Image: User adjusting the 3D headrest, highlighting its rotational and height capabilities.

Image: Detailed diagram of the 3D headrest's adjustment ranges.
3.4. 3D Armrest Adjustment
The 3D armrests provide versatile support for your arms and shoulders.
- Height Adjustment: Adjust armrest height by 7 cm.
- Front-Back Adjustment: Move armrests forward or backward by 5 cm.
- Rotation: Rotate armrests up to 40° to find your ideal position.

Image: Visual representation of the 3D armrest adjustment capabilities.
3.5. Recline Function and Weight-Sensitive Frame
The chair allows for recline up to 140°, supported by a weight-sensitive frame that automatically adjusts tension.
- To recline, lean back gently. The chair's mechanism will adapt to your weight, providing balanced support.
- The recline can be locked in various positions or left free to rock. (Specific locking mechanism not detailed in provided data, refer to assembly guide).

Image: User enjoying the 140-degree recline feature of the chair.

Image: Visual explanation of the chair's recline mechanism and weight-sensitive design.
3.6. Seat Depth Adjustment
Adjust the seat depth by 5 cm to accommodate different leg lengths and ensure proper thigh support.
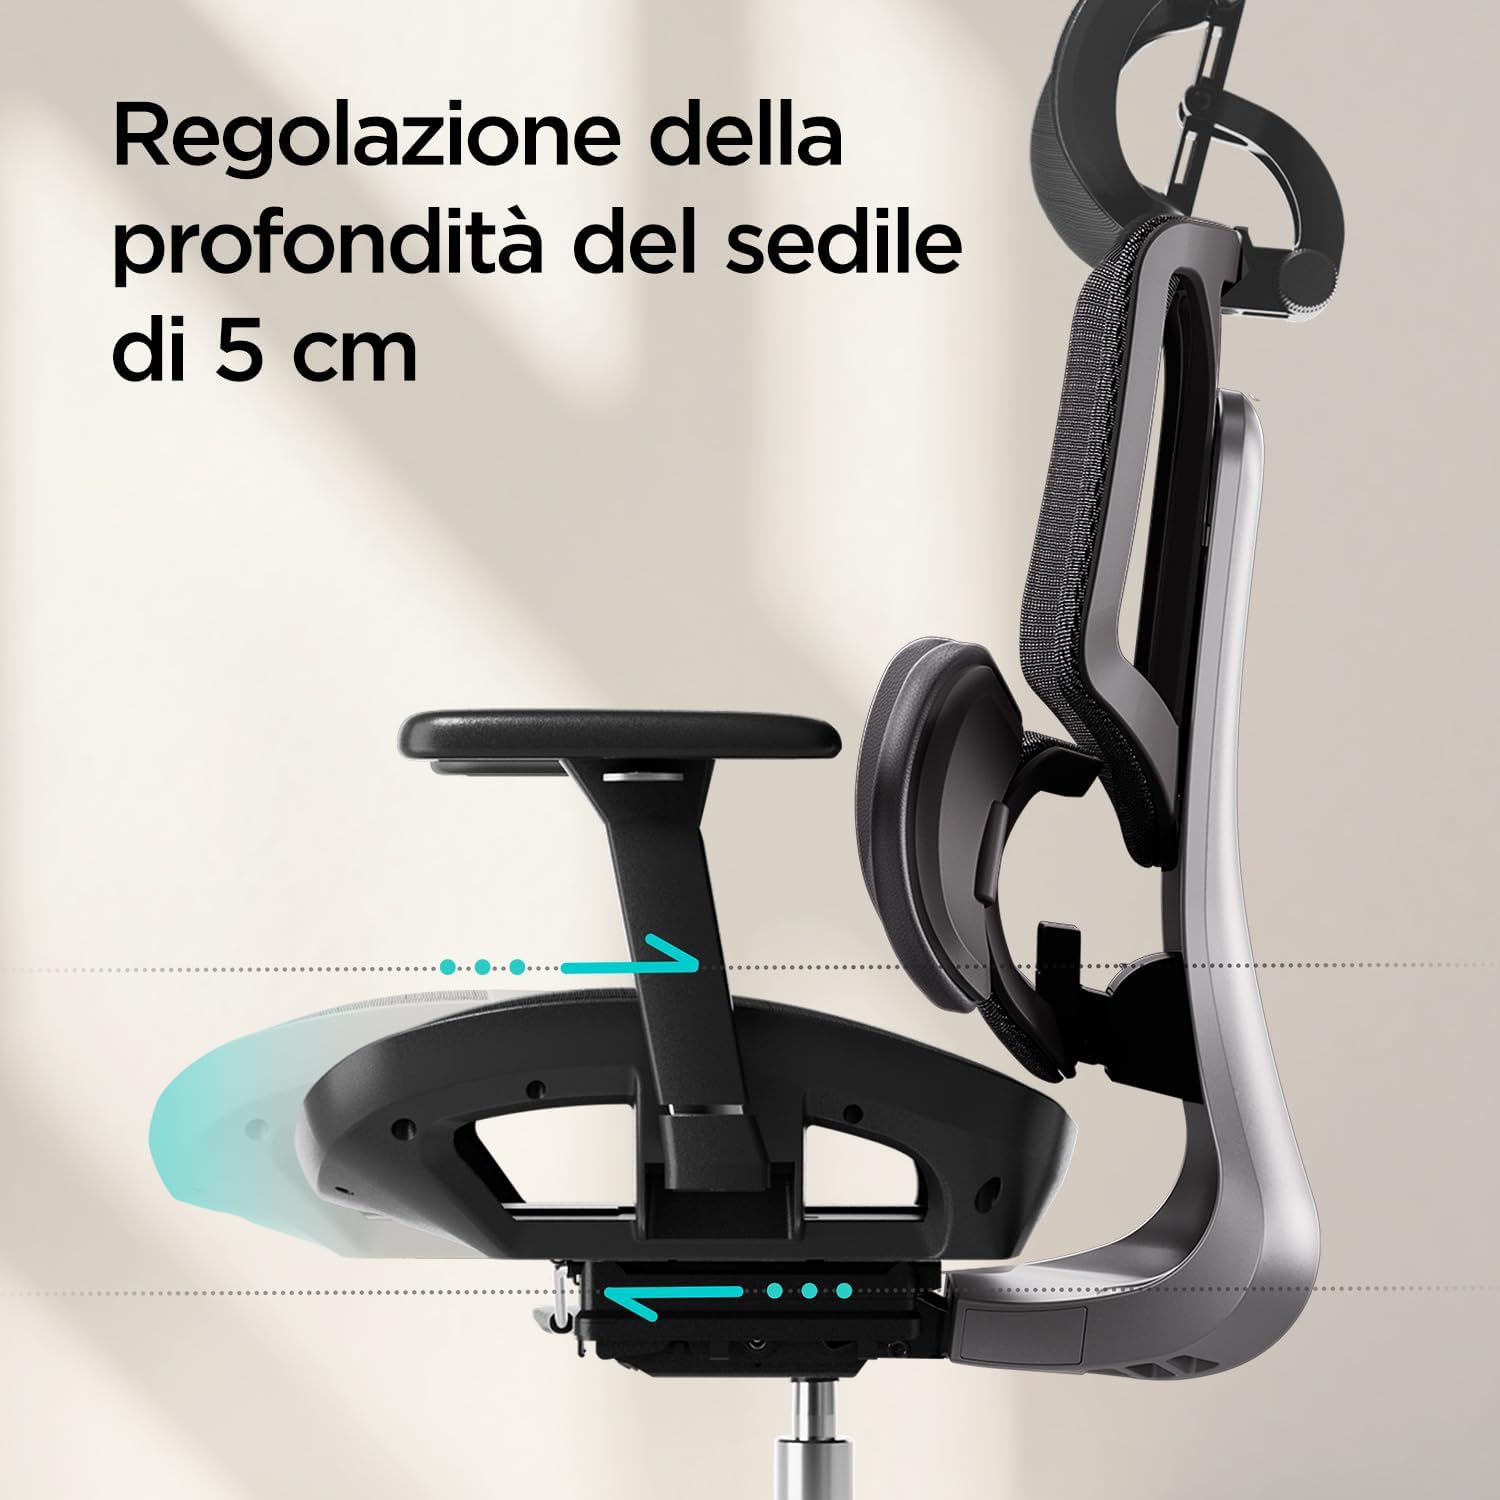
Image: Seat depth adjustment in progress, illustrating the 5 cm range.

Image: Combined view of seat depth and backrest height adjustments.
3.7. Backrest Height Adjustment
The backrest can be adjusted vertically by 7 cm, offering 9 different positions to suit various user heights.

Image: Backrest height adjustment, demonstrating the 7 cm vertical range.
4. Maintenance
Proper maintenance ensures the longevity and optimal performance of your Hbada E3 Air chair.
- Cleaning: Wipe mesh and plastic surfaces with a damp cloth and mild detergent. Avoid abrasive cleaners.
- Mesh Care: The chair features a breathable, highly elastic mesh fabric. Avoid sharp objects that could damage the mesh.
- Lubrication: Periodically check and lubricate moving parts (e.g., casters, gas lift) if they become stiff or noisy. Use silicone-based lubricant.
- Fasteners: Regularly inspect all screws and bolts and tighten them if necessary.

Image: Detail of the chair's breathable mesh material, emphasizing its elasticity and airflow.

Image: Visual representation of the mesh fabric's breathability and elasticity.
5. Troubleshooting
If you encounter any issues with your Hbada E3 Air chair, refer to the following common problems and solutions.
| Problem | Possible Cause | Solution |
|---|---|---|
| Chair does not adjust height | Gas lift cylinder malfunction or lever not engaged. | Ensure the height adjustment lever is fully engaged. If the issue persists, the gas lift may need replacement. Contact customer support. |
| Chair is wobbly or unstable | Loose screws or uneven floor. | Check and tighten all assembly screws. Ensure the chair is on a flat surface. |
| Squeaking or grinding noises | Lack of lubrication on moving parts or loose components. | Apply silicone lubricant to moving parts like the gas lift, tilt mechanism, and caster stems. Tighten any loose bolts. |
| Armrests are loose or difficult to adjust | Loose fasteners or debris in the adjustment mechanism. | Check and tighten the screws securing the armrests. Clean any visible debris from the adjustment tracks. |
| Backrest does not recline or lock | Recline mechanism jammed or tension knob too tight/loose. | Check the recline lock lever. Adjust the tilt tension knob (if present, refer to assembly guide). Ensure no obstructions. |
If these solutions do not resolve the issue, please contact Hbada customer support for further assistance.
6. Specifications
| Feature | Detail |
|---|---|
| Brand | Hbada |
| Model Number | E3AIR |
| Color | Pure Black |
| Material | Polyester/Nylon Mesh (Seat), Plastic (Frame) |
| Product Dimensions (D x W x H) | 76P x 57l x 39H cm (approx. 29.9 x 22.4 x 15.3 inches) |
| Item Weight | 24 Kilograms (approx. 52.9 lbs) |
| Recommended Use | Office |
| Special Features | Ergonomic, Dynamic 3-Zone Lumbar Support, 3D Adjustable Headrest, 3D Adjustable Armrests, 140° Recline, Adjustable Seat Depth, Adjustable Backrest Height |
| Assembly Required | Yes |
7. Warranty Information
The Hbada E3 Air Ergonomic Office Chair comes with a comprehensive warranty to ensure your peace of mind.
- Structural Components: Enjoy a 5-year warranty on all structural components of the chair.
- For detailed warranty terms and conditions, please refer to the warranty card included with your product or contact customer support.

Image: Warranty information highlighting 5 years coverage on structural parts.
8. Customer Support
Hbada is committed to providing excellent customer service. If you have any questions, concerns, or require assistance, please do not hesitate to contact us.
- Specialized Customer Assistance: Our team is ready to help with any product-related inquiries.
- 24/7 Customer Service: Support is available around the clock for your convenience.
- Contact Information: Please refer to the contact details provided in your product packaging or visit the official Hbada website for support options.

Image: Overview of Hbada's customer service commitments.


