
1. Introduction
This manual provides detailed instructions for the safe and proper installation, operation, and maintenance of your BONTEC Dual Arm Gas Spring Monitor Desk Mount. Please read this manual thoroughly before installation and retain it for future reference. This monitor mount is designed to enhance your workspace ergonomics and efficiency by providing adjustable positioning for two monitors.

Image 1.1: Overview of the BONTEC Dual Arm Gas Spring Monitor Desk Mount with two monitors.
2. Safety Information
WARNING: Failure to read and follow all instructions may result in personal injury or damage to the product. Keep this manual in a safe place for future reference.
- Ensure your desk can support the combined weight of the mount and your monitors.
- Do not exceed the maximum weight capacity of 19.8 lbs (9 kg) per arm.
- This mount is compatible with monitors between 15 and 32 inches.
- Use only with VESA compatible monitors (75x75mm or 100x100mm).
- Always use two people for monitor installation to prevent injury or damage.
- Tighten all screws securely, but do not overtighten.
- Keep small parts away from children.
3. Package Contents
Verify that all components are present and undamaged before beginning installation. If any parts are missing or damaged, contact customer support.
- Monitor Arms (2)
- Desk Clamp Base
- Grommet Base Components
- VESA Plates (2)
- Hardware Kit (screws, washers, Allen keys)
- Instruction Manual
4. Setup and Installation
The BONTEC monitor mount offers two installation options: C-Clamp or Grommet Mounting.
4.1. Choose Your Mounting Method

Image 4.1: C-Clamp and Grommet mounting options with compatible desk thickness ranges.
C-Clamp Mounting: Suitable for desk thicknesses from 0.39 inches to 3.15 inches (10mm to 80mm). This method does not require drilling.
Grommet Mounting: Suitable for desk thicknesses from 0.39 inches to 3.15 inches (10mm to 80mm) with a pre-existing hole diameter of 0.4 inches to 2.4 inches (10mm to 60mm). This method provides a more permanent installation.
4.2. Install the Desk Base
For C-Clamp Mounting:
- Attach the C-clamp to the main pole using the provided screws.
- Position the clamp on the edge of your desk.
- Tighten the C-clamp knob until the base is securely fastened to the desk. Ensure it is stable and does not wobble.
For Grommet Mounting:
- Disassemble the C-clamp components from the main pole.
- Insert the grommet bolt through the desk hole and secure it from underneath with the provided plate and nut.
- Attach the main pole to the grommet bolt and tighten securely.
4.3. Attach the Monitor Arms
- Slide the monitor arms onto the main pole. Adjust their height as desired and secure them with the locking collar.
- Attach the VESA plates to the back of your monitors using the appropriate screws from the hardware kit. Ensure the screws are tightened firmly.
- Carefully slide the monitors (with VESA plates attached) onto the monitor arms. Secure them with the provided locking mechanism.

Image 4.2: Detail of VESA plate attachment to the monitor arm using screws and an Allen wrench.
4.4. Adjust Gas Spring Tension
The gas spring tension may need adjustment to properly support your monitor's weight. If the monitor sags or rises too easily, adjust the tension screw located on the arm joint.
- Use the provided Allen key to turn the tension screw.
- Turn clockwise to increase tension (for heavier monitors).
- Turn counter-clockwise to decrease tension (for lighter monitors).
- Adjust gradually until the monitor stays in position when released.

Image 4.3: Internal view of the gas spring mechanism, responsible for smooth adjustments.
5. Operating Instructions
Once installed, your BONTEC monitor mount allows for flexible positioning to optimize your viewing experience.
5.1. Adjusting Monitor Position

Image 5.1: Full motion capabilities including tilt, swivel, and rotation for optimal viewing.
- Height Adjustment: Gently push or pull the monitor up or down to the desired height. The gas spring will hold it in place.
- Tilt: Tilt the monitor screen up or down by up to ±90° to reduce glare and find your preferred angle.
- Swivel: Swivel the monitor left or right by up to ±90° to share your screen or adjust viewing direction.
- Rotation: Rotate the monitor 360° to switch between landscape and portrait modes.

Image 5.2: Example of monitors configured in both landscape and portrait orientations.
5.2. Cable Management
Utilize the integrated cable management system to keep your workspace tidy.
- Open the cable clips located on the underside of the monitor arms.
- Route your monitor cables (power, video, etc.) through these clips.
- Close the clips to secure the cables. This helps prevent clutter and protects cables from damage.
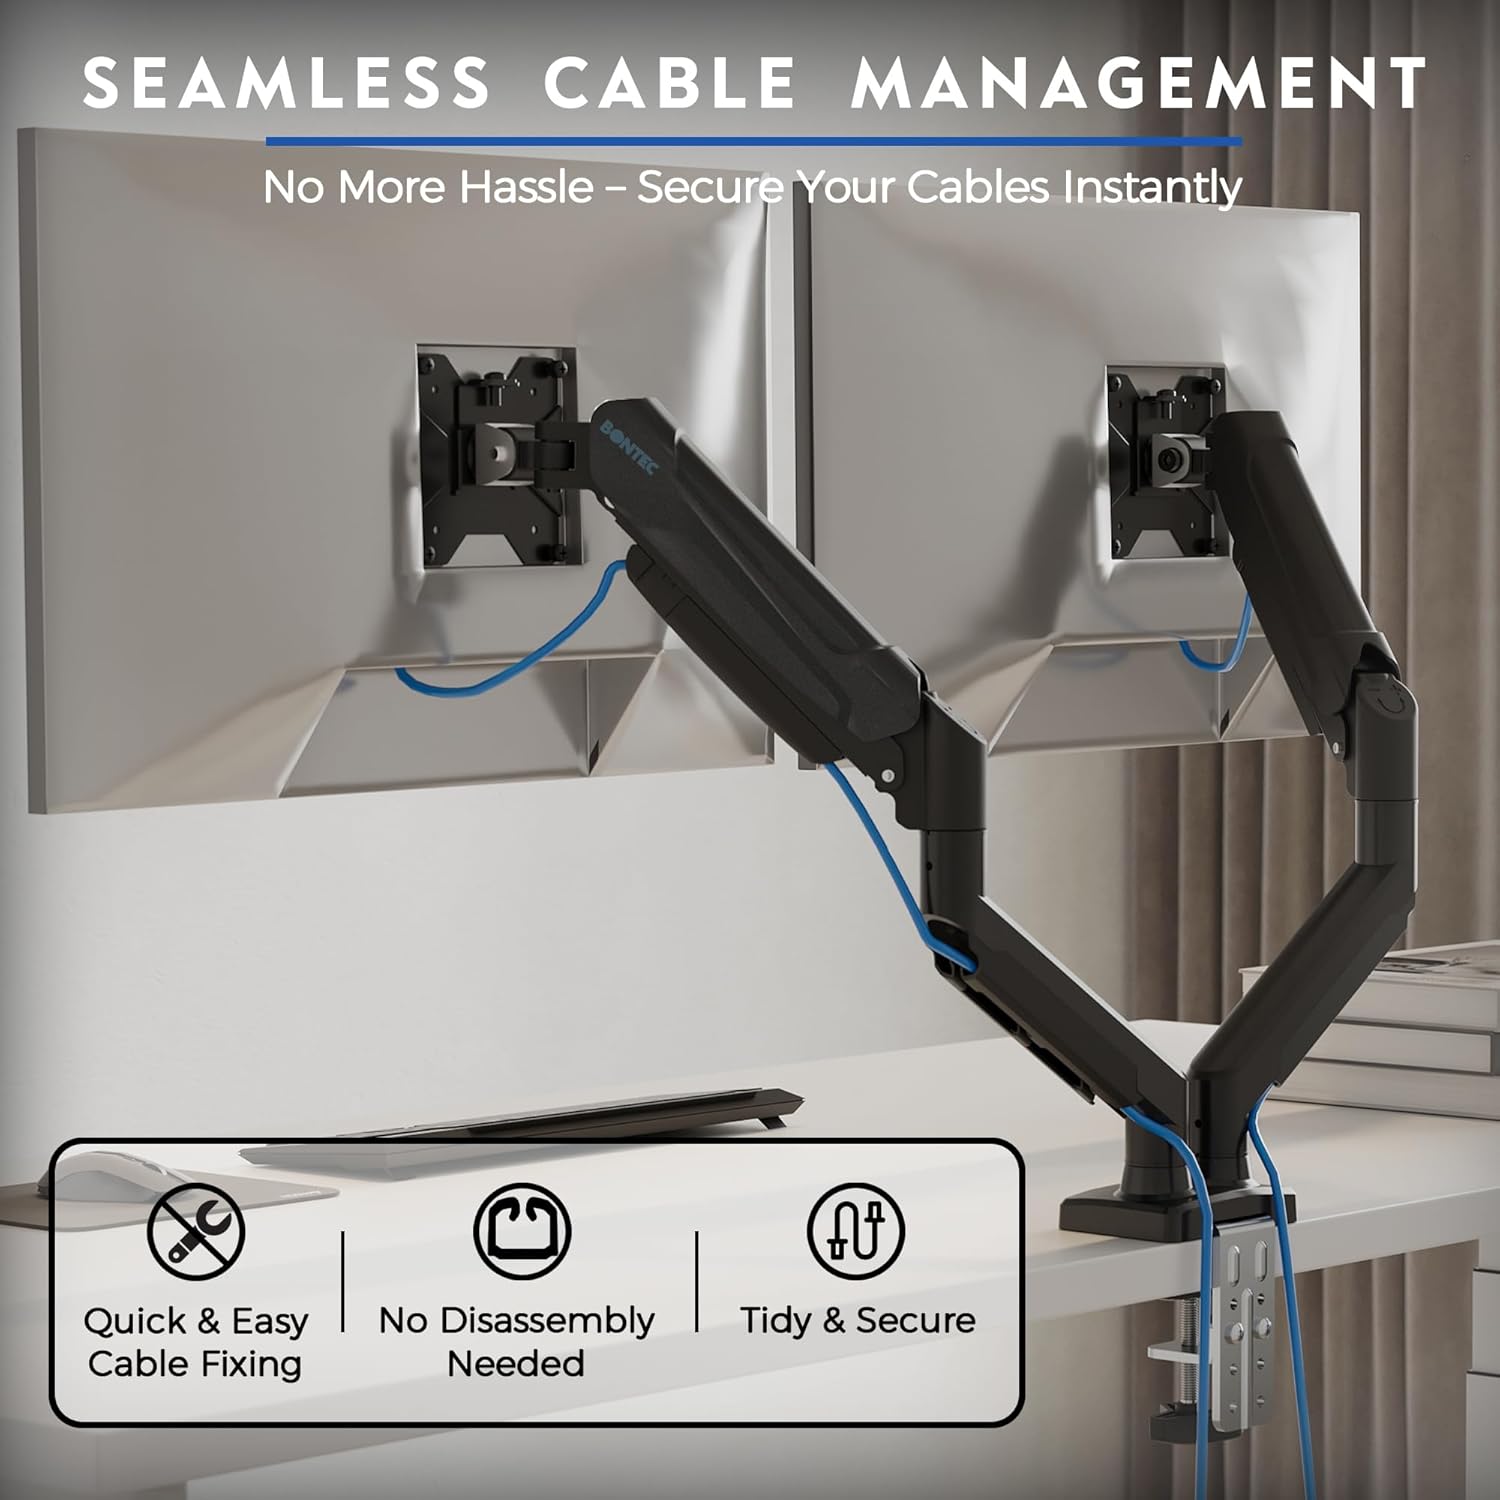
Image 5.3: Cables neatly routed through the integrated cable management system.
6. Maintenance
Regular maintenance ensures the longevity and optimal performance of your monitor mount.
- Cleaning: Wipe the mount with a soft, damp cloth. Avoid abrasive cleaners or solvents.
- Check Tightness: Periodically check all screws and connections to ensure they remain tight. Retighten if necessary, but do not overtighten.
- Gas Spring: The gas spring is designed for long-term use (30,000 cycles tested) and generally requires no specific maintenance. If adjustment becomes difficult, re-evaluate the tension setting.
7. Troubleshooting
If you encounter issues with your monitor mount, refer to the following common problems and solutions:
| Problem | Possible Cause | Solution |
|---|---|---|
| Monitor sags or does not stay at desired height. | Gas spring tension is too low for monitor weight. | Increase gas spring tension by turning the adjustment screw clockwise with the Allen key. |
| Monitor is difficult to move up or down. | Gas spring tension is too high for monitor weight. | Decrease gas spring tension by turning the adjustment screw counter-clockwise with the Allen key. |
| Mount is unstable or wobbles. | Desk clamp/grommet base is not securely tightened. | Ensure the C-clamp or grommet base is fully tightened to the desk. Check all arm connections. |
| Monitor cannot be tilted or rotated. | Tilt/rotation screws are overtightened or too loose. | Adjust the tilt/rotation screws on the VESA plate or arm joint. Do not overtighten. |
8. Specifications
- Model: GDM7502-v02-FBA
- Monitor Size Compatibility: 15-32 inches
- Weight Capacity: 6.6-19.8 lbs (3-9 kg) per arm
- VESA Compatibility: 75x75mm, 100x100mm
- Tilt Range: ±90°
- Swivel Range: ±90°
- Rotation: 360°
- Mounting Options: C-Clamp, Grommet
- Desk Thickness (C-Clamp/Grommet): 0.39" - 3.15" (10mm - 80mm)
- Grommet Hole Diameter: 0.4" - 2.4" (10mm - 60mm)
- Material: Aluminum, Metal
- Gas Spring Durability: 30,000 cycles tested


