1. Introduction
This manual provides essential information for the installation, operation, maintenance, and troubleshooting of the LG Dryer Thermostat and Thermistor Kit, model AGM30045804. This kit is designed as a replacement part for various LG dryer models to ensure proper temperature regulation and safety.
Using original replacement parts is crucial for maintaining the safety and optimal performance of your appliance. This kit includes two thermostats and one thermistor, which are critical components in your dryer's heating and control system.
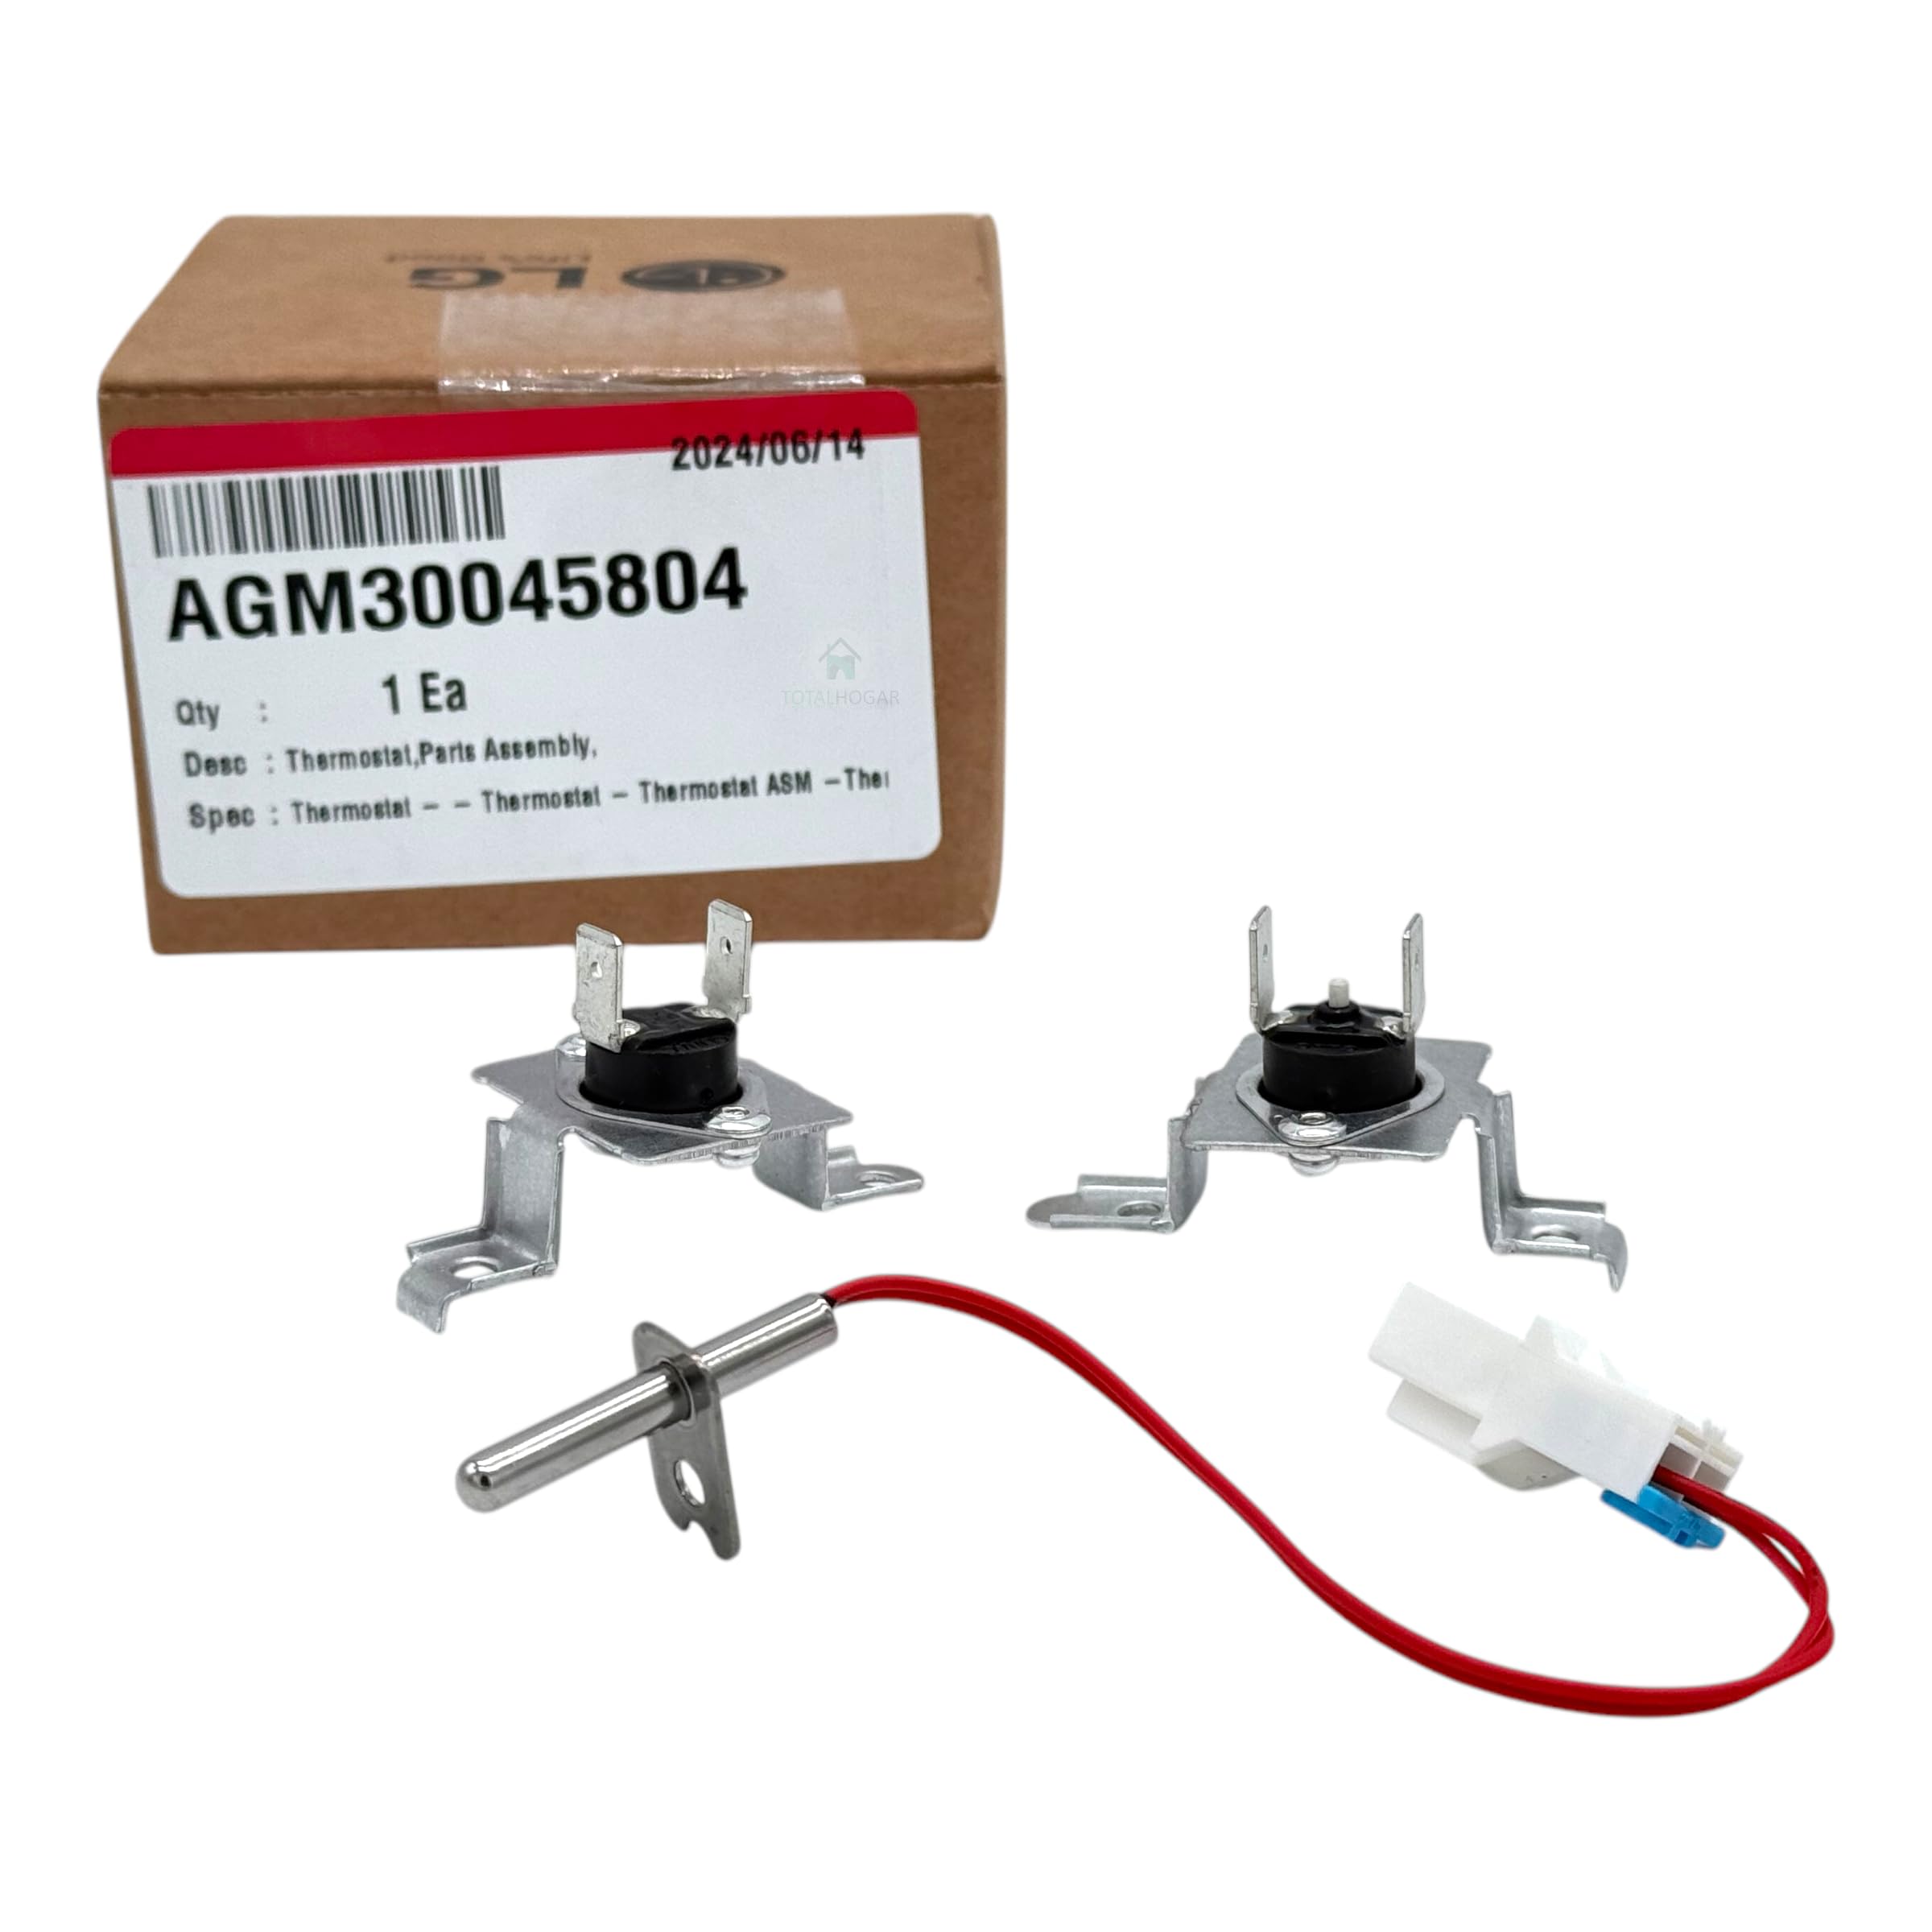
Image 1.1: Overview of the LG Dryer Thermostat and Thermistor Kit AGM30045804, showing two thermostats and one thermistor with its wiring.
2. Product Components
The AGM30045804 kit includes the following components:
- Two (2) Thermostats: These components regulate the dryer's temperature and act as safety cut-offs to prevent overheating.
- One (1) Thermistor: A temperature-sensitive resistor that provides precise temperature readings to the dryer's control board. Specifications: 10KOHM 1% 5V 1A 3.435KK.
Reference Codes: 383EEL9001D, 6323EL2001B, 6931EL3003C, 6931EL3004B, AGM30045804, AGM75510744.

Image 2.1: Close-up view of one of the thermostats included in the kit.

Image 2.2: Close-up view of the thermistor and its electrical connector.
3. Compatible Models
This kit is compatible with a wide range of LG dryer models. A partial list of compatible models includes:
- CDG27RSCES, CDG27RSCNS, CDG27RUCNS, CDT29MSCES, CDT29MSCNS, CDT29MUCNS
- DES2018EKD, DES2038EKD, DF20VVS, DF20WKSG, DF20WV, DF20WV2, DF20WV2R, DF20WV2W
- DF22BKS6, DF22BKS6B, DF22BS6, DF22BV2SGR, DF22BV2SR, DF22GBS6, DF22GGS6, DF22RV2S
- DLEX2650V, DLEX2650W, DLEX4070V, DLEX5101V, DLG2241S, DLG2251W
- DLGX2651V, DLGX2651W, DLGX3251V, DLGX3251W, DLGX3471V, DLGX3471W
- TCD1870CGG, TCD1870CGS, TCD1870QGS, TD-V10030G, TD-V10050G, TD-V10062G
- WF22RS6, WK22BS6, WK22BS6E, WK22GBS6, WK22GBS6E, WK22GGS6, WK22GGS6E
For a complete list of compatible models or to verify compatibility with your specific dryer model, please refer to the product listing or contact LG customer support with your dryer's model number.
4. Safety Information
Before attempting any repair or installation, please read and understand the following safety precautions:
- Disconnect Power: Always unplug the dryer from the electrical outlet or turn off the circuit breaker before beginning any work. Failure to do so can result in electric shock or serious injury.
- Professional Installation Recommended: Appliance repair can be complex and dangerous. If you are not comfortable performing the installation yourself, it is highly recommended to seek assistance from a qualified appliance technician.
- Wear Protective Gear: Use appropriate personal protective equipment, such as gloves and safety glasses, to prevent injury.
- Handle with Care: Components may have sharp edges. Handle all parts carefully.
- Ventilation: Ensure the work area is well-ventilated.
5. Installation / Setup
The following are general steps for replacing dryer thermostats and thermistors. Specific disassembly procedures may vary by dryer model. Always consult your dryer's service manual for detailed instructions.
- Prepare the Dryer: Ensure the dryer is unplugged from the power source. Move the dryer away from the wall to access the rear panel if necessary.
- Access Components: Depending on your dryer model, you may need to remove the rear panel, top panel, or front panel to access the heating element housing where the thermostats and thermistor are located. Use appropriate tools (e.g., screwdriver, nut driver).
- Locate and Identify: Identify the faulty thermostat(s) and thermistor. Note their positions and how they are connected. Take photos for reference if needed.
- Disconnect Wiring: Carefully disconnect the electrical wires from the old thermostat(s) and thermistor. Note that some wires may be color-coded or have specific connectors.
- Remove Old Components: Unscrew or unclip the old thermostat(s) and thermistor from their mounting brackets.
- Install New Components: Mount the new thermostats and thermistor in the exact same positions as the old ones. Ensure they are securely fastened.
- Connect Wiring: Reconnect the electrical wires to the new components. Ensure all connections are firm and correct.
- Reassemble Dryer: Reattach any panels or covers that were removed. Ensure all screws are tightened.
- Test Operation: Plug the dryer back into the power source. Run a short cycle to verify proper operation and heating. Monitor for any unusual noises or smells.

Image 5.1: Side view of a thermostat, showing its mounting bracket and terminals.

Image 5.2: Bottom view of a thermostat, showing the temperature sensing disc.
6. Operation
Once installed, the thermostats and thermistor operate automatically as part of your dryer's control system:
- Thermostats: These components monitor the air temperature inside the dryer drum and the heating element housing. They cycle the heating element on and off to maintain the selected drying temperature. High-limit thermostats also serve as a safety mechanism, cutting off power to the heating element if the temperature exceeds a safe threshold, preventing overheating and potential fire hazards.
- Thermistor: The thermistor provides continuous, precise temperature readings to the dryer's electronic control board. This allows the control board to accurately manage drying cycles, optimize energy usage, and ensure clothes are dried efficiently without damage from excessive heat.
7. Maintenance
While the thermostats and thermistor themselves do not require routine maintenance, ensuring the overall health of your dryer can prolong their lifespan and prevent future issues:
- Clean Lint Filter: Clean the lint filter before or after every load to ensure proper airflow.
- Inspect Dryer Vent: Periodically inspect and clean the dryer vent ductwork to prevent lint buildup, which can restrict airflow and cause overheating.
- Professional Inspection: Consider a professional dryer inspection every few years to check for wear and tear on internal components.
8. Troubleshooting
If your dryer exhibits problems after replacing these components, or if you suspect issues with the new parts, consider the following:
- Dryer Not Heating: This could indicate a faulty heating element, a tripped thermal fuse, or incorrect wiring of the thermostats.
- Dryer Overheating: Often caused by restricted airflow (clogged lint filter or vent) or a faulty operating thermostat that is not cycling off correctly.
- Dryer Not Starting: While less common for these specific parts, a shorted thermistor or thermostat could potentially interfere with the control board's ability to initiate a cycle.
- Error Codes: Consult your dryer's user manual for specific error codes related to temperature sensors or heating issues.
If troubleshooting steps do not resolve the issue, it is recommended to contact a qualified appliance technician for diagnosis and repair.
9. Specifications
| Feature | Specification |
|---|---|
| Product Type | Dryer Thermostat and Thermistor Kit |
| Model Number | AGM30045804 |
| Brand | LG |
| Components | 2 Thermostats, 1 Thermistor |
| Thermistor Specs | 10KOHM 1% 5V 1A 3.435KK |
| Material | Metal, Plastic |
| Package Dimensions | 10.8 x 10.6 x 7.1 cm (approx. 4.25 x 4.17 x 2.8 inches) |
| Product Weight | 80 g (approx. 2.8 oz) |

Image 9.1: Thermistor component with an approximate length measurement of 18.5 cm.
10. Warranty and Support
This LG original replacement part is backed by a satisfaction guarantee. As authorized distributors, we ensure the authenticity and quality of the product.
For specific warranty details, technical support, or assistance with installation, please refer to your original product purchase documentation or contact LG customer service. You may also reach out to the seller for product-related inquiries.