
1. Product Overview
The ARCCAPTAIN Welding Hood LY800J is an advanced auto-darkening welding helmet designed for various welding and grinding applications. It features a 180° panoramic view, high optical clarity, and rapid auto-darkening response to ensure eye protection and enhanced visibility during operation.
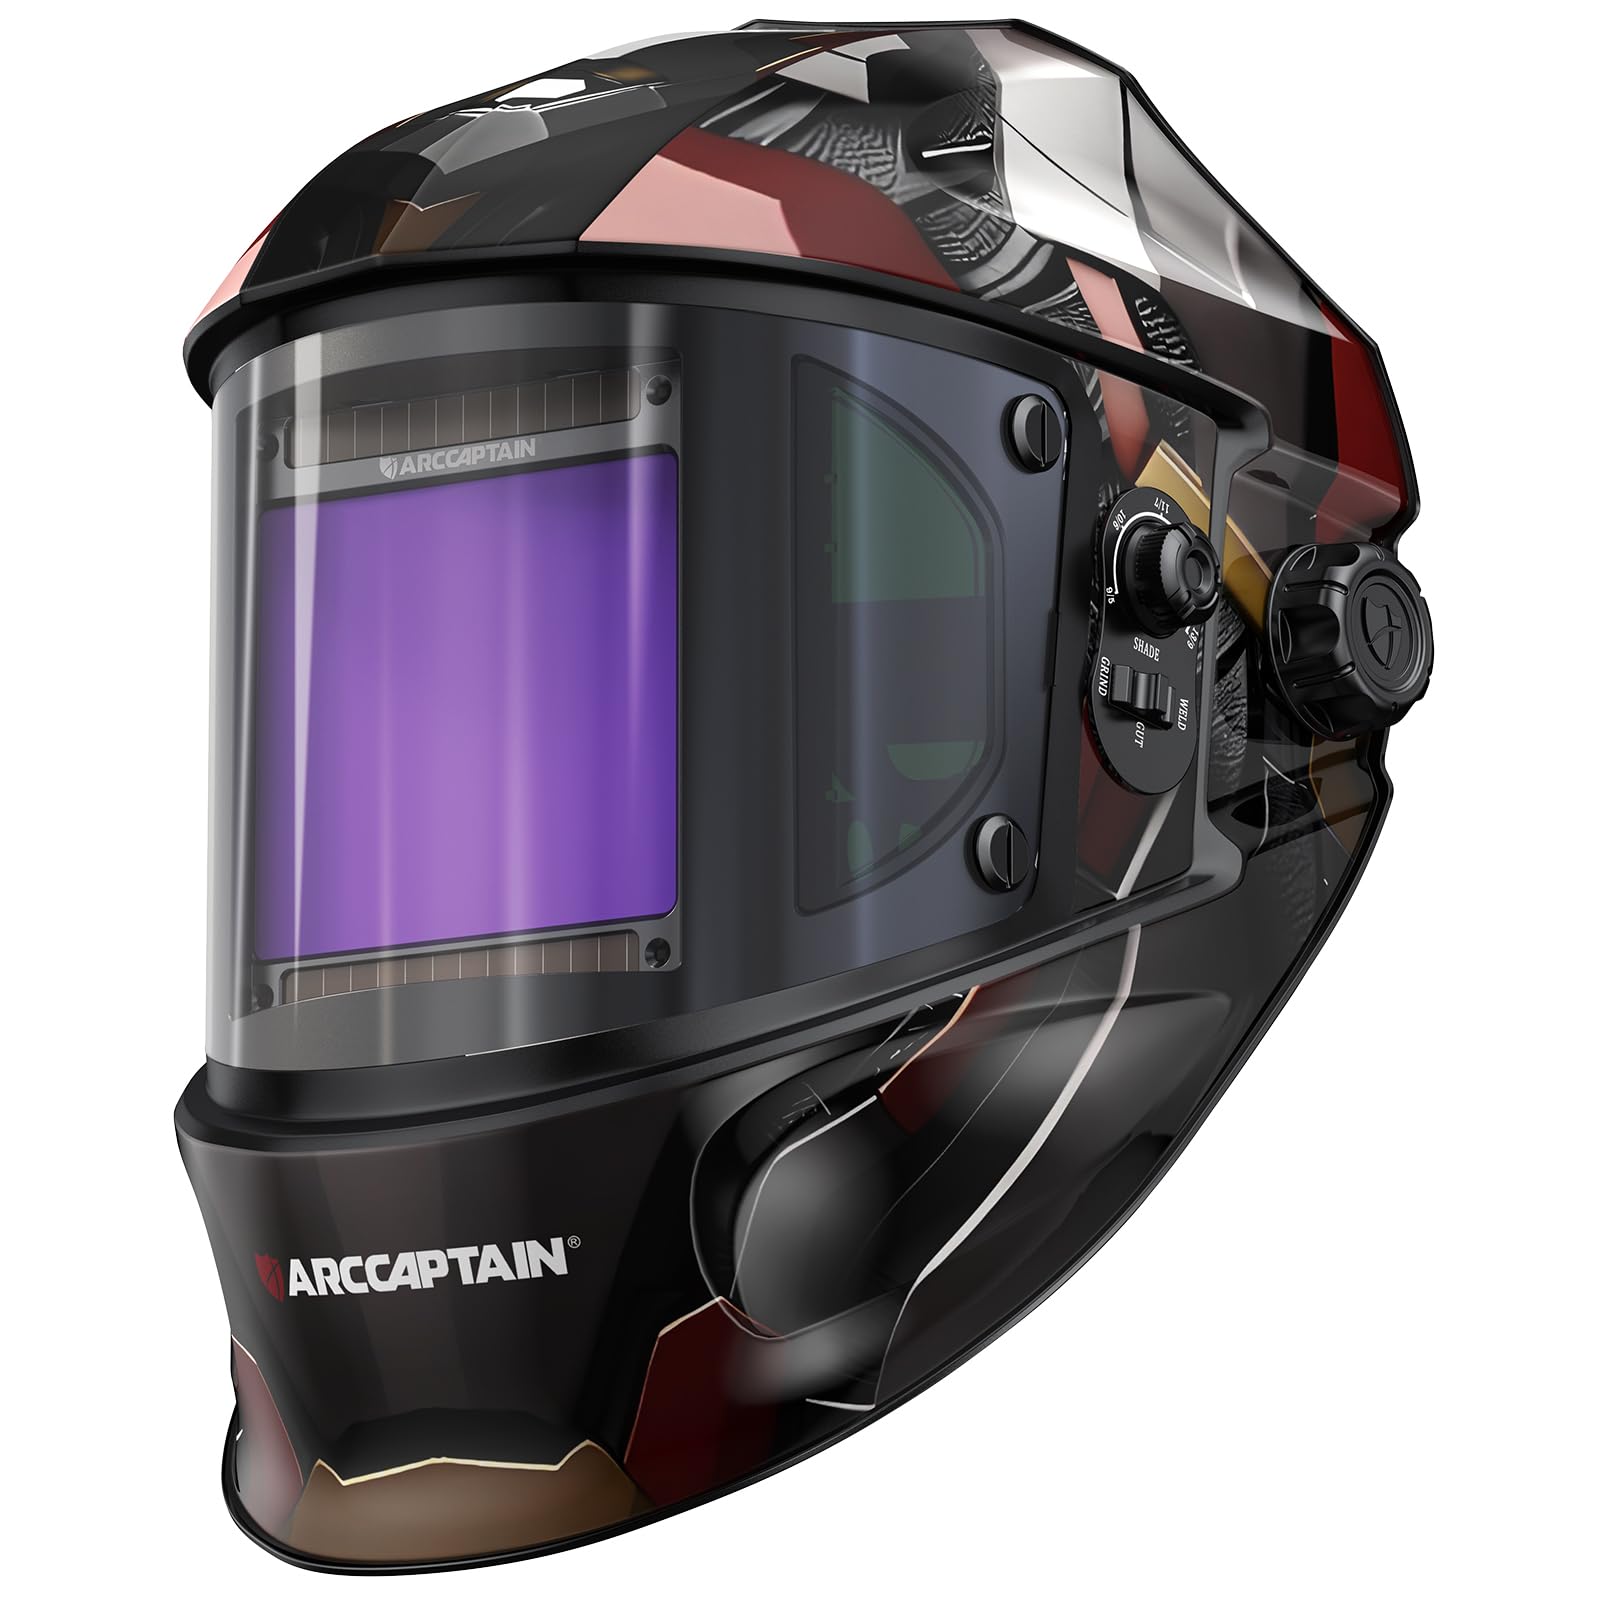
Figure 1: ARCCAPTAIN Welding Hood LY800J.
2. Safety Information
Always read and understand all safety warnings and instructions before using this welding hood. Failure to follow these instructions may result in serious personal injury.
- This welding hood is designed to protect eyes and face from sparks, spatter, and harmful radiation under normal welding conditions.
- Do not use this helmet for laser welding or oxyacetylene welding/cutting applications.
- Ensure the auto-darkening function is working correctly before each use.
- Replace damaged or scratched lenses immediately.
- Always wear appropriate secondary eye protection (safety glasses) under the welding hood.
3. Components and Assembly
The ARCCAPTAIN Welding Hood LY800J comes with several components that require proper assembly and adjustment for optimal performance and comfort.

Figure 2: Exploded view of the welding helmet components, including lens frame, inside lens cover, lens assembly, outside lens cover, side lens cover, and headset mounts.
3.1. Headgear Adjustment
The headgear is designed for a comfortable and secure fit. Adjustments can be made even while wearing gloves.
- Head Circumference Adjustment: Use the knob at the back of the headgear to tighten or loosen the fit around your head.
- Distance Adjustment (Eye-to-Lens): Adjust the distance between your eyes and the lens for optimal viewing.
- Angle Adjustment: Use the side buttons to set the desired angle of the helmet.
- Top Strap Adjustment: The top strap allows for flexible adjustment to ensure the helmet sits correctly on your head.
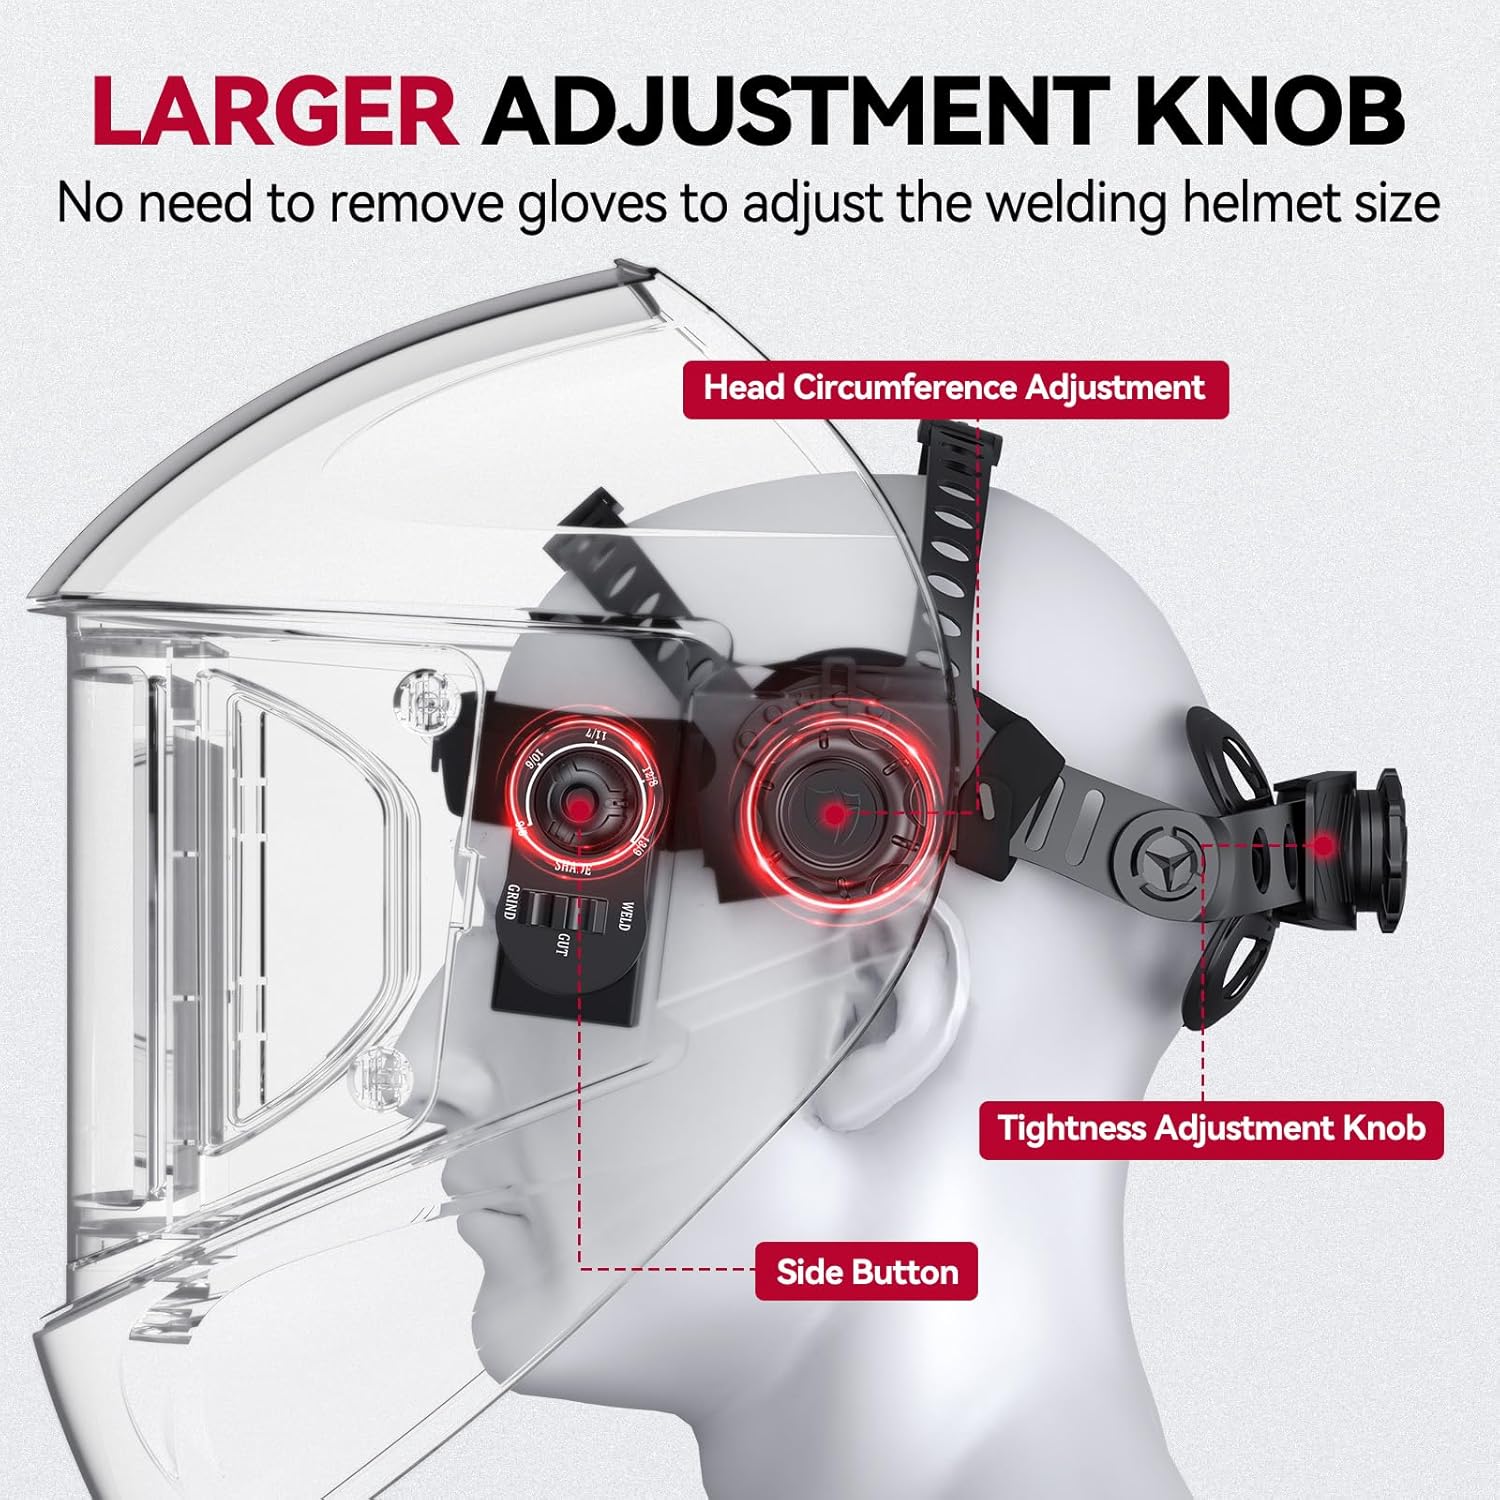
Figure 3: Illustration of the larger adjustment knob for head circumference and tightness, designed for easy use with gloves.

Figure 4: Detailed view of headgear adjustment points for personalized fit and comfort.
3.2. Battery Installation/Replacement
The welding hood is powered by two CR2450 lithium batteries and solar panels. The batteries provide power for the auto-darkening function.
- Locate the battery compartment, typically on the back of the auto-darkening filter (ADF) unit.
- Open the compartment and insert two CR2450 batteries, ensuring correct polarity.
- Close the compartment securely.
- The solar panels assist in extending battery life.

Figure 5: Location of solar charging panels and replaceable battery.
3.3. Lens Installation/Replacement
The helmet includes a main auto-darkening lens and two non-auto-darkening side views. Replacement lenses are provided.
- To replace the main lens, carefully remove the lens frame and old lens.
- Insert the new lens, ensuring it is clean and free of scratches.
- Secure the lens frame back into place.
- Side lenses can be replaced similarly.
4. Operating Instructions
The ARCCAPTAIN Welding Hood LY800J offers various settings to adapt to different welding and grinding tasks.
4.1. Auto-Darkening Function
The helmet is equipped with 4 smart arc sensors that detect the welding arc and automatically switch the lens from light state (DIN 4) to dark state (DIN 5-9/9-13) in 1/25000 seconds, protecting your eyes from harmful rays.
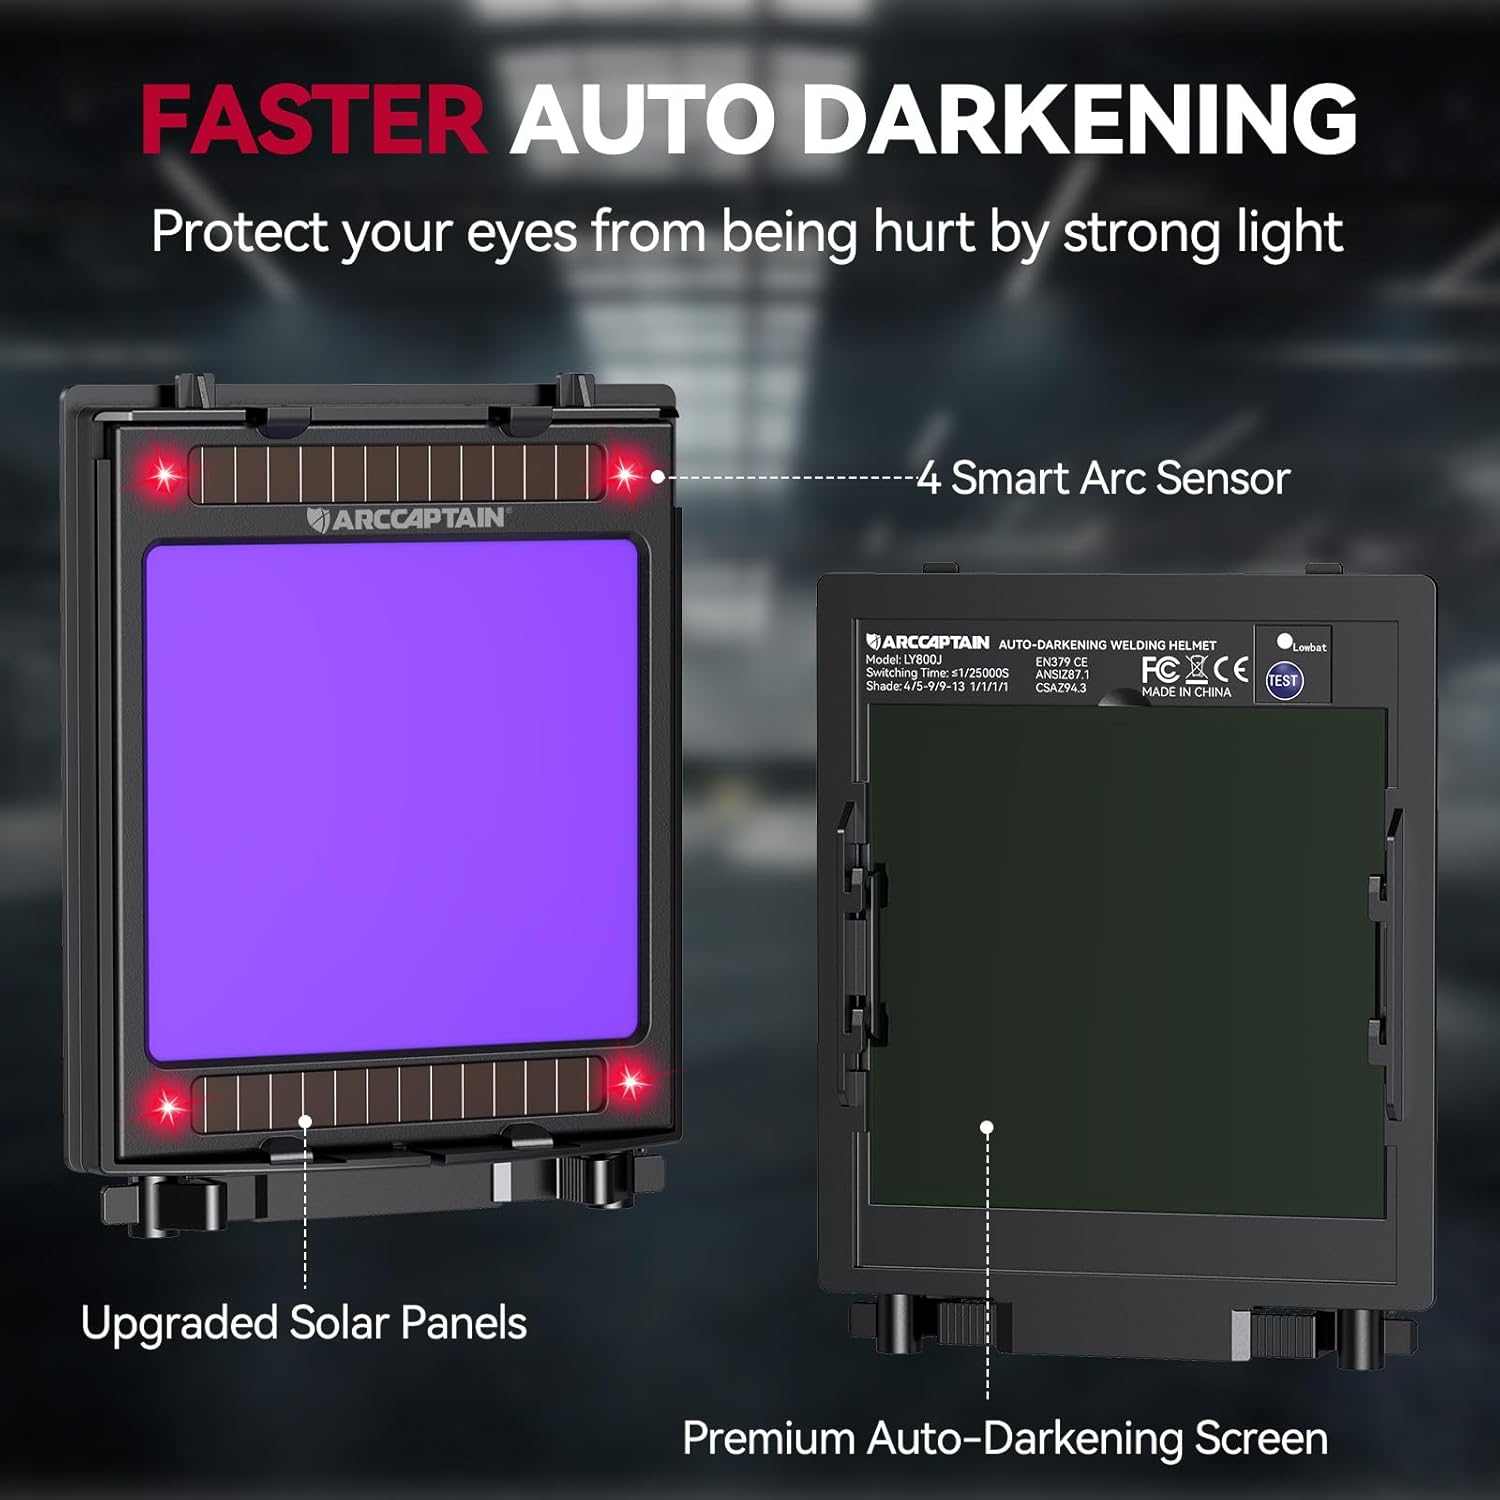
Figure 6: The auto-darkening filter unit showing smart arc sensors and upgraded solar panels.
4.2. Shade, Sensitivity, and Delay Control
Adjust these settings using the external knobs and switches to match your specific application and comfort.
- Shade Control: Select the appropriate shade level (DIN 5-9 or DIN 9-13) for welding. For grinding, the shade is fixed at DIN 4.
- Sensitivity Control: Adjust the sensitivity to accommodate different lighting conditions and welding processes. Turn the knob from MIN to MAX.
- Delay Control: Adjust the time it takes for the lens to return from dark to light state after the arc stops. This can be set from 0.1 to 0.8 seconds.

Figure 7: Controls for adjusting delay, shade, and sensitivity.
4.3. Application Modes
The helmet supports various modes for different tasks:
- Grind Mode: Set to DIN 4. Ideal for grinding operations.
- Cut Mode: Set to DIN 5-9. Suitable for plasma cutting.
- Weld Mode: Set to DIN 9-13. For TIG, MIG, and ARC welding.

Figure 8: Wide application range including Stick, MIG, TIG welding, and grinding.

Figure 9: Grind Mode (DIN 4) for grinding tasks.

Figure 10: Cut Mode (DIN 5-9) for cutting operations.

Figure 11: Weld Mode (DIN 9-13) for various welding processes.
5. Maintenance
Proper maintenance ensures the longevity and performance of your welding hood.
- Cleaning: Clean the helmet and lenses regularly with a soft, damp cloth. Do not use harsh abrasives or solvents.
- Lens Replacement: Replace front and side protective lenses if they become scratched, pitted, or damaged.
- Battery Check: Periodically check the battery status. Replace CR2450 batteries when the low battery indicator appears or if the auto-darkening function becomes unreliable.
- Storage: Store the helmet in a dry, cool place away from direct sunlight and extreme temperatures (-20°C to 70°C).
6. Troubleshooting
If you encounter issues with your welding hood, refer to the following common troubleshooting steps:
- Lens not darkening:
- Check if batteries are correctly installed and have sufficient charge. Replace if necessary.
- Ensure arc sensors are clean and unobstructed.
- Verify sensitivity setting is appropriate for the ambient light and welding process.
- Poor visibility:
- Clean the protective lenses.
- Replace scratched or damaged lenses.
- Adjust the shade level to a lighter setting if visibility is too dark for the task.
- Helmet uncomfortable or loose:
- Re-adjust all headgear settings: head circumference, eye-to-lens distance, and top strap.
7. Specifications
| Model Number | LY800J |
| Brand | ARCCAPTAIN |
| Viewing Area | Main: 3.94" x 3.66" (DIN 16); Side: 3.94" x 1.70" (DIN 5) |
| Optical Clarity | 1/1/1/1 |
| Arc Sensors | 4 |
| Switching Time | 1/25000 seconds |
| Light State Shade | DIN 4 |
| Dark State Shade | DIN 5-9 / DIN 9-13 (Adjustable) |
| UV/IR Protection | DIN 16 (Permanent) |
| Power Supply | Solar cells and 2x CR2450 Lithium Batteries |
| Material | Polypropylene (PP) |
| Operating Temperature | -5°C to 55°C (23°F to 131°F) |
| Storage Temperature | -20°C to 70°C (-4°F to 158°F) |
| Included Components | 1x Welding helmet, 3x Replacement Lens, 2x Replaced Lithium Battery, 1x ARCCAPTAIN Storage Bag |
8. Official Product Videos
The following videos provide additional information and demonstrations of the ARCCAPTAIN Welding Hood LY800J.
8.1. ArcCaptain Welding Helmet Unbox and Feature Overview
This video provides an unboxing experience and an overview of the features of the ArcCaptain Welding Helmet.
8.2. Review of Welding Helmet with Side View
A review highlighting the side view feature of the welding helmet.
8.3. ARCCAPTAIN Auto Darkening Welding Helmet with Side View, True Color 4 Arc Sensor Solar Powered
This video showcases the auto-darkening, true color, 4 arc sensor, and solar-powered features of the ARCCAPTAIN welding helmet.
8.4. My Thoughts on This Auto Darkening Welding Helmet
A user's perspective and thoughts on the auto-darkening welding helmet.
8.5. See Everything While You Weld (Game Changer)
A demonstration highlighting the wide field of view during welding.
8.6. Does it work? Some cool features
A video demonstrating the functionality and key features of the helmet.
8.7. What I Like About This ARCCAPTAIN Welding Helmet
A personal review detailing positive aspects of the ARCCAPTAIN welding helmet.
9. Warranty and Support
The ARCCAPTAIN Welding Hood LY800J comes with a 180-day warranty from the date of purchase. For warranty claims, technical support, or further inquiries, please refer to the manufacturer's official website or contact their customer service directly.