1. Introduction
Thank you for choosing the NOENNULL LED Digital Timer. This device is designed to assist with various timing needs, offering both countdown and count-up functions with multiple reminder modes. Please read this manual carefully to ensure proper use and to maximize the timer's functionality.
2. Safety Information
- Keep the device away from water and high humidity to prevent damage.
- Do not expose the timer to extreme temperatures or direct sunlight for extended periods.
- Use only the specified battery type (2 x AAA batteries).
- Do not mix old and new batteries, or different types of batteries.
- Dispose of used batteries according to local regulations.
- Keep out of reach of children.
3. Package Contents
Upon unpacking, please verify that all items are present:
- 1 x NOENNULL LED Digital Timer
- 1 x User Manual (this document)
Note: 2 x AAA batteries are required for operation and are not included in the package.
4. Product Overview
Familiarize yourself with the timer's components and controls.

Figure 4.1: Front view of the NOENNULL LED Digital Timer, showing the large LED display and control buttons (M, S, CLEAR, SP/ST) at the bottom.

Figure 4.2: Side view of the timer, highlighting the reminder mode switch with icons for high volume, low volume, silent/flash, and vibration modes.

Figure 4.3: Opposite side view of the timer, showing the brightness adjustment switch and the ECO (power-saving) mode switch.
Controls and Features:
- LED Display: Large, clear digital display for time.
- M Button: Used to set minutes.
- S Button: Used to set seconds.
- CLEAR Button: Resets the timer to 00:00.
- SP/ST Button: Starts and stops the timer. Also used to return to the last set time after a countdown.
- Reminder Mode Switch: Located on the side, allows selection between high volume (80-90dB), low volume (60-75dB), silent with flash, and vibration modes.
- Brightness Switch: Located on the side, adjusts display brightness between two levels.
- ECO Mode Switch: Located on the side, enables power-saving mode where the screen turns off after 10 seconds of inactivity.
- Magnetic Back: Two circular magnets for attachment to metal surfaces.
- Retractable Stand: For tabletop placement.
- Foldable Hook: For hanging the timer.
5. Setup
5.1 Battery Installation
The timer requires 2 x AAA batteries (not included).
- Locate the battery compartment cover on the back of the timer.
- Slide the cover open.
- Insert two AAA batteries, ensuring the correct polarity (+ and -) as indicated inside the compartment.
- Close the battery compartment cover securely.
The timer display should illuminate upon successful battery installation.
6. Operating Instructions
6.1 Setting the Timer (Countdown)
The timer supports countdowns from 1 second up to 9 hours, 59 minutes, and 59 seconds.
- Ensure the timer is stopped (display shows 00:00 or a paused time). If it's counting, press the SP/ST button to pause it.
- Press the M button repeatedly to set the desired minutes. Hold the M button for faster adjustment.
- Press the S button repeatedly to set the desired seconds. Hold the S button for faster adjustment.
- Once the desired time is set, press the SP/ST button to start the countdown.
- To pause the countdown, press SP/ST again. Press SP/ST again to resume.
- When the countdown reaches 00:00, the alarm will sound/vibrate/flash according to the selected reminder mode.
- To stop the alarm, press any button.
6.2 Count-Up Function
The timer can also function as a stopwatch, counting up from 00:00.
- Ensure the timer display is at 00:00. If not, press the CLEAR button.
- Press the SP/ST button to start counting up.
- To pause the count-up, press SP/ST again. Press SP/ST again to resume.
- To reset the count-up timer to 00:00, press the CLEAR button while the timer is paused or stopped.
6.3 Memory Function
After a countdown ends and the alarm sounds, pressing the SP/ST button will return the display to the last set countdown time. This is useful for repetitive tasks.
6.4 Adjusting Reminder Modes
Use the Reminder Mode Switch on the side of the timer to select your preferred alert method:
- High Volume: 80-90dB audible alarm.
- Low Volume: 60-75dB audible alarm.
- Silent & Flash: The display will flash when the timer reaches zero, with no sound.
- Vibration: The timer will vibrate when the timer reaches zero, with no sound.
6.5 Adjusting Display Brightness
Use the Brightness Switch on the side of the timer to toggle between two brightness levels for the LED display, suitable for different lighting conditions.
6.6 ECO (Power Saving) Mode
To conserve battery life, activate the ECO Mode Switch. When enabled, the display will automatically turn off after 10 seconds of inactivity (after setting a countdown or if the timer is paused/stopped). Press any button to reactivate the display.
7. Mounting Options
The NOENNULL LED Digital Timer offers versatile placement options:
- Magnetic Attachment: The two circular magnets on the back allow you to securely attach the timer to metal surfaces such as refrigerator doors, whiteboards, or metal cabinets.
- Tabletop Stand: Pull out the retractable bracket on the back to stand the timer upright on any flat surface, like a desk or kitchen counter.
- Hanging Hook: Utilize the foldable hook on the back to hang the timer on a nail, hook, or pegboard.
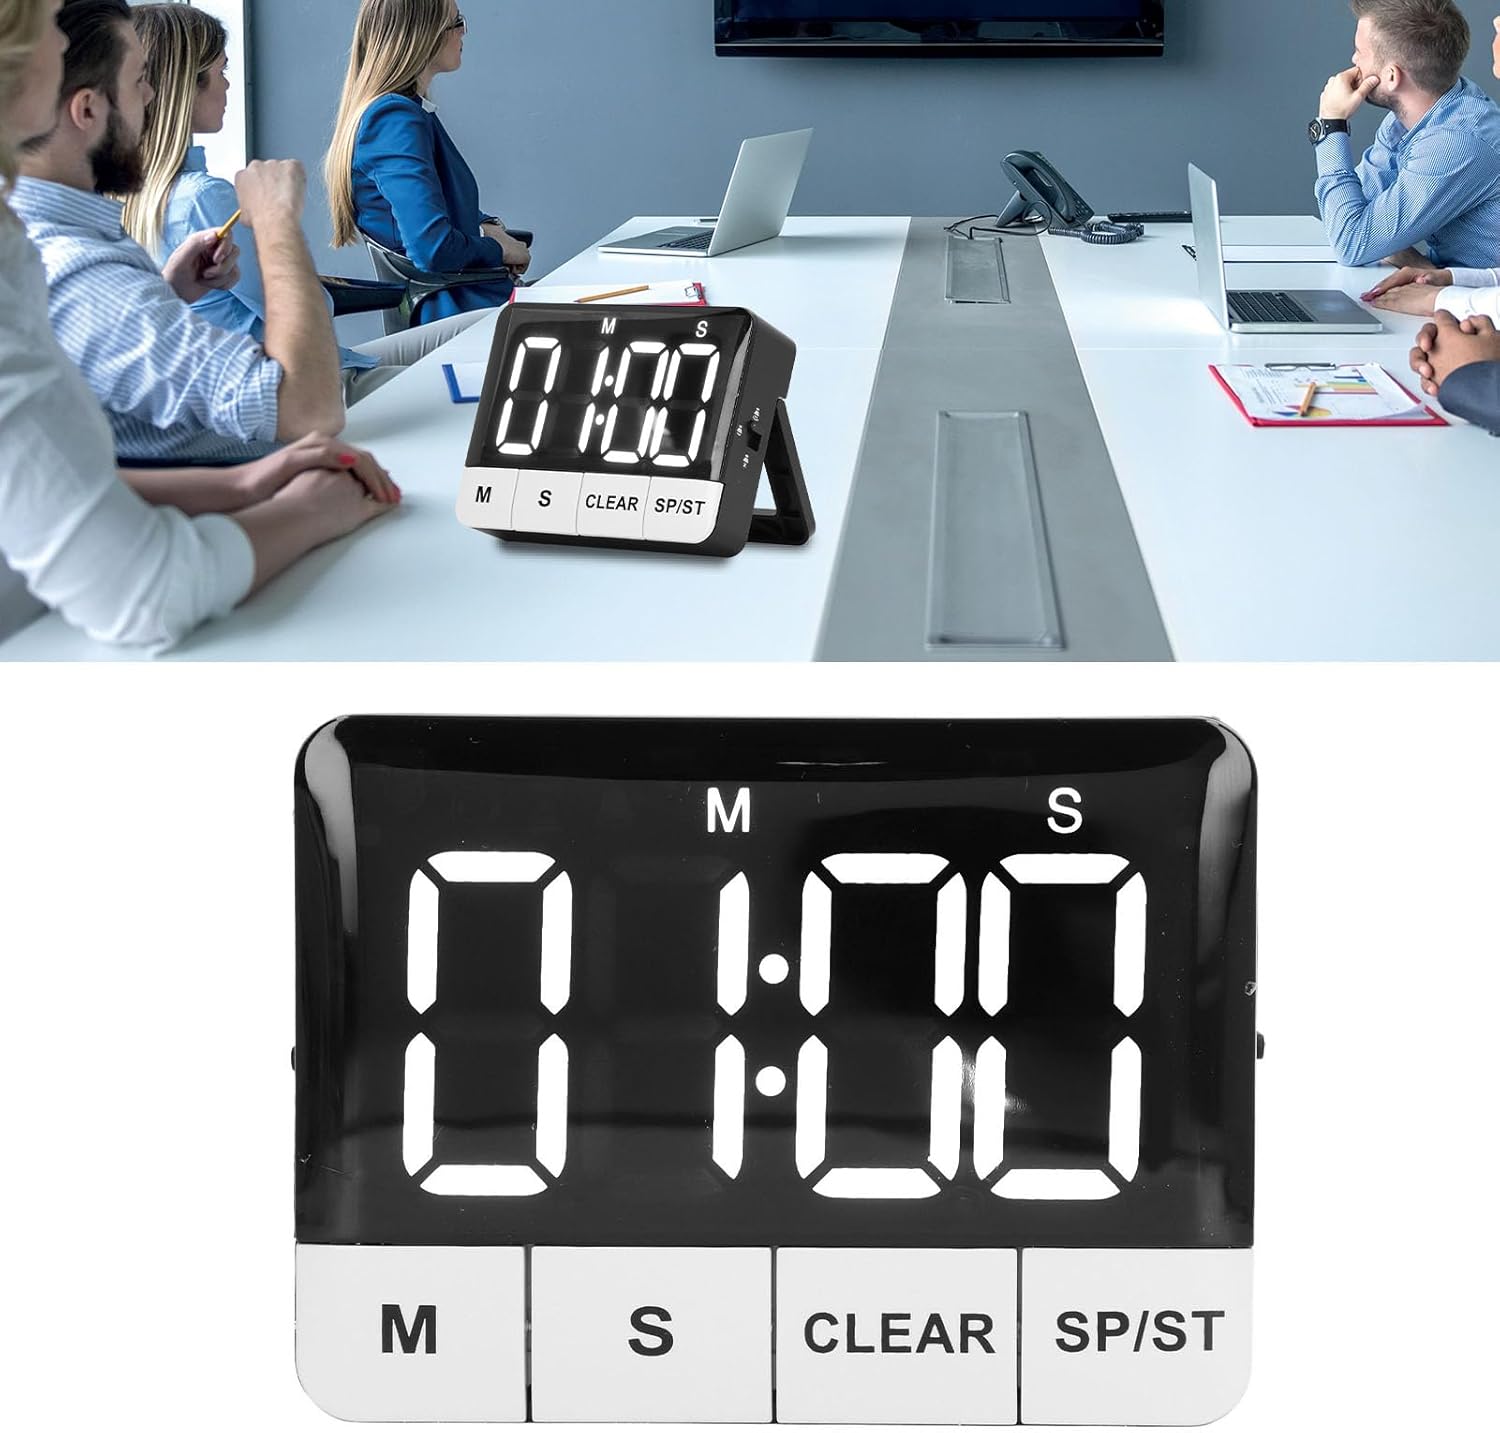
Figure 7.1: The timer displayed on a table, demonstrating its use in a professional setting.

Figure 7.2: The timer positioned on a kitchen counter, illustrating its versatility for home use.
8. Maintenance
8.1 Cleaning
To clean the timer, wipe it with a soft, dry, or slightly damp cloth. Do not use abrasive cleaners, solvents, or immerse the device in water.
8.2 Battery Replacement
When the display becomes dim or the timer functions erratically, it's time to replace the batteries. Follow the steps in Section 5.1 Battery Installation to replace the 2 x AAA batteries.
9. Troubleshooting
| Problem | Possible Cause | Solution |
|---|---|---|
| Timer does not turn on or display is blank. | Batteries are dead or incorrectly installed. | Check battery polarity. Replace with fresh AAA batteries. |
| Display is dim. | Low batteries or brightness setting is on low. | Replace batteries. Adjust the Brightness Switch to a higher setting. |
| Alarm is not sounding. | Reminder mode is set to Silent & Flash or Vibration. | Adjust the Reminder Mode Switch to High Volume or Low Volume. |
| Timer automatically turns off. | ECO (Power Saving) Mode is enabled. | This is normal behavior. Press any button to reactivate. If you prefer the display to stay on, disable ECO Mode. |
| Timer does not reset to last set time. | Memory function only works after a countdown completes and alarm sounds. | Ensure the countdown completes fully before pressing SP/ST to recall the last time. |
10. Specifications
| Feature | Detail |
|---|---|
| Item Type | Digital Timer |
| Material | ABS |
| Battery Type | 2 x AAA batteries (not included) |
| Countdown/Count-up Range | 1 second to 9 hours, 59 minutes, 59 seconds |
| Reminder Modes | High Volume (80-90dB), Low Volume (60-75dB), Silent & Flash, Vibration |
| Display Brightness | 2 levels adjustable |
| Power Saving Mode | ECO mode (screen off after 10 seconds) |
| Mounting Options | Magnetic back, Retractable stand, Foldable hook |
| Product Dimensions | 3.94 x 3.15 x 1.57 inches |
| Item Weight | 3.21 ounces |
| Model Number | NOENNULL0ugtgdayqx |
| ASIN | B0DSJCLCS1 |
11. Warranty and Support
For warranty information or technical support, please refer to the retailer's return policy or contact the seller directly through your purchase platform. Keep your purchase receipt as proof of purchase.