
Introduction
Thank you for choosing the johgee HCT-379-T 4-Outlet Irrigation Programmer. This digital water timer is designed to provide flexible and efficient watering solutions for your garden, lawn, or other irrigation needs. Featuring four independent outlets, durable brass inlets, and intelligent functions like rain delay and child lock, this device ensures precise and convenient control over your watering schedule. Please read this manual thoroughly before operation to ensure proper setup and optimal performance.
Product Overview
The johgee HCT-379-T irrigation programmer features a clear digital display and intuitive controls for managing up to four separate watering zones. Its robust construction includes a high-quality brass water inlet and IPX5 waterproofing for durability.
Key Components and Display
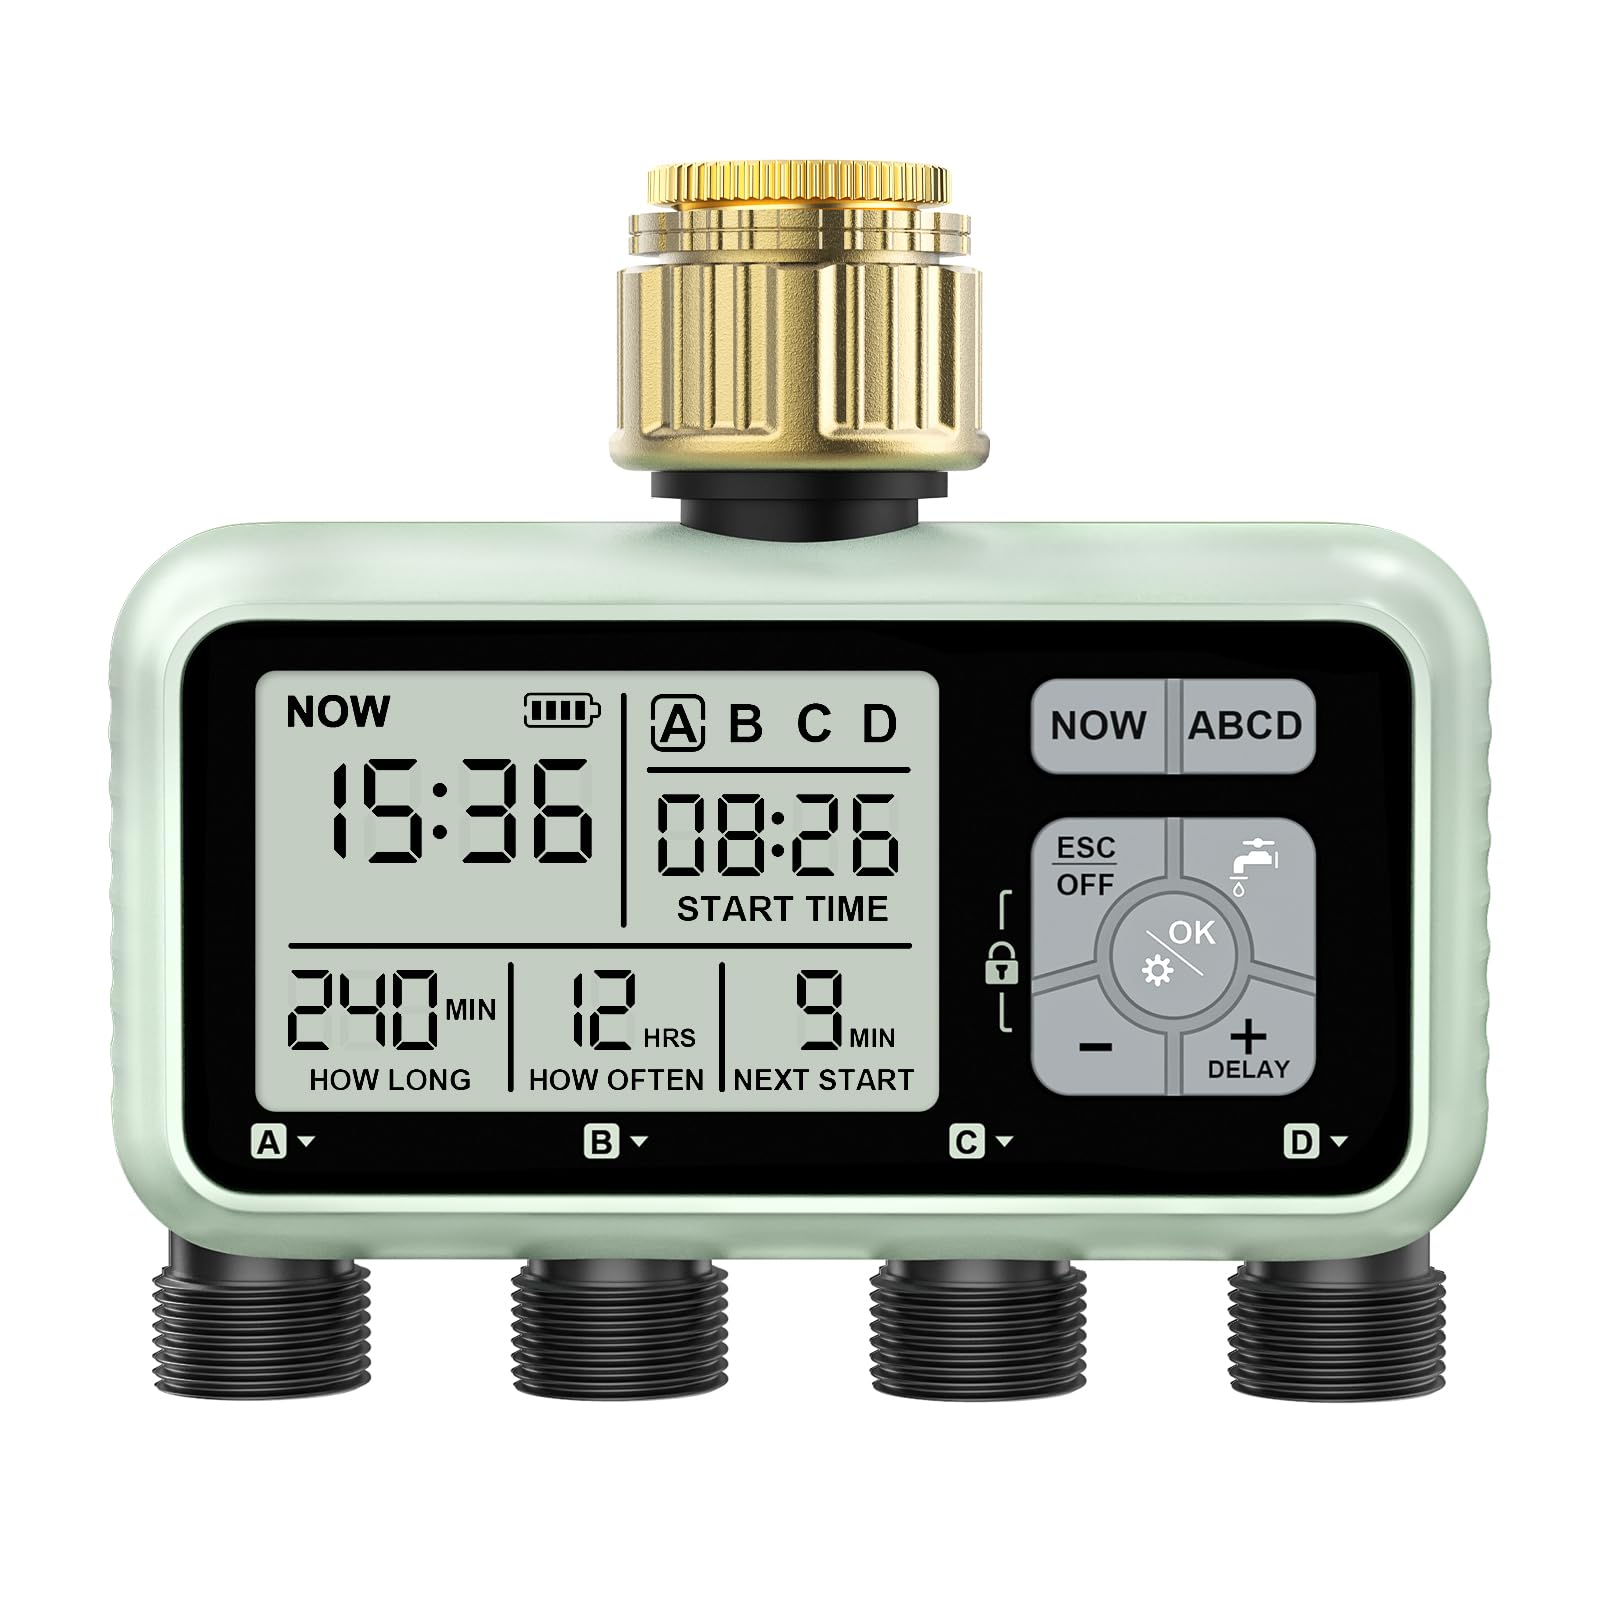
Image: Front view of the johgee HCT-379-T irrigation programmer, highlighting its digital display and control buttons. Labels indicate Current Time, Irrigation Start Time, Irrigation Duration, Irrigation Frequency, Duration to Next Irrigation, and the four independent watering zones (Zone 1-4 / A-D).
- Digital Display: Shows current time, battery status, program settings (start time, duration, frequency), and next irrigation time.
- Control Buttons:
- NOW / ABCD: Used to switch between current time display and programming modes for zones A, B, C, D.
- ESC / OFF: Exits current setting or turns off the selected zone.
- OK / SET: Confirms selections and enters setting modes.
- +/- / DELAY: Adjusts values up/down, and activates the rain delay function.
- Watering Can Icon Button: Activates or deactivates manual watering.
- Lock Icon: Indicates child lock status.
- Brass Water Inlet: Durable connection point for your main water supply.
- Four Independent Outlets (A, B, C, D): Connect up to four separate irrigation lines or hoses.
Setup
1. Battery Installation
The irrigation programmer requires 2 x 1.5V AA batteries (not included) for operation. Ensure the battery compartment is dry before installation.
- Locate the battery compartment on the back of the unit.
- Open the battery cover.
- Insert two AA batteries, observing the correct polarity (+/-) as indicated inside the compartment.
- Close the battery cover securely to maintain the IPX5 waterproof rating.
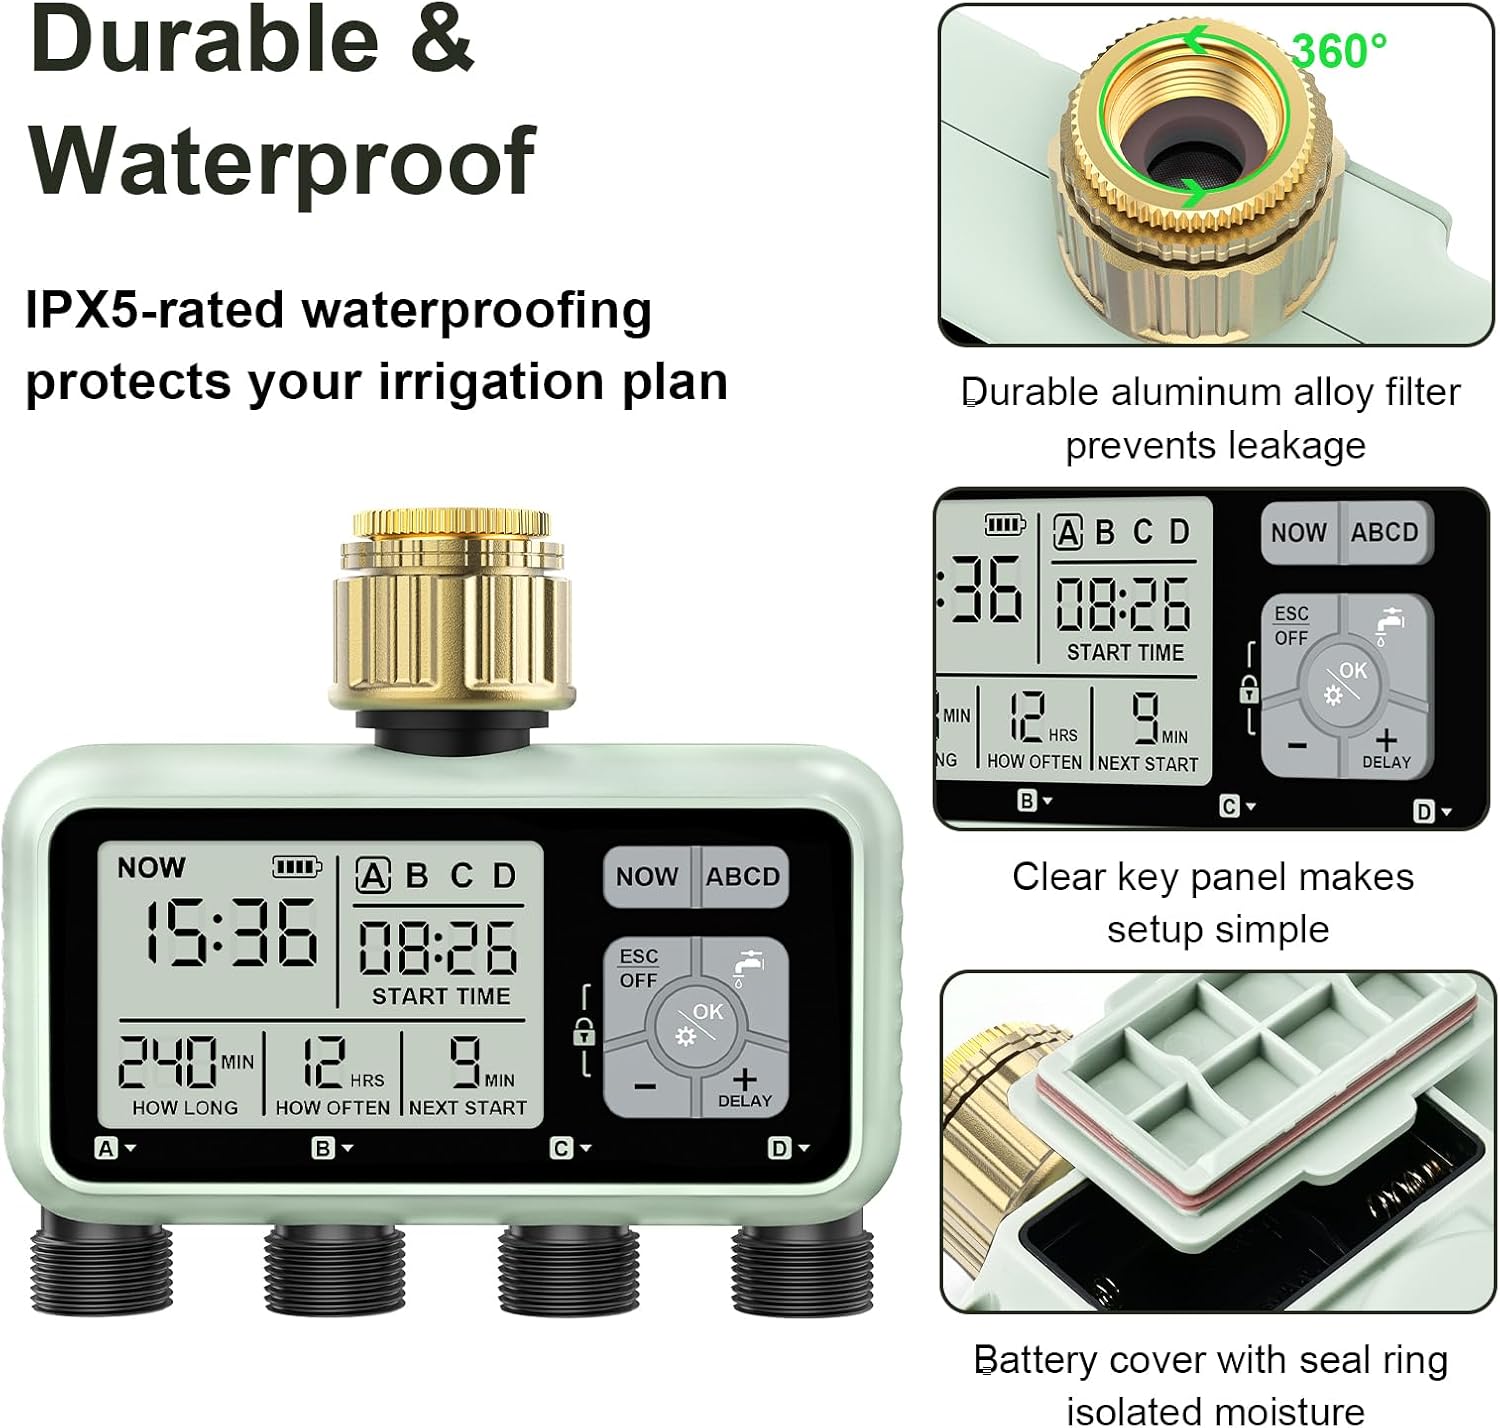
Image: Detailed view of the battery compartment with its sealing cover, emphasizing the importance of proper closure for waterproofing.
2. Connecting to Water Source
Connect the brass water inlet of the programmer to your outdoor faucet or water tap.
- Ensure the faucet is clean and free of debris.
- Screw the brass inlet onto the faucet securely by hand. Do not overtighten.
- An aluminum alloy filter is integrated to prevent leakage and clogging. Ensure it is properly seated.
3. Connecting Irrigation Lines
Attach your hoses or irrigation system lines to the four independent outlets (A, B, C, D) at the bottom of the unit.
- Screw each hose connector onto its respective outlet.
- Ensure all connections are tight to prevent leaks.
Operating Instructions
1. Setting Current Time
Upon first use or after battery replacement, you will need to set the current time.
- Press the NOW button to display the current time.
- Press and hold the OK button until the hour digits flash.
- Use the +/- buttons to adjust the hour.
- Press OK to confirm the hour and move to minutes.
- Use the +/- buttons to adjust the minutes.
- Press OK to save the current time.
2. Programming Watering Schedules (Zones A, B, C, D)
Each of the four outlets can be programmed independently. The programming steps are identical for each zone.

Image: The programmer's display illustrating how watering duration and frequency can be set for different zones (Zone 1-4) simultaneously without interference.
- Press the ABCD button to select the desired zone (A, B, C, or D) you wish to program. The selected zone will be highlighted on the display.
- Press and hold the OK button to enter programming mode for the selected zone.
- Set Start Time: The "START TIME" digits will flash. Use +/- to adjust the desired start hour, then press OK. Adjust minutes, then press OK.
- Set Watering Duration ("HOW LONG"): The "HOW LONG" digits will flash. Use +/- to set the watering duration from 1 second to 360 minutes. Press OK.
- Set Watering Frequency ("HOW OFTEN"): The "HOW OFTEN" digits will flash. Use +/- to set the frequency:
- From 1 hour to 23 hours.
- From 1 day to 15 days.
- The display will show "NEXT START" indicating the time until the next scheduled watering.
- Repeat these steps for other zones (B, C, D) as needed.
- To exit programming mode, press ESC.
3. Manual Watering
You can initiate manual watering at any time without affecting your programmed schedules.

Image: A hand interacting with the control panel, specifically pressing the watering can icon button to activate or deactivate manual watering.
- Press the Watering Can Icon Button.
- The display will prompt you to set the manual watering duration. Use +/- to adjust the desired time.
- Press OK to start manual watering.
- To stop manual watering, press the Watering Can Icon Button again or press ESC.
4. Rain Delay Function
The rain delay function allows you to temporarily pause your watering schedule during rainy weather, conserving water.

Image: The programmer's display with the "+ DELAY" icon visible, indicating that the rain delay function is active and the next watering cycle has been postponed.
- Press and hold the DELAY button (which is also the + button) for 3 seconds.
- The display will show the delay duration (e.g., 24H, 48H, 72H). Use +/- to select the desired delay period.
- Press OK to confirm the rain delay. The "DELAY" icon will appear on the screen, and your watering programs will be postponed for the selected duration.
- To cancel the rain delay, press and hold the DELAY button again for 3 seconds, then select "0H" or press ESC.
5. Child Lock Function
The child lock prevents accidental changes to your watering programs.
- To activate the child lock, press and hold the OK button and the ESC button simultaneously for 3 seconds. A lock icon will appear on the display.
- To deactivate the child lock, repeat the same action. The lock icon will disappear.
Maintenance
- Battery Replacement: When the battery indicator on the display shows low power, replace the two AA batteries promptly to ensure continuous operation.
- Filter Cleaning: Periodically check and clean the aluminum alloy filter located at the water inlet to prevent debris buildup and ensure optimal water flow. Unscrew the unit from the faucet, remove the filter, rinse it under running water, and reinsert it.
- Winterization: Before freezing temperatures occur, disconnect the irrigation programmer from the faucet and hoses. Remove the batteries. Store the unit indoors in a dry, frost-free location to prevent damage from freezing water.
- General Cleaning: Wipe the exterior of the unit with a soft, damp cloth. Do not use abrasive cleaners or solvents.
Troubleshooting
| Problem | Possible Cause | Solution |
|---|---|---|
| No water flow from outlets. |
|
|
| Display is blank or dim. |
|
|
| Water leaks from connections. |
|
|
| Cannot change settings. |
|
|
Specifications
| Brand | johgee |
| Model Number | HCT-379-T |
| Material | Brass (inlet), Reinforced Nylon Fiber (main connector) |
| Product Dimensions (D x W x H) | 5.59" x 6.46" x 2.91" |
| Watering Duration Range | 1 second to 360 minutes |
| Watering Frequency Range | 1 hour to 23 hours, or 1 day to 15 days |
| Waterproof Rating | IPX5 |
| Power Source | 2 x 1.5V AA Batteries (not included) |
Warranty and Support
johgee provides customer service and technical support for this product. If you encounter any issues or have questions regarding the operation, maintenance, or troubleshooting of your HCT-379-T Irrigation Programmer, please do not hesitate to contact our customer support team. Refer to your purchase documentation or the johgee brand store on Amazon for contact information.
We are committed to ensuring your satisfaction and providing assistance to resolve any concerns you may have.