
1. Important Safety Instructions
Please read all instructions carefully before using this product and retain them for future reference. Observe all warnings on the product and in the operating instructions.
- Do not block any ventilation openings. Install in accordance with the manufacturer's instructions.
- Do not install near any heat sources such as radiators, heat registers, stoves, or other apparatus (including amplifiers) that produce heat.
- Protect the power cord from being walked on or pinched, particularly at plugs, convenience receptacles, and the point where they exit from the apparatus.
- Only use attachments/accessories specified by the manufacturer.
- Unplug this apparatus during lightning storms or when unused for long periods of time.
- Refer all servicing to qualified service personnel. Servicing is required when the apparatus has been damaged in any way, such as power-supply cord or plug is damaged, liquid has been spilled or objects have fallen into the apparatus, the apparatus has been exposed to rain or moisture, does not operate normally, or has been dropped.
2. Package Contents
Verify that all items listed below are included in your package. If any items are missing or damaged, please contact customer support.
- Bettdow AC1061 Projector
- User Manual
- Power Cord
- HDMI Cable
- Remote Control
3. Product Overview
The Bettdow AC1061 is a smart projector featuring Google TV, native 1080P resolution with 4K support, WiFi 6, and Bluetooth 5.0. It is designed for various applications including home theater, outdoor viewing, education, and conference presentations.

Image: The Bettdow AC1061 projector in white, shown with its accompanying remote control. The projector features a lens on the front panel and ventilation grilles.
3.1 Projector Components
Familiarize yourself with the various ports and controls on your projector.

Image: Diagram illustrating the projector's rear and side ports, including USB 2.0, Headphone Jack, and HDMI 2.0.
- USB 2.0 Port: For connecting USB storage devices.
- Headphone Jack: For connecting external audio devices.
- HDMI 2.0 Port: For connecting external video sources such as laptops, gaming consoles, or media players.
- Power Input: For connecting the power cord.
4. Setup
4.1 Remote Control Setup
The remote control requires two AAA batteries (not included).
- Open the battery compartment cover on the back of the remote control.
- Insert two AAA batteries, ensuring correct polarity (+/-).
- Close the battery compartment cover.

Image: The remote control with its battery compartment open, showing where to insert two AAA batteries.
4.2 Power Connection
- Connect the power cord to the power input port on the projector.
- Plug the other end of the power cord into a suitable electrical outlet.
- Press the power button on the projector or remote control to turn on the device.
4.3 Initial Projection and Automatic Adjustments
Upon powering on, the projector will automatically perform several adjustments to optimize the image.
- Auto Focus: The projector automatically detects and adjusts the focus to ensure a clear picture without manual intervention.
- Auto Keystone Correction: The projector automatically corrects trapezoidal distortion, ensuring a rectangular image even when projected from an angle.
- Automatic Obstacle Avoidance: Built-in sensors detect obstacles in front of the projection area and adjust the image to avoid them.
- Auto Screen Fit: The projector automatically recognizes the edges of the projection surface and adjusts the image to fit perfectly.

Image: A projected image on a wall, illustrating the automatic focus and keystone correction features of the projector.
5. Operating Instructions
5.1 Google TV Interface
The projector is equipped with an officially licensed Google TV system, providing access to a wide range of streaming applications and content.
- After powering on, the Google TV home screen will appear.
- Use the remote control to navigate through apps, movies, shows, and other content.
- Popular streaming services such as Netflix, Disney+, YouTube, Prime Video, and HBO are accessible directly from the interface.

Image: The Google TV home screen projected onto a wall, showing various streaming app icons and content recommendations.
5.2 Google Voice Assistant
The integrated Google Voice Assistant allows for convenient control of the projector and content playback using voice commands.
- Press the dedicated Voice Assistant button on the remote control.
- Speak clearly into the remote control's microphone.
- Examples of commands include: "Open Netflix," "Find Batman movie," "Increase the volume," or "What's the weather?"
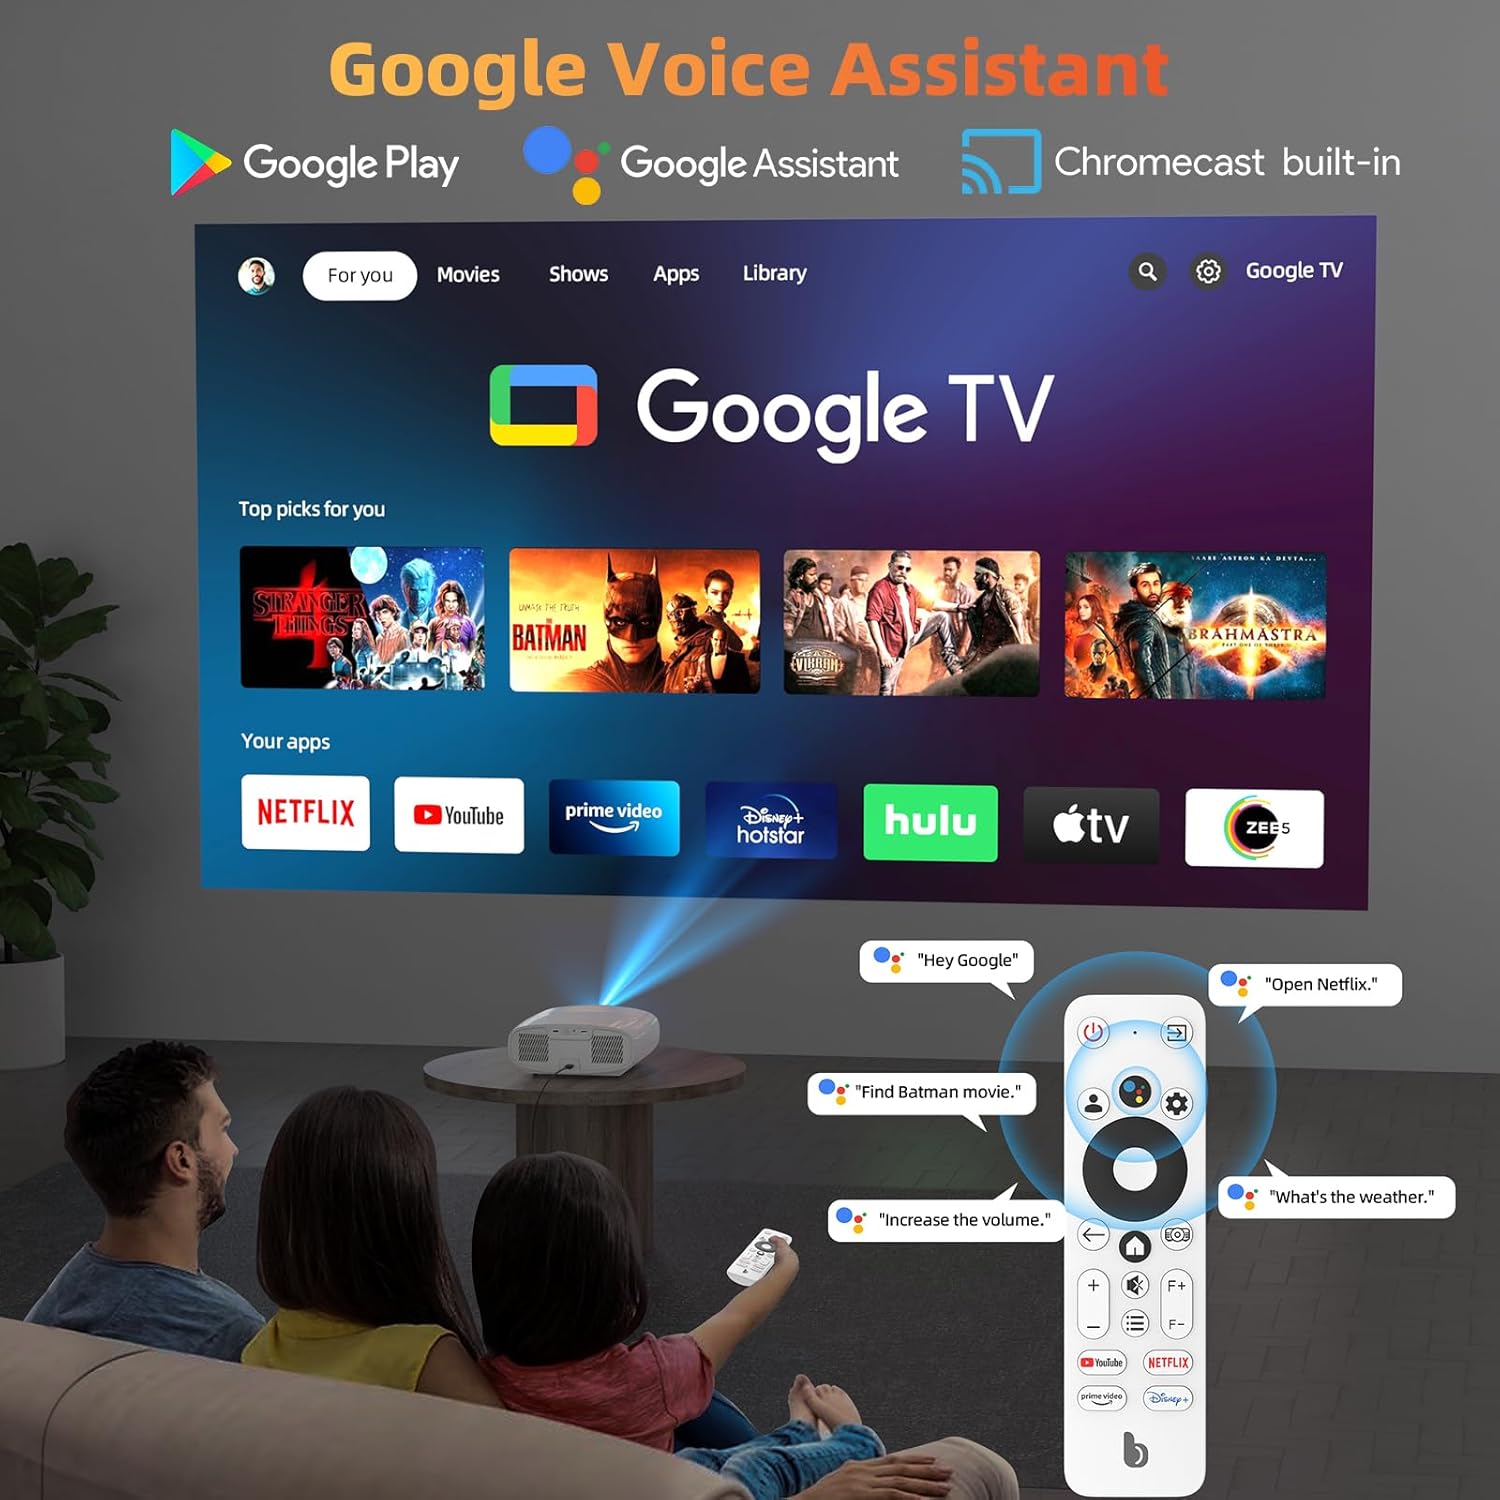
Image: A user holding the remote control and using voice commands to interact with the Google TV interface displayed on the projection screen.
5.3 Connecting External Devices
The projector supports various connectivity options for external devices.
- HDMI: Connect laptops, gaming consoles, Blu-ray players, or other HDMI-enabled devices using an HDMI cable. Select the HDMI input source from the projector's menu.
- USB: Insert a USB flash drive into the USB 2.0 port to play media files directly.
- Bluetooth 5.0: Pair Bluetooth-enabled audio devices such as headphones or external speakers for enhanced sound. The projector can also function as a Bluetooth speaker.
- Dual-Band WiFi 6 (2.4G+5G): Connect to your wireless network for internet access, streaming, and screen mirroring from compatible devices.

Image: A projector wirelessly connected to a smartphone via WiFi and Bluetooth, displaying content on a large screen.
5.4 Audio Settings
The projector features dual 10W subwoofers with Dolby Audio support for an immersive sound experience.
- Access audio settings through the Google TV interface to adjust volume, sound modes, or connect external audio devices.
- The projector supports one-touch switching to Bluetooth speaker mode, allowing it to function as a standalone speaker.

Image: A visual representation of the immersive 360-degree sound effect produced by the projector's Dolby Atmos-enabled speakers.
6. Maintenance
6.1 Fully Enclosed Optical Engine
The projector features a fully enclosed optical engine designed to minimize maintenance and extend lifespan.
- Dust Prevention: The enclosed design prevents dust from entering the optical path, reducing the occurrence of black spots on the projected image.
- Reduced Noise: The design contributes to lower operational noise levels.
- Extended Lifespan: By protecting internal components from environmental factors, the lifespan of the projector is enhanced.

Image: A cutaway diagram illustrating the fully enclosed optical engine of the projector, highlighting its dustproof and low-maintenance design.
6.2 Cleaning
- Use a soft, dry cloth to clean the exterior of the projector.
- For the lens, use a specialized lens cleaning cloth and solution to avoid scratches.
- Do not use abrasive cleaners or solvents.
7. Troubleshooting
If you encounter issues with your Bettdow AC1061 projector, refer to the following common troubleshooting tips:
- No Power: Ensure the power cord is securely connected to both the projector and the power outlet. Try a different outlet.
- No Image: Check that the correct input source (HDMI, USB, or internal Google TV) is selected. Verify all cables are connected properly.
- Blurry Image: Allow the auto-focus feature to complete its adjustment. If the issue persists, ensure the projector lens is clean.
- Distorted Image: The auto keystone correction should resolve most image distortions. Ensure the projector is placed on a stable, level surface.
- No Sound: Check the volume settings on the projector and any connected external audio devices. Ensure Bluetooth audio devices are properly paired.
- Remote Control Not Working: Replace the AAA batteries in the remote control. Ensure there are no obstructions between the remote and the projector.
- WiFi/Bluetooth Connectivity Issues: Ensure the projector is within range of your router or Bluetooth device. Restart the projector and your network equipment.
For further assistance, please contact Bettdow customer support.
8. Specifications
The following table outlines the key technical specifications of the Bettdow AC1061 Google TV Projector.

Image: Diagram showing the dimensions of the Bettdow AC1061 projector: 296mm (length), 285mm (width), and 118mm (height).
| Feature | Specification |
|---|---|
| Model Number | AC1061 |
| Display Resolution | Native 1920 x 1080P (4K Support) |
| Brightness | 850 ANSI Lumens |
| Operating System | Android 9.0 (AOSP) + Google TV (Officially Licensed) |
| Connectivity | Dual-Band WiFi 6 (2.4G+5G), Bluetooth 5.0, HDMI 2.0, USB 2.0, Headphone Jack |
| Special Features | Auto Focus, Auto Keystone Correction, Automatic Obstacle Avoidance, Auto Screen Fit, Built-In Speaker, HDR10+ |
| Audio | 2 x 10W Subwoofers, Dolby Audio Support |
| Projection Size | 50-200 Inches |
| Aspect Ratio | 16:9 |
| Bulb Lifespan | 30,000 hours |
| Dimensions | 11.65 x 11.22 x 4.65 inches (296 x 285 x 118 mm) |
| Weight | 5.29 pounds |
9. Warranty and Support
For warranty information or technical support, please refer to the documentation included with your purchase or contact Bettdow customer service through their official channels. Keep your purchase receipt for warranty claims.
