
1. Introduction
This manual provides essential information for the safe and efficient use of your new Pladeca 36 Inch Electric Cooktop. Please read these instructions thoroughly before installation and operation, and retain them for future reference. This cooktop features 5 radiant burners, 8400W total power, knob controls, and over-temperature protection, designed for 220-240V hard-wired installation.
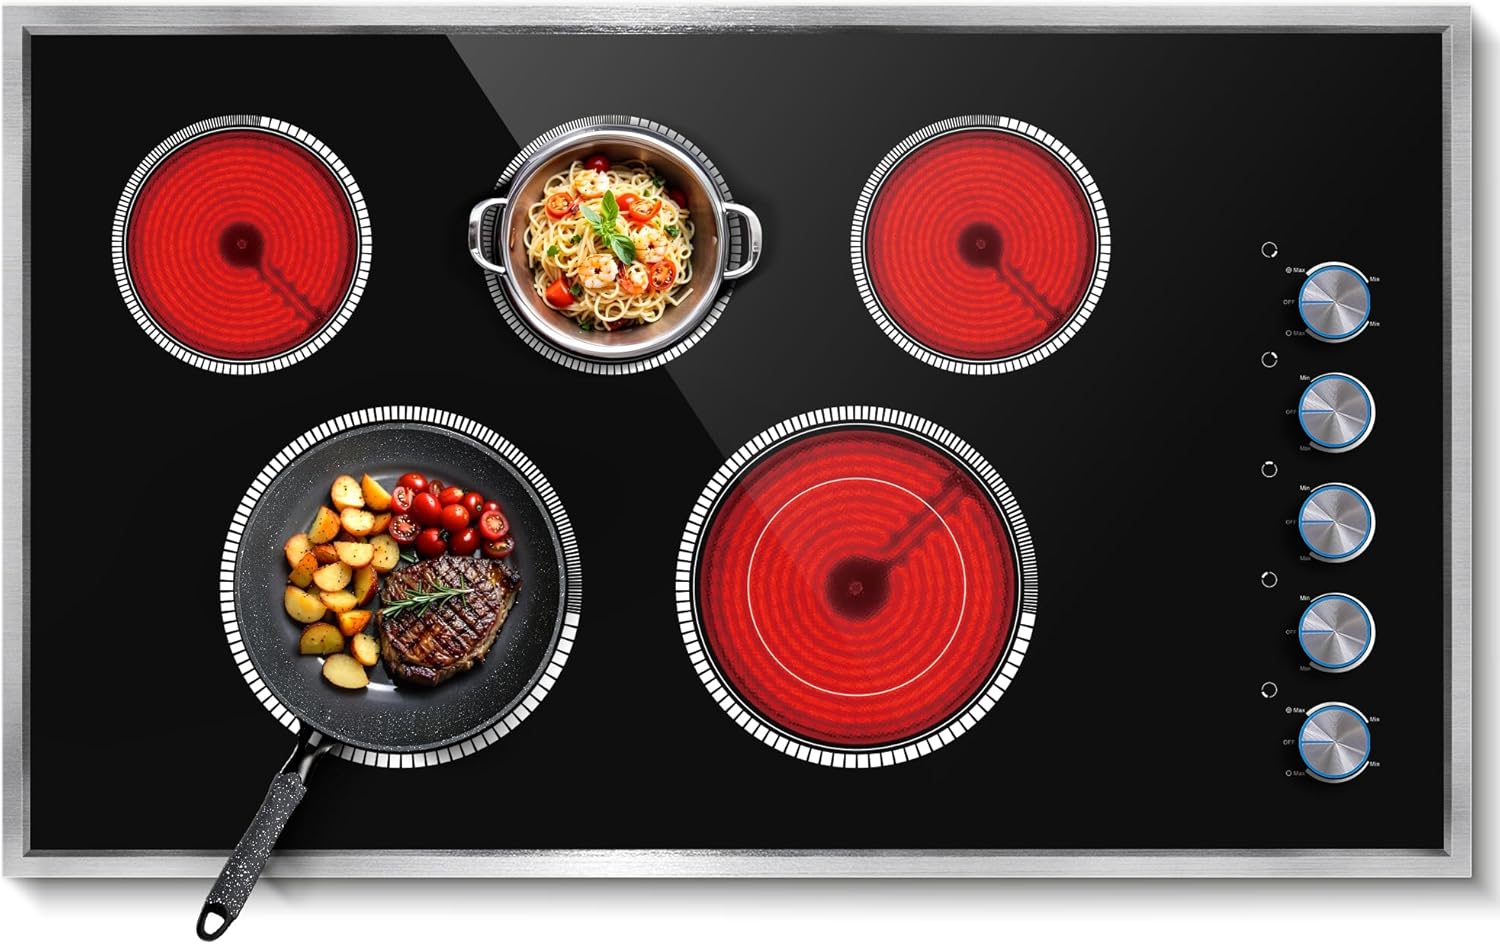
Image 1.1: Top-down view of the Pladeca 36 Inch Electric Cooktop, showcasing its five radiant heating zones and side-mounted knob controls.
2. Safety Information
To prevent personal injury or property damage, adhere to the following safety precautions:
- Electrical Safety: This appliance must be hard-wired by a qualified electrician to a dedicated 220-240V circuit. Do not use extension cords or adapters. Ensure proper grounding.
- Hot Surfaces: Cooktop surfaces remain hot after use. Avoid touching hot surfaces until they have cooled. Use pot holders.
- Supervision: Never leave the cooktop unattended during operation. Close supervision is necessary when the appliance is used by or near children.
- Proper Use: Use the cooktop only for its intended purpose of cooking food. Do not use it as a heating source or for drying clothes.
- Flammable Materials: Keep flammable materials (e.g., aerosols, cleaning products, paper) away from the cooktop surface.
- Over-Temperature Protection: The cooktop is equipped with an automatic shut-off feature if excessive heat is detected, preventing damage to the appliance and surrounding cabinetry.
- Ventilation: Ensure adequate ventilation in the kitchen area during operation.
3. Product Overview
3.1 Components
- Ceramic Glass Cooktop Surface
- 5 Radiant Heating Zones (Burners)
- 5 Knob Controls
- Metal Frame
- Power Supply Wiring (Hard-wired)
3.2 Control Panel
The cooktop features five independent knob controls, one for each heating zone. These knobs allow for precise adjustment of heat levels from minimum to maximum. The dual-ring zones offer flexibility for various cookware sizes.
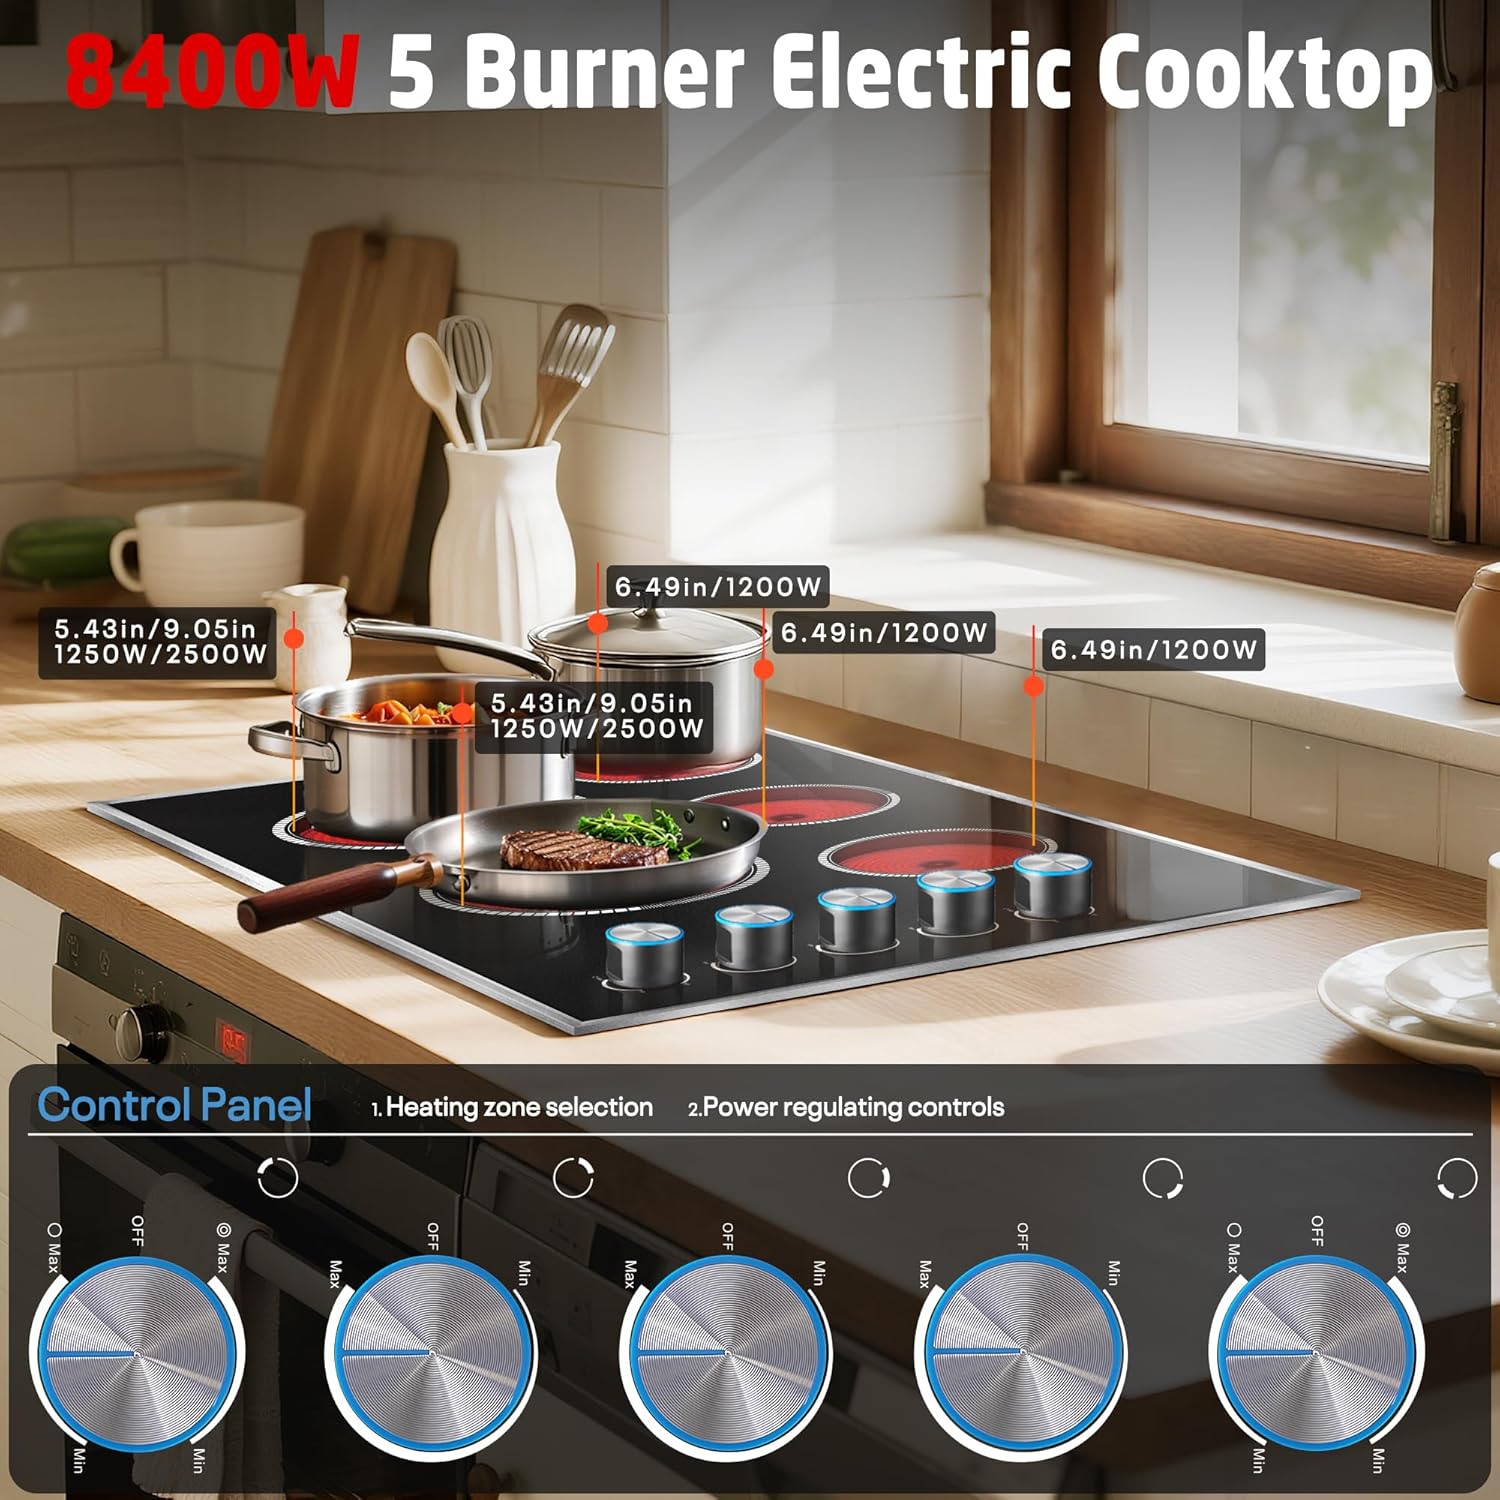
Image 3.1: Illustration of the cooktop's control panel, showing the five rotary knobs and the power ratings for each heating zone, including dual-ring options.
4. Installation
4.1 Before Installation
- Ensure the installation area is clean and dry.
- Verify that the electrical supply meets the cooktop's requirements (220-240V, 8400W total).
- Confirm sufficient clearance around the cooktop for ventilation and safety.
4.2 Dimensions and Cutout
The cooktop is designed for seamless embedded installation. Refer to the diagram below for precise dimensions and countertop cutout requirements.

Image 4.1: Technical drawing detailing the cooktop's overall dimensions (35.43"D x 20.47"W x 1.73"H) and the required countertop cutout size (approximately 33.85" x 20.47"), along with a basic electrical wiring diagram.
| Measurement | Value |
|---|---|
| Overall Depth | 35.43 inches |
| Overall Width | 20.47 inches |
| Overall Height | 1.73 inches |
| Cutout Width | Approx. 33.85 inches |
| Cutout Depth | Approx. 20.47 inches |
4.3 Electrical Connection
This appliance requires a 220-240V, 8400W hard-wired electrical connection. Installation must be performed by a qualified electrician in accordance with all local electrical codes. The wiring diagram is provided in Image 4.1 for reference. Ensure the cooktop is properly grounded.
5. Operating Instructions
5.1 Turning On/Off and Adjusting Heat
Each burner is controlled by its corresponding knob. To activate a burner, push down and turn the knob clockwise to the desired heat setting. The heat can be adjusted infinitely between 'Min' (low simmer) and 'Max' (searing heat). To turn off a burner, rotate the knob counter-clockwise back to the 'Off' position.

Image 5.1: An example of the cooktop in use, demonstrating the intuitive knob controls for heat adjustment.
5.2 Dual-Ring Burner Usage
Two of the burners feature a dual-ring design, allowing them to accommodate cookware ranging from 5 inches to 9 inches in diameter. These burners can increase power from 1250W to 2500W, providing flexibility for different cooking needs and pan sizes.

Image 5.2: The cooktop with multiple pots and pans on its five burners, illustrating its capacity for simultaneous cooking.
5.3 Cookware Compatibility
The ceramic glass surface is compatible with a wide range of cookware types. For optimal performance, use flat-bottomed pots and pans that match the size of the heating zone.
- Compatible: Cast iron, stainless steel, concave base, enameled iron, aluminum.
- Not Recommended: Copper, ceramic, glass cookware (unless specifically rated for electric radiant cooktops).
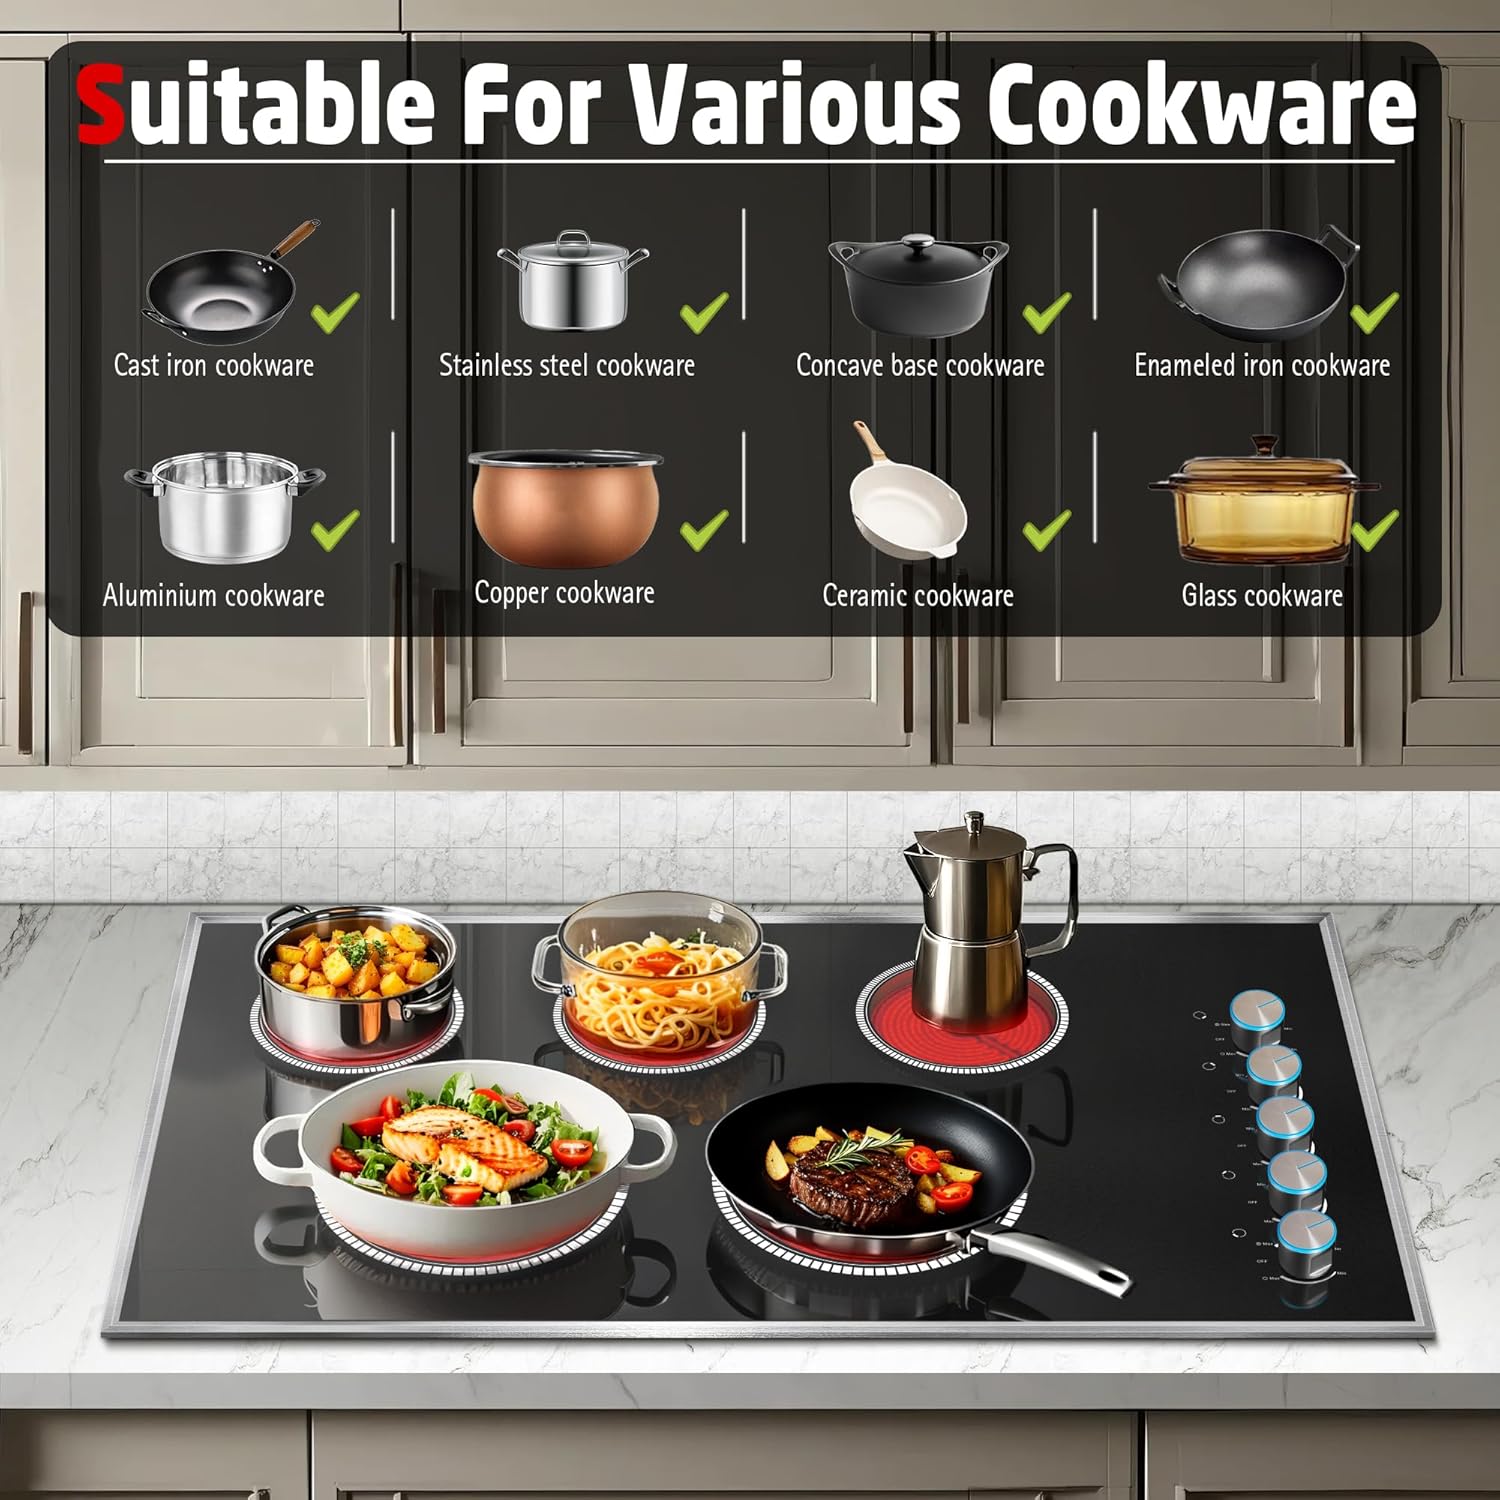
Image 5.3: A visual guide indicating which types of cookware are suitable for use on the electric cooktop.
6. Care and Cleaning
Regular cleaning maintains the appearance and performance of your cooktop. Always ensure the cooktop is cool before cleaning.
- Daily Cleaning: Wipe the ceramic glass surface with a damp cloth and mild detergent. Dry thoroughly with a clean cloth.
- Stubborn Stains: For burnt-on food or stubborn stains, use a ceramic cooktop cleaner and the included scraper. Follow the cleaner's instructions.
- Metal Frame: Clean the metal frame with a soft, damp cloth. Avoid abrasive cleaners that could scratch the finish.
- Knobs: The knobs can be removed for cleaning. Wash with warm, soapy water, rinse, and dry completely before reattaching.

Image 6.1: Demonstrates the ease of cleaning the cooktop's smooth, scratch-resistant, and anti-stick ceramic glass surface.
7. Troubleshooting Guide
If you encounter issues with your cooktop, refer to the following common problems and solutions:
- Cooktop does not turn on: Check the circuit breaker. Ensure the cooktop is properly hard-wired and receiving power.
- Burner not heating: Verify the knob is turned to an active heat setting. Ensure cookware is compatible and making good contact with the heating zone.
- Uneven heating: Use flat-bottomed cookware. Ensure the cookware size is appropriate for the burner.
- Cooktop shuts off unexpectedly: This may be due to the over-temperature protection activating. Allow the cooktop to cool down before attempting to restart. Ensure proper ventilation.
- Indicator light remains on after use: An 'H' indicator light signifies that the surface is still hot. This is normal and will turn off once the surface has cooled to a safe temperature.
If problems persist after attempting these solutions, contact customer support.
8. Technical Specifications
| Feature | Specification |
|---|---|
| Brand | Pladeca |
| Model Number | PDC-PC-J58400-MG-BB |
| Material | Ceramic Glass |
| Heating Elements | 5 Radiant Burners |
| Total Wattage | 8400 watts |
| Voltage | 220-240 Volts |
| Power Source | Corded Electric (Hard-wired) |
| Product Dimensions (D x W x H) | 35.43" x 20.47" x 1.73" |
| Item Weight | 28.7 Pounds |
| Special Feature | Over-Temperature Protection, Dual Ring Zone |
| Included Components | Manual, Scraper |
| UPC | 792138173649 |
9. Warranty and Customer Support
For warranty information or technical assistance, please refer to the warranty card included with your product or contact Pladeca customer support directly. Ensure you have your model number (PDC-PC-J58400-MG-BB) and purchase date available when contacting support.
No official product videos were available from the manufacturer for inclusion in this manual.