
1. Introduction
Thank you for choosing the Benass 12x20 Metal Carport. This heavy-duty carport is designed to provide reliable protection for your vehicles and outdoor equipment against various weather conditions. Featuring a galvanized steel roof, a robust powder-coated steel frame, and removable polyethylene sidewalls, this structure offers durability and versatility. This manual provides essential information for safe assembly, operation, and maintenance to ensure the longevity and optimal performance of your carport.

Image 1.1: The Benass 12x20 Metal Carport with its full enclosure, providing comprehensive protection.
2. Safety Information
Please read and understand all safety warnings and instructions before assembly and use. Failure to follow these instructions may result in serious injury or property damage.
- Anchoring: Ensure proper anchoring using the provided 8 anchor stakes to secure the carport. This is crucial for stability, especially in high winds.
- Weather Resistance: The carport is designed to withstand winds up to 120 MPH and snow loads up to 10.3 PSF. However, in extreme weather conditions, additional precautions may be necessary.
- UV Protection: Avoid prolonged exposure to direct sunlight without the protective sidewalls to prevent material degradation over time.
- Assembly: Follow all assembly instructions carefully to maintain structural integrity. Incorrect assembly can compromise the carport's stability and safety.
- Sharp Edges: Exercise caution during assembly and maintenance, as some metal components, particularly roof pieces, may have sharp edges. Wearing protective gloves is recommended.
3. Package Contents
Before beginning assembly, verify that all parts listed below are present and undamaged. If any parts are missing or damaged, contact Benass customer support immediately.
- Frame Components: Powder-coated steel tubes (2"x2"), including 10 legs, 5 reinforced crossbeams, and 2 ground tubes.
- Roof Panels: Galvanized steel roof panels.
- Sidewalls: 2 removable polyethylene sidewalls.
- Anchoring Hardware: 8 anchor stakes.
- Sealing Materials: Weather strip, sealant filler, leak-proof adhesive strip.
- Additional Accessories: Solar light, rubber edge banding, drill sleeve, Φ6 alloy screwed nails.

Image 3.1: Various accessories included with the Benass carport, such as a solar light, rubber edge banding, drill sleeve, and alloy screwed nails.
4. Setup and Assembly Instructions
Assembly of the Benass 12x20 Metal Carport requires careful attention to detail. It is recommended to have at least two people for assembly, and to wear protective gloves.
4.1 Site Preparation
- Choose a level and stable surface for installation.
- Clear the area of any debris, rocks, or obstacles.
- Ensure adequate clearance around the carport for assembly and future use.
4.2 Frame Assembly
- Unpack all frame components and lay them out according to the included diagram.
- Connect the ground tubes and legs using the provided hardware.
- Attach the reinforced crossbeams to form the roof structure. Ensure all connections are secure.

Image 4.1: Illustration of the carport's reinforced frame construction, highlighting the 2x2 square tube frame and five reinforced crossbeams for structural integrity.
4.3 Roof Installation
- Carefully place the galvanized steel roof panels onto the assembled frame. Note that roof assembly can be challenging and may require a 5-step ladder or higher.
- Ensure each roof panel overlaps correctly to create a waterproof seal.
- Apply the weather strip, sealant filler, and leak-proof adhesive strip as directed to prevent water ingress.
- Secure the roof panels to the frame using the provided screws. Consider upgrading to #14-3/4 length self-tapping screws with a 3/8 magnetic socket for easier installation and improved security, as suggested by some users.

Image 4.2: Detail of the overlapping galvanized steel roof panels, designed for superior waterproofing.
4.4 Sidewall Attachment and Anchoring
- Attach the removable polyethylene sidewalls to the carport frame. These provide additional protection from elements.
- Drive the 8 anchor stakes firmly into the ground through the designated points on the carport frame. This step is critical for stability and wind resistance.
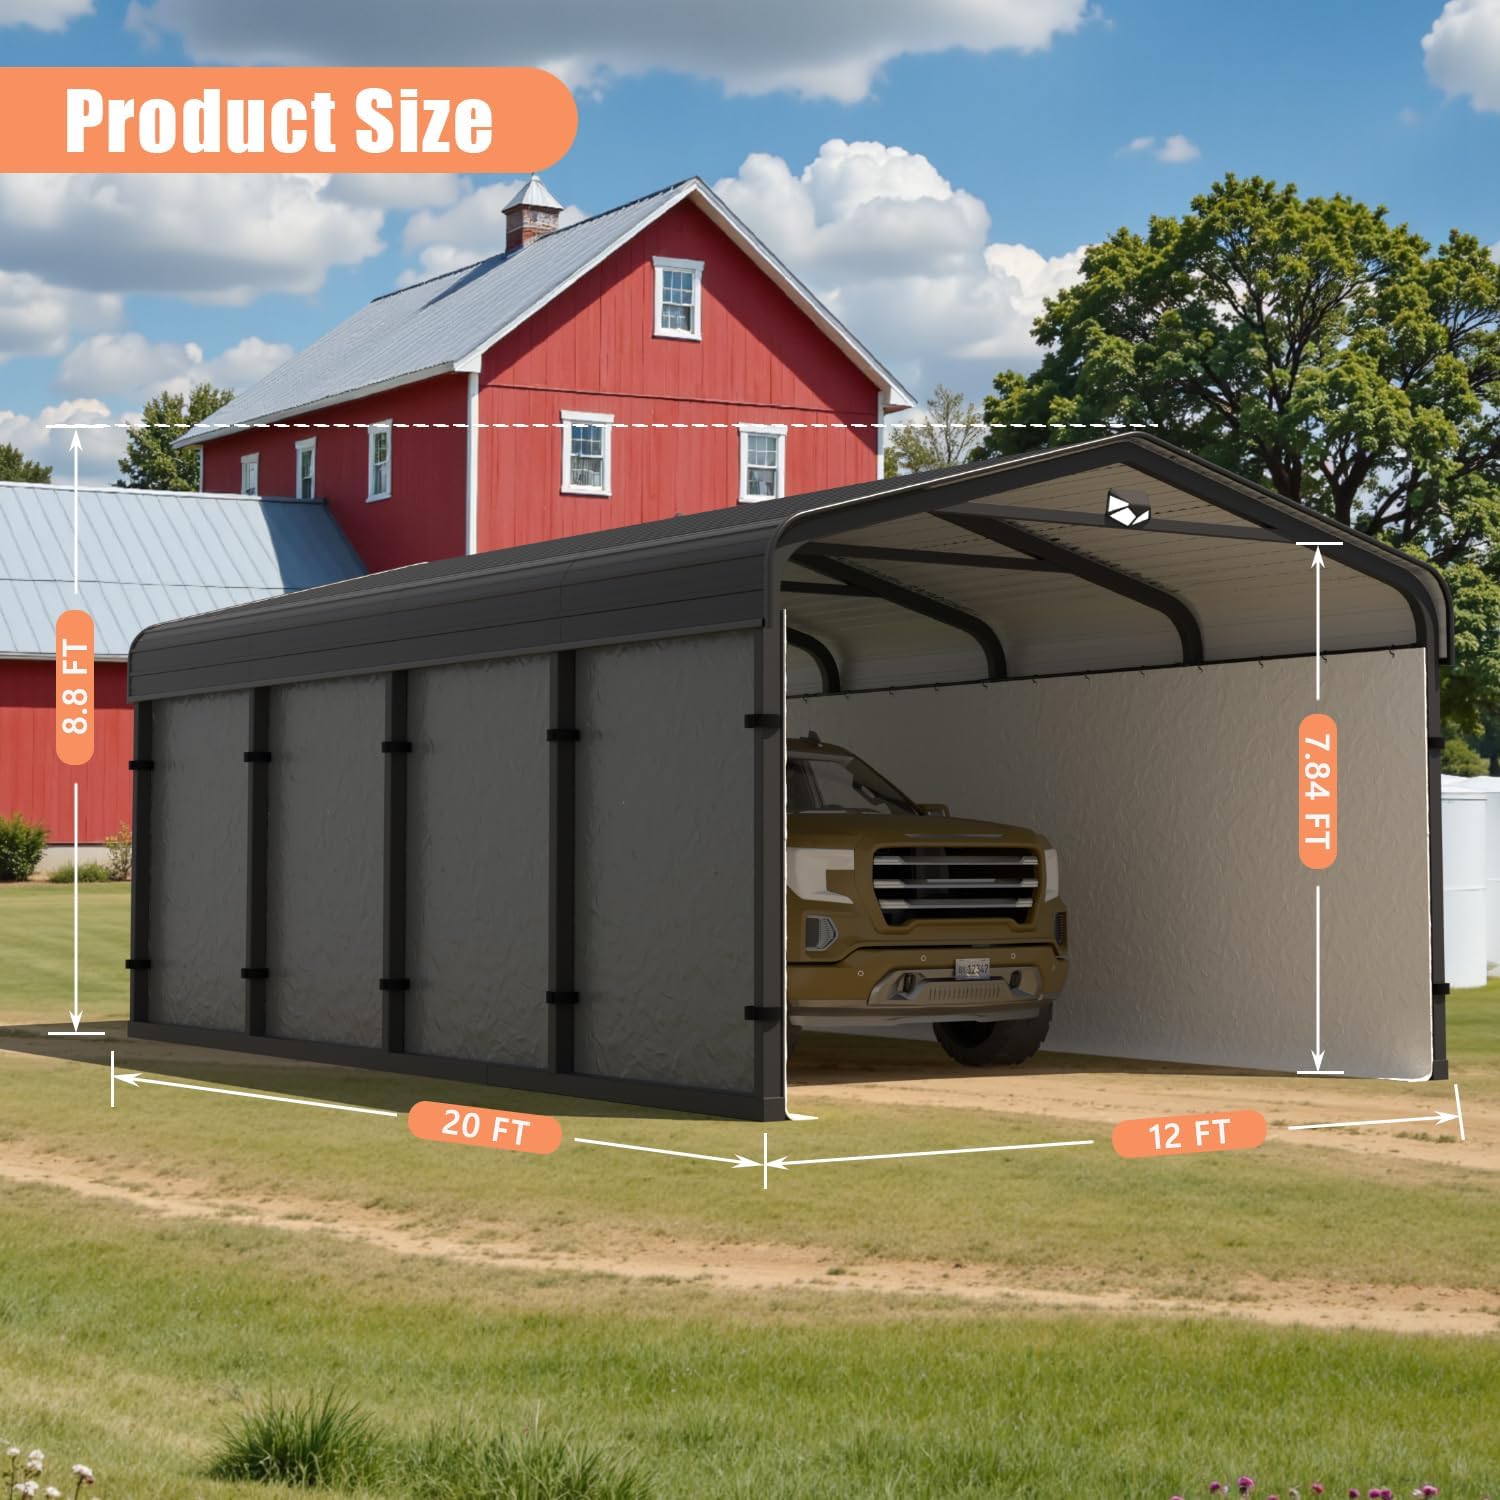
Image 4.3: The Benass carport with its key dimensions: 20 feet in length, 12 feet in width, and 8.8 feet in height.
5. Operating Instructions
The Benass 12x20 Metal Carport is designed for straightforward use and adaptability.
5.1 General Use
- The carport provides shelter for vehicles, boats, RVs, and other outdoor equipment.
- Ensure vehicles are parked centrally to avoid contact with the frame or sidewalls.
5.2 Removable Sidewalls
- The polyethylene sidewalls can be easily attached or removed based on your needs for protection from wind, rain, or sun.
- When sidewalls are removed, the carport functions as an open canopy, allowing for easy drive-through access.

Image 5.1: The carport demonstrating its versatility with both open drive-through and removable sidewall configurations.
5.3 Solar Light Operation
- The integrated solar light automatically senses ambient light and illuminates the carport area, enhancing visibility and safety during nighttime.
- Ensure the solar panel is clean and exposed to direct sunlight for optimal charging.

Image 5.2: The carport at night, illuminated by its automatic sensing solar light, providing visibility.
6. Maintenance
Regular maintenance will help preserve the condition and extend the lifespan of your Benass carport.
- Frame Inspection: Periodically check all frame connections and hardware for tightness. Tighten any loose bolts or screws.
- Roof and Sidewall Cleaning: Clean the galvanized steel roof and polyethylene sidewalls with mild soap and water as needed to remove dirt, debris, or mildew. Avoid abrasive cleaners.
- Anchoring Check: Regularly inspect the anchor stakes to ensure they remain firmly secured in the ground, especially after strong winds or heavy rainfall.
- Snow Removal: While the carport is designed for snow loads, heavy accumulation should be cleared promptly to prevent excessive stress on the structure.
- Sealant Integrity: Inspect the weather strip, sealant filler, and adhesive strips for any signs of wear or damage. Reapply or repair as necessary to maintain waterproofing.

Image 6.1: Close-up of the carport roof, illustrating the waterproof design with gap sealant, stack adhesive tape, and waterproof tape.
7. Troubleshooting
This section addresses common issues you might encounter with your Benass carport.
- Missing Hardware: If you find any bolts or other hardware missing upon unboxing, immediately contact Benass customer support for replacements. Do not attempt to substitute with incompatible parts.
- Roof Assembly Difficulty: The roof installation can be challenging. Ensure you have adequate tools, including a sturdy 5-step ladder or taller, and assistance from another person. Review the assembly diagrams carefully.
- Water Leakage: If water leakage occurs, inspect the roof panel overlaps and the application of the weather strip, sealant filler, and leak-proof adhesive strip. Reapply or reinforce these materials as needed to ensure a complete seal.
- Carport Instability: If the carport feels unstable, verify that all frame connections are tightened and that the 8 anchor stakes are fully driven into the ground. Ensure the installation surface is level.
8. Specifications
| Feature | Specification |
|---|---|
| Brand | Benass |
| Model Number | TPCP1220-NEW |
| Material | Alloy Steel (Frame), Galvanized Steel (Roof), Polyethylene (Sidewalls) |
| Style | 12x20 |
| Product Dimensions (L x W x H) | 240"L x 144"W x 105.5"H (20ft L x 12ft W x 8.8ft H) |
| Frame Material | 2"x2" Powder Coated Alloy Steel |
| Water Resistance Level | Waterproof |
| Shape | Rectangular |
| Ultraviolet Light Protection | 100+ |
| Assembly Required | Yes |
| Color | Gray |
| Floor Area | 240 Square Feet |
| Wind Resistance | Up to 120 MPH |
| Snow Load Capacity | Up to 10.3 PSF |
| Total Weight | 580 LBs |

Image 8.1: The Benass heavy-duty metal carport shown with a layer of snow, illustrating its capacity to withstand significant snow loads.
9. Warranty and Support
Benass is committed to providing high-quality products and customer satisfaction.
- Warranty: We offer a one-year warranty for satisfactory after-sales service.
- Customer Support: If you encounter any problems when you receive the carport or during future use, please contact Benass customer service. We are dedicated to assisting you promptly.
For support, please refer to the contact information provided with your purchase or visit the official Benass website.
