1. Introduction
Thank you for choosing the MOKKOM Electric Dough Maker. This appliance is designed to simplify your baking process by efficiently kneading and proofing dough. Featuring a microcomputer control system, a 6.34-quart (6L) 304 stainless steel bowl, and multiple operating modes, it provides convenience and consistent results for various dough types.
Please read this manual thoroughly before first use to ensure safe and optimal operation. Keep this manual for future reference.
2. Safety Instructions
- Always ensure the appliance is unplugged before cleaning, assembling, or disassembling parts.
- Do not immerse the main unit in water or other liquids. Clean with a damp cloth only.
- Keep hands and utensils away from the mixing blade during operation to prevent injury.
- Ensure the lid is securely closed before starting the machine.
- This appliance is for household use only. Do not use outdoors or for commercial purposes.
- Do not operate the appliance with a damaged cord or plug. Contact customer support for repairs.
- Keep out of reach of children. Close supervision is necessary when the appliance is used near children.
- Place the appliance on a stable, flat, and dry surface.
- Avoid placing the appliance near hot surfaces or open flames.
3. Product Overview
3.1 Components
- Main Unit with Control Panel
- 304 Stainless Steel Mixing Bowl (6.34 Qt / 6L capacity)
- 304 Stainless Steel Kneading Blade
- ABS Mixing Bucket Lid
- PP Conical Lid (Small Top Lid)
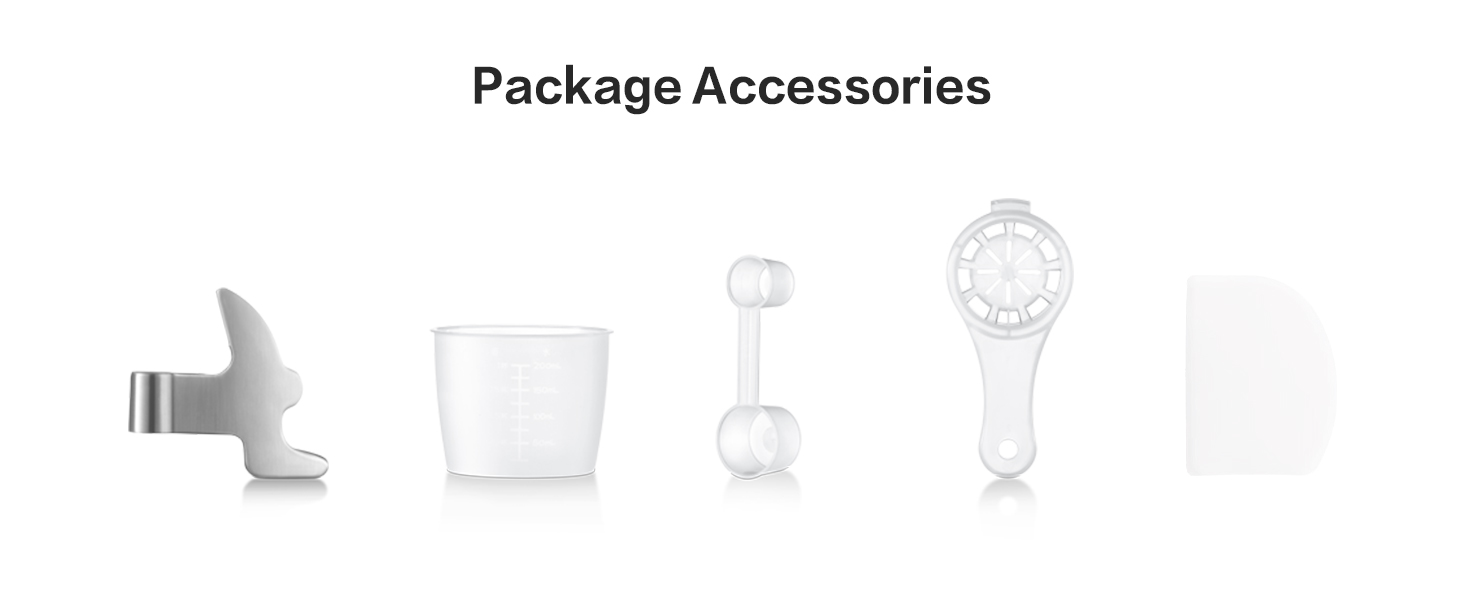
- Measuring Cup
- Measuring Spoon
- Egg Separator
- Scraper
3.2 Product Diagram


3.3 Specifications
| Feature | Specification |
|---|---|
| Brand | MOKKOM |
| Model | B0DSDTKXWS |
| Color | Green |
| Capacity | 6 Liters (6.34 Quarts) |
| Product Dimensions | 11.4"D x 9.6"W x 13.5"H |
| Item Weight | 9.93 pounds |
| Controls Type | Touch Button / Rotary Knob |
| Dishwasher Safe Parts | No (Removable parts are easy to clean by hand) |
| Special Feature | Microcomputer Timing, Dough Proofing Function, 360° Wrapped Heating |
4. Setup and Assembly
Before first use, ensure all packaging materials are removed and clean all removable parts as described in the 'Maintenance and Cleaning' section.
4.1 Installing the Kneading Blade
- Place the stainless steel mixing bowl onto the main unit.
- Insert the kneading blade into the central shaft at the bottom of the bowl.
- Place the small white spacer ring over the shaft, on top of the blade.
- Secure the blade by inserting the inverse screw into the shaft and tightening it counter-clockwise.
4.2 Initial Placement
Place the assembled dough maker on a clean, dry, and stable countertop. The anti-slip mats on the bottom of the unit will help prevent movement during operation.

5. Operating Instructions
The MOKKOM Electric Dough Maker features a microcomputer control panel for easy operation. The buttons are touch-sensitive and require a light tap rather than hard pressing.
5.1 Basic Operation Steps
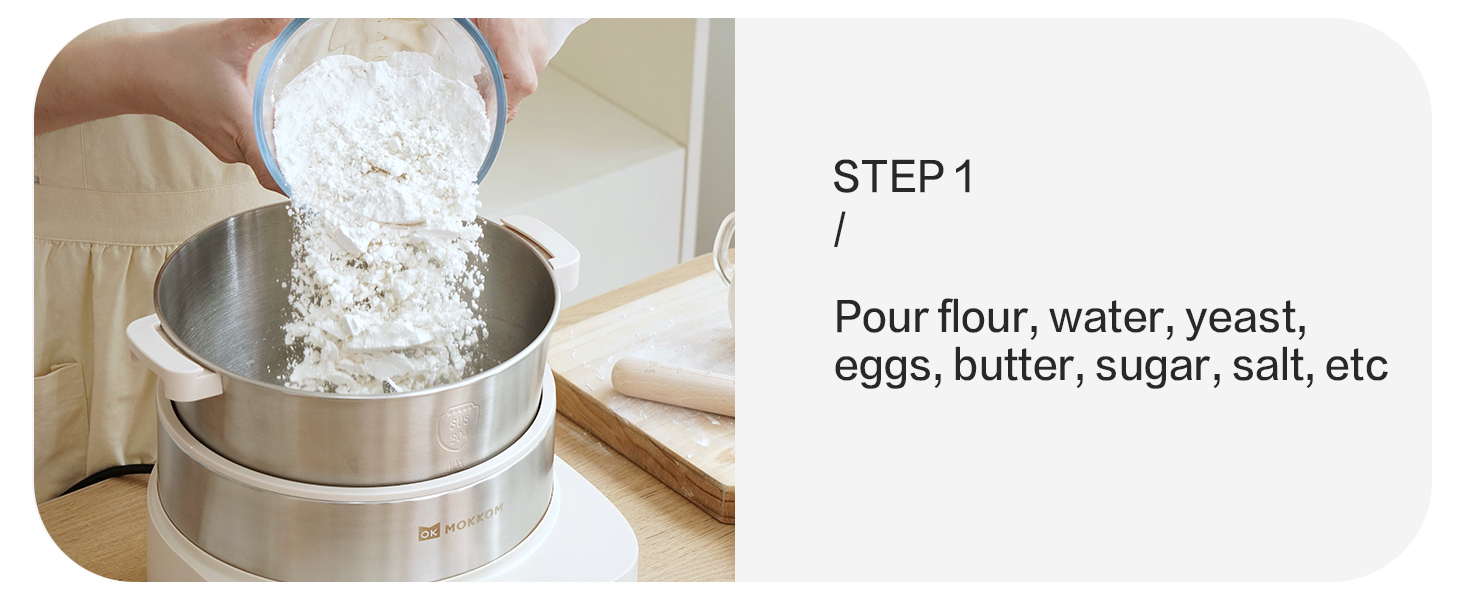
- Add Ingredients: Pour flour, water, yeast, and other desired ingredients into the stainless steel mixing bowl. Ensure the kneading blade is properly installed.
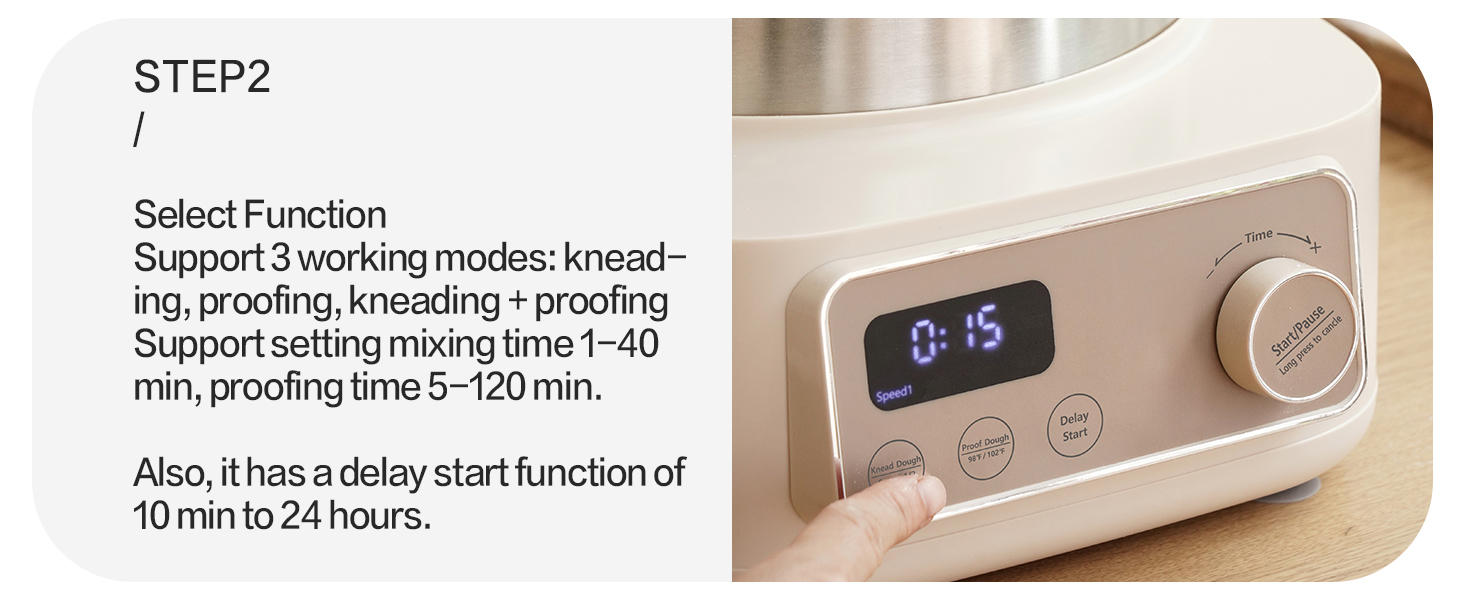
- Select Function: Close the lid securely. Use the control panel to select your desired function: Knead Dough, Proof Dough, or Delay Start.
- Set Time: Adjust the operation time using the rotary knob. The default time for Knead Dough is 15 minutes (adjustable 1-40 minutes), for Proofing is 90 minutes (adjustable 5-120 minutes), and for Delay Start is 8 hours (adjustable 10 minutes - 24 hours).
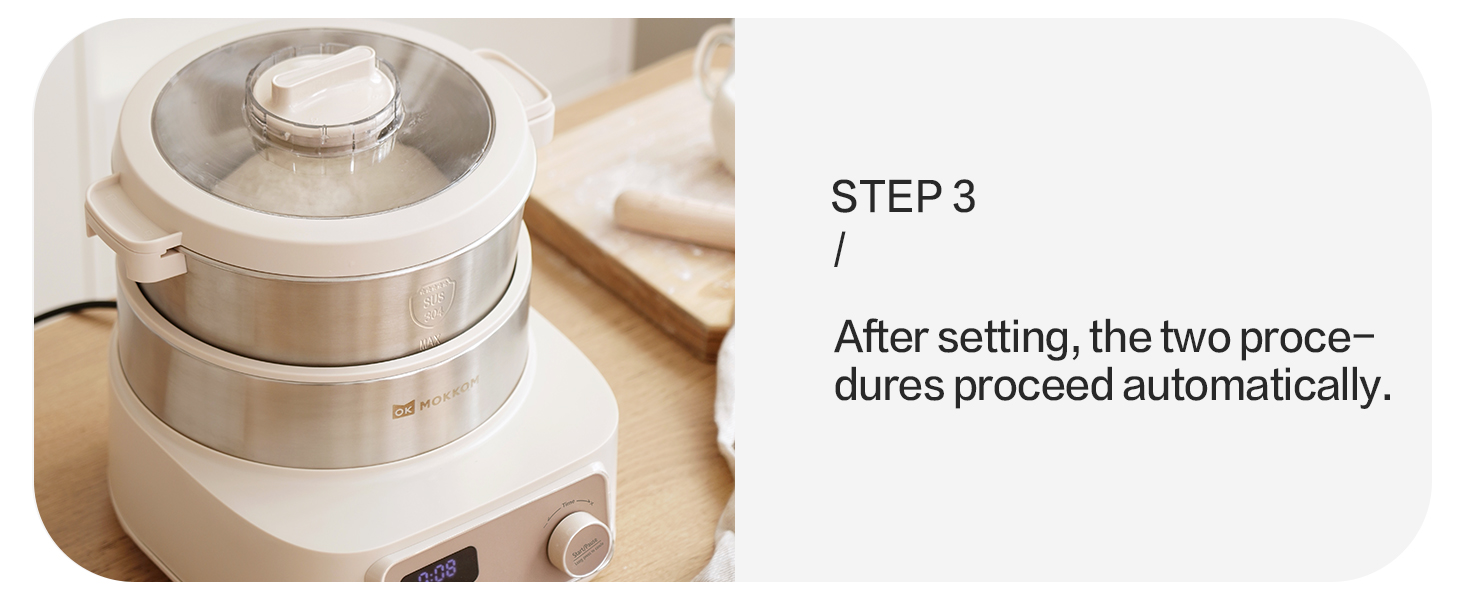
- Start Operation: Press the 'Start/Pause' button to begin. The machine will automatically proceed with the selected program.
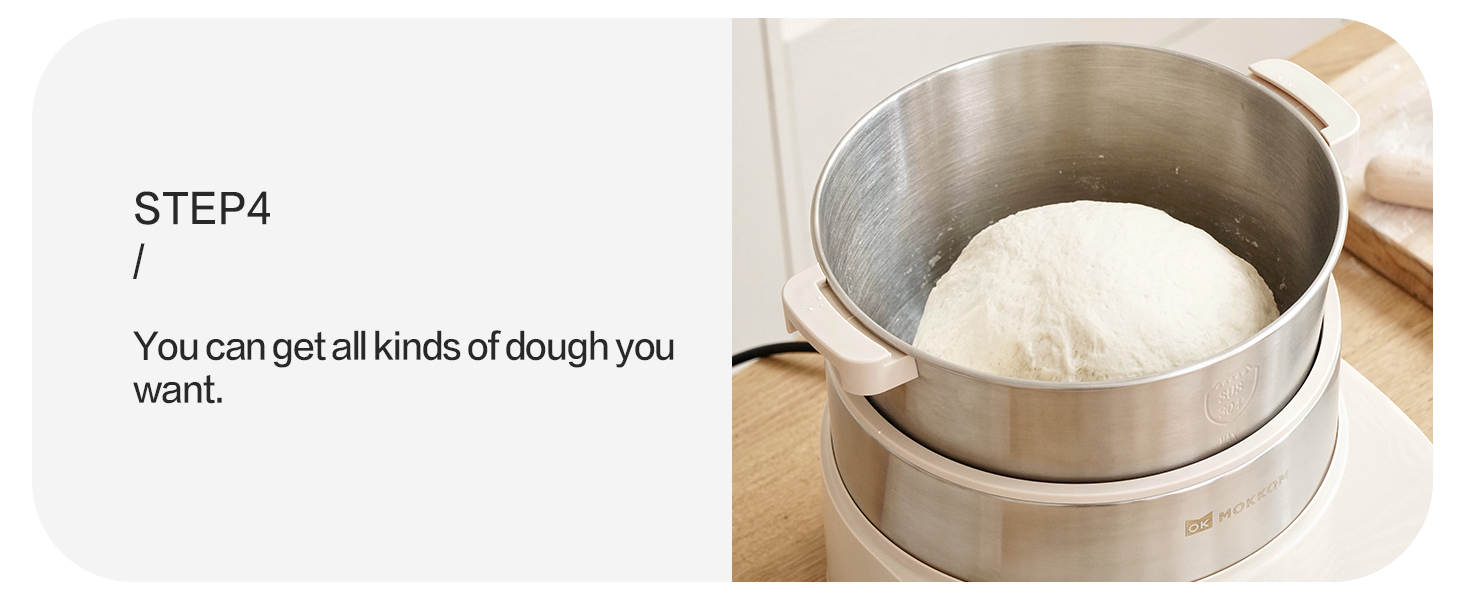
- Completion: Once the program is complete, the machine will stop. You can then remove the dough.

5.2 Knead Dough Modes
The dough maker offers two distinct kneading speeds:
- Speed 1: Ideal for making dough for noodles, dumplings, and Mantou, requiring a firmer consistency.
- Speed 2: Suitable for making dough for bread, pizza, and toast, which typically requires more elasticity.

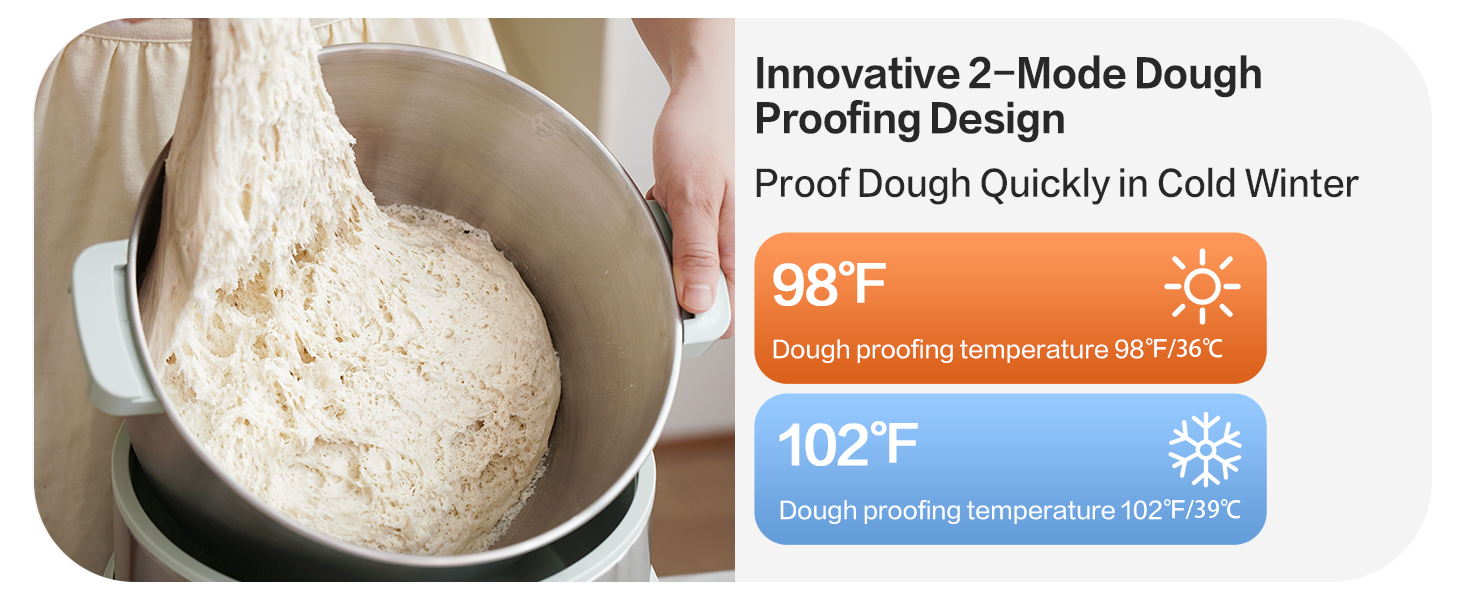
5.3 Dough Proofing Modes
The appliance features two innovative dough proofing modes with 360° three-dimensional wrapped heating for consistent temperature:
- 98°F (36°C) Mode: Suitable for general proofing.
- 102°F (39°C) Mode: Designed for quicker proofing, especially useful in colder environments.

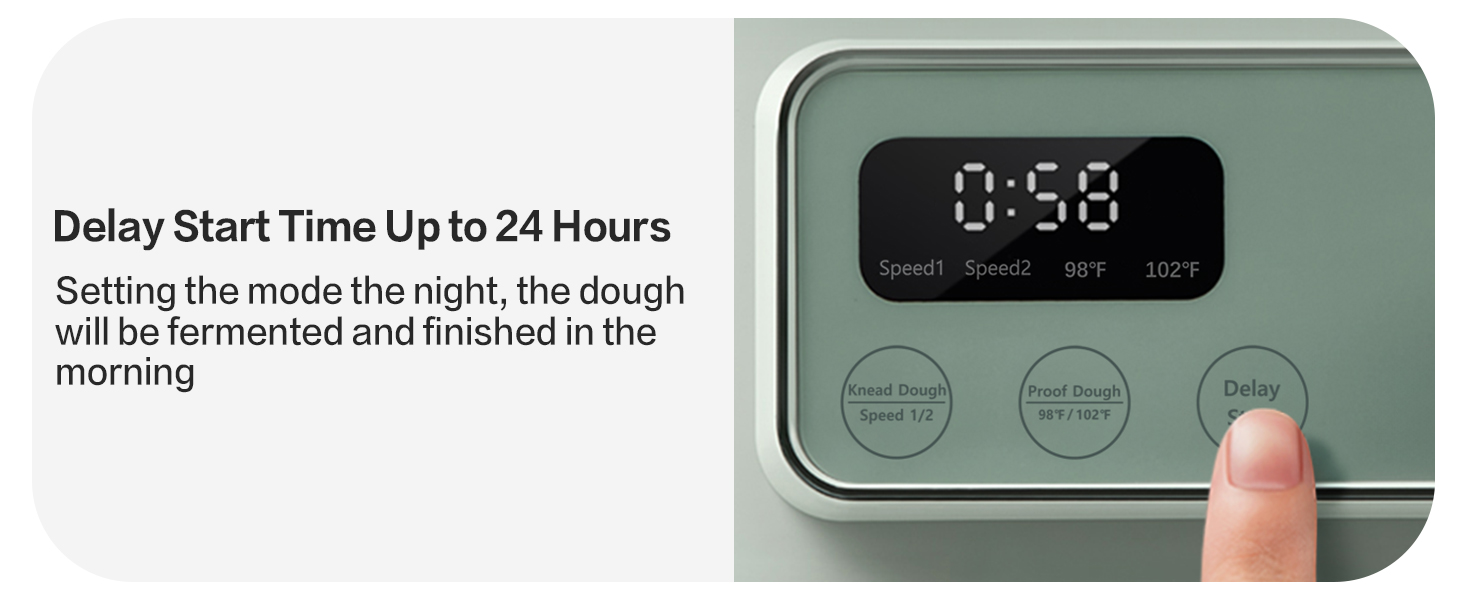

5.4 24-Hour Delay Timer
The delay timer allows you to set a delayed start time from 10 minutes up to 24 hours. This feature enables you to prepare ingredients in advance and have freshly kneaded or proofed dough ready at a specific time.

6. Maintenance and Cleaning
Regular cleaning ensures the longevity and hygienic operation of your MOKKOM Electric Dough Maker.
6.1 Disassembly for Cleaning
- Unplug the appliance from the power outlet.
- Remove the ABS mixing bucket lid and the PP conical lid.
- To remove the kneading blade, unscrew the inverse screw clockwise, then remove the spacer and the blade.
- Carefully lift the stainless steel mixing bowl from the main unit.

6.2 Cleaning Instructions
- Removable Parts: The stainless steel mixing bowl, kneading blade, and lids are removable and can be washed by hand with warm, soapy water. Rinse thoroughly and dry completely before reassembly.
- Main Unit: Wipe the exterior of the main unit with a soft, damp cloth. Do not use abrasive cleaners or immerse the unit in water.
- Sealed Blade Shaft: The sealed blade shaft design helps prevent flour from falling into the motor, simplifying cleaning.


7. Troubleshooting
- Appliance does not turn on: Ensure the power cord is securely plugged into a working outlet. Check if the lid is properly closed.
- Buttons are unresponsive: The control panel uses touch-sensitive buttons. Apply a light tap rather than a hard press. If issues persist, try unplugging and replugging the unit.
- Dough is not mixing properly: Ensure the kneading blade is correctly installed and secured. Verify that the amount of ingredients is within the recommended capacity (1-6 liters of dough).
- Dough is not proofing: Check that the correct proofing mode and temperature are selected. Ensure the lid is closed to maintain the internal temperature.
- Unusual odor during first use: A slight burning smell may occur during the first few uses as new motor components settle. If the smell persists or is strong, discontinue use and contact customer support.
- Machine moves during operation: Ensure the appliance is placed on a flat, stable surface. The anti-slip mats should prevent excessive movement.
8. Warranty and Support
For warranty information, product support, or to inquire about replacement parts, please contact MOKKOM customer service directly. Refer to the contact information provided with your purchase or visit the official MOKKOM website.
You can also visit the MOKKOM Store on Amazon for additional resources and product information.
