
1. Introduction
The Growell Electric Composter EC02 is designed to efficiently process kitchen food waste, reducing its volume and transforming it into a nutrient-rich material. This manual provides essential information for the safe and effective operation, maintenance, and care of your composter.

Image 1.1: Growell Electric Composter EC02 unit.
2. Safety Information
Please read all safety instructions carefully before using the Growell Electric Composter EC02. Failure to follow these instructions may result in injury or damage to the appliance.
- Always use the composter on a stable, flat surface.
- Keep the composter away from heat sources and direct sunlight.
- Do not place sharp objects or hazardous materials in the composter.
- Always unplug the composter before cleaning or performing maintenance.
- Wear protective gloves when handling the composter or its contents, especially when emptying.
- Do not compost meat, dairy, or oily foods in large quantities, as this can affect processing efficiency and odor control.
- Composting may attract pests; ensure the composter is properly sealed and maintained to minimize this risk.
- Always follow the manufacturer's instructions for safe operation and maintenance.
3. Product Components
The Growell Electric Composter EC02 consists of several key components designed for efficient operation:
- Main Unit: Houses the motor, heating element, and control panel.
- Processing Bucket: A 2.5L non-stick inner barrel where food waste is processed.
- Lid: Features a viewing window and an integrated activated carbon filter compartment.
- Activated Carbon Filter: Essential for odor adsorption.
- Control Panel: LED display with one-touch buttons for operation modes.
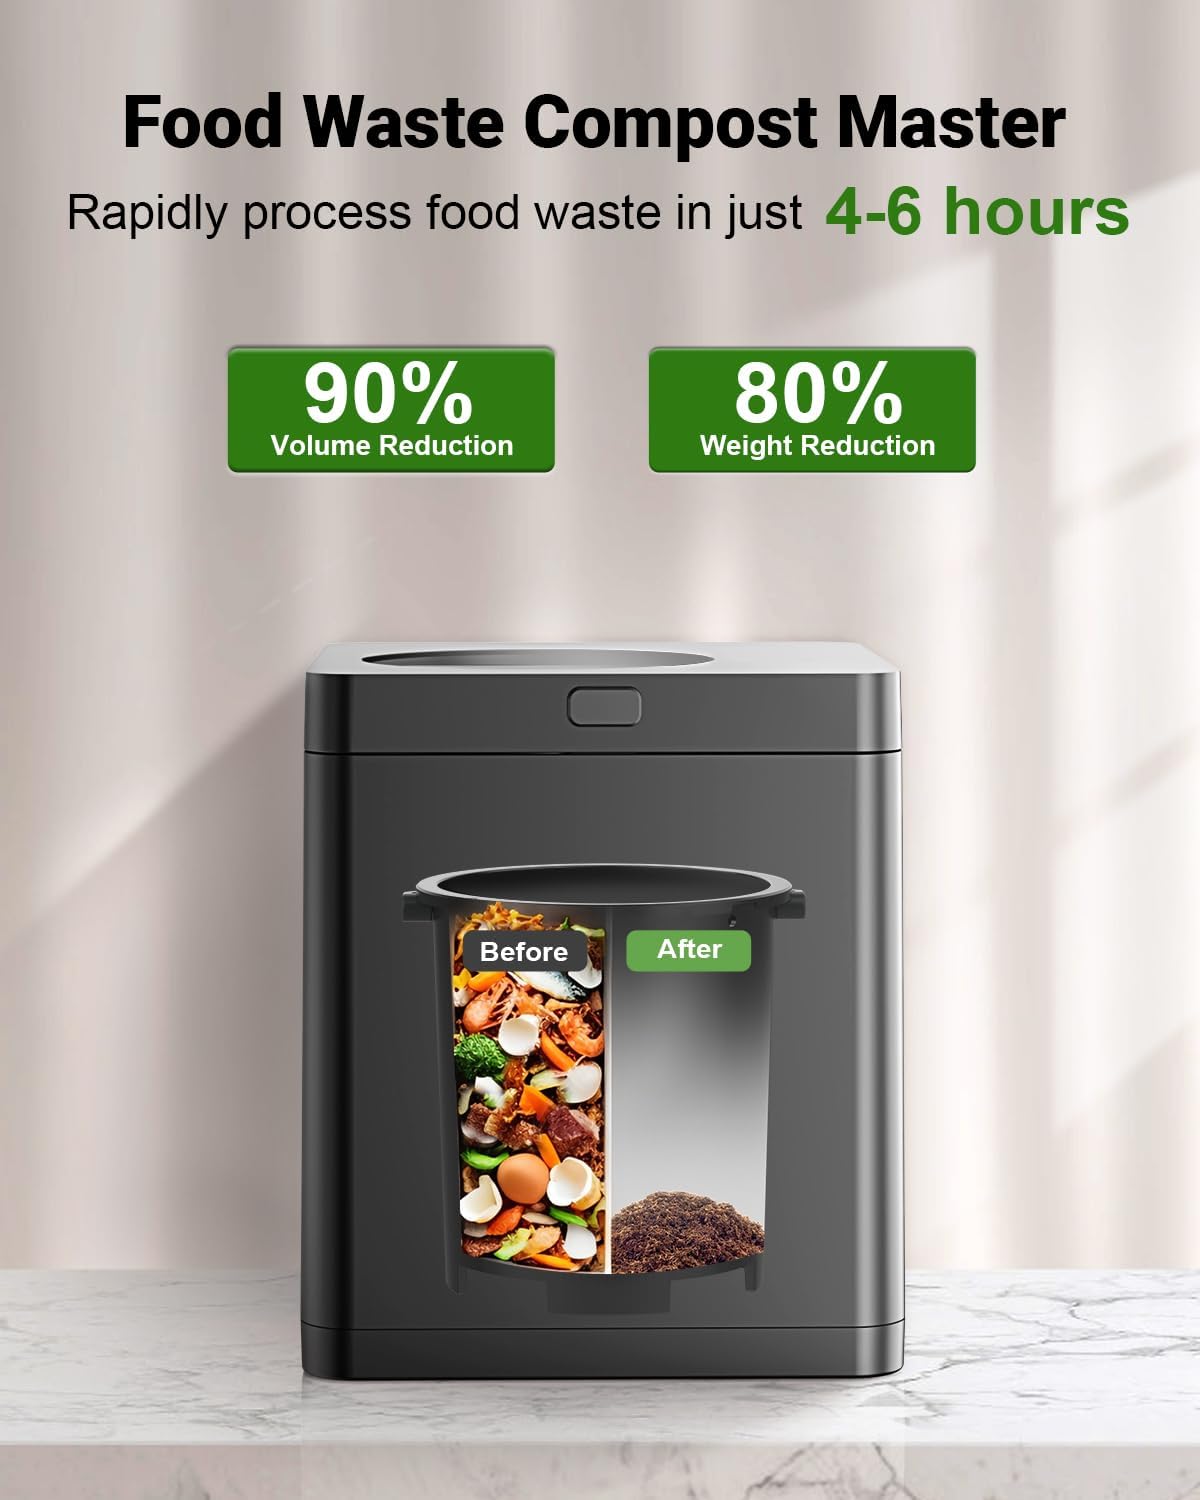
Image 3.1: The composter with its lid open, showing the inner bucket.
4. Setup
- Unpack: Carefully remove all components from the packaging.
- Placement: Place the composter on a stable, flat, and heat-resistant surface in your kitchen. Ensure adequate ventilation around the unit.
- Filter Installation: Ensure the activated carbon filter is correctly installed in its compartment within the lid.
- Power Connection: Plug the power cord into a grounded electrical outlet.
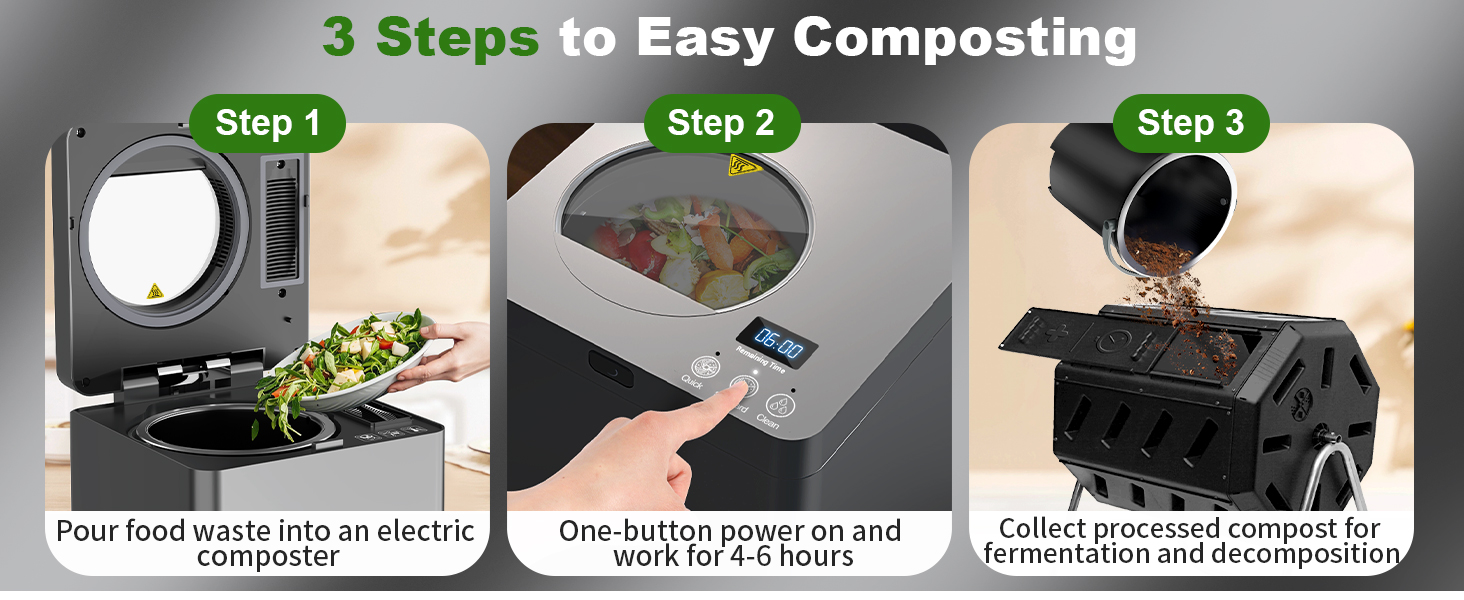
Image 4.1: Visual guide for initial setup and operation steps.
5. Operating Instructions
5.1 Adding Food Waste
Open the composter lid and place food waste directly into the 2.5L inner processing bucket. Do not overfill the bucket beyond the maximum fill line.

Image 5.1: A user adding food waste into the composter's inner bucket.
5.2 Selecting a Processing Mode
The composter features an LED display and one-touch controls for different processing modes:
- Quick Mode (4 hours): Reduces kitchen waste volume by over 85%. Suitable for smaller loads or waste with lower moisture content.
- Standard Mode (6 hours): Reduces kitchen waste volume by over 90%. Recommended for general use and larger loads.
After adding waste, close the lid securely. Press the desired mode button (Quick or Standard) on the control panel to begin processing. The LED display will show the remaining time.
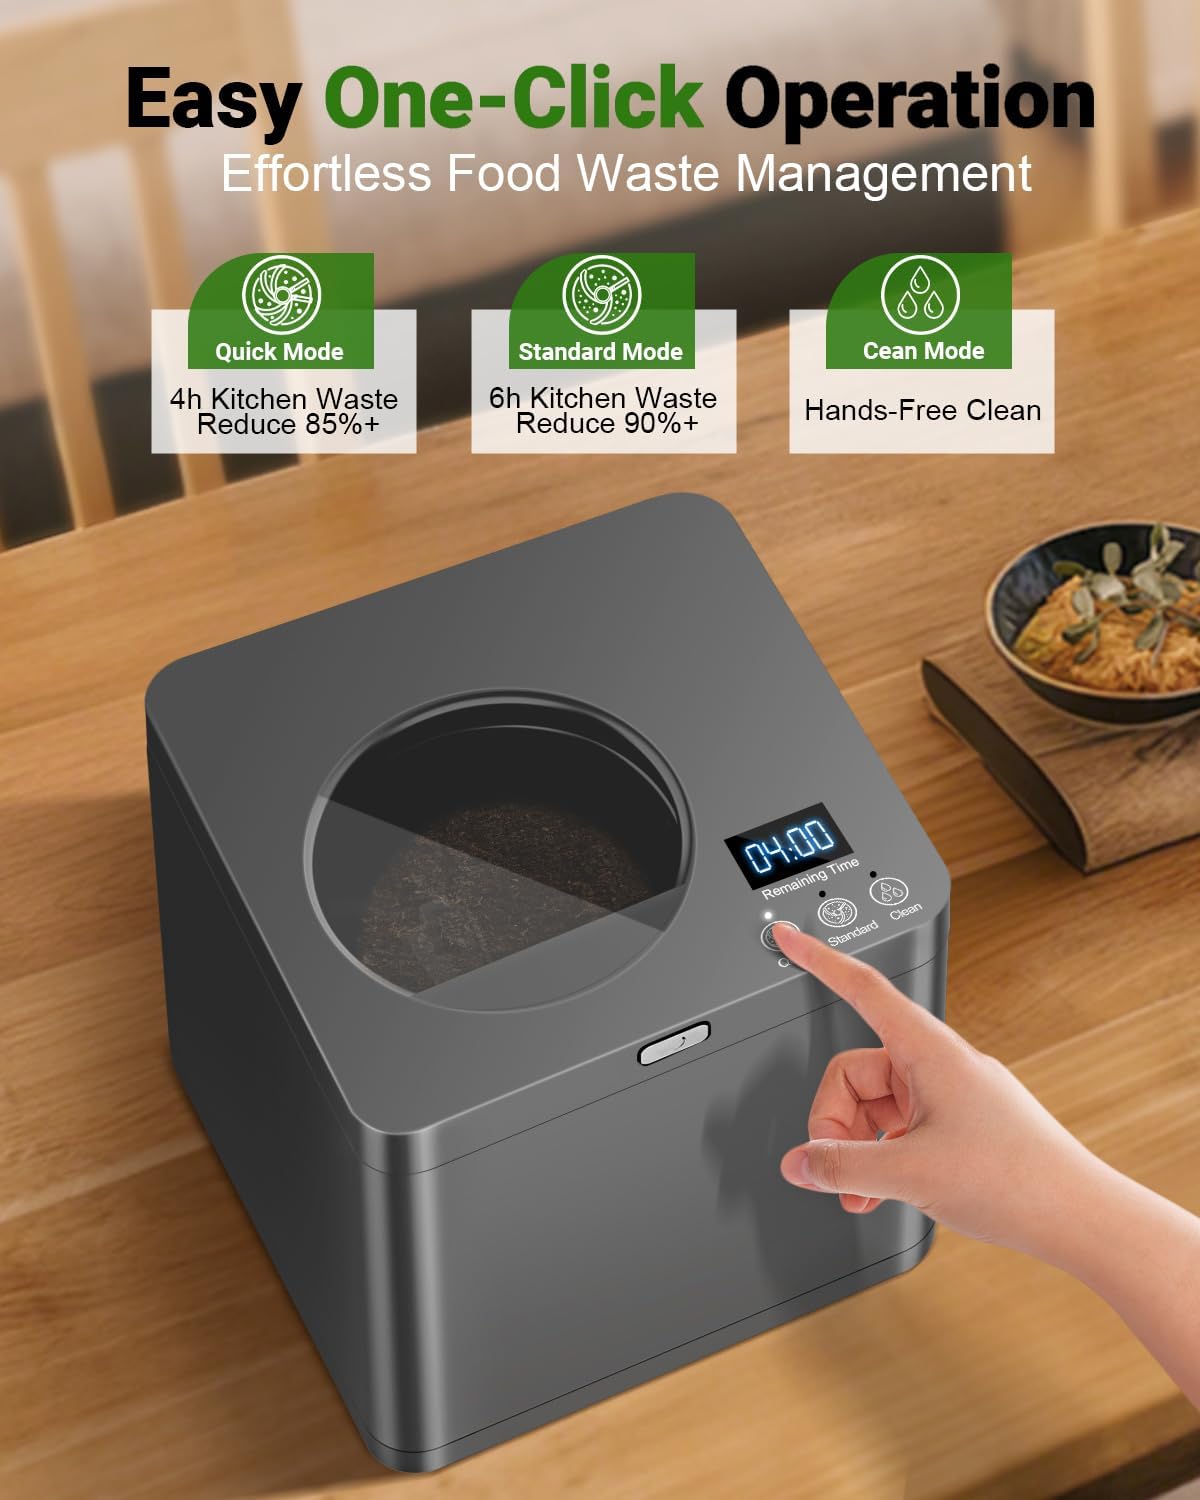
Image 5.2: The composter's control panel showing the LED display and mode selection buttons.
5.3 What Can Be Composted
The Growell Electric Composter is designed to process a variety of organic kitchen waste:
- Vegetable and Fruit Scraps
- Meat (small quantities, avoid large bones)
- Soft Bones (e.g., fish bones)
- Soft Shells (e.g., eggshells)
- Cereal & Grains
- Dairy (small quantities)
- Coffee & Tea Grounds
- Beans & Nuts
- Tissues & Papers (small amounts)
- Yard Waste (small, soft pieces)
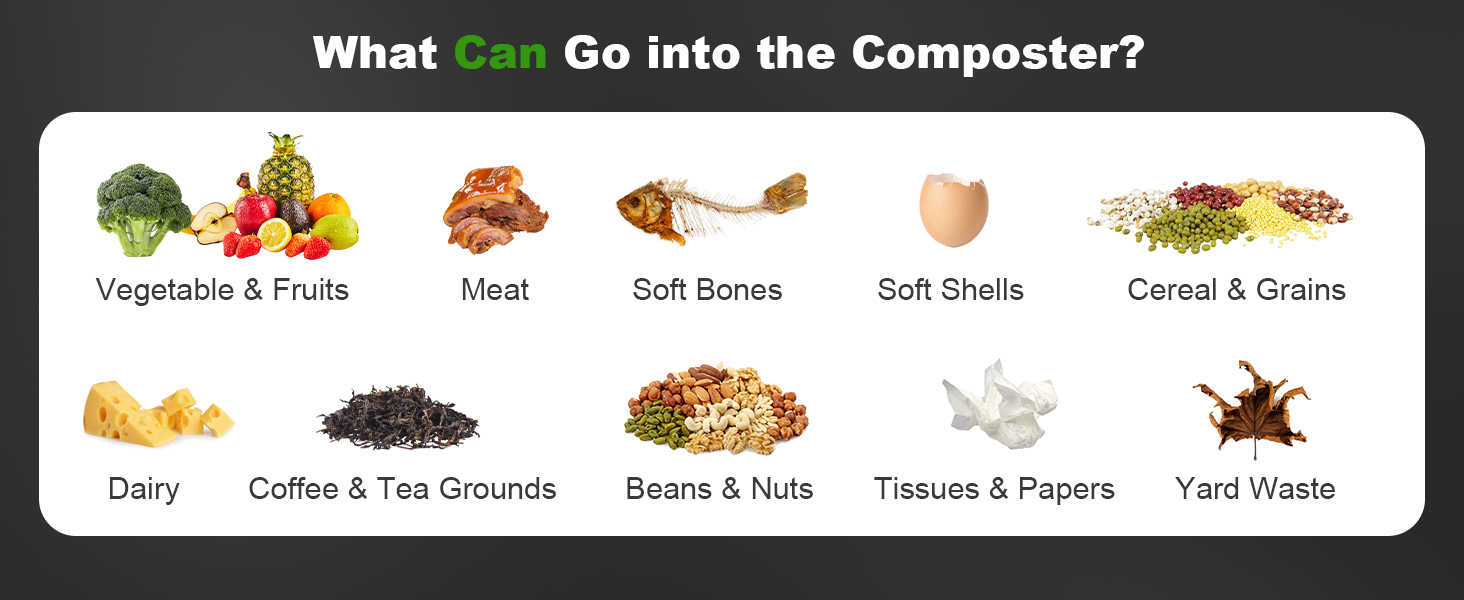
Image 5.3: Examples of compostable materials.
5.4 What Cannot Be Composted
To ensure proper function and longevity of your composter, avoid adding the following items:
- Cooking Oils and excessive greasy foods
- Hard Bones (e.g., beef bones, large poultry bones)
- Confectionery (candies, sweets)
- Chewing Gums
- Seafood Shells (hard shells like oyster or clam shells)
- Wipes & Diapers
- Plastic
- Metal
- Glass
- Wood (large pieces)

Image 5.4: Items not suitable for composting.
5.5 Processing Cycle
During the processing cycle, the composter dries food waste on high heat, grinds it with sharp blades, and then cools the processed material. This process reduces moisture and volume, creating a fine, dry material suitable for plant food.
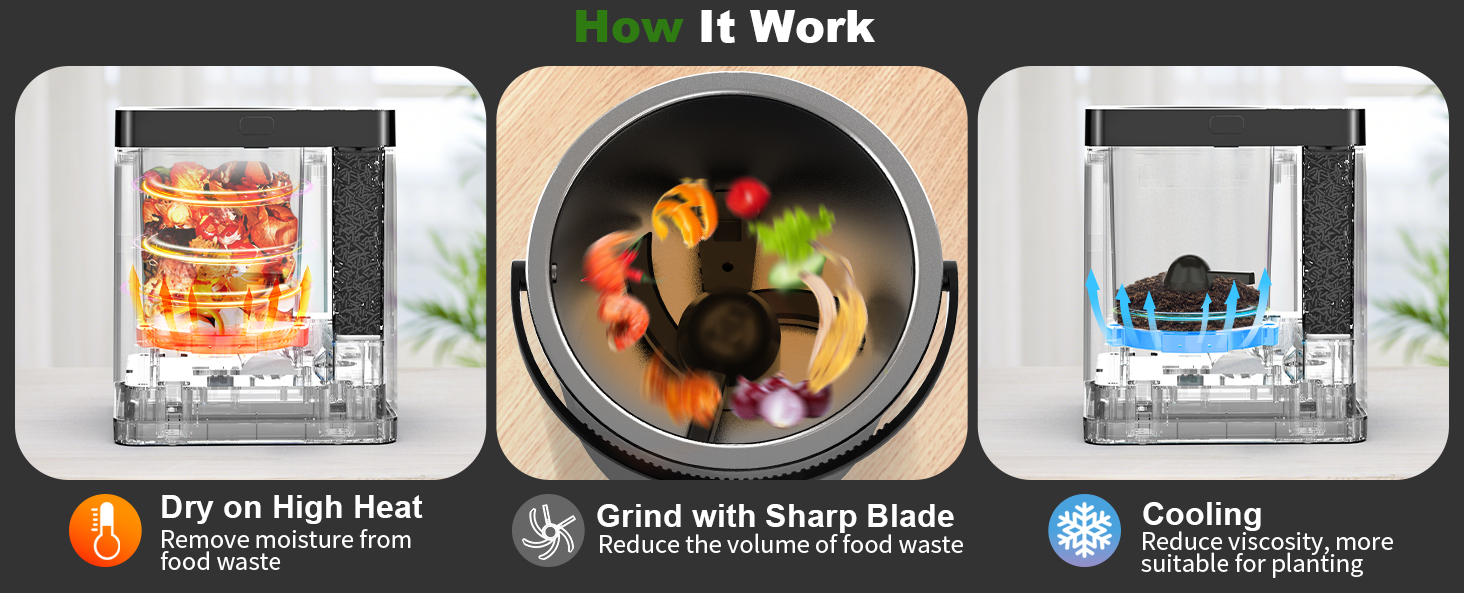
Image 5.5: How the composter processes food waste.
Video 5.1: Demonstration of the Growell Electric Composter in operation.
6. Maintenance
6.1 Auto-Clean Function
After each use, activate the automatic cleaning mode by pressing the "Clean" button on the control panel. This function helps maintain the cleanliness of the inner bucket and grinding mechanism.

Image 6.1: The composter's auto-clean cycle in progress.
6.2 Activated Carbon Filter Replacement
The built-in activated carbon filter is crucial for odor control. It is recommended to replace the activated carbon every 6 months to ensure continuous odor-free performance. Replacement filters (Model: F02, ASIN: B0FC2JKHWX) can be purchased from the Growell store.
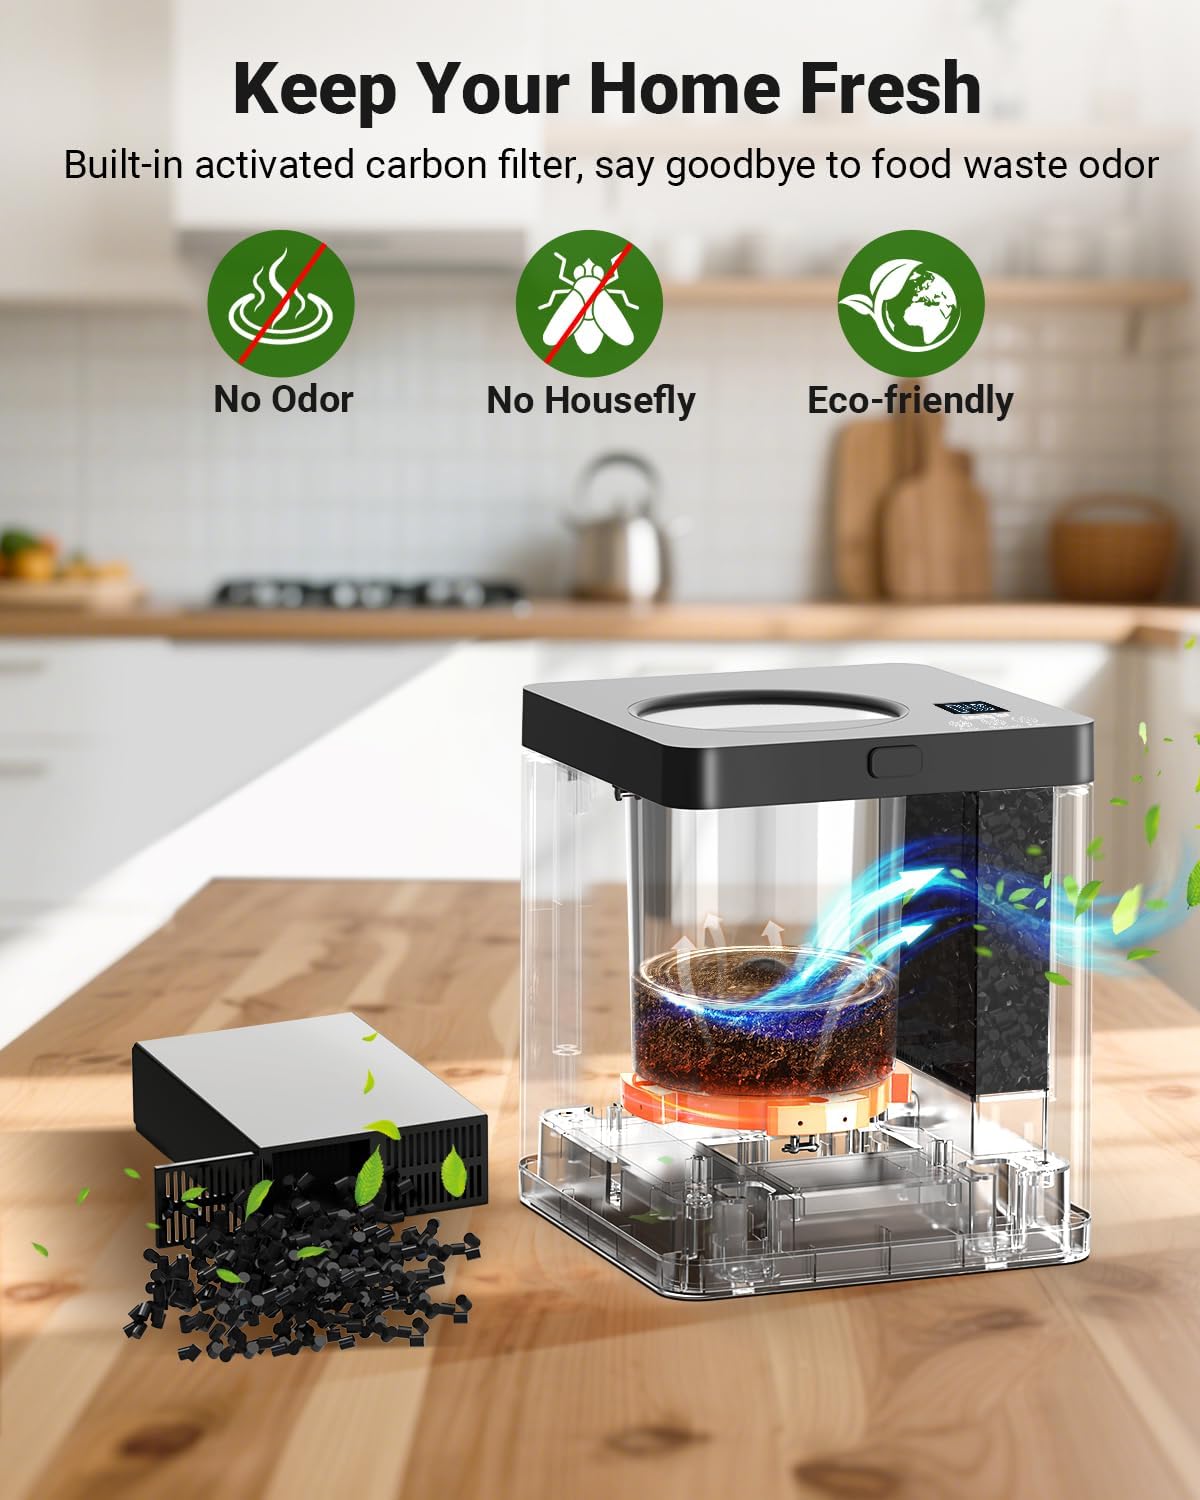
Image 6.2: Internal view of the activated carbon filter for odor adsorption.
7. Troubleshooting
If you encounter any issues with your Growell Electric Composter, please consider the following general advice:
- Unit Not Starting: Ensure the power cord is securely plugged in and the lid is properly closed. Check if the power outlet is functional.
- Unusual Odors: Verify that the activated carbon filter is correctly installed and not expired. Replace the filter if it has been in use for more than 6 months. Ensure you are not composting prohibited items.
- Incomplete Processing: This may occur if the bucket is overfilled or if the food waste contains too much moisture. Try processing smaller batches or running the cycle again.
- Excessive Noise: While the unit operates quietly, unusual loud noises may indicate an issue. Ensure no hard, non-compostable items were accidentally placed inside.
For persistent problems or issues not covered here, please contact Growell customer support.
8. Specifications
| Feature | Specification |
|---|---|
| Brand | Growell |
| Model Number | EC02 |
| Capacity | 2.5 Liters |
| Material | Aluminum Alloy, Stainless Steel, ABS |
| Color | Gray |
| Product Dimensions (L x W x H) | 11.41" x 12.59" x 13.93" |
| Item Weight | 13.82 pounds |
| Processing Time | 4-6 hours (depending on mode) |
| Odor Control | Activated Carbon Filter |

Image 8.1: Dimensions of the Growell Electric Composter EC02.
9. Warranty and Support
Growell provides a 3-year warranty for the Electric Composter EC02. For any questions, technical assistance, or warranty claims, please contact Growell customer support. Our team is available 24/7 to assist you.
For activated carbon filter refills, please refer to Model: F02, ASIN: B0FC2JKHWX.