Introduction
This manual provides comprehensive instructions for setting up, operating, and maintaining your UeeKKoo Pi 500 Portable Keyboard Computer. The Pi 500 is a compact, all-in-one computer built into a high-quality keyboard, designed for a streamlined computing experience.
It integrates a powerful quad-core 64-bit Arm processor and RP1 I/O controller, similar to the Raspberry Pi 5, offering robust performance for various applications. This kit includes essential accessories to get you started quickly.
Package Contents
Please verify that all items listed below are included in your package:
- Pi 500 Portable Keyboard Computer (with built-in 32GB Raspberry Pi Micro SD card)
- GPIO adapter board (with screws pack)
- HDMI to Micro HDMI cable (2 pieces)
- 27W USB-C power supply
- USB mouse
- Card reader
Product Overview and Port Introduction
The UeeKKoo Pi 500 features a compact design with various ports for connectivity and expansion. Understanding these ports is crucial for proper setup and operation.
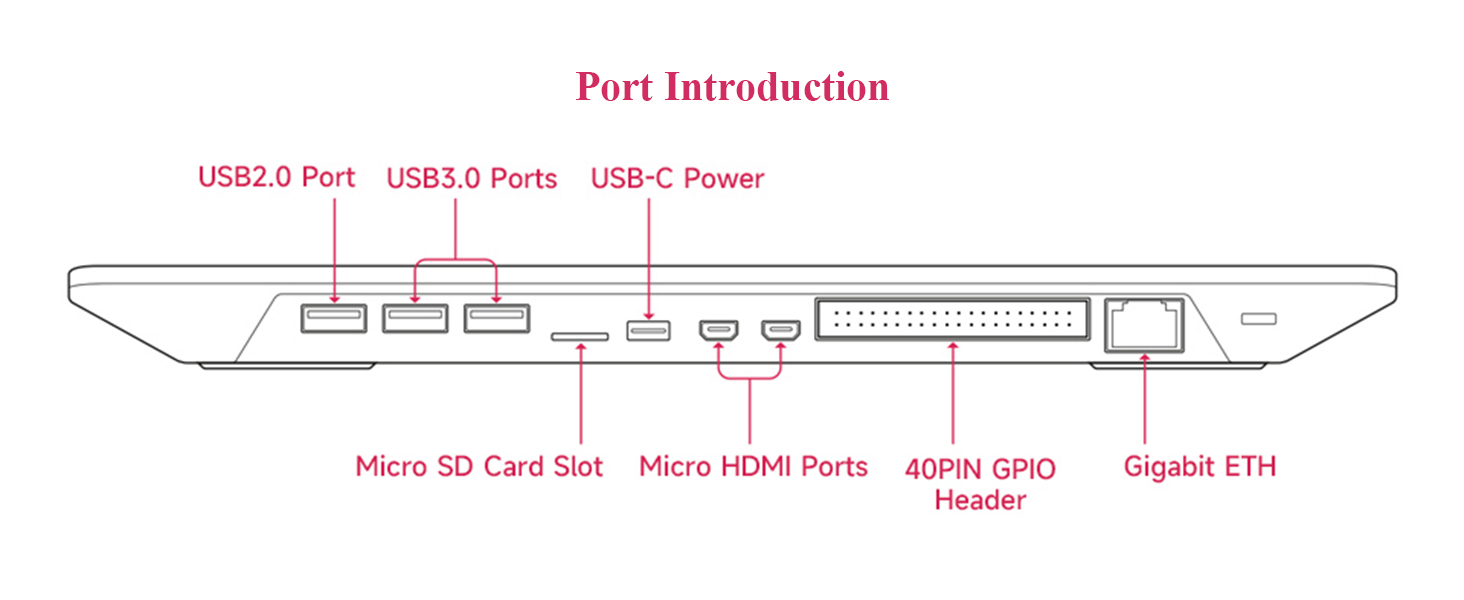
- Type-C Power Interface: Recommended for use with the official Raspberry Pi power supply (5V and 5A).
- 40PIN GPIO Interface: Provides access to the Raspberry Pi's 40PIN I/O, enabling connection to various expansion boards.
- Micro SD Card Slot: Used for the operating system and data storage.
- Micro HDMI Interface: Supports dual 4Kp60 high-resolution displays. Connects to a monitor's HDMI port via a micro HDMI cable.
- USB 2.0 Port: One port for connecting peripherals.
- USB 3.0 Ports: Two ports for high-speed peripheral connections.
- Gigabit Ethernet: For wired network connectivity.
Setup Guide
Follow these steps to set up your UeeKKoo Pi 500 Portable Keyboard Computer:
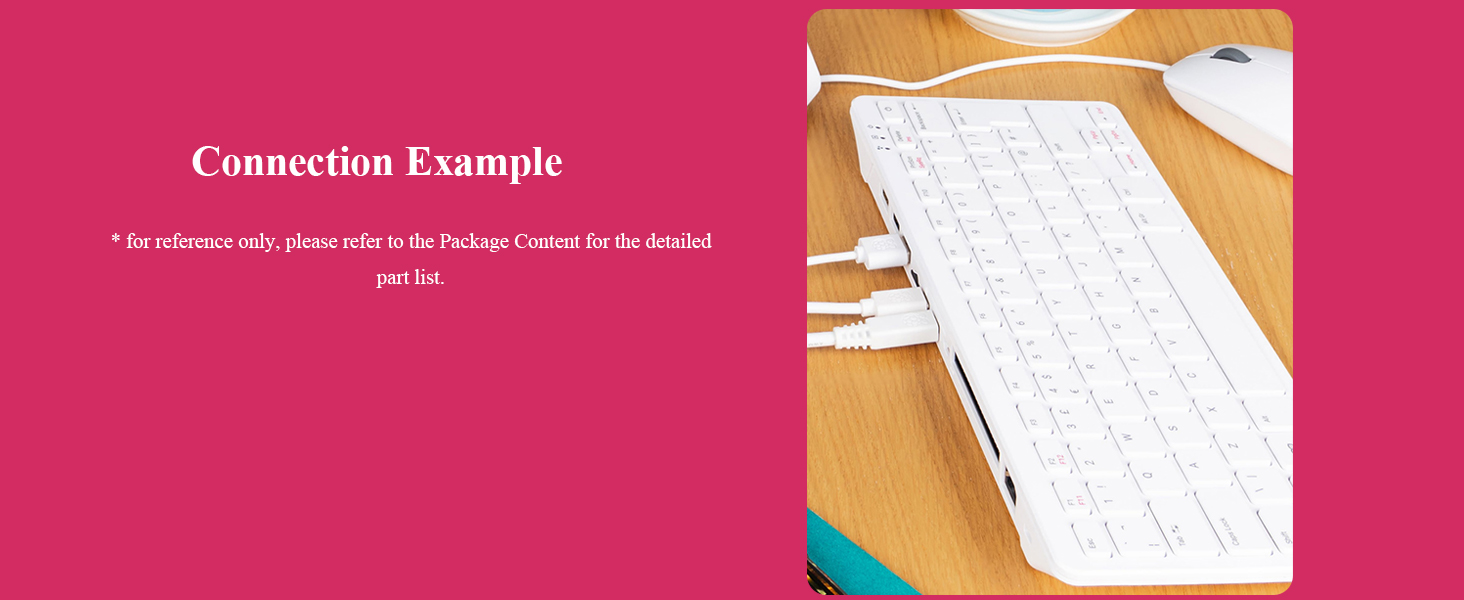
- Connect the Monitor: Use one of the provided HDMI to Micro HDMI cables to connect your Pi 500 to a monitor or TV. The Pi 500 supports dual 4K displays.
- Connect the Mouse: Plug the included USB mouse into one of the USB ports on the Pi 500.
- Insert Micro SD Card: Ensure the 32GB Micro SD card (pre-installed with the operating system) is securely inserted into the Micro SD card slot.
- Connect Power: Plug the 27W USB-C power supply into the USB-C power port on the Pi 500, then connect it to a power outlet. The system will power on automatically.
- Initial Boot: The Pi 500 will begin its initial boot sequence. Follow any on-screen prompts to complete the operating system setup, if necessary.

For further assistance, refer to the Online Beginner's Guide.
Operating Instructions
Basic Usage
- Power On/Off: The Pi 500 powers on automatically when connected to power. To shut down, use the operating system's shutdown function. Disconnect power only after a complete shutdown.
- Keyboard: The integrated 78-key (US) compact keyboard functions like a standard computer keyboard.
- Mouse: Use the included USB mouse for navigation within the graphical user interface.
- Network Connectivity: Connect to the internet via the Gigabit Ethernet port or through the built-in dual-band Wi-Fi (2.4GHz and 5.0GHz).
- Bluetooth: Utilize Bluetooth 5.0 for connecting compatible wireless peripherals.
Connecting Peripherals
The Pi 500 supports a variety of USB peripherals. Simply plug them into the available USB 2.0 or USB 3.0 ports. For additional expansion, the 40PIN GPIO header allows connection of specialized hardware.
Maintenance
- Cleaning: Use a soft, dry cloth to clean the exterior of the Pi 500. Avoid liquid cleaners directly on the device.
- Ventilation: Ensure the device is operated in a well-ventilated environment. Do not cover the Pi 500 during operation to prevent overheating.
- Software Updates: Regularly update the operating system and installed software to ensure optimal performance and security.
- Storage: When not in use for extended periods, store the Pi 500 in a cool, dry place away from direct sunlight.
Troubleshooting
- No display on monitor:
- - Ensure the HDMI to Micro HDMI cable is securely connected to both the Pi 500 and the monitor.
- - Verify the monitor is powered on and set to the correct input source.
- - Check if the power supply is properly connected to the Pi 500 and a working power outlet.
- Keyboard or mouse not responding:
- - Ensure the USB peripherals are firmly plugged into the USB ports.
- - Try plugging the peripheral into a different USB port.
- - Restart the Pi 500.
- Wi-Fi or Bluetooth connectivity issues:
- - Check if Wi-Fi/Bluetooth is enabled in the operating system settings.
- - Ensure the device is within range of the Wi-Fi network or Bluetooth device.
- - Restart the Pi 500 and your router/Bluetooth device.
- System overheating:
- - Ensure the Pi 500 is in a well-ventilated area and not covered.
- - Reduce heavy workloads if possible.
Technical Specifications
| Component | Specification |
|---|---|
| Processor | 2.4GHz Quad-core 64-bit Arm Cortex-A76 CPU |
| RAM | 8GB LPDDR4X-4267 SDRAM |
| Storage | 32GB Raspberry Pi A2-Class Micro SD card (included) |
| Wi-Fi | Dual-band (2.4GHz and 5.0GHz) IEEE 802.11b/g/n/ac |
| Bluetooth | Bluetooth 5.0, BLE |
| Ethernet | Gigabit Ethernet |
| USB Ports | 2 x USB 3.0, 1 x USB 2.0 |
| GPIO | Horizontal 40-pin GPIO header |
| Video Output | 2 x Micro HDMI (supports up to 4Kp60) |
| Multimedia | H.265 (4Kp60 decode); OpenGL ES 3.0 graphics |
| Keyboard | 78-key (US) compact keyboard |
| Power Input | 5V DC USB-C port |
| Operating Temperature | 0°C to 50°C ambient temperature |
| Dimensions | 286 x 122 x 23 mm |
| Weight | Approx. 1.9 pounds (0.86 kg) |

Safety Instructions and Warnings
Warnings
- Any external power supply used with the Raspberry Pi 500 should comply with the relevant regulations and standards applicable in the country/region of intended use.
- This product should be operated in a well-ventilated environment and should not be covered during operation.
- Connecting devices incompatible with the Raspberry Pi 500 may affect compliance, cause damage to the equipment, and void the warranty.
- The Raspberry Pi 500 has no user-repairable components inside. Opening the device may damage the product and void the warranty.
- All peripherals used with this product should comply with the relevant standards of the country/region of use and have the appropriate markings to ensure that safety and performance requirements are met. These peripherals include, but are not limited to, mice, monitors, and cables.
- All cables and connectors of the peripherals used with this product must have sufficient insulation to meet the relevant safety requirements.
- Prolonged exposure to direct sunlight may cause discoloration.
Safety Instructions
To avoid malfunction or damage to this product, please observe the following precautions:
- Do not touch water or moisture during operation.
- Do not expose to any heat source; the Raspberry Pi 500 is designed to operate reliably at normal ambient temperatures.
- Handle with care during operation to avoid mechanical or electrical damage to the computer.

Support
For additional information, detailed guides, and troubleshooting tips, please refer to the official online resources:
- Online Beginner's Guide: Access the comprehensive guide at bit.ly/4j1w3fI. This resource provides in-depth instructions to help you maximize your new computer's potential.
For product-specific inquiries or technical support, please contact UeeKKoo customer service through their official channels.


