1. Introduction
This manual provides essential instructions for the setup, operation, and maintenance of your Agatige MMDVM Simplex Hotspot Module. This module is designed to extend the connectivity of digital walkie-talkies, enabling nationwide communication by interfacing with a Raspberry Pi.
2. Product Overview
The Agatige MMDVM Simplex Hotspot Module is a multi-mode digital voice modem (MMDVM) main board. It facilitates communication for various digital radio protocols, including DMR, D-Star, YSF (C4FM), P25, NXDN, and POCSAG. When paired with a compatible Raspberry Pi, it allows digital walkie-talkies to overcome distance limitations and connect over wider networks.

Figure 2.1: Agatige MMDVM Simplex Hotspot Module. This image displays the compact design of the MMDVM hotspot module, highlighting its various components and interfaces on the circuit board.
3. Features
- Nationwide Connectivity: Enables digital walkie-talkies to achieve nationwide communication, overcoming traditional distance limitations.
- Stable Performance: Utilizes premium components and temperature-compensated crystal oscillators for stable long-term operation and a low bit error rate.
- Multi-Mode Support: Compatible with DMR, D-Star, YSF (C4FM), P25, NXDN, and POCSAG digital voice modes.
- Flexible Display Options: Features two (old and new version) Organic Light Emitting Diode (OLED) screen interfaces and one NXT serial port screen interface for personalized display installations.
- DMR System Optimization: Debugged and calibrated specifically for the DMR system to ensure stable use and improved sound quality reproduction.
- Raspberry Pi Compatibility: Designed for direct integration with Raspberry Pi models 2B, 3B, 3B+, 4B, and ZeroW, with pre-welded headers.
- BlueDV Connectivity: Includes a Type-C interface for connecting to computers running BlueDV software.
4. Package Contents
Please verify that all items are present in your package:
- 1 x MMDVM Hotspot Module
- 3 x Pin Headers
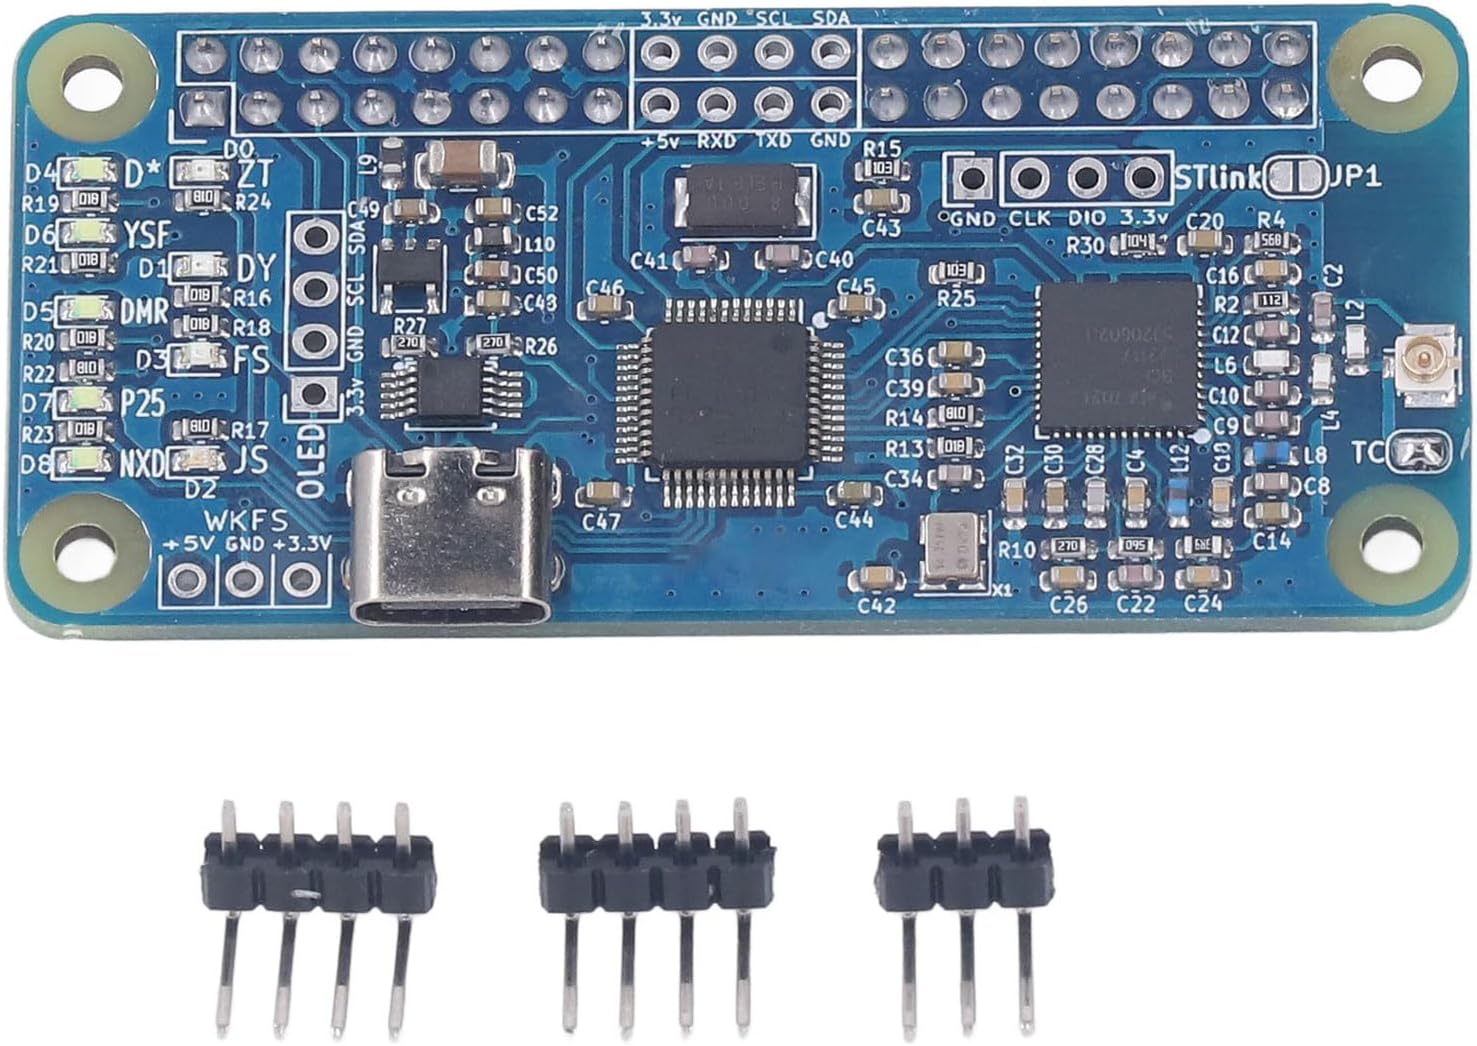
Figure 4.1: Package contents. This image shows the MMDVM hotspot module along with the three included pin headers, ready for assembly or connection.
5. Specifications
| Parameter | Value |
|---|---|
| Item Type | MMDVM Hotspot Module |
| Material | PCB |
| Frequency Band | U band (420.000 to 434.900 MHz / 438.100 to 470.00 MHz) |
| Supported Modes | DMR, D-Star, YSF (C4FM), P25, NXDN, POCSAG |
| Output Power | 20 milliwatts |
| Product Size (L x W) | Approx. 65 x 30mm / 2.56 x 1.18in |
| Raspberry Pi Support | 2B, 3B, 3B+, 4B, ZeroW (direct load with welded header) |
| BlueDV Interface | Type-C (for connecting to computers) |
| Item Weight | 0.6 ounces |
| Model Number | Agatige2u13knhmq7 |
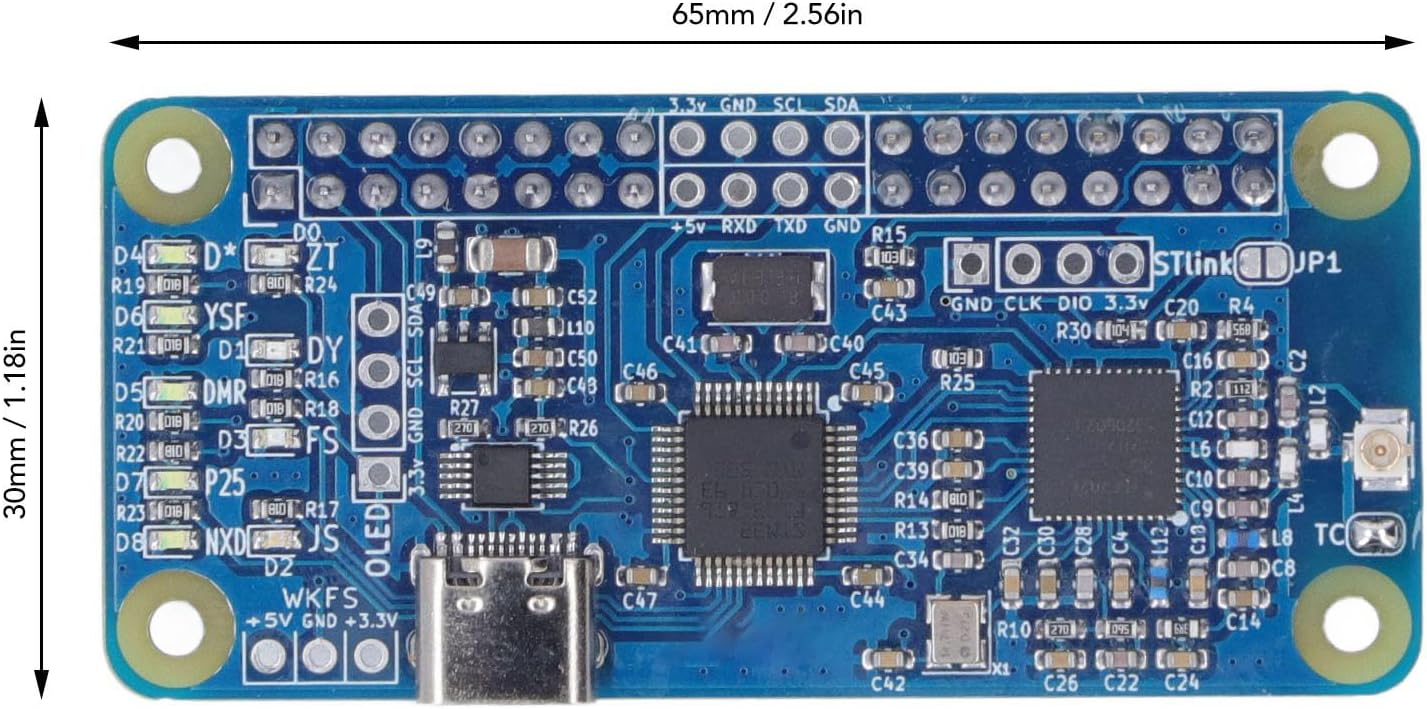
Figure 5.1: Module dimensions. This image illustrates the physical dimensions of the MMDVM hotspot module, showing its length and width measurements.
6. Setup
The MMDVM Hotspot Module is designed for integration with a Raspberry Pi. Ensure you have a compatible Raspberry Pi model (2B, 3B, 3B+, 4B, or ZeroW) before proceeding.
6.1. Connecting to Raspberry Pi
- Ensure your Raspberry Pi is powered off.
- Align the pre-welded pin header on the MMDVM module with the corresponding GPIO pins on your Raspberry Pi.
- Gently press the MMDVM module onto the Raspberry Pi's GPIO header until it is securely seated.
- Refer to the interface diagram below for pin identification.
6.2. Connecting to Computer (for BlueDV)
For use with BlueDV software on a computer, connect the MMDVM module via its Type-C interface.
- Connect one end of a USB Type-C cable to the Type-C port on the MMDVM module.
- Connect the other end of the USB Type-C cable to an available USB port on your computer.
- Install and configure the BlueDV software on your computer according to its specific instructions.

Figure 6.1: Interface diagram. This detailed diagram labels the various ports and interfaces on the MMDVM module, including the Raspberry Pi GPIO interface, OLED screen interface, Type-C port for BlueDV, and STLink firmware upgrade interface.
Note: This module requires a Raspberry Pi for operation. It cannot function as a standalone device.
7. Operating Instructions
Once the MMDVM module is correctly connected to your Raspberry Pi and powered on, you will need to configure the necessary software on the Raspberry Pi to enable hotspot functionality.
7.1. Software Configuration (Raspberry Pi)
Typically, MMDVM hotspots use specialized firmware and software distributions (e.g., Pi-Star, openSPOT, etc.) that run on the Raspberry Pi. Detailed instructions for installing and configuring these software packages are usually found on their respective project websites or community forums. Key configuration steps generally include:
- Flashing the chosen MMDVM hotspot software image to an SD card for your Raspberry Pi.
- Connecting to the hotspot's web interface (usually via Wi-Fi or Ethernet) to set up network parameters.
- Configuring your callsign, radio ID, and other digital radio network settings.
- Selecting the MMDVM modem type (e.g., STM32-DVM/MMDVM_HS - Raspberry Pi Hat (GPIO)) within the software.
- Enabling and configuring the desired digital modes (DMR, D-Star, YSF, P25, NXDN, POCSAG).
For specific software configuration details, please consult the documentation provided by the MMDVM software distribution you choose.
7.2. Using with Digital Radios
Once your MMDVM hotspot is configured and operational, you can connect your digital walkie-talkie to it. Ensure your radio is set to the correct frequency (within the U band range of 420.000-470.00 MHz) and the appropriate digital mode (DMR, D-Star, YSF, etc.) as configured on your hotspot.
8. Maintenance
The Agatige MMDVM Simplex Hotspot Module is designed for reliable operation with minimal maintenance. Follow these guidelines to ensure its longevity:
- Keep Clean: Periodically clean the module with a soft, dry cloth. Avoid using liquids or abrasive cleaners.
- Environmental Conditions: Operate and store the module in a dry environment, away from extreme temperatures, humidity, and direct sunlight.
- Handle with Care: Avoid dropping or subjecting the module to physical shock, as this can damage internal components.
- Firmware Updates: Regularly check for firmware updates for your MMDVM software distribution (e.g., Pi-Star) to ensure optimal performance and access to new features. The module includes an STLink Firmware Upgrade Interface (see Figure 6.1) for advanced firmware management.
9. Troubleshooting
If you encounter issues with your MMDVM Hotspot Module, consider the following troubleshooting steps:
- No Power/LEDs Off:
- Ensure the Raspberry Pi is powered correctly.
- Verify the MMDVM module is securely seated on the Raspberry Pi's GPIO header.
- No Digital Voice Connectivity:
- Check that your digital radio is configured to the correct frequency and digital mode.
- Verify the MMDVM software on your Raspberry Pi is running and configured for the correct modem type and digital mode.
- Ensure your internet connection (for the Raspberry Pi) is stable if connecting to online reflectors/gateways.
- Confirm that the frequency band (U band) is correctly set in your software.
- Poor Audio Quality/High Bit Error Rate:
- This module is calibrated for the DMR system. Ensure your DMR settings are optimal.
- Check for potential RF interference.
- Ensure the module is securely connected and not experiencing physical stress.
- Display Issues (OLED/NXT):
- Verify the display is correctly connected to one of the reserved interfaces.
- Check software configuration for display settings.
For more advanced troubleshooting or specific software-related issues, refer to the documentation of your chosen MMDVM software distribution or consult relevant online amateur radio forums and communities.
10. Warranty and Support
For warranty information and technical support regarding your Agatige MMDVM Simplex Hotspot Module, please refer to the purchase documentation or contact the retailer/manufacturer directly. Keep your proof of purchase for warranty claims.
Manufacturer: Agatige