
1. Introduction
Thank you for purchasing the Lafocuse 5.7" LED Digital Alarm Clock. This versatile clock is designed to provide accurate timekeeping, temperature, and humidity readings, along with convenient alarm and charging features. Please read this manual thoroughly before use to ensure proper operation and to maximize the lifespan of your device.

Image 1.1: The Lafocuse 5.7" LED Digital Alarm Clock, showcasing its large display with time, day of the week, temperature, and humidity.
2. Product Features
- 5.7-inch LED Display: Large numbers for easy reading of time, temperature, and humidity from a distance.
- Snooze Function: Allows for an additional 5 minutes of sleep after the alarm sounds.
- USB Charging Output: Conveniently charge your phone or other devices overnight via the integrated USB port. (Note: Power adapter not included).
- Adjustable Brightness: Features 3 levels of brightness, with both manual adjustment and an automatic photosensitive function to prevent disturbance during sleep.
- Dual Alarms & 3 Modes: Set two independent alarms with flexible scheduling options: 5-day (Monday-Friday), 6-day (Monday-Saturday), or 7-day (Monday-Sunday).
- Multi-function Display: Shows time, date, day of the week, temperature, and humidity.

Image 2.1: Overview of the Lafocuse Digital Alarm Clock's main features.
3. Package Contents
Please check the package contents upon unboxing:
- Lafocuse 5.7" LED Digital Alarm Clock (x1)
- USB Charging Cable (x1)
- User Manual (x1)

Image 3.1: The back of the alarm clock with labeled buttons and ports, and the included USB charging cable.
4. Product Overview (Buttons and Ports)
Familiarize yourself with the buttons and ports on your alarm clock:
| No. | Label | Function |
|---|---|---|
| 1 | SET | Enter setting mode for time, date, and alarms. |
| 2 | ALARM | Enter alarm setting mode. |
| 3 | LIGHT/SNOOZE | Adjust brightness (short press) or activate snooze (during alarm). |
| 4 | UP | Increase value in setting mode. |
| 5 | DOWN | Decrease value in setting mode. |
| 6 | Battery Compartment | Holds backup batteries (not included). |
| 7 | Type-C Input | Main power input for the clock. |
| 8 | USB Output | USB port for charging external devices. |
5. Setup
5.1 Powering the Device
The Lafocuse Digital Alarm Clock can be powered in two ways:
- USB Power (Recommended): Connect the provided USB cable to the Type-C input port (7) on the back of the clock and plug the other end into a USB power adapter (not included) or a computer USB port. When powered by USB, the display will remain continuously on.
- Battery Power (Backup): Insert 3 AAA batteries (not included) into the battery compartment (6). When powered by batteries, the display will turn off automatically after a few seconds to conserve power. Press any button to activate the display for 10 seconds.

Image 5.1: Illustration of the two power modes: continuous display with USB power and on-demand display with battery power.
6. Operating Instructions
6.1 Setting Time and Date
- Press and hold the SET button (1) for 3 seconds to enter time setting mode. The hour digits will flash.
- Use the UP (4) or DOWN (5) buttons to adjust the hour.
- Press SET again to move to minute setting. Adjust minutes using UP or DOWN.
- Continue pressing SET to cycle through year, month, and day settings, adjusting each with UP or DOWN.
- After setting the day, press SET one last time to exit setting mode.
6.2 Setting Alarms
The clock supports two independent alarms (AL1 and AL2).
- Press the ALARM button (2) to select AL1 or AL2. The alarm icon will appear.
- Press and hold the ALARM button for 3 seconds to enter alarm setting mode. The alarm hour will flash.
- Use UP (4) or DOWN (5) to adjust the alarm hour.
- Press ALARM again to set the alarm minute.
- Press ALARM again to select the alarm mode:
- LUN-FRI (5-day): Alarm sounds Monday to Friday.
- LUN-SAT (6-day): Alarm sounds Monday to Saturday.
- LUN-SUN (7-day): Alarm sounds every day.
- Press ALARM one last time to confirm and exit.
- To enable/disable an alarm, short press the ALARM button until the desired alarm (AL1 or AL2) is selected, then press UP or DOWN to toggle it on or off.
6.3 Snooze Function
When the alarm sounds, press the LIGHT/SNOOZE button (3) to activate the snooze function. The alarm will pause for 5 minutes and then sound again. To stop the alarm completely, press any other button on the top of the clock.

Image 6.1: Using the snooze function by pressing the large button on top of the clock.
6.4 Adjusting Brightness
The clock offers 3 levels of brightness and an automatic photosensitive mode:
- Manual Adjustment: Short press the LIGHT/SNOOZE button (3) to cycle through the 3 brightness levels (High, Medium, Low).
- Automatic Brightness: To activate the photosensitive function, continue pressing the LIGHT/SNOOZE button until the display shows 'AUTO'. In this mode, the clock will automatically adjust its brightness based on ambient light conditions.

Image 6.2: The three adjustable brightness levels of the clock display.
6.5 USB Charging Port
The USB output port (8) on the back of the clock allows you to conveniently charge your smartphone or other USB-powered devices. Simply connect your device's charging cable to this port. This feature is active when the clock is powered via its main USB input.

Image 6.3: The alarm clock's USB output port being used to charge a smartphone.
6.6 Display Modes (Time, Date, Temperature, Humidity)
The clock can display time, date, temperature, and humidity. By default, it cycles through these displays or shows time continuously depending on the setting.
- Switching Display: Short press the UP button (4) to toggle between displaying time continuously and cycling through time, date, temperature, and humidity.
- Temperature Unit: In time display mode, press and hold the DOWN button (5) to switch between Celsius (°C) and Fahrenheit (°F).
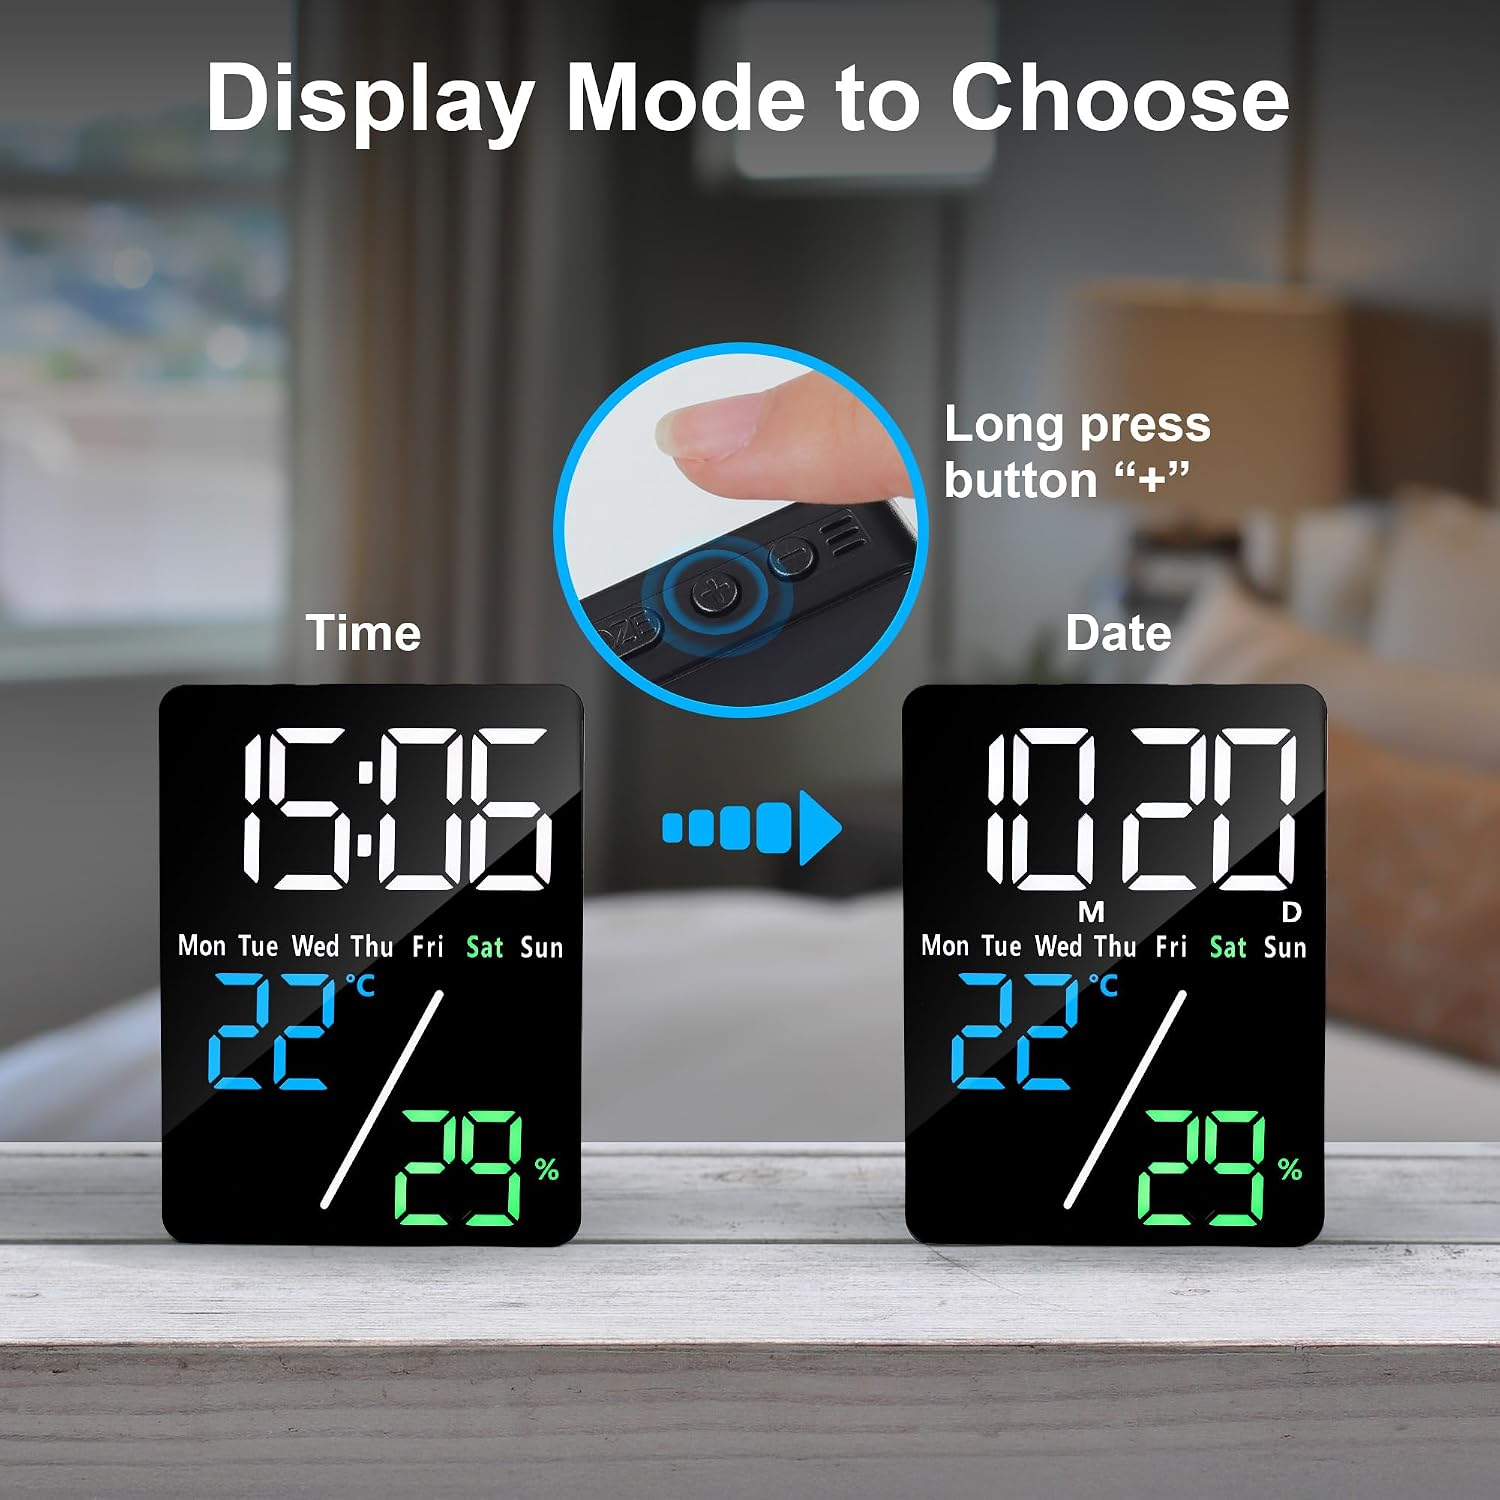
Image 6.4: Switching between time and date display modes.
7. Maintenance
- Clean the clock with a soft, dry cloth. Do not use abrasive cleaners or solvents.
- Avoid exposing the clock to extreme temperatures, direct sunlight, or high humidity.
- If not in use for an extended period, remove the batteries to prevent leakage.
- Keep the clock away from strong magnetic fields.
8. Troubleshooting
| Problem | Possible Cause | Solution |
|---|---|---|
| Display is blank or dim. | No power, low batteries, or brightness set too low. | Ensure USB cable is properly connected. Replace batteries if using battery power. Adjust brightness using the LIGHT/SNOOZE button. |
| Alarm does not sound. | Alarm is not enabled or set incorrectly. | Check if the alarm icon (AL1/AL2) is displayed. Re-set the alarm time and mode. |
| Time/Date is incorrect. | Time/Date not set or power interruption. | Re-set the time and date following Section 6.1. Ensure continuous USB power for uninterrupted display. |
| USB charging port not working. | Clock not powered by USB or device cable issue. | Ensure the clock is connected to a USB power source. Try a different charging cable or device. |
9. Specifications
| Feature | Detail |
|---|---|
| Brand | Lafocuse |
| Model Number | ZH0156 |
| Color | Multi |
| Product Dimensions | 9.8 x 3.81 x 12.9 cm (3.86 x 1.5 x 5.08 inches) |
| Product Weight | 160 g (0.35 lbs) |
| Material | Plastic |
| Display Type | Digital LED |
| Power Source | USB Powered (AC adapter not included), Battery Operated (3x AAA, not included) |
| Special Features | Dual Alarms & 3 Modes, Adjustable Brightness, Multi-function Display, USB Charging Output |
10. Warranty and Support
Lafocuse products are manufactured to high-quality standards. For warranty information and customer support, please refer to the documentation provided with your purchase or contact your retailer. Keep your purchase receipt as proof of purchase for any warranty claims.