VIVOHOME 84 Inch White
VIVOHOME 84-Inch Motorized Projector Screen User Manual
Model: 84 Inch White
1. Introduction
Thank you for choosing the VIVOHOME 84-Inch Motorized Projector Screen. This manual provides essential information for the safe and efficient installation, operation, and maintenance of your new projector screen. Please read this manual thoroughly before use and retain it for future reference.
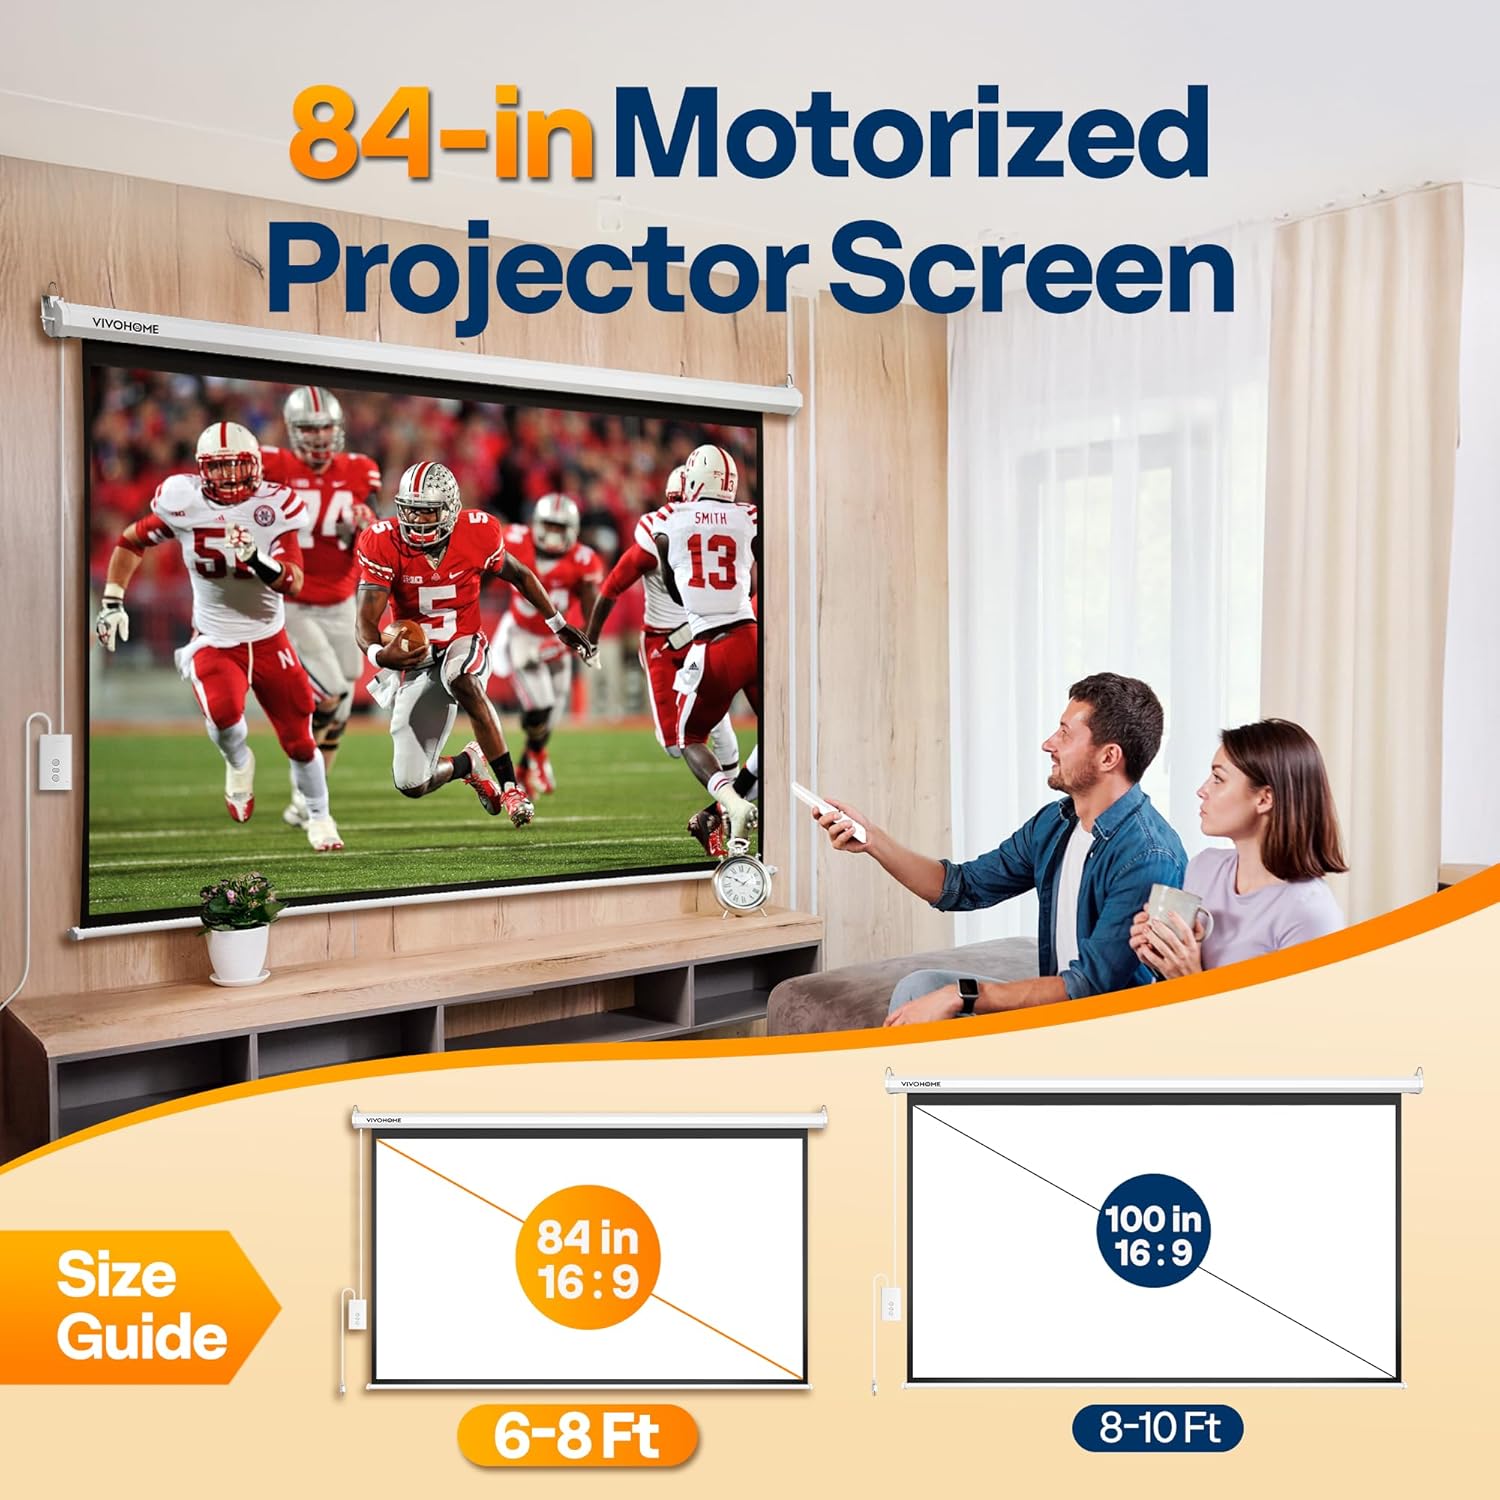
Figure 1: VIVOHOME 84-inch motorized projector screen in a home theater setting, illustrating its size and application.
2. Important Safety Information
- Ensure the installation surface (wall or ceiling) is structurally sound and can support the weight of the screen (approximately 15.4 pounds).
- Use appropriate mounting hardware for your specific wall or ceiling type. Included plastic/metal expansion screws are for general use; consult a professional if unsure.
- Keep the remote control away from children to prevent accidental operation.
- Do not attempt to manually pull or push the screen surface while the motor is operating.
- Avoid exposing the screen to direct sunlight or extreme temperatures, as this may affect material integrity.
- A slight odor may be noticeable when first opening the package. This is normal and will dissipate after airing out the screen in a well-ventilated area.
- This product is certified to meet CE, GCC, UL, FCC, and ROHS safety and compliance standards.
3. Product Specifications
| Feature | Detail |
|---|---|
| Model | 84 Inch White |
| Display Area (W x H) | 73.2" x 41.1" (16:9 Aspect Ratio) |
| Overall Dimensions (W x H) | 81.9" x 51.2" |
| Item Weight | 15.4 pounds |
| Material | Alloy Steel, Fabric, Polyvinyl Chloride (PVC) |
| Mounting Type | Ceiling/Wall Mount |
| Viewing Angle | 160° |
| Supported Resolutions | 3D, 1080P, 4K, Full HD |
| Remote Control Range | Up to 82 ft (25 m) |
| Motor Noise Level | Under 40 dB |

Figure 2: Detailed dimensions of the 84-inch VIVOHOME projector screen.
4. Setup and Installation
The VIVOHOME motorized projector screen offers versatile installation options for both wall and ceiling mounting. Ensure you have sufficient space for the screen's overall dimensions (81.9"W x 51.2"H) and an optimal viewing distance of 6-8 feet.
4.1 Choosing a Location
- Select a flat, stable wall or ceiling area.
- Verify that the chosen location is free from obstructions and has a power outlet nearby.
- Consider the projector's throw distance and the desired screen size for optimal image quality.

Figure 3: Recommended viewing distance for the 84-inch screen.
4.2 Mounting Options
The screen can be mounted horizontally or vertically. Included plastic/metal expansion screws are provided for installation. For ceiling mounting, optional ceiling chains (not included) can be used for suspended setups.

Figure 4: Examples of ceiling and wall mounting configurations.
- Marking Points: Measure and mark the desired installation points on your wall or ceiling, ensuring they are level and spaced correctly for the screen's width.
- Drilling Holes: Drill pilot holes at the marked locations.
- Inserting Anchors: Insert the appropriate wall anchors (plastic/metal expansion screws) into the drilled holes.
- Attaching the Screen: Securely attach the projector screen casing to the installed anchors.
- Power Connection: Plug the screen's power cord into a suitable electrical outlet.
5. Operating Instructions
Your VIVOHOME motorized projector screen can be operated using either the included wireless remote control or the wired control panel.
5.1 Wireless Remote Control
The wireless remote control allows you to operate the screen from a distance of up to 82 feet (25 meters). It features simple one-touch buttons for raising, lowering, and stopping the screen.

Figure 5: Wired and wireless remote controls.
- Press the UP button to retract the screen.
- Press the DOWN button to extend the screen.
- Press the STOP button to halt the screen at any desired position.
- The remote can be wall-mounted for convenient fixed control.
5.2 Wired Control Panel
A wired control panel is integrated into the screen's power cable for direct operation, serving as a backup or primary control method.
- Locate the wired control panel attached to the power cord.
- Use the corresponding UP, DOWN, and STOP buttons on the panel to control the screen's movement.
The quiet motor operates at under 40 dB, ensuring a minimal disturbance during use.

Figure 6: The screen supports various high-definition formats for clear viewing.
6. Maintenance
Proper maintenance will ensure the longevity and optimal performance of your VIVOHOME projector screen.
- Cleaning the Screen: The 3-layer water-proof PVC fabric is wipe-clean. Use a soft, damp cloth with mild soap and water to gently clean the screen surface. Avoid abrasive cleaners or harsh chemicals.
- Casing Care: The metal casing protects the screen from deformation. Wipe it with a dry or slightly damp cloth to keep it clean.
- Storage: When not in use, retract the screen fully into its casing to protect it from dust and damage.
- Odor: If a slight odor persists after initial airing, ensure the room is well-ventilated. The odor is harmless and will fade over time.

Figure 7: The screen's matte white finish is designed for easy cleaning and resistance to creases.
7. Troubleshooting
If you encounter issues with your projector screen, refer to the following common problems and solutions:
| Problem | Possible Cause | Solution |
|---|---|---|
| Screen does not move. | No power, remote battery low, or motor issue. | Check power connection. Replace remote batteries. Try wired control. If issue persists, contact support. |
| Screen stops mid-movement. | Accidental press of STOP button, or motor obstruction. | Press UP or DOWN again. Check for any physical obstructions. |
| Image appears distorted or unclear. | Projector settings, screen not fully extended, or screen surface issue. | Adjust projector focus/keystone. Ensure screen is fully extended and flat. Clean screen surface if dirty. |
| Strong odor from screen. | New product odor. | This is normal. Air out the screen in a well-ventilated area; odor will fade. |
8. Warranty and Support
VIVOHOME products are designed for quality and reliability. For specific warranty details, please refer to the warranty card included with your purchase or visit the official VIVOHOME website. If you require technical assistance, have questions about installation, or need to report a defect, please contact VIVOHOME customer support.
For more information, visit the VIVOHOME Store.
Related Documents - 84 Inch White
 |
VIVOHOME Convection Toaster Oven VH861 Instruction Manual Instruction manual for the VIVOHOME Convection Toaster Oven, model VH861. Includes product specifications, important safety safeguards, parts of the appliance, and operating instructions. |
 |
VIVOHOME Bathroom Exhaust Fan with Heater User Manual and Installation Guide Comprehensive user manual and installation guide for the VIVOHOME Bathroom Exhaust Fan with Heater, covering specifications, wiring, safety, installation, remote control pairing, and warranty information. |
 |
VIVOHOME VH1818 Bathroom Exhaust Fan with RGB Light User Manual Comprehensive user manual for the VIVOHOME VH1818 Bathroom Exhaust Fan with RGB Light, covering installation, operation, safety, troubleshooting, and warranty information. |
 |
VIVOHOME Alcohol Distiller Still Kit Instruction Manual This instruction manual provides detailed guidance for the VIVOHOME Alcohol Distiller Still Kit, covering essential information on packing, installation for both fermentation and distillation, safety precautions, the distilling process, and a variety of moonshine recipes. |
 |
VIVOHOME Vacuum Pump User Manual - Operation, Maintenance, and Troubleshooting Detailed user manual for VIVOHOME Vacuum Pumps (VB130, VB140, VB150, VB240). Learn about pump components, operating procedures, maintenance tips, troubleshooting common issues, technical specifications, and warranty information. |
 |
VIVOHOME Bathroom Exhaust Fan User Manual - VH1796, VH1797 Comprehensive user manual for VIVOHOME Bathroom Exhaust Fans (models VH1796, VH1797), covering safety, installation, operation, troubleshooting, and warranty information. |