
Introduction
This instruction manual provides detailed guidance for assembling, setting up, and maintaining your Leo Jaymz DIY TL Style Electric Guitar Kit. This kit is designed for individuals who enjoy hands-on projects and wish to build their own electric guitar. It features a roasted pine body, a maple neck, and a maple fingerboard, offering a solid foundation for a custom instrument.

Image: Leo Jaymz logo on a guitar body, representing the brand and the DIY kit.
Package Contents
Your Leo Jaymz DIY TL Style Electric Guitar Kit includes all the necessary components for assembly. Please verify that all items listed below are present before beginning the assembly process.
- Roasted Pine Body (TL style)
- Maple Neck with Maple Fingerboard (21 frets, 25.5" scale length, 6mm pearl dot inlays)
- One-side machine heads for headstock
- Pickups (S-S configuration)
- Bridge (Hard Tail system)
- Control Switch & Output Jack
- All necessary wire cables and screws
- Guitar Strap
- Security Quick Retainer System Guitar Strap Locks
- Copper Foil Tape (for noise reduction)
- Audio Cable
- Guitar Strings
- Neckplate
- Tuning Pegs
- Allen Wrench
- Two Pickguards

Image: All components of the Leo Jaymz DIY TL Style Electric Guitar Kit, including the body, neck, hardware, and electronics.
Assembly Instructions
The assembly process for this kit is designed to be straightforward, with pre-drilled cavities and plug-in connections to simplify wiring. No soldering is required for the electronics.
1. Body and Neck Preparation
Inspect the roasted pine body and maple neck for any imperfections. The body features pre-reserved holes for easy assembly. You may choose to apply a finish to the body and neck at this stage, or after initial assembly.

Image: Detailed dimensions and routing of the roasted pine guitar body.

Image: CNC routing process on a solid wood guitar body.

Image: Detailed dimensions of the maple guitar neck.

Image: Maple headstock and fingerboard with pre-drilled holes for tuning pegs.
2. Neck Attachment
Align the neck with the neck pocket on the body. Secure the neck using the neck plate and screws provided. Ensure a snug fit for optimal sustain and playability.
3. Electronics Installation
Install the pickups into their respective cavities. Connect the wiring using the plug-in connectors. Install the control switch and output jack. The copper foil tape can be applied to the wire compartment and pickup grooves to effectively reduce noise.

Image: Simple plug-in connections for electronics, eliminating the need for soldering.
4. Hardware Installation
Attach the bridge to the body. Install the tuning pegs onto the headstock. Secure the strap buttons using the provided screws. The kit includes a guitar strap and security quick retainer system strap locks for added convenience.
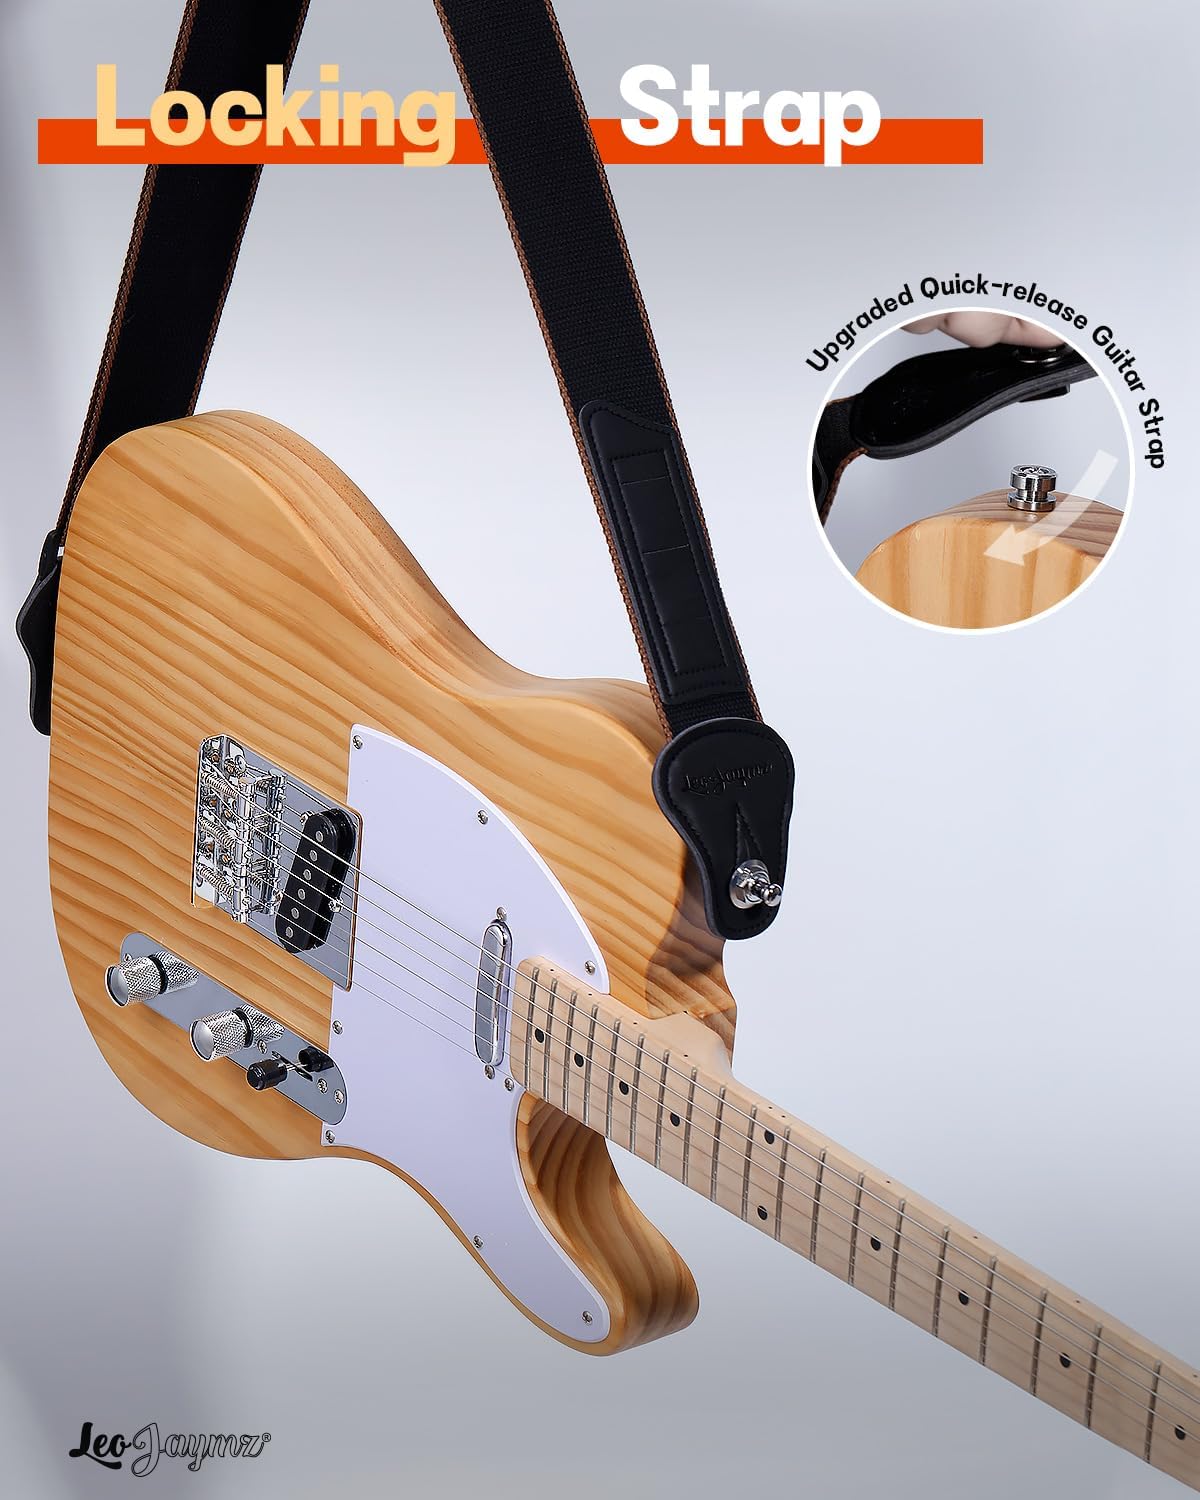
Image: Guitar with an upgraded quick-release locking strap.
5. Stringing
Install the guitar strings. Ensure they are properly seated in the bridge and wound securely around the tuning pegs.
Assembly Video Guide
For a visual guide on the assembly process, please refer to the video below. This video demonstrates key steps in building a similar Leo Jaymz DIY guitar kit.
Video: An overview of the assembly process for a Leo Jaymz DIY electric guitar kit, demonstrating the installation of the body, neck, and electronics. This video is provided by a seller and offers helpful visual instructions for building your guitar.
Setup
After assembly, proper setup is crucial for optimal playability and tone. This may require some patience and fine-tuning.
- Nut Adjustment: The nut may need to be filed or adjusted to achieve the correct string height at the first fret.
- Fret Leveling and Dressing: Inspect the frets for any unevenness. Minor filing and polishing may be required to ensure smooth playability and prevent buzzing.
- Action Adjustment: Adjust the bridge saddles to set the desired string height (action) across the fretboard.
- Intonation: Adjust the length of each string at the bridge to ensure that notes play in tune across the entire fretboard.
- Truss Rod Adjustment: If the neck has too much or too little relief (forward or backward bow), adjust the truss rod using the provided Allen wrench. Make small adjustments and allow the neck to settle.
- Pickup Height: Adjust the height of the pickups to achieve your preferred output and tonal balance.
- Tuning: Tune the guitar to standard pitch using an electronic tuner.
Operating Your Guitar
Once your Leo Jaymz TL Style Electric Guitar is assembled and properly set up, it is ready for use. Connect the guitar to an amplifier using the audio cable. Use the volume and tone knobs to shape your sound. Experiment with different amplifier settings and effects to explore the guitar's tonal capabilities.
Maintenance
Regular maintenance will help preserve the playability and longevity of your guitar.
- Cleaning: Wipe down the body, neck, and strings with a soft, clean cloth after each use to remove sweat and grime. Use guitar-specific cleaning products if desired.
- String Replacement: Replace strings regularly, typically every 1-3 months depending on usage, to maintain optimal tone and feel.
- Fretboard Care: Periodically clean and condition the maple fretboard to prevent drying and cracking.
- Hardware Inspection: Check all screws and hardware for tightness. Tighten any loose components to prevent rattles or damage.
- Storage: Store your guitar in a stable environment, away from extreme temperature changes and humidity fluctuations, to prevent wood warping.
Troubleshooting
If you encounter issues with your guitar, consider the following common troubleshooting steps:
- No Sound: Check all cable connections (guitar to amp, power). Ensure volume knobs on the guitar and amplifier are turned up. Verify that the output jack wiring is secure and not shorting against the cavity.
- Buzzing Strings: This can be caused by low action, uneven frets, or an improperly adjusted truss rod. Refer to the "Setup" section for adjustments.
- Poor Tuning Stability: Ensure strings are properly installed and stretched. Check tuning pegs for tightness. A poorly cut nut can also cause tuning issues.
- Excessive Noise/Hum: Ensure all electronic connections are secure. Verify that the copper foil shielding is correctly applied in the cavities.
If problems persist after attempting these steps, it is recommended to consult a qualified guitar technician or luthier.
Specifications
| Brand | Leo Jaymz |
| Model Number | SNGK |
| Body Material | Roasted Pine |
| Neck Material | Maple |
| Fretboard Material | Maple |
| Scale Length | 25.5 Inches |
| Number of Strings | 6 |
| Pickup Configuration | S-S (Single-Single) |
| Bridge System | Hard Tail |
| Item Dimensions | 39 x 14 x 2.3 inches |
| UPC | 743333602496 |
Warranty and Support
This Leo Jaymz DIY TL Style Electric Guitar Kit comes with a 30-day warranty. For any questions, technical assistance, or support regarding your kit, please visit the official Leo Jaymz store or contact customer service through your purchase platform.
Official Brand Store: Leo Jaymz Store