
iJoy DS2018DAC
iJoy Disney Mickey Mouse DS2018DAC Disposable Camera Instruction Manual
Model: DS2018DAC
1. Introduction
Thank you for choosing the iJoy Disney Mickey Mouse Disposable Camera. This camera is designed for simple, point-and-shoot photography, capturing 20 exposures on film. It features a built-in flash for use in low-light conditions. Please read this manual carefully to ensure proper use and to understand important details regarding film development.
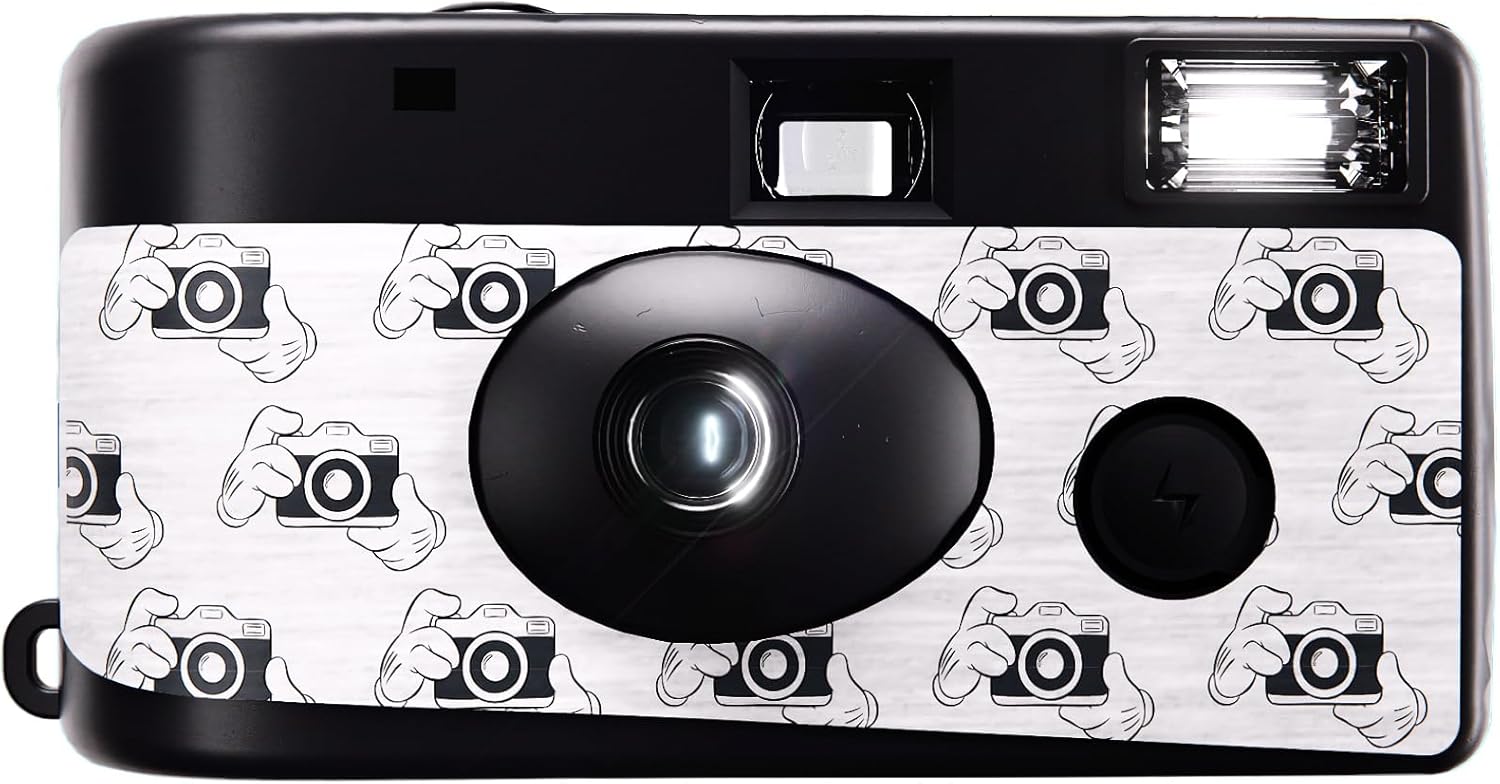
Image 1.1: Front view of the iJoy Disney Mickey Mouse Disposable Camera, featuring a black body with a white and black Mickey Mouse camera pattern, a central lens, and a flash unit.
2. Camera Components
Familiarize yourself with the various parts of your disposable camera:

Image 2.1: Diagram illustrating the key components of the camera, including the Viewfinder, 28mm Lens, Flash Window, Flash Button, Film Advance Wheel, Exposure Counter, Flash Ready Light, and Lanyard Loop.
- Viewfinder: Used to compose your shot.
- 28mm Lens: The camera's fixed lens.
- Flash Window: Emits light when the flash is activated.
- Flash Button: Press and hold to charge the flash.
- Flash Ready Light: Illuminates when the flash is charged and ready to fire.
- Film Advance Wheel: Rotate after each shot to advance the film to the next exposure.
- Exposure Counter: Displays the number of remaining exposures.
- Lanyard Loop: For attaching a wrist strap (not included).
3. Setup
Your camera comes pre-loaded with 20 exposures of film. Before first use, you will need to install a battery for the flash function.
- Battery Installation: The camera requires 1 AA battery (not included) to power the flash. Locate the battery compartment on the bottom of the camera. Open the compartment, insert the AA battery according to the polarity markings, and close the cover securely.
- Initial Film Advance: Rotate the Film Advance Wheel clockwise until it stops. This prepares the first frame for shooting.
4. Operating the Camera
Follow these steps to take photographs with your disposable camera:
- Aim and Compose: Hold the camera steady and look through the Viewfinder to frame your subject.
- Distance: For optimal results, ensure your subject is approximately 1 meter (3 feet) away from the camera, especially when using the flash.
- Using the Flash (for dim light or indoors):
- Press and hold the Flash Button on the front of the camera.
- Wait for the Flash Ready Light (usually on top or back) to illuminate, indicating the flash is charged.
- While holding the Flash Button, press the Shutter Button to take the picture.

Image 4.1: A person holding the camera to their eye, demonstrating the use of the built-in flash for indoor or low-light photography.
- Taking a Picture (without flash, for bright outdoor conditions): Simply press the Shutter Button.
- Advance Film: After each picture, rotate the Film Advance Wheel clockwise until it stops. This prepares the next frame. The Exposure Counter will decrease by one.
- Finish Film: Continue until all 20 exposures are used. The Film Advance Wheel will no longer turn.

Image 4.2: A visual guide showing the five steps of camera operation: 1. Rotate film advance wheel, 2. Use outdoors (1m/3ft distance), 3. Use outdoors (1m/3ft distance), 4. Use flash in dim light or indoors, 5. Repeat process to take new pictures.
5. Maintenance
- Keep the camera dry and away from extreme temperatures.
- Avoid touching the lens. If necessary, gently wipe the lens with a soft, lint-free cloth.
- Do not attempt to open the camera or remove the film yourself, as this will expose the film and ruin your pictures.
6. Important Information: Film Development
This camera uses 35mm ECN-2 film. It is crucial to understand that ECN-2 film requires a specialized development process different from standard 35mm C-41 color negative film, which is commonly processed at most photo labs (e.g., Walgreens, CVS, Walmart).
Before using the camera or taking it for development, please confirm with your chosen photo lab that they can process 35mm ECN-2 film. Many local labs may not have the necessary chemicals or equipment for ECN-2 processing, which could result in your film being un-developable or requiring shipment to a specialized lab.
Failure to use a lab equipped for ECN-2 processing will likely result in your photos not being developed correctly or at all.
7. Specifications
| Model Name | DS2018DAC |
| Brand | iJoy |
| Film Format Type | 35mm ECN-2 |
| Exposures | 20 |
| Special Feature | Built-in Flash |
| Battery Required | 1 AA (not included) |
| Product Dimensions (L x W x H) | 4.5 x 1 x 2.5 inches |
| Item Weight | 4.2 ounces |
8. Troubleshooting
- No pictures after development:
- Ensure the film was fully advanced after each shot.
- Verify the flash was used in low-light conditions and the Flash Ready Light was on.
- Most importantly, confirm that the lab you used is capable of processing 35mm ECN-2 film. This is a common reason for undeveloped film from this camera.
- Flash not working:
- Check if a fresh AA battery is correctly installed.
- Ensure you are pressing and holding the Flash Button until the Flash Ready Light illuminates before taking the picture.
9. Warranty and Support
For warranty information or technical support, please refer to the contact details provided with your purchase or visit the official iJoy website. Keep your proof of purchase for any warranty claims.
Ask a question about this manual
Ask about setup, troubleshooting, compatibility, parts, safety, or missing instructions. Manuals+ will review the question and use this page’s manual context to help answer it.