1. Introduction
Welcome to the Treedix Soldering Practice Piano DIY Starter Kit. This kit is designed to provide an engaging way to practice soldering techniques while building a functional 7-note electronic piano. It is suitable for beginners interested in electronics and soldering. Please read this manual carefully before beginning assembly and operation.
2. Product Overview
2.1 Included Components
The kit includes various electronic components necessary for assembly. Please verify all parts are present before starting.

This image displays all the individual components provided in the kit, including the printed circuit board (PCB), various LEDs, buttons, resistors, capacitors, integrated circuits, battery holder, and the CR2032 battery.
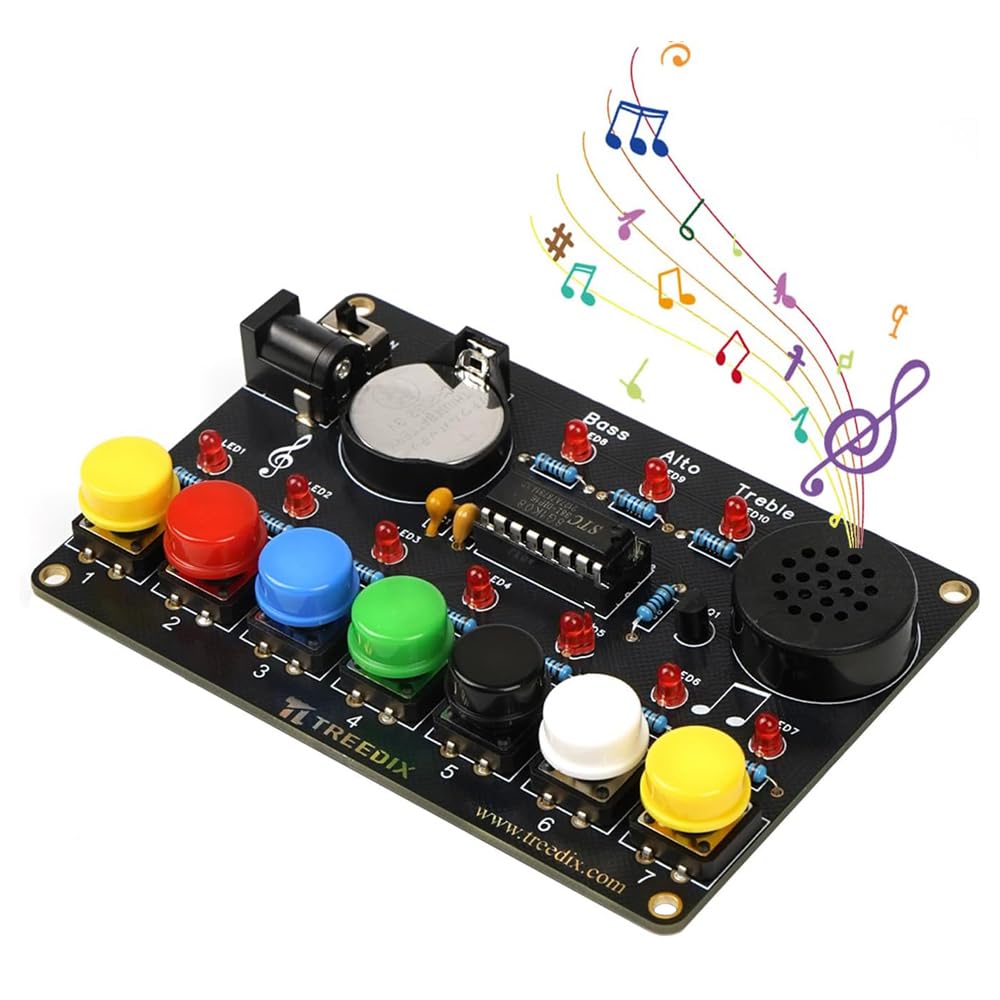
2.2 Assembled Product Features
- 7-Note Piano: Once assembled, the kit functions as a mini piano capable of playing Do, Re, Mi, Fa, Sol, La, Ti.
- 3 Pitch Options: Select between Bass, Alto, and Treble tones.
- Compact Design: The assembled unit is small and portable.
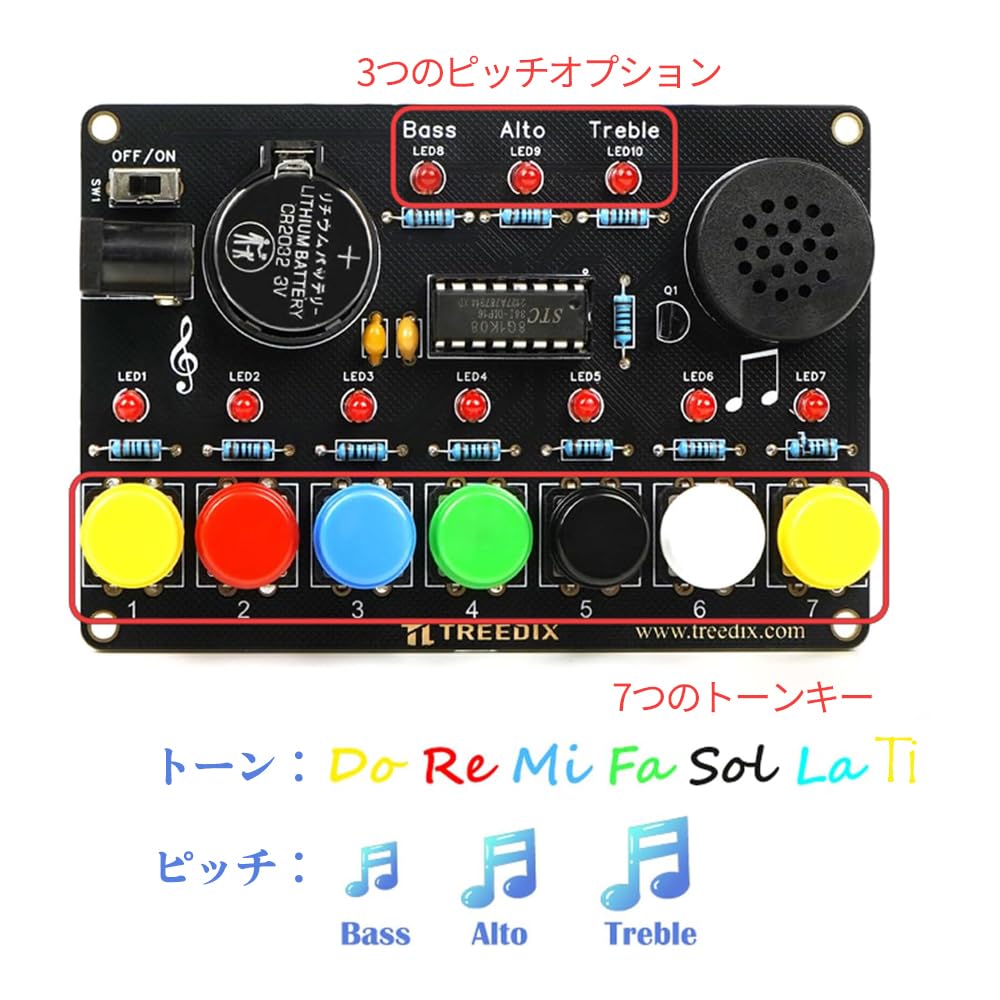
This image shows the fully assembled Treedix Soldering Practice Piano Kit. It highlights the three pitch options (Bass, Alto, Treble) and the seven musical keys (Do, Re, Mi, Fa, Sol, La, Ti) with corresponding numbers 1 through 7.

The assembled kit measures 9.8 cm in length and 6.5 cm in width, as indicated by the arrows and measurements in this image.
3. Safety Information
Soldering involves high temperatures and can be hazardous if proper precautions are not taken. Please observe the following safety guidelines:
- Always work in a well-ventilated area to avoid inhaling solder fumes.
- Wear appropriate eye protection to shield against splashes of molten solder.
- Use a soldering iron stand and ensure the hot iron is never left unattended.
- Allow components and solder joints to cool completely before handling.
- Keep batteries away from children and pets. Do not short-circuit or dispose of batteries in fire.
- Adult supervision is recommended for younger users.
4. Setup and Assembly
This kit requires soldering to assemble. Follow the instructions provided in the included Japanese manual for detailed component placement and soldering steps. Ensure correct orientation for polarized components like LEDs and integrated circuits.
This image shows the main board of the assembled kit, illustrating the layout of various components before the buttons are fully attached.

This image shows the compact size of the assembled Treedix Soldering Practice Piano Kit when held in a hand, demonstrating its portability.
5. Operating Instructions
5.1 Powering the Device
The kit can be powered by the included CR2032 battery or an external DC power source.
- Battery Power: Insert the CR2032 battery into the battery holder with the positive (+) side facing up. Ensure it is securely seated.
- DC Power: To use DC power, remove the CR2032 battery. Insert a compatible DC power cable (not included) into the DC jack.
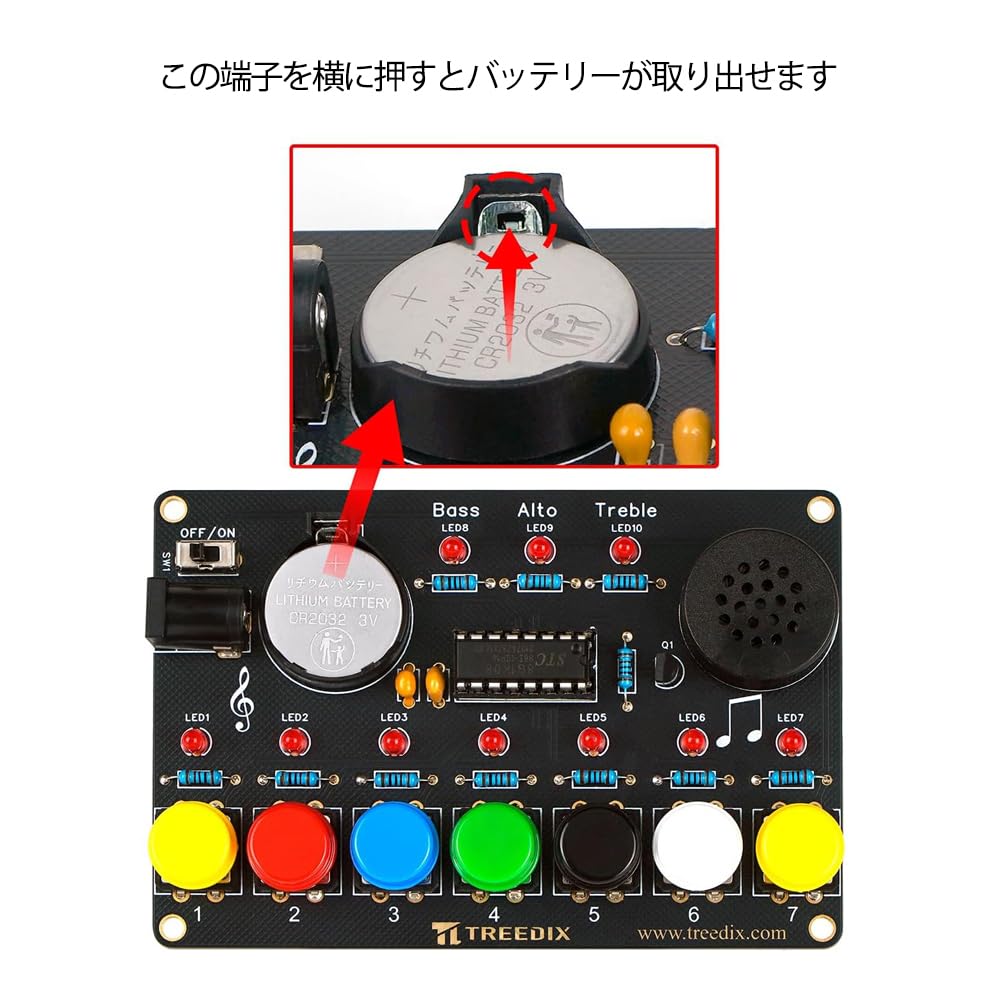
This image illustrates how to remove the CR2032 lithium battery from the kit. Pressing the side tab allows the battery to be easily extracted.

This image demonstrates the two ways to power the kit. Method 1 (labeled ①) uses the included CR2032 battery. Method 2 (labeled ②) shows the option to use a DC power cable (not included) by removing the battery and inserting the cable into the DC jack.
5.2 Turning On/Off
Locate the ON/OFF switch on the board. Slide the switch to the 'ON' position to power on the device. Slide it to 'OFF' to power off.
5.3 Playing the Piano
Press the colored buttons to play the corresponding musical notes (Do, Re, Mi, Fa, Sol, La, Ti). Experiment with different button presses to create melodies.
5.4 Adjusting Pitch
Use the pitch selection switches (Bass, Alto, Treble) to change the octave or tone of the piano. Select the desired pitch before playing.
This video provides a brief demonstration of the Treedix Soldering Practice Piano Kit in operation, showcasing its sound and functionality.
6. Maintenance
- Cleaning: Use a soft, dry cloth to clean the circuit board and buttons. Avoid using liquids or abrasive cleaners.
- Battery Replacement: When the sound becomes weak or the device stops functioning, replace the CR2032 battery. Refer to Section 5.1 for battery removal and installation.
- Storage: Store the kit in a dry, cool place away from direct sunlight and moisture. If storing for extended periods, remove the battery.
7. Troubleshooting
If you encounter issues with your Treedix Soldering Practice Piano Kit, refer to the following common problems and solutions:
| Problem | Possible Cause | Solution |
|---|---|---|
| No sound when buttons are pressed. |
|
|
| Incorrect notes or erratic sound. |
|
|
| Device does not power on. |
|
|
8. Specifications
| Feature | Detail |
|---|---|
| Model Number | TRX70278 |
| Dimensions (L x W) | 9.8 cm x 6.5 cm |
| Weight | 50 g |
| Power Source | 1 x CR2032 3V Lithium Battery (included) or DC Power (cable not included) |
| Included Components | Printed circuit board, LEDs, buttons, resistors, capacitors, integrated circuit, battery holder, CR2032 battery |
| Pitch Options | Bass, Alto, Treble |
9. Warranty and Support
This product is a DIY kit, and its functionality depends on correct assembly. Treedix provides support for manufacturing defects in the components. For assistance with missing parts or component defects, please contact Treedix customer support through the retailer where the product was purchased. Please note that issues arising from incorrect assembly or soldering are not covered under warranty.


