
1. Introduction
This manual provides comprehensive instructions for the installation, operation, and maintenance of your SAFWAT HX2019FR-A refrigerator water filter. Please read these instructions carefully before installation and retain them for future reference. This filter is designed to provide clean, filtered water from your refrigerator's dispenser.
2. Product Compatibility
The SAFWAT HX2019FR-A water filter is compatible with the following refrigerator models:
- Hisense: HRM260N6TSE, HRFD560SW, HRCD585BW, HRFD634BW, HRCD650BW, HRCD586TBWB, RF815N4SESE
- Mora: MRM260N6TSE
It is a direct replacement for Hisense filter models: HX2019F-A, HX2019FR-A, HX2019FR-A-2, HX2019FR-A-3, K2100990, K2100988.
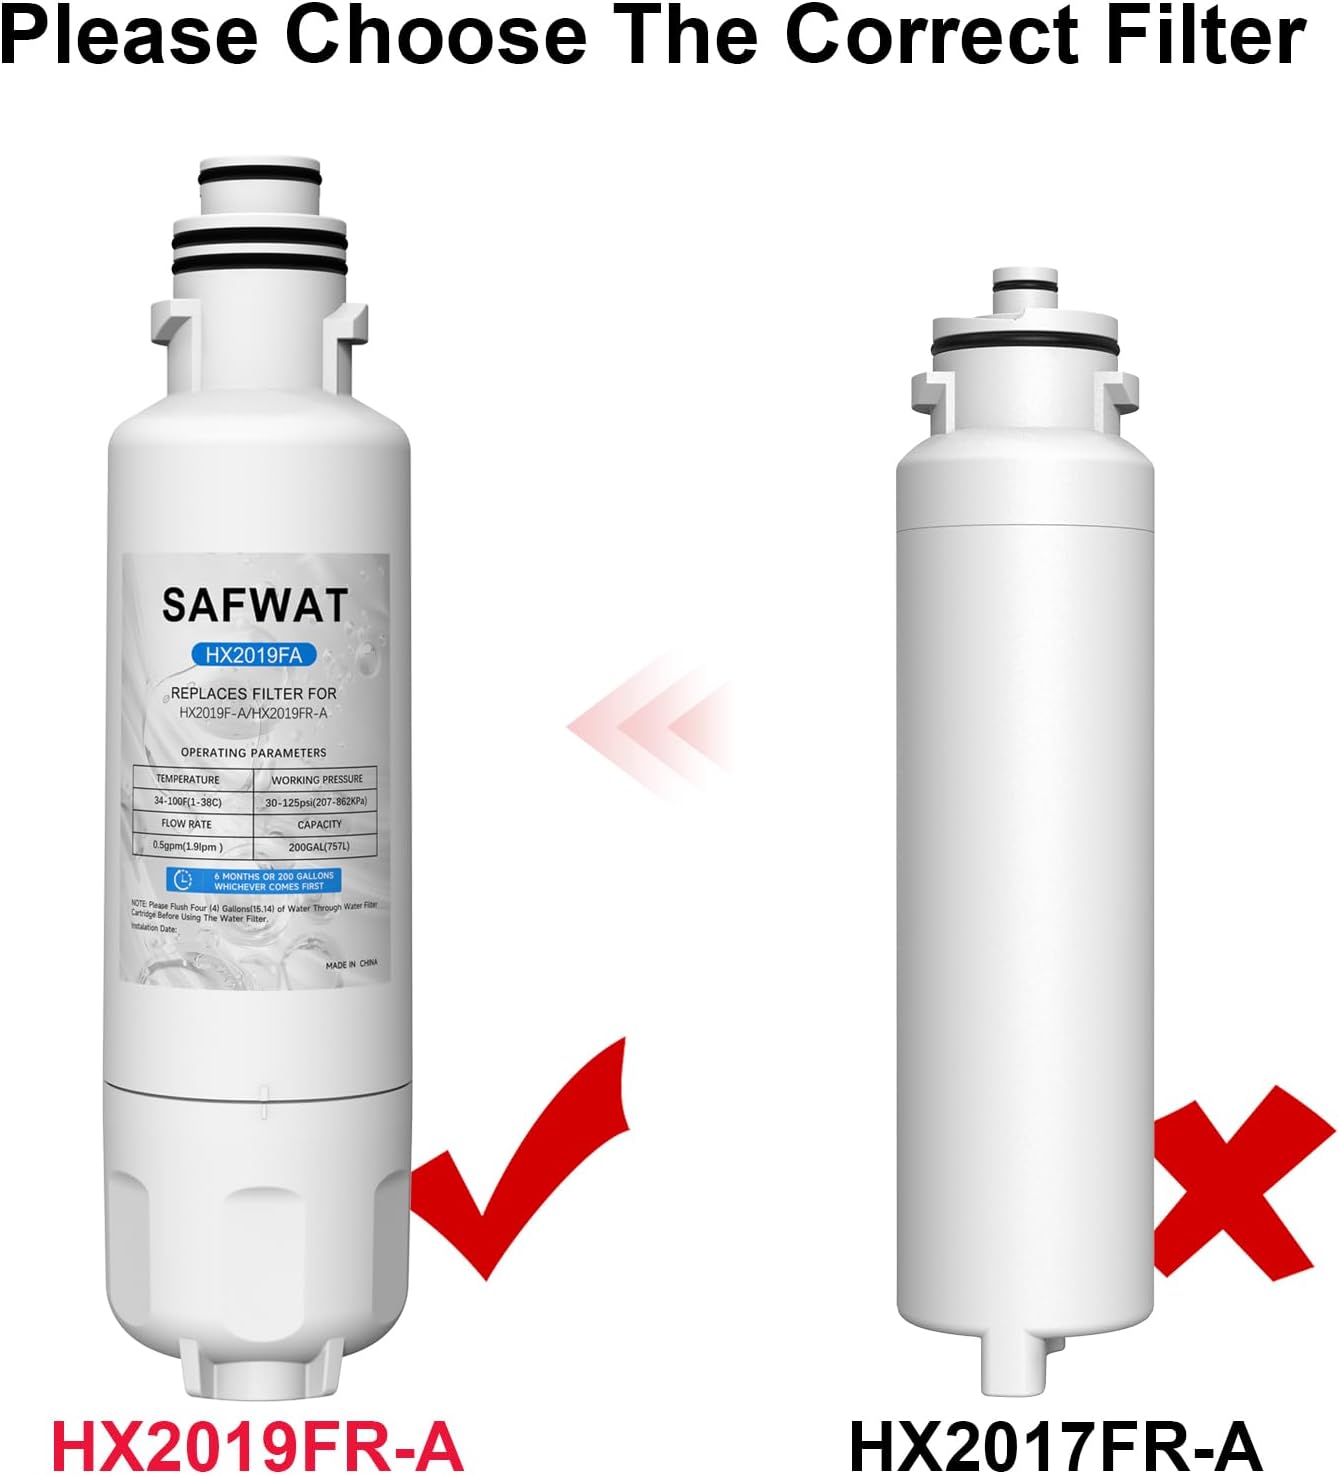
Figure 1: Ensure you have the correct filter model (HX2019FR-A) for your refrigerator.
3. Specifications
| Specification | Value |
|---|---|
| Material | Carbon Block, Plastic |
| Product Dimensions | 1.8"D x 1.8"W x 6.9"H |
| Minimum Operating Temperature | 1°C / 34 °F |
| Maximum Operating Temperature | 38°C / 100 °F |
| Minimum Working Pressure | 207 kPa / 30 psi |
| Maximum Working Pressure | 862 kPa / 125 psi |
| Flow Rate | 1.9 lpm / 0.5 gpm |
| Capacity | 200 gallons (757 liters) |
| External Testing Certification | IAPMO, NSF Standard 42 |
| Product Benefits | Reduces Turbidity |

Figure 2: The filter utilizes eco-friendly materials and is NSF/ANSI certified.
4. Installation Instructions (Setup)
Follow these steps to install your new water filter:
- Locate the Filter Compartment: The water filter is typically located inside the refrigerator compartment, often in the upper right corner or in the base grille. Refer to your refrigerator's owner's manual for the exact location.
- Turn Off Water Supply: Before removing the old filter, turn off the water supply to the refrigerator. This usually involves turning a valve behind the refrigerator or at the main water line.
- Remove Old Filter:
- If the filter has a push-button release, press the button to eject the filter.
- If the filter requires twisting, turn the old filter counter-clockwise until it releases.
- Some water may drip out; have a towel ready.
- Prepare New Filter: Remove the new filter from its packaging. Remove the protective cap or seal from the O-rings.
- Insert New Filter:
- Align the new filter with the filter housing.
- If it's a push-in type, push it firmly until it clicks into place.
- If it's a twist-in type, insert it and turn clockwise until it locks securely. Do not overtighten.
- Turn On Water Supply: Restore the water supply to the refrigerator.
- Check for Leaks: Visually inspect the filter area for any signs of water leakage. If leaks occur, ensure the filter is properly seated and tightened.

Figure 3: Observe the filter's connection points for proper alignment during installation.
5. Operation (Flushing the Filter)
After installing a new water filter, it is essential to flush the system to remove any trapped air and loose carbon particles. This ensures optimal filter performance and water quality.
- Dispense Water: Place a large container under the water dispenser.
- Flush the System: Dispense approximately 1.5 gallons (5.7 liters) of water through the dispenser. This process typically takes about 5 minutes.
- Discard Water: Discard the flushed water. The first few glasses of water may appear cloudy or contain black carbon specks; this is normal and will clear up after flushing.
- Reset Filter Indicator: If your refrigerator has a filter change indicator light, consult your refrigerator's manual for instructions on how to reset it.
6. Maintenance (Filter Replacement)
For optimal performance and water quality, it is recommended to replace your SAFWAT HX2019FR-A water filter regularly.
- Replacement Frequency: Replace the filter every 6 months or after filtering 200 gallons (757 liters) of water, whichever comes first.
- Indicator Light: Your refrigerator may have a filter change indicator light that will illuminate when it's time to replace the filter.
- Reduced Flow: A noticeable decrease in water flow from the dispenser can also indicate that the filter is clogged and needs replacement.
Follow the "Installation Instructions" (Section 4) to replace the old filter with a new one.

Figure 4: Replace your filter every 6 months or after 200 gallons for continuous clean water.
7. Troubleshooting
| Problem | Possible Cause | Solution |
|---|---|---|
| Water Leakage | Filter not properly seated or overtightened. Damaged O-rings. | Turn off water supply, remove filter, re-insert and twist clockwise until snug but not overtightened. Check O-rings for damage. If problem persists, contact support. |
| Reduced Water Flow | Clogged filter. Air trapped in the system. | Flush the filter for 5 minutes (Section 5). If flow remains low, replace the filter (Section 6). |
| Cloudy Water / Black Specks | New filter, carbon particles being flushed out. | Continue flushing the filter for the recommended duration (Section 5). This is normal for new carbon filters and will clear. |
| No Water Dispensed | Water supply turned off. Filter not installed correctly. | Ensure water supply to the refrigerator is on. Re-install the filter, ensuring it is fully seated. |
8. Important Safety Information
- Use this filter only with potable (safe to drink) water.
- Do not use with water that is microbiologically unsafe or of unknown quality without adequate disinfection before or after the system.
- Ensure the water supply is turned off before installing or replacing the filter to prevent water damage.
- Do not overtighten the filter during installation, as this may cause damage or leaks.
- Keep the filter out of reach of children.
9. Warranty and Support
For any questions, concerns, or support regarding your SAFWAT water filter, please contact the manufacturer directly. Refer to the product packaging or the retailer's website for contact information.
Specific warranty details are not provided in this manual. Please consult your purchase documentation or the manufacturer's official website for warranty information.