Introduction
Thank you for choosing WdtPro Solar Fence Lights. These lights are designed to provide efficient and versatile outdoor illumination, enhancing the ambiance and safety of your outdoor spaces. Featuring two lighting modes (Cool White 6000K and Warm Light 3500K), upgraded focused LEDs, and advanced solar technology, these lights are built for durability and long-lasting performance.
This manual provides detailed instructions for the setup, operation, and maintenance of your WdtPro Solar Fence Lights to ensure optimal performance and longevity.

Image: WdtPro Solar Fence Lights illuminating a fence. These lights provide focused illumination for outdoor areas.
Key Features
- Dual Lighting Modes: Easily switch between 6000K Cool White and 3500K Warm Light to match your outdoor aesthetic.
- Focused Beam & Energy-Saving: Advanced reflective lenses create a 50-lumen focused beam, covering a wider area with 30% higher solar conversion efficiency.
- Extended Runtime: Equipped with monocrystalline solar panels and a 600mAh battery, providing 10-12 hours of illumination after 6-8 hours of charging.
- Durable & Weatherproof: Constructed from high-quality ABS materials with IP65 waterproof protection, designed to withstand various weather conditions.
- Versatile Installation: Suitable for fences, decks, patios, walls, stairs, and more.

Image: Illustration showing the focused V-shaped beam of WdtPro lights compared to a less focused beam from other lights, highlighting brighter illumination.

Image: Diagram detailing the wider and brighter beam produced by the convex lensed LEDs, showing light spread and components.
Package Contents
- WdtPro Solar Fence Lights (6 Pack)
- Mounting Screws
Setup and Installation
Proper installation is crucial for the optimal performance of your solar lights. Please follow these steps carefully:
1. Choose the Right Location
Select a location where the solar panel can receive direct sunlight for at least 6-8 hours daily. Avoid areas under trees, eaves, or other obstructions that may cast shadows on the solar panel, as this will significantly reduce charging efficiency and runtime.

Image: Illustration demonstrating the importance of direct sunlight for solar panel charging.
Also, ensure the installation area is away from other strong light sources (e.g., streetlights, porch lights) at night. These external light sources can trigger the light sensor, preventing the solar light from turning on automatically.

Image: Illustration showing how external light sources can interfere with the solar light's automatic operation.
2. Initial Activation
Before first use, please remove the protective film from the solar panel. Allow the lights to charge in direct sunlight for 6-8 hours to ensure the battery is fully charged.

Image: Instructions for initial activation, including removing the protective film from the solar panel.
3. Mounting the Lights
The WdtPro Solar Fence Lights can be installed using two methods:
- Screw Installation (Recommended):
- Mark the desired mounting points on the surface.
- Drill pilot holes if necessary.
- Align the light with the holes and secure it using the included screws.
- Adhesive Tape Installation (Not Included):
- Clean the mounting surface thoroughly to ensure it is dry and free of dust or grease.
- Apply strong outdoor-grade double-sided adhesive tape (not included) to the back of the light.
- Press the light firmly onto the desired surface for several seconds.

Image: Illustration of the two available installation methods for the solar lights.
Operating Instructions
Your WdtPro Solar Fence Lights are designed for simple, automatic operation.
Automatic On/Off Function
The lights are equipped with a built-in light sensor. They will automatically turn on at dusk and turn off at dawn, provided they have received sufficient sunlight during the day.
Image: Depiction of the automatic dusk-to-dawn operation of the solar lights.
Switching Lighting Modes
Each light features a button to switch between the two available lighting modes:
- Mode 1: Warm Light (3500K) - Provides a soft, inviting glow.
- Mode 2: Cool White (6000K) - Offers a brighter, more modern illumination.
Press the button located on the light to cycle between these modes until you reach your desired color temperature.
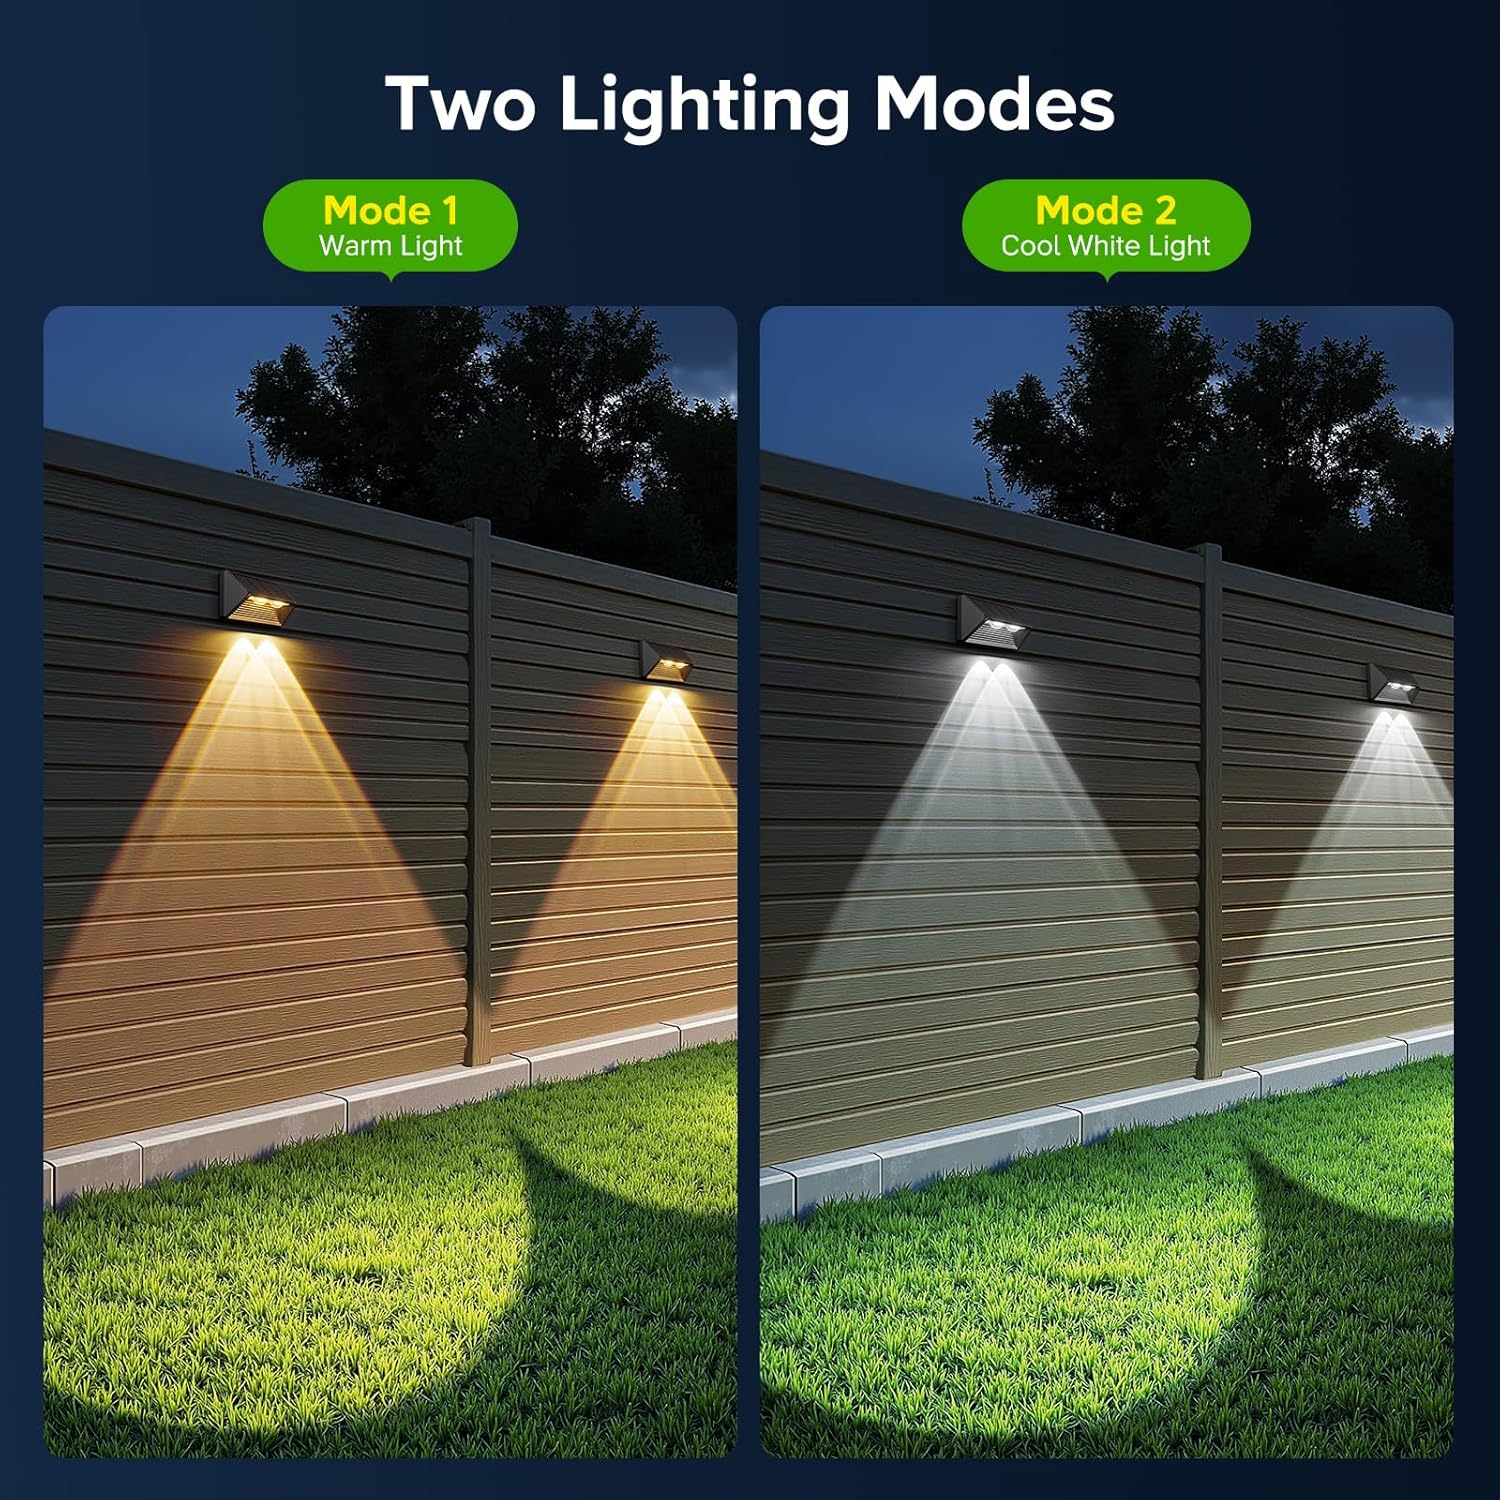
Image: Visual representation of the two distinct lighting modes: Warm Light and Cool White Light.
Maintenance
Regular maintenance ensures the longevity and optimal performance of your WdtPro Solar Fence Lights.
Cleaning
Periodically wipe the solar panel with a soft, damp cloth to remove dust, dirt, leaves, or snow. A clean solar panel ensures maximum sunlight absorption and charging efficiency.
Weather Resistance
These lights are designed with IP65 waterproof protection and are built from durable ABS materials to withstand various weather conditions, including rain, snow, frost, and sleet. No special weather-related maintenance is typically required beyond ensuring the solar panel remains clear.

Image: Illustration highlighting the all-weather readiness of the solar lights, including IP65 waterproof rating.
Troubleshooting
If your WdtPro Solar Fence Lights are not functioning as expected, please refer to the following common issues and solutions:
| Problem | Possible Cause | Solution |
|---|---|---|
| Lights do not turn on at night. |
|
|
| Lights are dim or only stay on for a short period. |
|
|
| Light mode cannot be changed. |
|
|
Specifications
| Feature | Detail |
|---|---|
| Brand | WdtPro |
| Model Name | TDL011 |
| Color | Black |
| Material | Acrylonitrile Butadiene Styrene (ABS) |
| Product Dimensions | 4.6"L x 2.6"W x 1.8"H |
| Item Weight | 1.63 pounds (for 6 Pack) |
| Power Source | Solar Powered |
| Light Source Type | LED (Convex Lensed) |
| Light Color Modes | Cool White (6000K), Warm Light (3500K) |
| Lumen Output | 50 lumens (focused beam) |
| Battery Capacity | 600mAh |
| Charging Time | 6-8 hours (direct sunlight) |
| Working Time | 10-12 hours (after full charge) |
| Water Resistance Level | IP65 Waterproof |
| Installation Type | Surface Mount (Screws included) |

Image: Detailed comparison of WdtPro's upgraded features and specifications.
Warranty and Support
WdtPro stands behind the quality of its products. For specific warranty details, please refer to the product packaging or contact the retailer where you purchased the item. Generally, products are covered by a standard manufacturer's warranty against defects in materials and workmanship.
If you encounter any issues or have questions regarding your WdtPro Solar Fence Lights, please contact WdtPro customer support through the retailer's platform or the official WdtPro website. Please have your model number (TDL011) and purchase information ready when contacting support.
For more information, visit the official WdtPro store: WdtPro Store on Amazon.
