1. Introduction
This manual provides detailed instructions for the installation, operation, and maintenance of your Montech AX 120 ARGB Fans. These 120mm fans are designed to provide efficient cooling and customizable lighting for your computer system. Please read this manual thoroughly before installation to ensure proper function and safety.
2. Safety Information
- Always disconnect power from your computer before installing or handling internal components.
- Handle fans by their frames, avoiding contact with the blades.
- Ensure proper grounding to prevent electrostatic discharge (ESD) damage.
- Keep small parts and packaging materials away from children.
- Do not attempt to modify the fan or its cables. Unauthorized modifications may void your warranty and pose safety risks.
3. Package Contents
Verify that all items are present in your package:
- Montech AX 120 ARGB Fan (x4)
- Mounting Screws (x16)
- Fan Hub (if included in your specific pack)

Figure 3.1: Montech AX 120 ARGB Fan (Pack of 4)
4. Setup and Installation
Follow these steps to install your Montech AX 120 ARGB Fans:
- Prepare Your System: Power off your computer and disconnect it from the power outlet. Open your computer case.
- Identify Fan Mounting Locations: Determine where you want to install the fans (e.g., front, top, rear, bottom of the case).
- Mount the Fans: Position each fan in the desired location. The AX series fans are designed to blow air from the RGB-lit side towards the non-RGB side. Consider this for optimal airflow (e.g., intake or exhaust). Secure each fan using four mounting screws. The integrated anti-vibration pads help reduce noise from resonance.

Figure 4.1: Front view of the Montech AX 120 ARGB Fan

Figure 4.2: Back view of the Montech AX 120 ARGB Fan, indicating airflow direction from front to back.
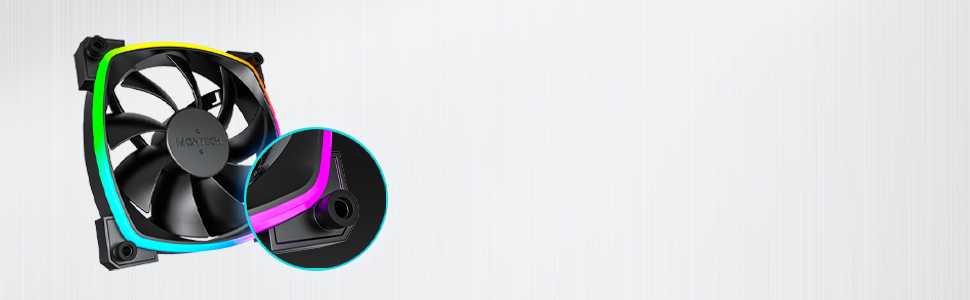
Figure 4.3: Integrated anti-vibration pads for reduced noise.
- Connect Power and ARGB Cables: Each fan has two cables: a 4-pin PWM cable for fan speed control and a 3-pin ARGB cable for lighting control.
- Connect the 4-pin PWM cable to an available 4-pin fan header on your motherboard or to a fan hub.
- Connect the 3-pin ARGB cable to an available 5V 3-pin ARGB header on your motherboard or to a compatible ARGB controller/hub. Note: Do not connect to a 12V RGB header, as this will damage the LEDs.
- Cable Management: Route cables neatly to avoid interference with other components and to improve airflow.
- Close Case and Power On: Once all connections are secure, close your computer case, reconnect power, and power on your system.
5. Operating Instructions
The Montech AX 120 ARGB Fans offer both speed and lighting control:
5.1 Fan Speed Control (PWM)
The 4-pin PWM connection allows for precise fan speed control based on system temperature. The fan speed can be adjusted from 600 RPM to 1600 RPM.
- BIOS/UEFI: Access your motherboard's BIOS/UEFI settings to configure fan curves. This allows the fan speed to automatically adjust based on CPU or system temperatures.
- Software: Use your motherboard's fan control software (e.g., ASUS Fan Xpert, MSI Dragon Center, Gigabyte SIV) to create custom fan profiles within your operating system.
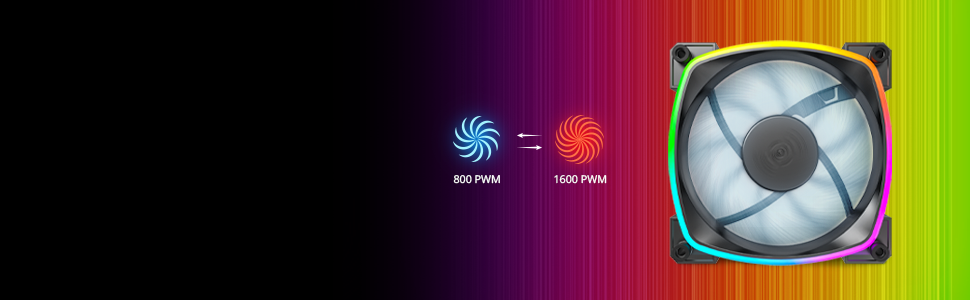
Figure 5.1: PWM fan speed adjustment from 600 RPM to 1600 RPM.
5.2 ARGB Lighting Control
The Addressable RGB (ARGB) lighting can be synchronized and customized through your motherboard's software or a dedicated ARGB controller.
- Motherboard Software: If connected to a 5V 3-pin ARGB header, use your motherboard's RGB software (e.g., ASUS Aura Sync, MSI Mystic Light Sync, Gigabyte RGB Fusion, ASRock Polychrome Sync) to control lighting effects, colors, and synchronization with other ARGB components.
- ARGB Controller: If using a standalone ARGB controller, refer to the controller's manual for specific instructions on changing lighting modes.
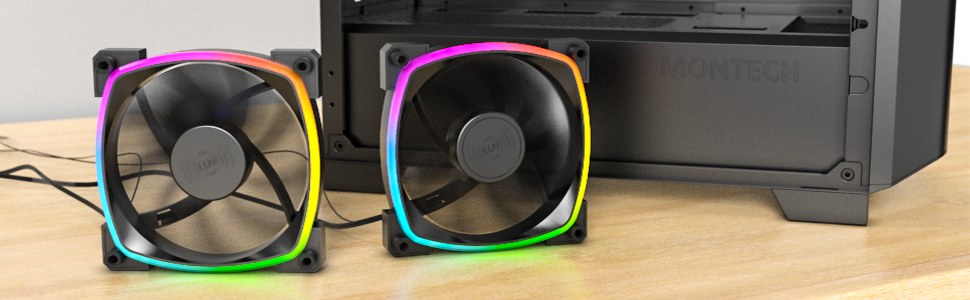
Figure 5.2: Customizable hexagonal ARGB lighting.
6. Maintenance
Regular maintenance ensures optimal performance and longevity of your fans:
- Cleaning: Periodically clean dust from the fan blades and frame using compressed air or a soft brush. Ensure the computer is powered off and unplugged before cleaning.
- Inspection: Check cables for any signs of wear or damage. Ensure mounting screws are secure.
- Bearing Longevity: The fans feature an HDB (Hydro Dynamic Bearing) designed for high-end durability and a lifespan of 40,000 hours. No user maintenance is required for the bearing.
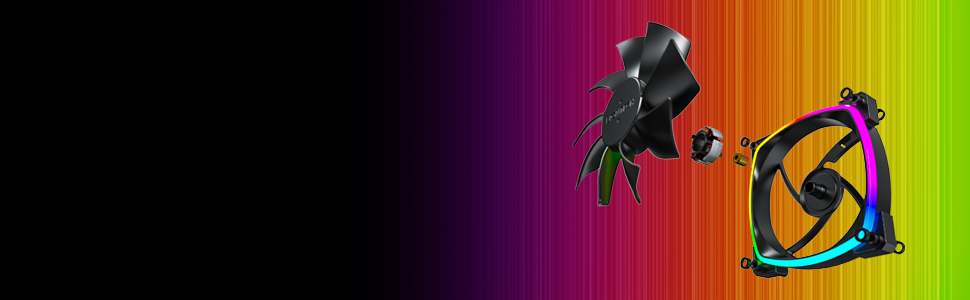
Figure 6.1: Hydro Dynamic Bearing (HDB) for extended lifespan.
7. Troubleshooting
If you encounter issues, refer to the following troubleshooting guide:
| Problem | Possible Cause | Solution |
|---|---|---|
| Fan not spinning | Loose 4-pin PWM cable connection Insufficient power from motherboard header Fan curve set too low in BIOS/software | Ensure 4-pin PWM cable is securely connected. Try connecting to a different fan header. Adjust fan curve settings in BIOS/software to ensure fans spin at low temperatures. |
| ARGB lighting not working | Loose 3-pin ARGB cable connection Connected to incorrect 12V RGB header ARGB software not configured or running | Ensure 3-pin ARGB cable is securely connected to a 5V ARGB header. Verify connection is to a 5V 3-pin ARGB header, not a 12V 4-pin RGB header. Install and configure your motherboard's ARGB software or check your ARGB controller settings. |
| Excessive noise | High fan speed Vibrations Obstruction | Adjust fan speed in BIOS/software to a lower RPM. Ensure all mounting screws are tight. The fans have anti-vibration pads to minimize this. Check for any cables or objects interfering with fan blades. |
8. Specifications
Key technical specifications for the Montech AX 120 ARGB Fan:
- Model: AX120 PWM BLACK
- Fan Dimensions: 120mm x 120mm x 25mm (4.72 x 4.72 x 0.98 inches)
- Bearing Type: Hydro Dynamic Bearing (HDB)
- Rotational Speed: 600 - 1600 RPM (PWM controlled)
- Noise Level: Under 27.9 dB(A)
- Power Connector: 4-Pin PWM
- ARGB Connector: 3-Pin 5V ARGB
- Rated Voltage: 12V DC (Fan), 5V DC (LED)
- Wattage: 2 watts
- Material: Metal, Plastic, Rubber
- Lifespan: 40,000 hours
9. Warranty and Support
Montech products are manufactured to the highest quality standards. For warranty information, technical support, or customer service inquiries, please visit the official Montech website or contact your local retailer. Please retain your proof of purchase for warranty claims.


