1. Introduction
Thank you for choosing the SUSTEAS Rotary Cheese Grater and Vegetable Slicer. This manual provides essential information for the safe and efficient use, assembly, operation, and maintenance of your new kitchen tool. Please read these instructions carefully before first use and retain them for future reference.
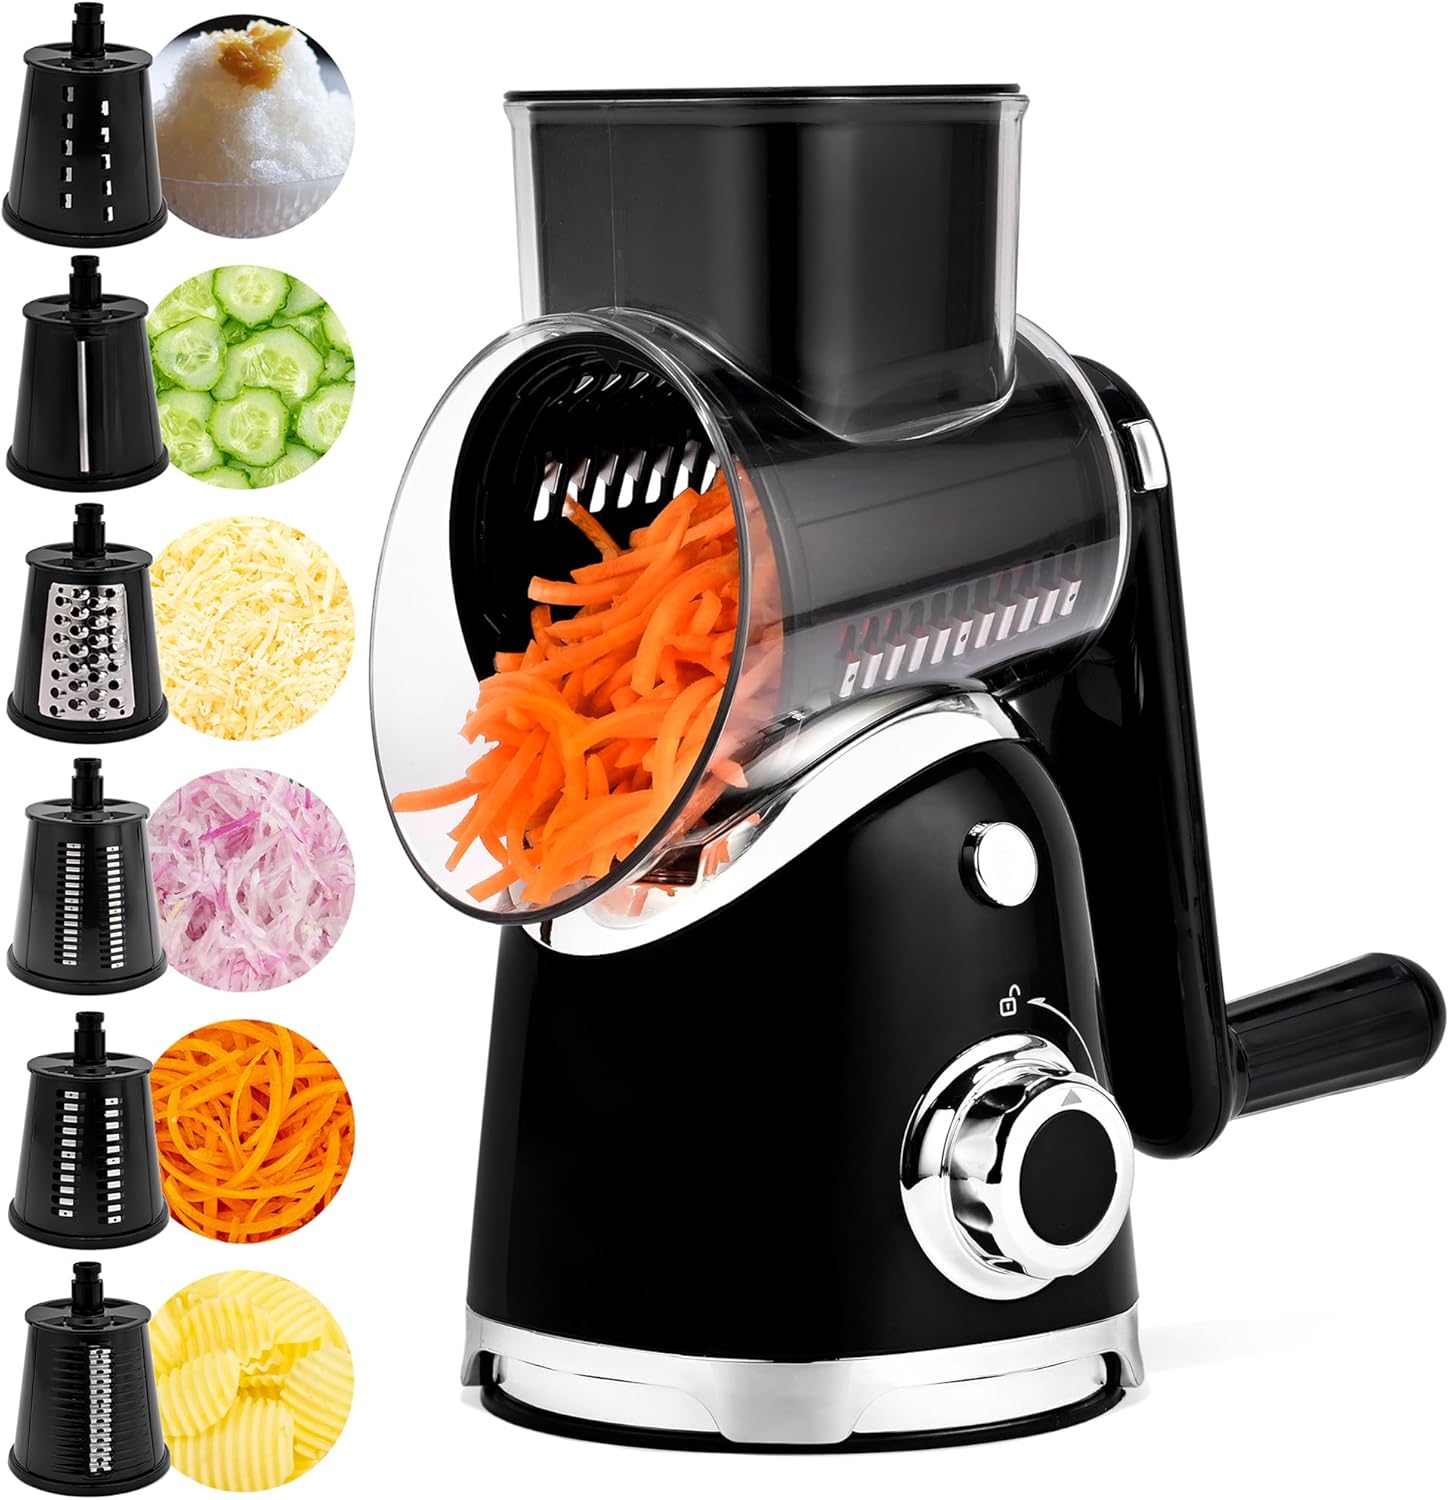
Image 1.1: The SUSTEAS Rotary Cheese Grater and Vegetable Slicer with its various components and example food preparations.
2. Product Components
The SUSTEAS Rotary Cheese Grater and Vegetable Slicer includes the following parts:
- Main Unit: Base with suction mechanism and handle attachment point.
- Transparent Barrel: The food chamber where ingredients are processed.
- Food Pusher: Used to safely push ingredients into the barrel.
- Handle: For manual rotation of the blades.
- 6 Interchangeable Stainless Steel Blades:
- Slicing Blade
- Wavy Slicing Blade
- 2mm Julienne Blade
- 4mm Shredding Blade
- 6mm Shredding Blade
- Ice Crushing Blade
- Blade Storage Case: For organized and safe storage of blades.
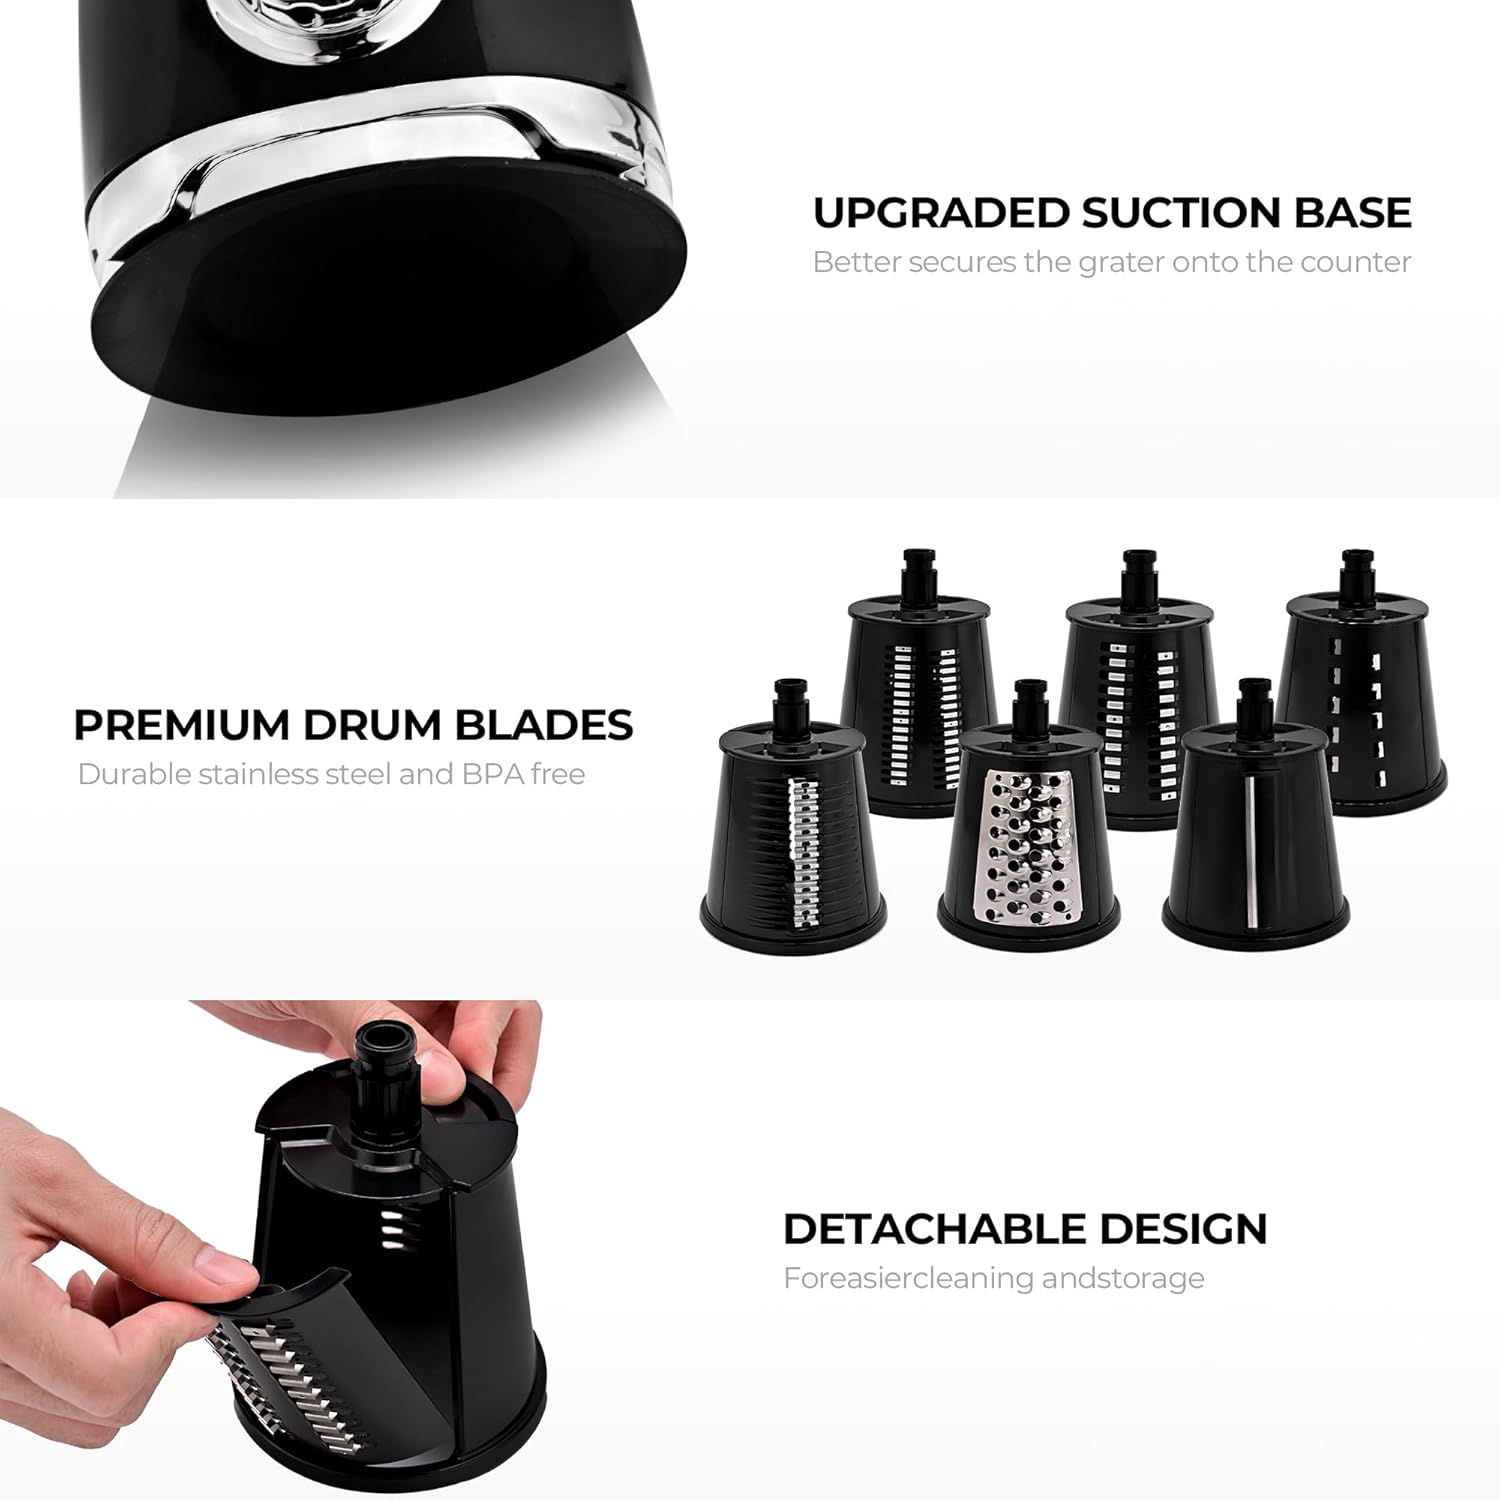
Image 2.1: Overview of the main unit, suction base, premium drum blades, and detachable design for easy cleaning and storage.
3. Setup and Assembly
Follow these steps to assemble your rotary grater:
- Secure the Suction Base: Place the main unit on a clean, smooth, and dry countertop (e.g., quartz, tile, glass). Turn the knob on the side of the base clockwise to engage the suction cup, securing the unit firmly to the surface.
- Install the Transparent Barrel: Align the transparent barrel with the opening on the main unit and slide it into place until it clicks securely.
- Insert the Desired Blade: Select one of the six interchangeable blades. Hold the blade by its plastic top and carefully insert it into the transparent barrel, ensuring it sits correctly on the internal spindle.
- Attach the Handle: Insert the handle into the opening on the side of the transparent barrel, aligning it with the blade's spindle. Turn the handle clockwise until it locks into position.
- Prepare the Food Pusher: Place the food pusher into the top opening of the transparent barrel.

Image 3.1: Step-by-step assembly instructions: 1. Lock suction base, 2. Install transparent barrel, 3. Install blade, 4. Install barrel into main unit, 5. Fix handle, 6. Insert food pusher.
4. Operating Instructions
Once assembled, your SUSTEAS Rotary Grater is ready for use. Always ensure the unit is securely suctioned to the countertop before operating.
4.1 General Operation
- Place a bowl or container beneath the discharge port to collect processed ingredients.
- Insert your chosen ingredient into the transparent barrel. For best results, cut larger items to fit the feed opening (3.82" x 3.66").
- Place the food pusher on top of the ingredient.
- With one hand holding the food pusher down gently, use your other hand to turn the handle clockwise. Apply steady pressure to the food pusher to guide the ingredient against the rotating blade.
- Continue turning the handle until the ingredient is fully processed.
4.2 Blade Usage Guide
The grater comes with 6 specialized blades for various tasks:
- Slicing Blade: Ideal for thin, even slices of cucumbers, radishes, carrots, and other vegetables.
- Wavy Slicing Blade: Creates decorative wavy slices for potatoes, carrots, and sweet potatoes, perfect for garnishes or homemade chips.
- 2mm Julienne Blade: Produces fine, thin strips suitable for salads, stir-fries, or garnishes from cucumbers, carrots, and zucchini.
- 4mm Shredding Blade: For medium shredding of ingredients like onions, potatoes, or garlic.
- 6mm Shredding Blade: Suitable for coarser shredding of cheese, nuts, or chocolate.
- Ice Crushing Blade: Specifically designed for crushing ice, ideal for homemade smoothies and shaved ice desserts.

Image 4.1: Slicing blade in action, producing uniform slices of vegetables.

Image 4.2: Wavy slicing blade for decorative cuts.

Image 4.3: 2mm Julienne blade for fine strips.

Image 4.4: 4mm Shredding blade for medium shredding.

Image 4.5: 6mm Shredding blade for coarse shredding of cheese, nuts, and chocolate.

Image 4.6: Ice crushing blade for preparing shaved ice.
5. Cleaning and Maintenance
Proper cleaning and maintenance ensure the longevity and hygiene of your grater.
- Disassembly: Turn the handle counter-clockwise to unlock and remove it. Remove the transparent barrel from the main unit. Carefully remove the blade from the barrel.
- Washing: All detachable parts (blades, transparent barrel, food pusher, handle) are easy to clean. Rinse them under running water immediately after use to prevent food from drying on the surfaces. Use a brush to remove any food residue from the blades.
- Drying: Ensure all parts are thoroughly dried before reassembly or storage to prevent rust on the stainless steel blades.
- Main Unit: Wipe the main unit with a damp cloth. Do not immerse the main unit in water.
- Dishwasher Safety: This product is not dishwasher safe. Hand washing is recommended for all components.
6. Storage
Store the grater and its components in a clean, dry place. The included blade storage case helps keep the blades organized and protected when not in use.
7. Troubleshooting
- Unit not suctioning properly: Ensure the countertop surface is clean, smooth, and dry. Press down firmly on the unit while turning the suction knob clockwise to create a strong seal. Avoid porous or uneven surfaces.
- Difficulty turning the handle: Ensure the blade is correctly seated and not obstructed by large food pieces. Do not overfill the transparent barrel. Apply steady, not excessive, pressure with the food pusher.
- Food getting stuck: Cut ingredients into smaller pieces to fit the feed opening. Ensure the food pusher is applying even pressure.
- Blades not cutting effectively: Ensure the correct blade is selected for the ingredient type. Blades are sharp; handle with care.
8. Specifications
| Attribute | Detail |
|---|---|
| Brand | SUSTEAS |
| Model Number | A911 |
| Color | Black |
| Material | ABS+PP, Stainless Steel |
| Product Dimensions | 4.89"L x 4.89"W x 10.44"H |
| Item Weight | 3.16 pounds |
| Dishwasher Safe | No |
9. Safety Information
- Always keep hands and fingers away from the blades during operation and cleaning. Use the food pusher provided.
- Blades are sharp. Handle with extreme care when installing, removing, and cleaning.
- Ensure the suction base is firmly secured to a stable surface before use to prevent tipping.
- Do not attempt to process frozen foods other than ice with the designated ice crushing blade.
- Keep out of reach of children.
- Do not use abrasive cleaners or scouring pads on any part of the grater.
- Inspect the product for any damage before each use. Do not use if any parts are broken or damaged.
10. Warranty and Support
For product support, warranty information, or to inquire about replacement parts, please contact SUSTEAS customer service through the retailer where the product was purchased. Please have your model number (A911) and purchase date available when contacting support.


