1. Introduction
This manual provides detailed instructions for the installation, operation, and maintenance of your AINAVITO 10-inch Single Knob-Keybutton QLED Touch Screen Car Stereo. This unit is designed to enhance your driving experience with features like Wireless CarPlay, Android Auto, AM/FM radio, and seamless integration with your vehicle's steering wheel controls. Please read this manual thoroughly before installation and use to ensure proper function and safety.
2. What's in the Box
Your AINAVITO car stereo package includes the following components:
- 1x Car Stereo radio with Frame
- 1x RCA Cable
- 1x Power Cable
- 1x Car Microphone
- 1x GPS Antenna
- 1x Frame Removal Tool
- 1x Rear View 1080P Camera
- 2x USB Cables
- 1x Reversing Control Extension Cable
- 1x Detailed Installation Picture
- 1x Product User Manual
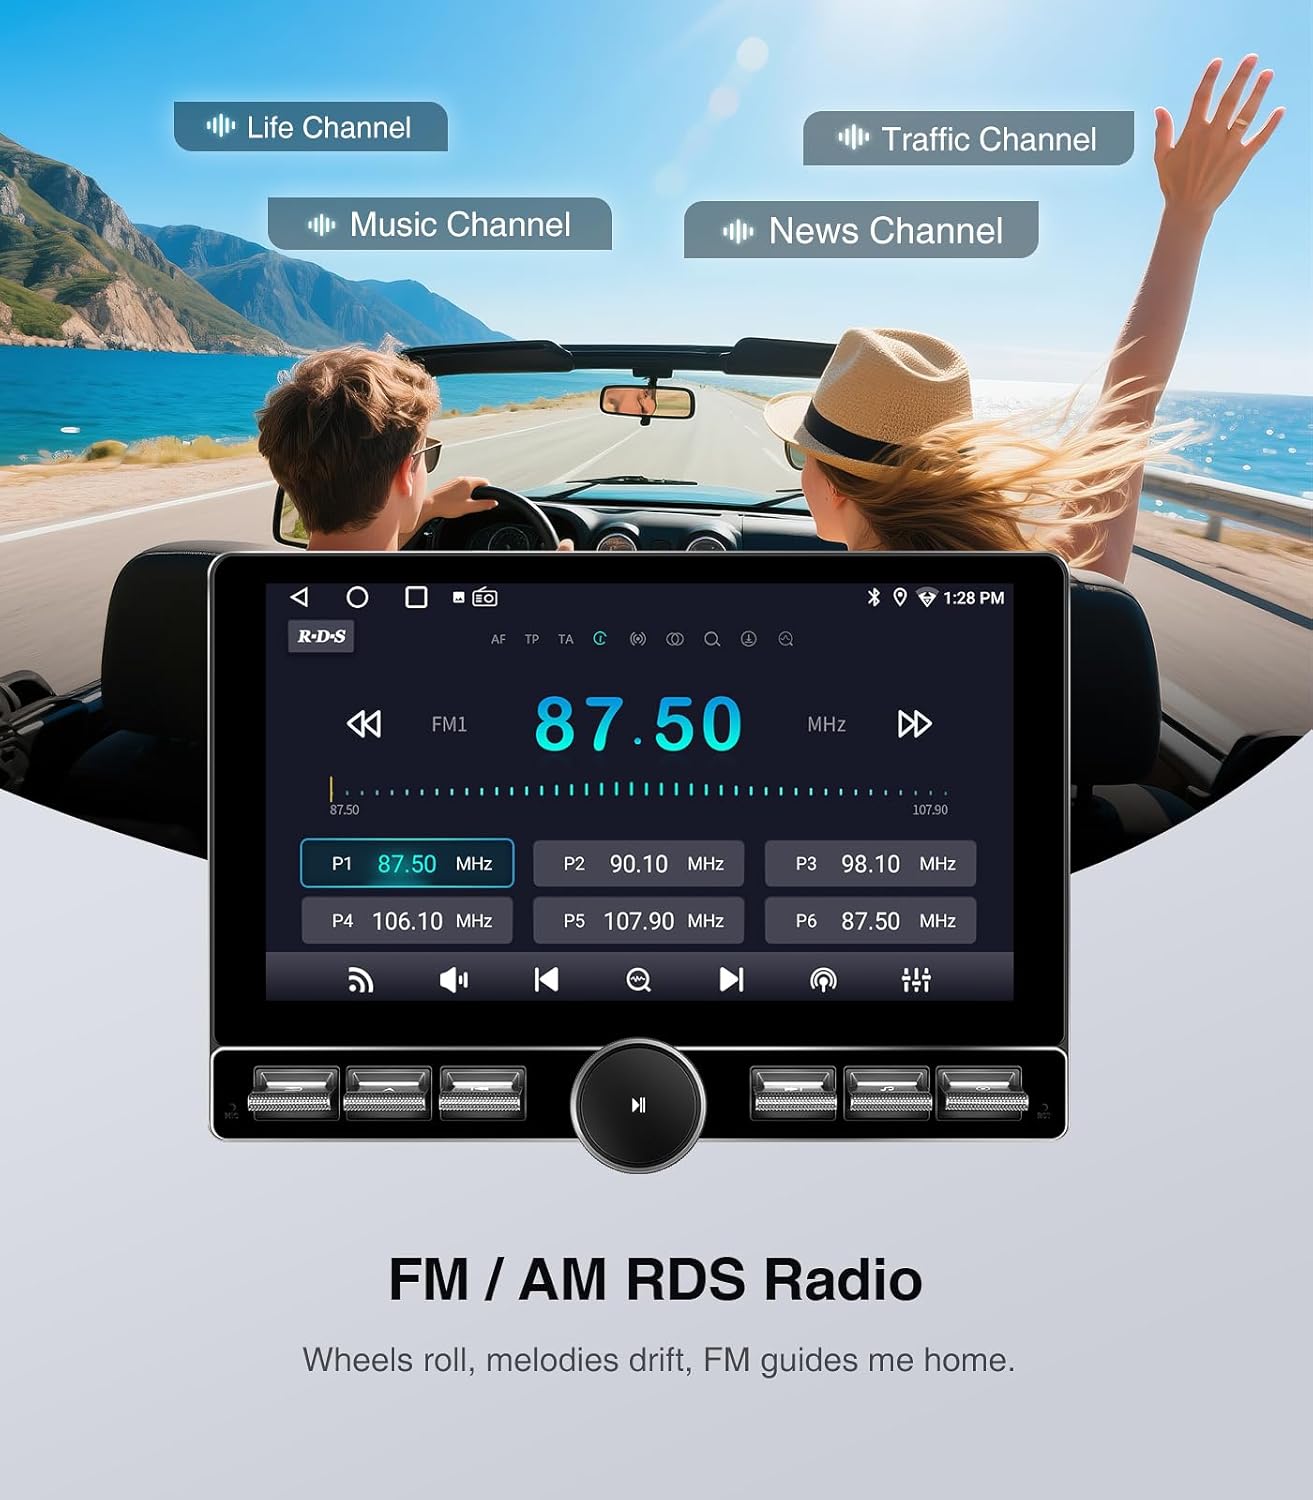
Image: All components included in the AINAVITO car stereo package, laid out neatly on a white surface. This includes the head unit, frame, various cables (RCA, power, USB, GPS), microphone, rearview camera, and tools.
Video: An unboxing video demonstrating the contents of the AINAVITO 10-inch Single Knob-Keybutton Jeep Radio package.
3. Specifications
| Display Size | 10 Inch |
| Resolution | 1280x720 QLED Touch Screen |
| Operating System | Android 13.0 |
| Memory (ROM) | 64GB |
| Connectivity | 5G Wi-Fi, Bluetooth 5.0, AUX, AM/FM, GPS & Navigation |
| CarPlay/Android Auto | Wireless/Wired CarPlay & Android Auto |
| Mirroring | iPhone Airplay, Wireless/Wired Mirroring |
| Backup Camera | 1080P AHD Backup Camera (included) |
| Steering Wheel Control | Supported |
| Dimensions | 13.15 x 10.2 x 5.59 inches (Package) |
| Item Weight | 4.69 pounds |
4. Setup and Installation
This section guides you through the process of installing your new car stereo. It is recommended to watch the provided installation videos for visual guidance.
4.1 Pre-Installation Steps
- Remove Decorative Panels: Carefully pry off the plastic decorative strip around the original radio and the panels on the left and right sides of the steering wheel using a removal tool.
- Disconnect Window Control Panel: Pry off the window control panel and disconnect its wiring harness. Push the clip to the left to release it.
- Unscrew Retaining Screws: Unscrew the hidden retaining screw behind the window control panel and the screw located in the top dashboard tray.
- Remove Original Radio: Unscrew the four screws holding the original car radio in place. Pull out the old radio and disconnect all wires from its back.
Video: Detailed installation guide for Jeep Wrangler JK, showing panel removal and wiring steps.
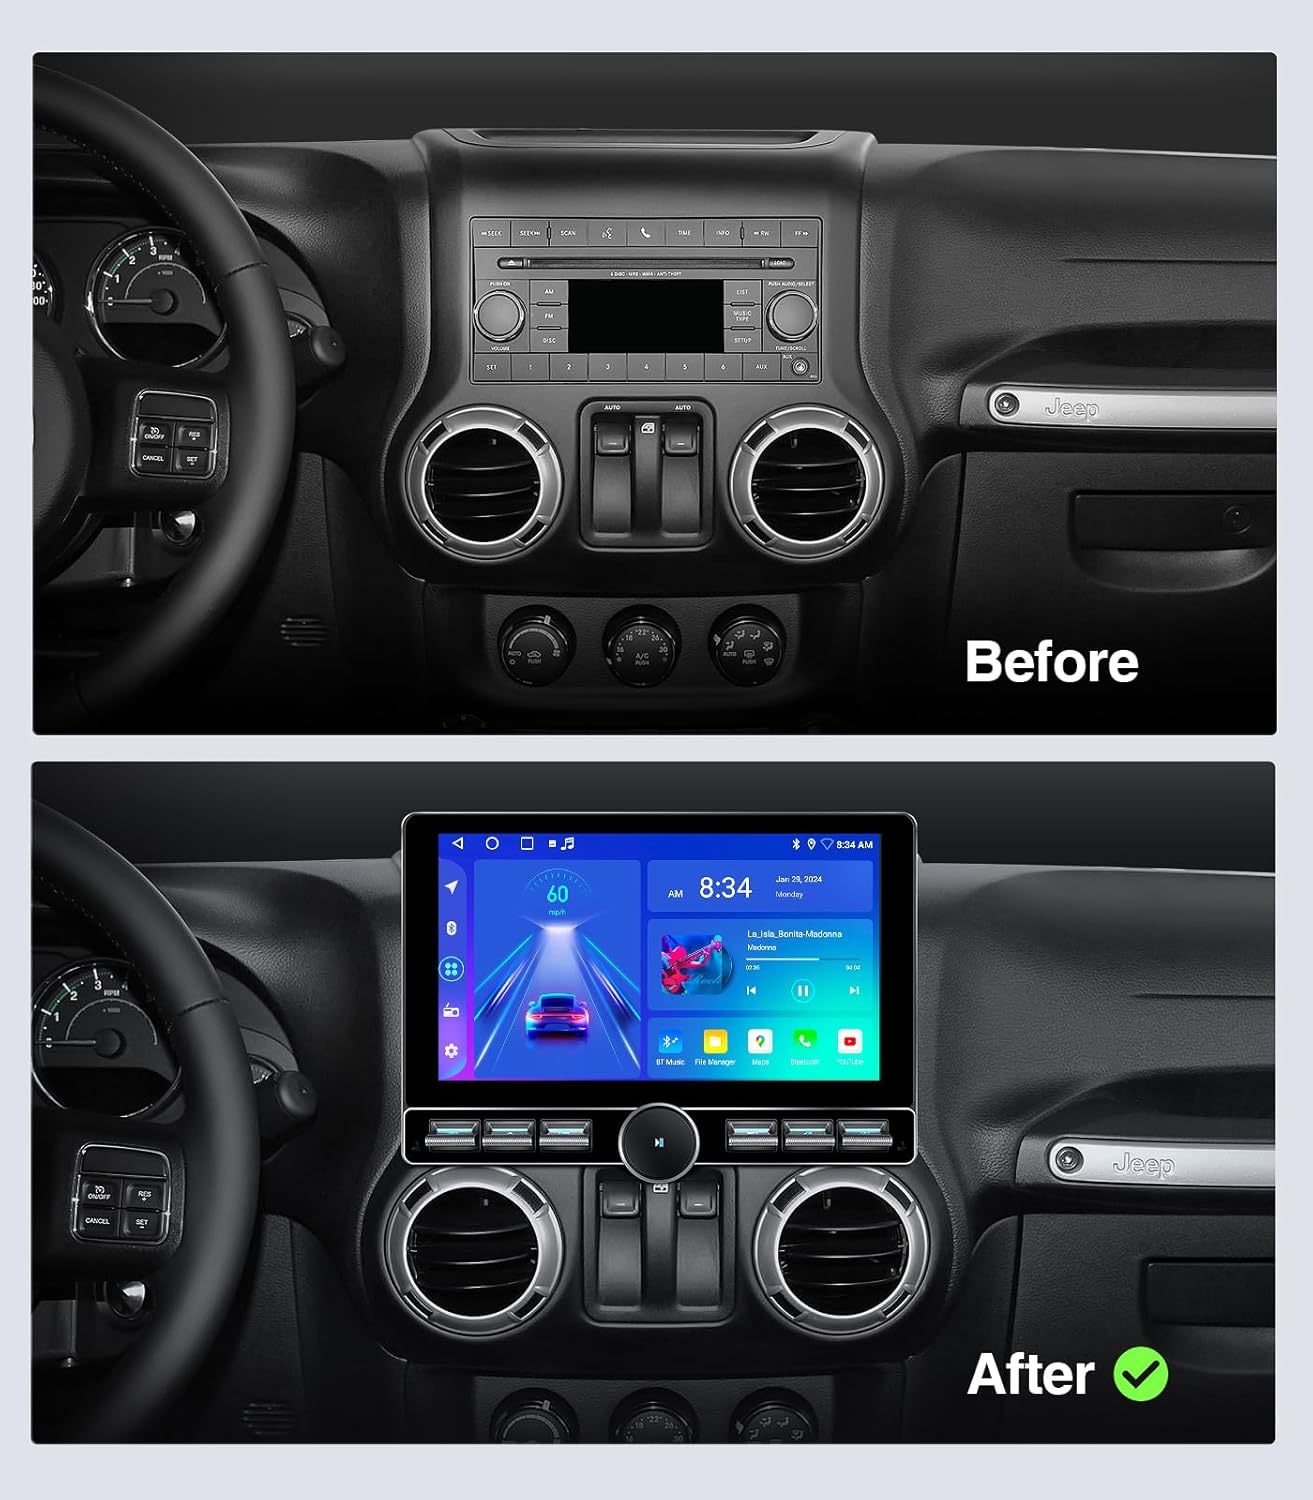
Image: A side-by-side comparison showing the original Jeep Wrangler dashboard with the factory radio (Before) and the same dashboard with the new AINAVITO 10-inch QLED Touch Screen Car Stereo installed (After).
4.2 Wiring Connections
- Power Cable: Connect the appropriate power cable (with or without amplifier) to your car's wiring harness.
- GPS Antenna: Connect the GPS antenna cable. It is advised to mount the GPS antenna to the A-pillar of the car.
- Microphone: Connect the external microphone. It is advised to mount the microphone above the rearview mirror.
- USB Cables: Connect the USB cables. Route them from inside the passenger glove compartment to the car's center console area.
- Rearview Camera: Connect the rearview camera video input cable and its extension cable. Route the extension cable along the edge of the car seat to the trunk. Connect the camera to the extension cable and install the camera in your desired location (e.g., near the license plate). Ensure the side with the logo faces downwards. Connect the reversing wire from the car to the reversing adapter cable, and insulate the connection.
- Radio Antenna: Connect the radio antenna adapter cable.
Video: Step-by-step guide on how to install the Jeep Wrangler Radio, including wiring and component placement.
4.3 Final Assembly
- Install Frame: Install the provided installation frame for the navigation screen. Ensure the round holes are facing upwards.
- Connect Head Unit: Feed all connected wires from inside the frame to the outside. Connect all cables to the back of the head unit.
- Secure Head Unit: Carefully place the head unit into the dashboard opening, ensuring all wires are neatly tucked away and not pinched. Snap the head unit into place.
- Reinstall Panels: Reinstall the decorative panels and the window control panel.
5. Operating Instructions
Your AINAVITO car stereo offers a range of functions to enhance your driving experience.
5.1 Wireless CarPlay & Android Auto
Connect your smartphone wirelessly or via USB to access navigation, messages, music, and calls directly on the car stereo display.
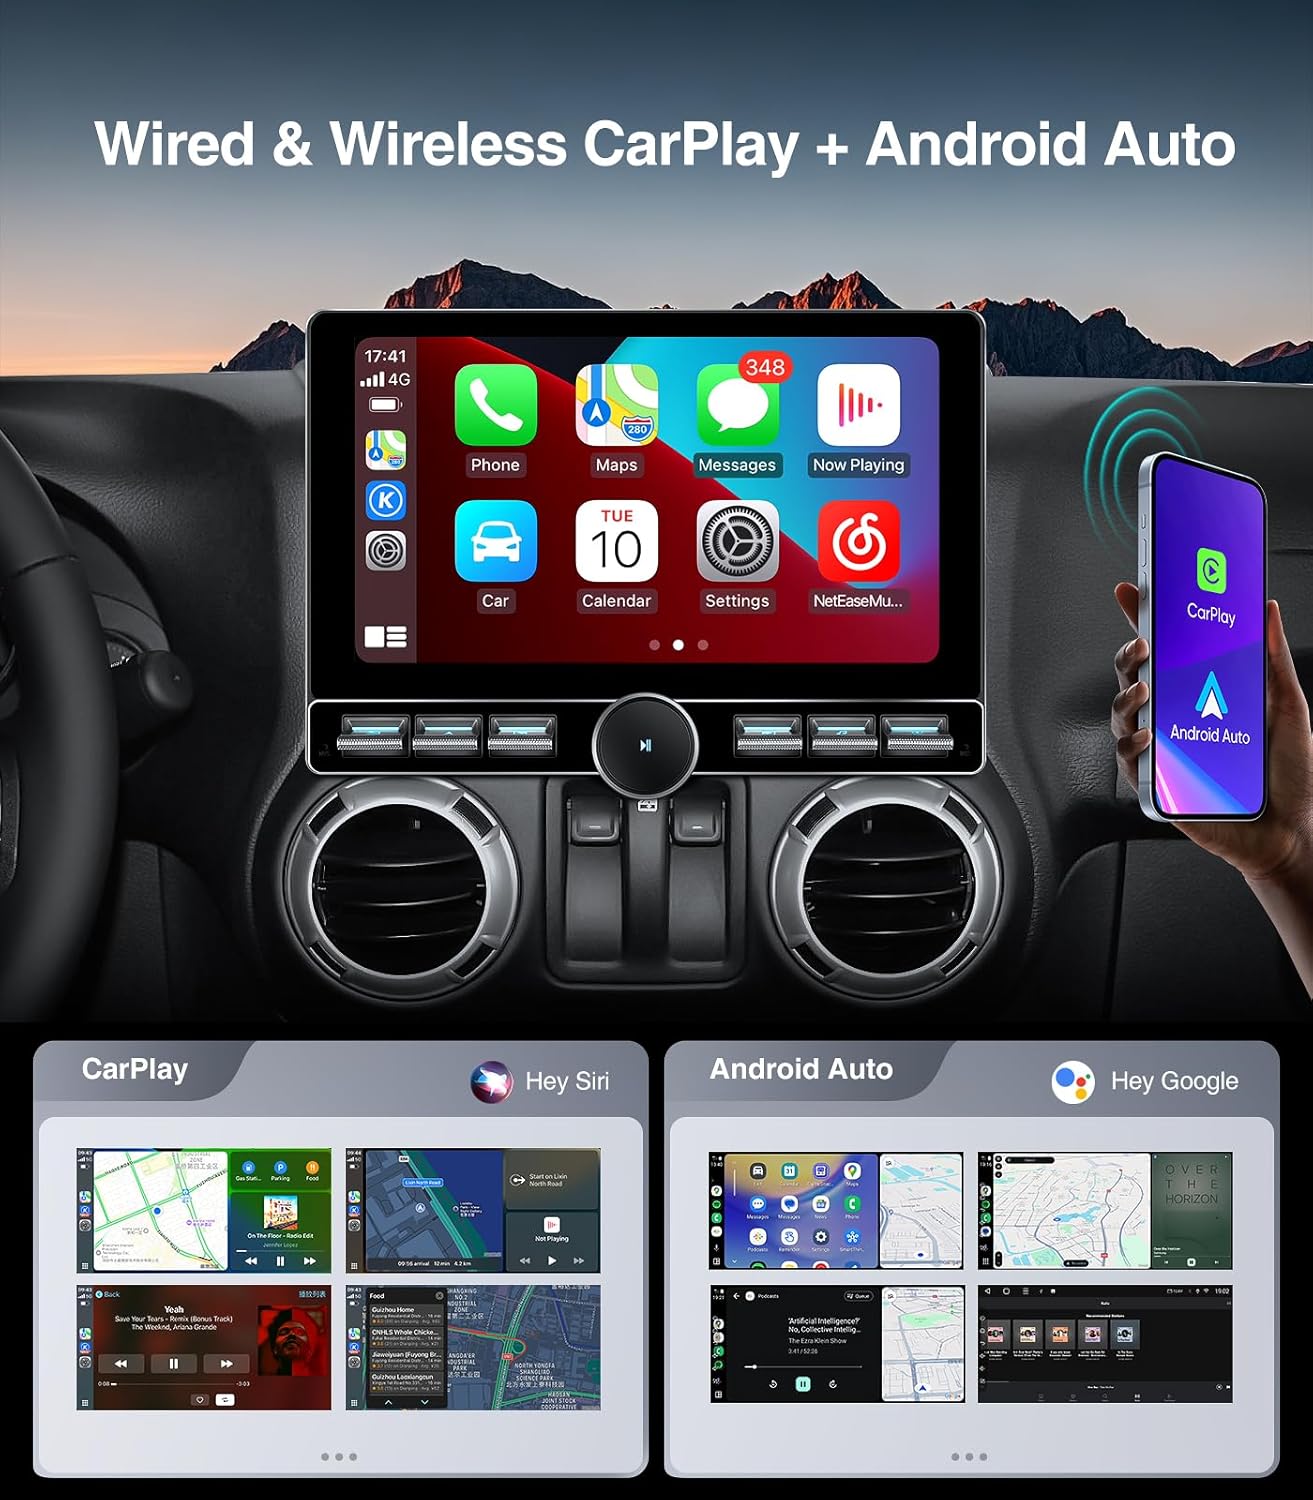
Image: The car stereo display showing the Wireless CarPlay and Android Auto interface, with various app icons for phone, music, maps, and messages.
Video: Demonstration of how to connect Android Auto via Bluetooth and Tlink.
Video: Demonstration of Wireless CarPlay connection.
5.2 Bluetooth 5.0
Enjoy hands-free calling, phonebook synchronization, and wireless music streaming through Bluetooth 5.0.
5.3 AM/FM Radio
Access your favorite radio stations with automatic and manual search functions. Supports AM/FM RDS radio.
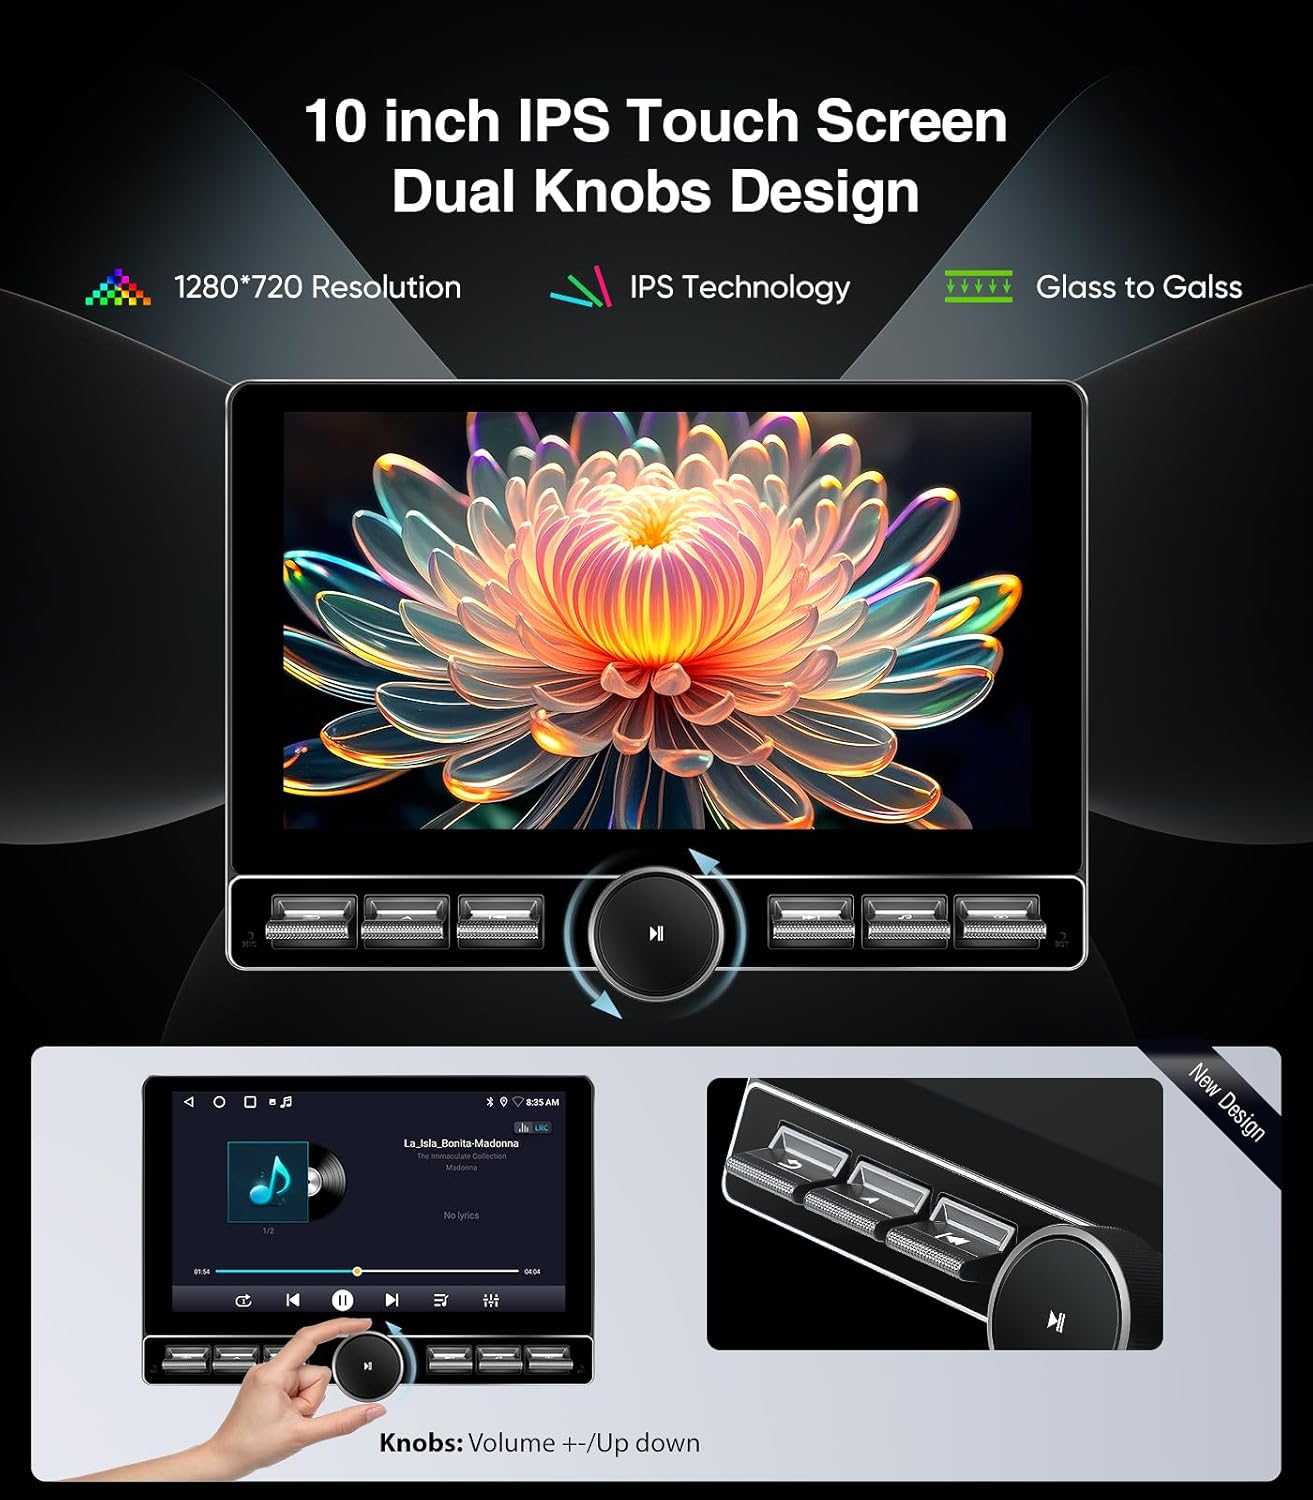
Image: The car stereo display showing the FM/AM RDS Radio interface with frequency display and station presets.
5.4 DSP Sound System
Customize your audio experience with the built-in Digital Sound Processor (DSP) for enhanced sound quality and various sound effects.
5.5 Customizable Knob and Keybutton
The single knob and keybutton design allows for easy control of navigation, music, Bluetooth, video, and other shortcuts.
Image: The car stereo display highlighting the customizable knob and keybutton design for easy control.
Video: Demonstration of how to customize the single keybutton shortcut function on the car stereo.
5.6 Parking Assistance
The included 1080P AHD backup camera provides a 170° wide-angle view for full visibility, assisting with parking maneuvers.
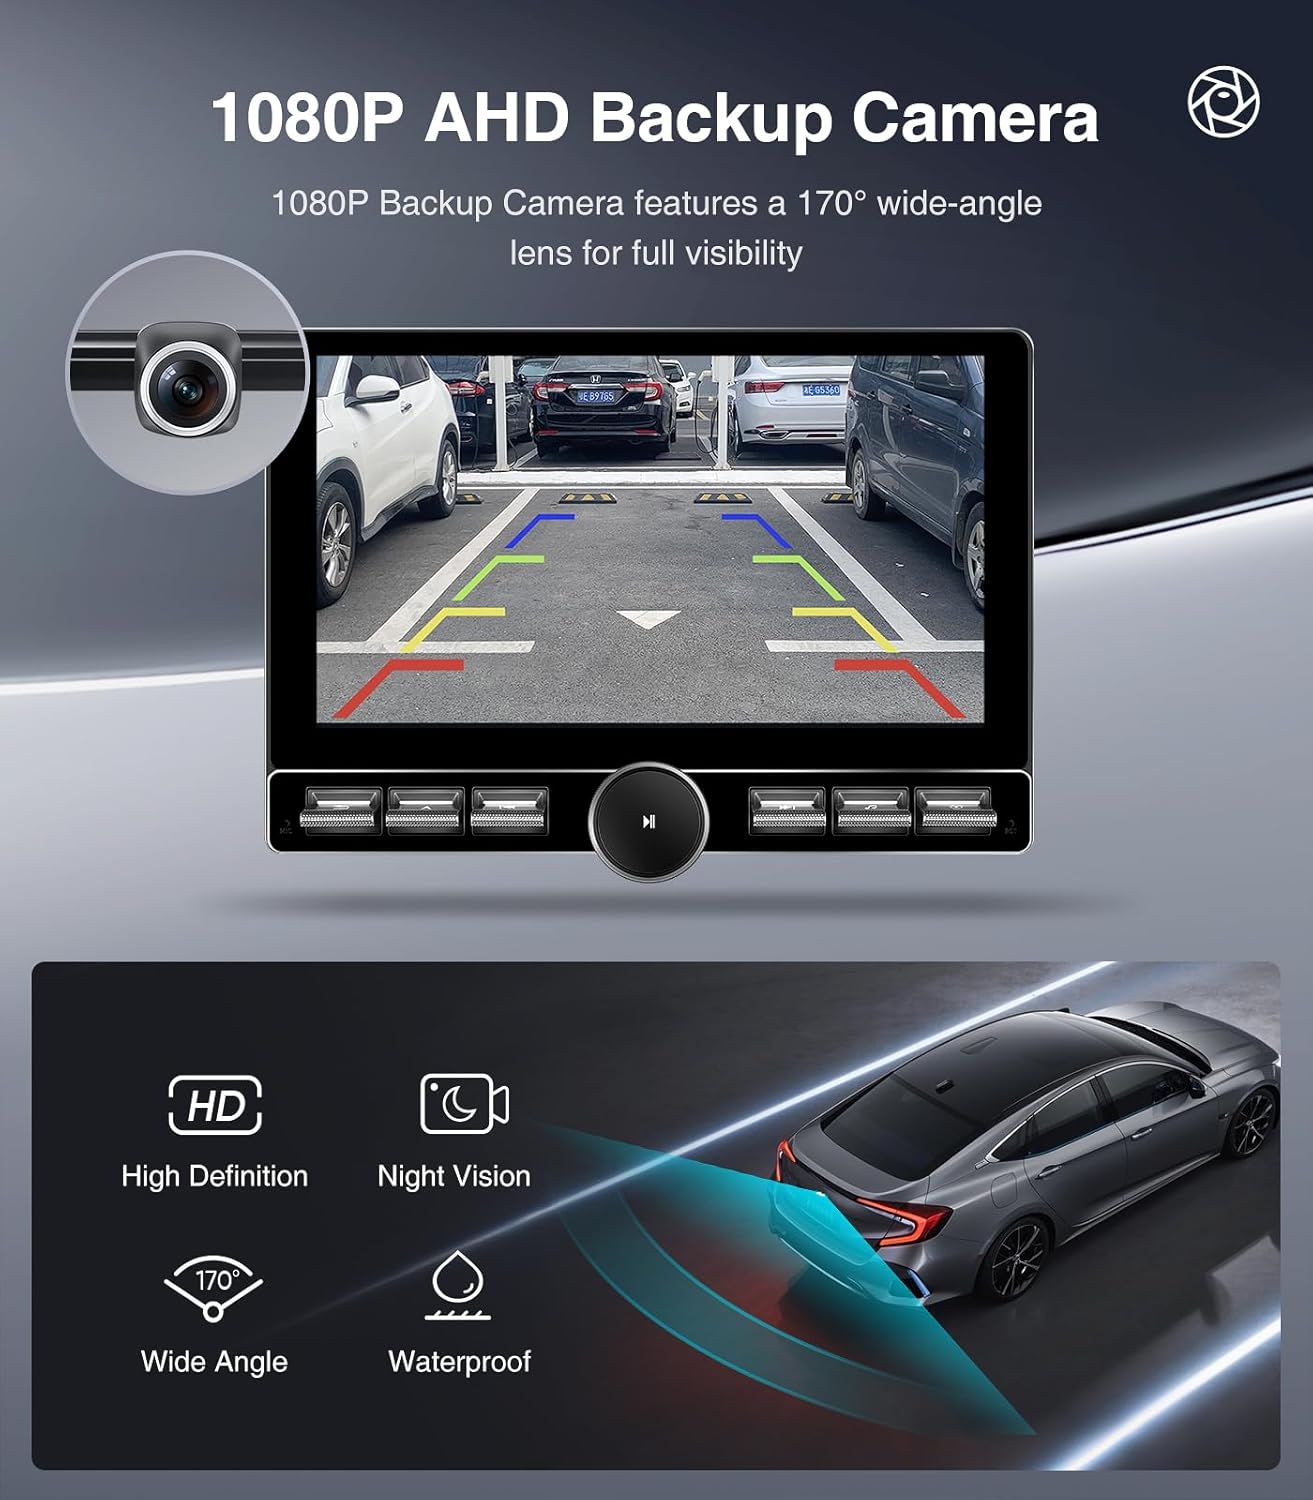
Image: The car stereo display showing the view from the 1080P AHD Backup Camera with parking guidelines.
6. Troubleshooting
If you encounter issues with your car stereo, please refer to the following common problems and solutions:
- CarPlay/Android Auto Connection Issues: If your smartphone is not connecting, ensure Bluetooth is enabled on both devices and the correct app (e.g., Tlink) is configured on the head unit. Check USB cable connections for wired connections.
- No Power/Unit Not Turning On: Verify all power cable connections are secure. Check the vehicle's fuse box for any blown fuses related to the stereo.
- Incorrect Time/Units: Access the system settings on the head unit to adjust time, date, and measurement units (e.g., kilometers to mph).
- Canbus System Not Responding: Ensure the Canbus decoder is correctly connected and configured according to the installation instructions. Incorrect wiring can lead to communication issues with vehicle systems.
7. Warranty and Support
AINAVITO provides professional engineer guidance and customer support for any product-related questions, settings, or installation issues.
- 24-Hour After-Sale Service: Our engineers are available 24 hours for after-sale service.
- Contact Support: You can leave a message by clicking on our Store, then "Sold By ----Speedroad" and finding the "ASK a Question" button. We will reply to you within 24 hours.

Image: A customer support representative wearing a headset, assisting with product inquiries.