
1. Introduction
This manual provides comprehensive instructions for the safe and efficient operation, maintenance, and care of your OSTBA Electric Deli Slicer. Designed for home use, this appliance features a powerful 200W DC motor, dual 7.5-inch stainless steel blades, and adjustable thickness settings for precise slicing of various foods. Please read this manual thoroughly before first use and retain it for future reference.
2. Important Safety Instructions
When using electrical appliances, basic safety precautions should always be followed to reduce the risk of fire, electric shock, and/or injury to persons, including the following:
- Read all instructions carefully before operating the slicer.
- Always ensure the appliance is unplugged from the power outlet before assembling, disassembling, cleaning, or when not in use.
- Keep hands and utensils away from the blade during operation. The blade is extremely sharp.
- Use the food pusher to guide food, never your hands directly.
- This appliance is equipped with child safety locks. Ensure they are engaged when the slicer is not in use or during cleaning.
- Place the slicer on a stable, flat, and dry surface. The non-slip feet are designed to keep the unit stable during operation.
- Do not immerse the motor base in water or other liquids.
- Do not operate the slicer with a damaged cord or plug, or after the appliance malfunctions or has been damaged in any manner.
- Close supervision is necessary when any appliance is used by or near children.
3. Product Components
Familiarize yourself with the parts of your OSTBA Meat Slicer:
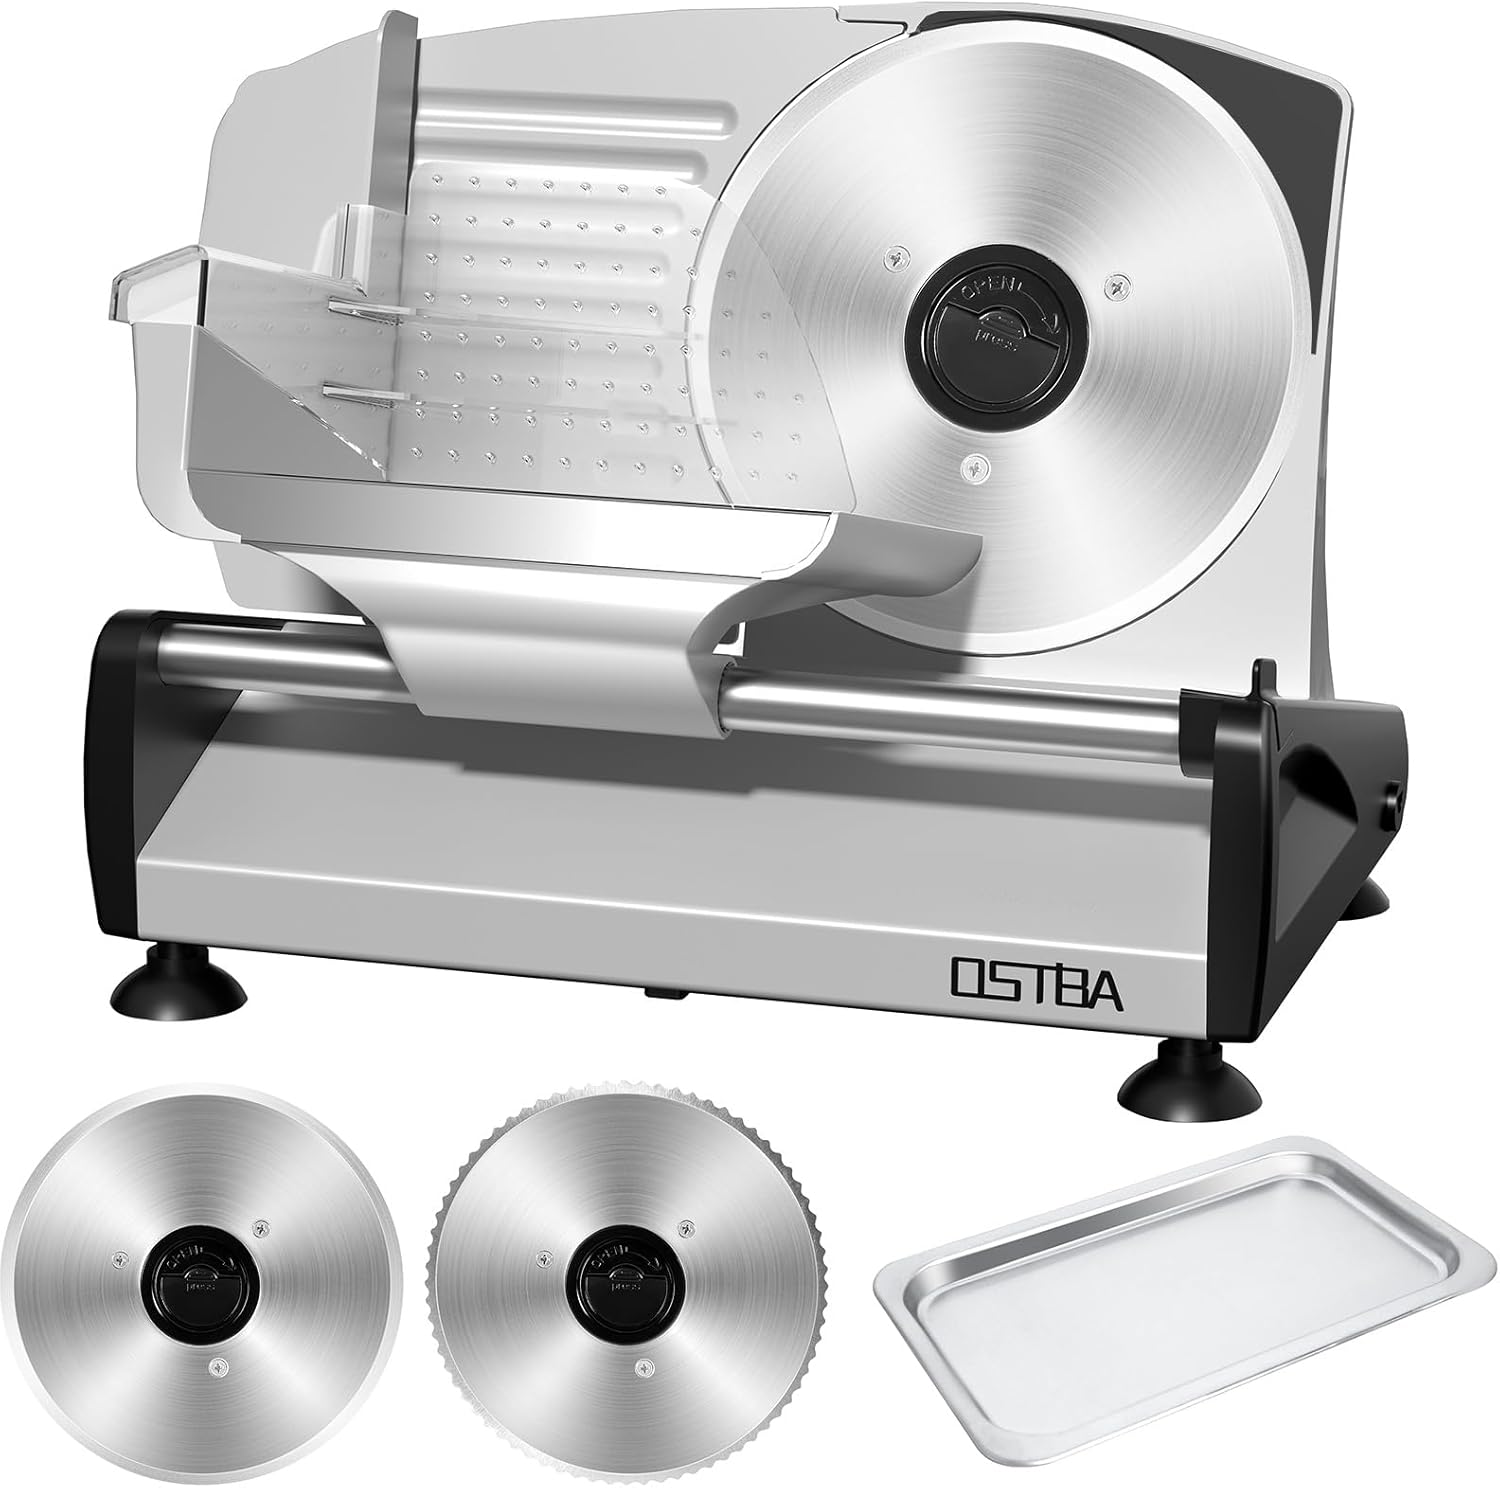 Main Unit with Accessories
The complete meat slicer unit, including the main body, food carriage, food pusher, and the two interchangeable blades (serrated and non-serrated), along with a stainless steel collection tray.
 Adjustable Thickness Dial
Allows for precise adjustment of slice thickness from 0mm to 15mm, enabling custom cuts for various foods.
 Removable Components
The blade, food tray, and food pusher are designed to be easily removable for thorough cleaning and maintenance.
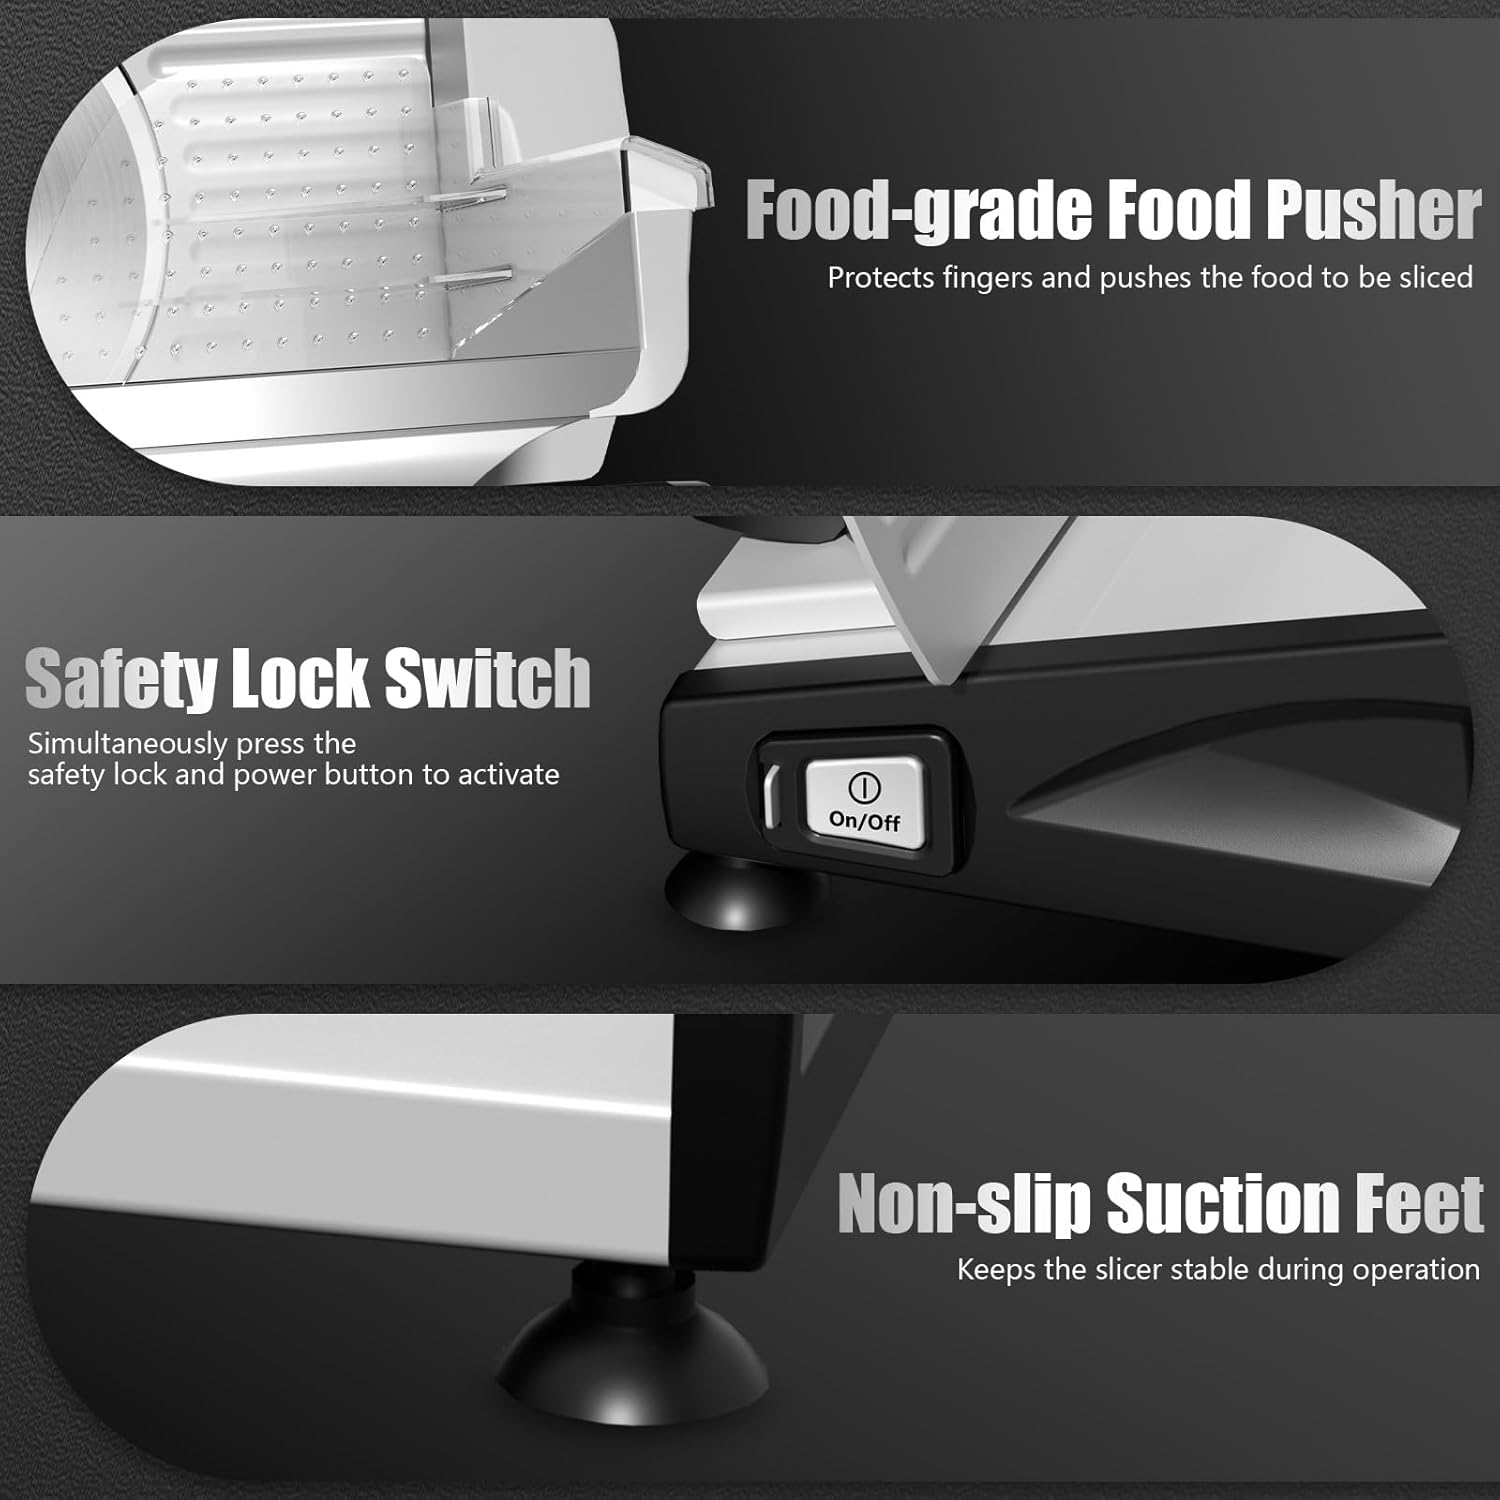 Safety Features
Includes a food-grade food pusher for hand protection, a safety lock switch requiring simultaneous press to activate, and non-slip suction feet for stability during operation.
 200W DC Motor
Provides stable torque and operates with low noise, ensuring efficient and smooth slicing performance.
4. Setup
- Unpacking: Carefully remove all packaging materials from the slicer. Ensure all components, including both blades and the stainless steel tray, are present. Remove any silicone blade protectors or small black top and bottom blade protectors.
- Placement: Place the slicer on a clean, dry, stable, and flat surface. Ensure the non-slip suction feet are securely gripping the countertop to prevent movement during operation.
- Blade Installation:
- Choose the desired blade (serrated for frozen/fresh meat, smooth for cheese, bread, vegetables, fruit).
- Align the blade with the motor shaft and gently push it into place.
- Rotate the blade lock mechanism (usually a central knob) to secure the blade firmly. Ensure it is locked to prevent uneven slicing.
- Food Carriage and Pusher Assembly: Slide the food carriage onto its rails until it clicks into place. Attach the food pusher to the food carriage.
- Initial Cleaning: Before first use, wipe down all parts that will come into contact with food using a damp cloth and mild detergent. Rinse and dry thoroughly.
5. Operation
- Prepare Food: Ensure food items are appropriately sized to fit on the food carriage. For optimal slicing of fresh meat, freeze it for 1-3 hours until partially frozen. For frozen meat, defrost for 20-30 minutes before slicing. Avoid cutting fully frozen meat with bones.

Image: Preparation tips for fresh and frozen meat.
- Adjust Thickness: Use the adjustable thickness dial to select your desired slice thickness (0-15mm). Turn the knob to increase or decrease the gap between the blade and the food carriage.

Image: Adjustable thickness settings for various foods.
- Place Food: Place the food item securely on the food carriage, ensuring it rests against the food guide plate. Use the food pusher to hold the food firmly in place.
- Power On: Plug the slicer into a grounded electrical outlet. Simultaneously press the safety lock and the On/Off button to activate the slicer.
- Slice: While the blade is rotating, gently push the food carriage forward and backward, guiding the food towards the rotating blade using the food pusher. Apply even pressure for consistent slices.
- Collect Slices: Sliced food will fall onto the stainless steel collection tray placed beneath the blade.
- Power Off: Once slicing is complete, press the On/Off button to turn off the slicer. Unplug the appliance from the power outlet.
6. Maintenance and Cleaning
Regular cleaning and maintenance will ensure the longevity and optimal performance of your slicer. Always unplug the slicer before cleaning.
- Disassembly: Remove the food pusher, food carriage, and the blade. These parts are designed for easy removal.

Image: Removable parts for easy cleaning.
- Cleaning Removable Parts: The removable parts, including the blades and food tray, are dishwasher safe. Alternatively, wash them with warm, soapy water and rinse thoroughly.
- Cleaning Main Unit: Wipe the motor base and other non-removable parts with a damp cloth. Do not immerse the motor base in water.
- Blade Care Tips:
- Clean after each use: Wipe the blade with a damp cloth and mild detergent.
- Avoid soaking: Do not immerse the blade in water to prevent rust.
- Dry thoroughly: Always dry the blade completely before reassembling.
- Use food-safe oil: Lightly oil the blade if storing for long periods.
- Handle with care: Use cut-resistant gloves when removing or cleaning the blade due to its sharpness.

Image: Detailed blade care instructions.
- Storage: Store the slicer in a clean, dry place, away from direct sunlight and out of reach of children.
7. Troubleshooting
If you encounter issues with your slicer, refer to the following common problems and solutions:
| Problem | Possible Cause | Solution |
|---|---|---|
| Slicer does not turn on. | Not plugged in; power outlet issue; safety lock not engaged; power button not pressed simultaneously with safety lock. | Ensure the power cord is securely plugged into a working outlet. Press the safety lock and On/Off button at the same time. Check household circuit breaker. |
| Uneven or poor quality slices. | Blade not securely locked; food not properly positioned; food too soft/hard; incorrect blade for food type. | Ensure the blade is securely locked in place. Firmly hold food with the food pusher. Partially freeze meat if too soft. Use the appropriate blade (serrated for meat, smooth for bread/cheese). |
| Slicer is noisy or vibrates excessively. | Loose components; unstable surface. | Check that all removable parts are correctly assembled and secured. Ensure the slicer is on a stable, flat surface and the suction feet are engaged. |
| Food gets stuck or jams. | Food piece too large; accumulation of food debris. | Cut food into smaller, manageable pieces. Turn off and unplug the slicer, then carefully remove any accumulated food debris. |
8. Specifications
- Brand: OSTBA
- Model Number: SL-5230D12C
- Product Dimensions: 14.6"L x 9.4"W x 10.2"H
- Material: Stainless Steel
- Color: Silver
- Special Feature: Adjustable Thickness (0-15mm)
- Recommended Uses: Meat, Cheese, Bread, Fruits, Vegetables, etc.
- Product Care Instructions: Dishwasher Safe (removable parts)
- Blade Material: Stainless Steel
- Blade Length: 7.5 Inches
- Blade Shape: Round
- Operation Mode: Semi Automatic
- Item Weight: 8.6 Pounds
- Manufacturer: OSTBA APPLIANCE INC

Image: Product dimensions.
9. Warranty and Support
For warranty information, product support, or to purchase replacement parts, please contact OSTBA customer service directly. You can find contact details on the official OSTBA website or through the seller from whom you purchased the product.
For additional information and products, visit the official OSTBA Store: OSTBA Store on Amazon


