1. Introduction
This manual provides detailed instructions for the installation, operation, and maintenance of your SriHome NVS010-IPC047 PTZ Surveillance Camera System. This system includes a 10.1-inch LCD touch screen NVR (Network Video Recorder) and four 5MP wireless PTZ cameras, designed for comprehensive indoor and outdoor security monitoring.
The system features high-resolution video recording, advanced motion detection with humanoid recognition, two-way audio communication, and various night vision modes, including full-color night vision. The NVR comes with a pre-installed 500GB hard drive for local storage and supports expansion up to 16TB.

Figure 1: SriHome NVS010-IPC047 Surveillance System components, including the 10.1-inch NVR and four PTZ cameras.
2. Package Contents
Verify that all items listed below are present in your package:
- 1x 10.1-inch LCD Touch Screen NVR Host
- 4x IPC047 5MP Wireless PTZ Cameras (System supports up to 8 cameras)
- 1x 12V2A Power Adapter for NVR
- 4x 12V Power Adapters for Cameras
- 5x Screw Packs for mounting
- 1x User Manual (this document)
- 1x Ethernet Cable
3. Setup Instructions
3.1 NVR Overview and Connections
Familiarize yourself with the NVR's ports and features before proceeding with installation.

Figure 2: NVR rear panel with Audio Output, HDMI, VGA, LAN, USB, and 12V Power ports. Dimensions are also shown.
- Audio Output Port: Connect external speakers if desired.
- HDMI Port: Connect to an external monitor for larger display.
- VGA Port: Connect to an external monitor (VGA compatible).
- LAN Port: Connect an Ethernet cable to your router for internet access and mobile app functionality. This connection is essential for remote viewing via the app.
- USB Mouse Port: Connect a USB mouse for easier navigation of the NVR interface.
- 12V Power Port: Connect the NVR power adapter.
- 2.5" HDD Bay: Located on the top, this bay houses the pre-installed 500GB HDD and supports expansion up to 16TB.
3.2 Initial Power-Up and Camera Pairing
- Power the NVR: Connect the 12V2A power adapter to the NVR's power port and plug it into an electrical outlet. The NVR will power on and the 10.1-inch LCD screen will display the boot sequence.
- Power the Cameras: Connect each of the four 5MP cameras to their respective 12V power adapters and plug them into electrical outlets. Ensure the cameras are within the wireless range of the NVR (up to 60 meters in open environments, 10-25 meters with partitions).
- Automatic Pairing: The cameras are pre-paired with the NVR. Once both the NVR and cameras are powered on, the cameras should automatically connect to the NVR and display live video feeds on the LCD screen.
- Network Connection (for App Access): Connect the NVR to your router using the provided Ethernet cable. This is crucial for enabling remote viewing and control via the mobile application.
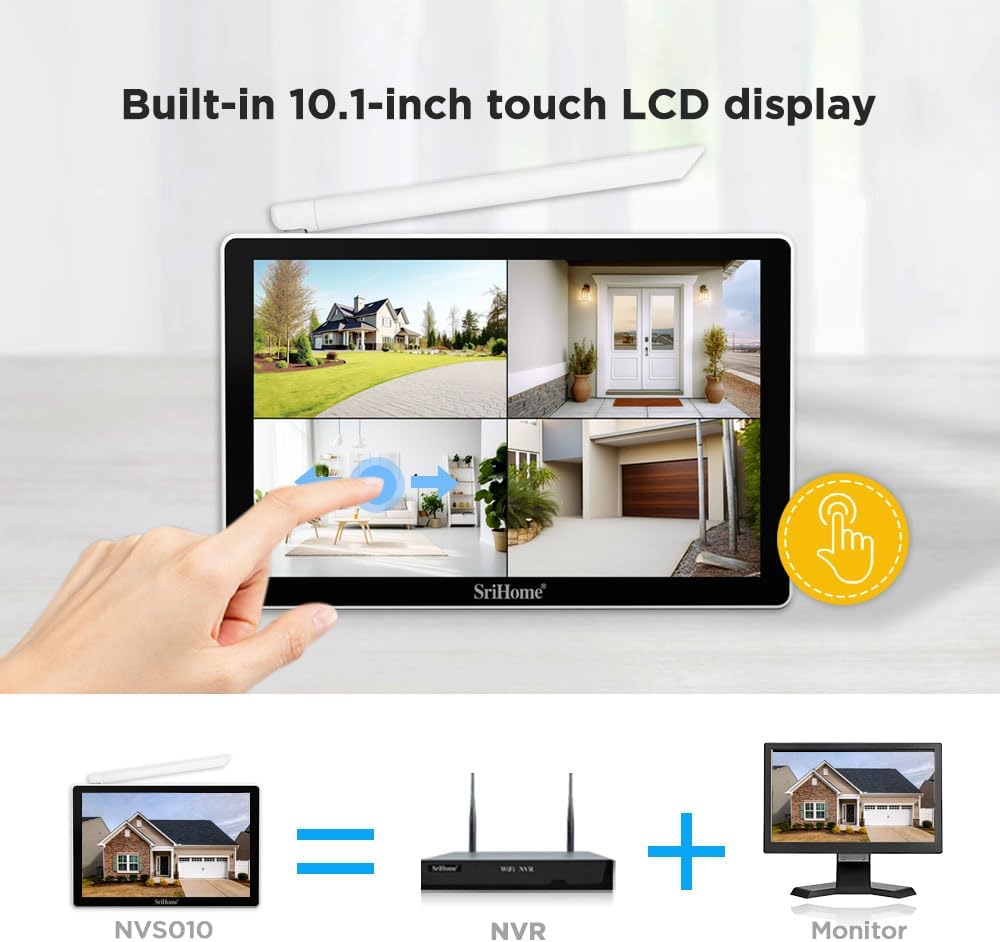
Figure 3: The NVR features a built-in 10.1-inch touch LCD display for direct viewing and control.
3.3 Camera Placement and Wireless Range
Consider the following when positioning your cameras:
- Power Source: Each camera requires a continuous power supply. Plan your installation to ensure access to electrical outlets.
- Wireless Signal: The system utilizes a wireless bridge mode to extend signal range. Cameras with a strong signal can relay the signal to cameras with weaker signals, extending the maximum range up to 60 meters in open areas. In environments with walls or obstructions, the effective range is typically 10-25 meters.
- Optimal Coverage: Position cameras to cover critical areas, taking advantage of their PTZ capabilities for wider surveillance.
- Weather Protection: While cameras are IP66 waterproof, consider sheltered locations to prolong their lifespan and ensure optimal performance in extreme weather.

Figure 4: Illustration of the relay bridge transmission feature, showing how cameras can extend the wireless signal range up to 60 meters.
4. Operation
4.1 Live View and Playback
The NVR's 10.1-inch LCD touch screen allows for direct viewing of live feeds from all connected cameras. You can switch between single-camera view and multi-camera grid view. Recorded footage can be accessed and played back directly from the NVR interface.
4.2 Camera Control (PTZ)
The PTZ cameras offer flexible viewing angles:
- Pan: Rotate horizontally up to 340°.
- Tilt: Adjust vertically up to 90°.
- Digital Zoom: 5X digital zoom is available. Note that this is digital zoom, not optical zoom.
Control the camera's pan and tilt functions using the NVR's touch screen interface or through the mobile application.

Figure 5: Demonstrates the 5MP (2560*1920) resolution compared to 2MP (1920*1080) and illustrates the 345° pan and 90° tilt rotation capabilities of the cameras.
4.3 Night Vision Modes
The cameras offer three night vision modes:
- Infrared Night Vision (Default): Provides clear black and white video in low-light conditions using infrared LEDs.
- Full-Color Night Vision: When motion is detected, the camera's white lights activate, enabling full-color video recording. This mode can also be manually activated or scheduled via the app (default schedule: 17:00 to 08:00). The brightness of the white light is adjustable.
- Alarm Mode: Similar to full-color night vision, but the white light activates specifically upon alarm detection.

Figure 6: Illustrates the visual difference between day vision, infrared night vision (black and white), and full-color night vision when white lights are activated.
4.4 Motion Detection and Alerts
The system features advanced motion detection with humanoid recognition to minimize false alarms. When humanoid motion is detected, the system will:
- Automatically track the movement of the detected person.
- Send instant alert notifications to your mobile phone via the app.
- Activate full-color night vision if configured.
You can customize the motion detection sensitivity and define specific detection zones and periods through the NVR interface or mobile application.

Figure 7: Shows the camera's motion-tracking capability and how humanoid detection triggers an alarm push notification on a smartphone.
4.5 Two-Way Audio
Each camera is equipped with a built-in microphone and speaker, enabling two-way audio communication. This allows you to:
- Speak to individuals near the camera from your mobile phone.
- Listen to audio from the camera's location.

Figure 8: Depicts the two-way audio function, showing a person receiving a package and communicating with someone remotely via the camera.
4.6 Mobile Application
Download the official SriHome mobile application from your device's app store. The app allows for:
- Remote live viewing of all cameras.
- Remote PTZ control.
- Two-way audio communication.
- Access to recorded footage and playback.
- Configuration of motion detection settings and alerts.
Ensure your NVR is connected to the internet via an Ethernet cable for the mobile app to function correctly.
5. Maintenance
- Regular Cleaning: Periodically clean the camera lenses and the NVR screen with a soft, dry cloth to ensure clear image quality and touch responsiveness. Avoid abrasive cleaners.
- Firmware Updates: Check the SriHome official website or mobile app for any available firmware updates for your NVR and cameras. Keeping your system updated ensures optimal performance and security.
- Connection Checks: Regularly inspect all power and Ethernet cable connections to ensure they are secure and free from damage.
- Storage Management: The 500GB HDD provides approximately 30 days of continuous recording for four cameras using H.265+ compression. If you require longer storage, consider upgrading the HDD to a maximum of 16TB. The system automatically overwrites the oldest footage when the disk is full.
- Environmental Protection: While cameras are IP66 waterproof and dustproof, extreme temperatures (-10°C to 50°C) can affect performance. Ensure proper ventilation for the NVR.

Figure 9: Highlights the IP66 waterproof and dustproof rating of the cameras, indicating their suitability for outdoor use in diverse weather conditions.
6. Troubleshooting
6.1 No Video Display on NVR Screen
- Check Power: Ensure both the NVR and all cameras are properly powered on and their power adapters are securely connected.
- Camera Connection: Verify that cameras are within the effective wireless range of the NVR. Obstructions like thick walls can reduce signal strength.
- Reboot: Try restarting both the NVR and the cameras.
6.2 Mobile App Not Connecting or Showing Cameras
- Ethernet Connection: The NVR requires a wired Ethernet connection to your router for mobile app functionality. Ensure the Ethernet cable is securely connected to both the NVR's LAN port and your router.
- Internet Access: Confirm that your router has an active internet connection.
- App Permissions: Check that the SriHome app has all necessary network permissions on your smartphone.
6.3 NVR Touch Screen Unresponsive
- Clean Screen: Ensure the screen is clean and free of dust or debris that might interfere with touch input.
- Reboot NVR: A simple restart can often resolve temporary software glitches affecting touch responsiveness.
- Use USB Mouse: If the touch screen remains unresponsive, connect a USB mouse to the NVR for navigation and control.
6.4 Issues with HDMI Output
- Connect External Device First: If you intend to use an external monitor via HDMI, ensure the external monitor is connected and powered on before enabling the "Video to HDMI" option in the NVR settings.
- Input Device: If the NVR's screen turns off after enabling HDMI output without an external monitor, you may need to connect a USB mouse to regain control, as the NVR's touch screen might act as a touchpad for the (non-existent) external display, making navigation difficult.
7. Specifications
| Feature | Detail |
|---|---|
| Model Number | NVS010-IPC047 |
| Brand | SriHome |
| NVR Display | 10.1-inch LCD Touch Screen |
| Camera Resolution | 5MP (2560 x 1920P) |
| Video Recording Resolution | 1920p |
| Number of Channels | 8 (4 cameras included) |
| Connectivity Technology | Wireless (Cameras to NVR), Wired (NVR to Router) |
| Wireless Range | Up to 60 meters (open environment), 10-25 meters (with partitions) |
| PTZ Capabilities | Pan 340°, Tilt 90°, 5X Digital Zoom |
| Night Vision | Infrared (B&W), Full-Color (with white light activation) |
| Special Features | Automatic Motion Detection, Humanoid Detection, Two-Way Audio, Remote Access via Mobile App |
| Storage Capacity | 500GB HDD included, expandable up to 16TB |
| Video Compression | H.265+ |
| Power Source | Cable Electric (12V adapters) |
| Weather Resistance | IP66 Waterproof and Dustproof |
| Operating Temperature | -10°C to 50°C (14°F to 122°F) |
| Dimensions (NVR) | 32 x 22 x 22.5 cm |
| Weight | 3.3 kilograms |
8. Warranty & Support
For warranty information, please refer to the documentation provided with your purchase or contact SriHome customer support directly. Information regarding spare parts availability is not provided in the product specifications.
For technical assistance, troubleshooting beyond this manual, or general inquiries, please visit the official SriHome website or contact their customer service department. Contact details are typically found on the product packaging or the manufacturer's website.


