
1. Introduction
Thank you for choosing the Fydeamer Gas Spring Monitor Arm. This monitor arm is designed to provide an ergonomic and adjustable solution for your display, supporting screens from 17 to 35 inches and weighing up to 11 kg. It features full-range adjustability including tilt, swivel, and rotation, along with a robust gas spring mechanism for smooth height adjustments. This manual provides detailed instructions for safe installation, operation, and maintenance.
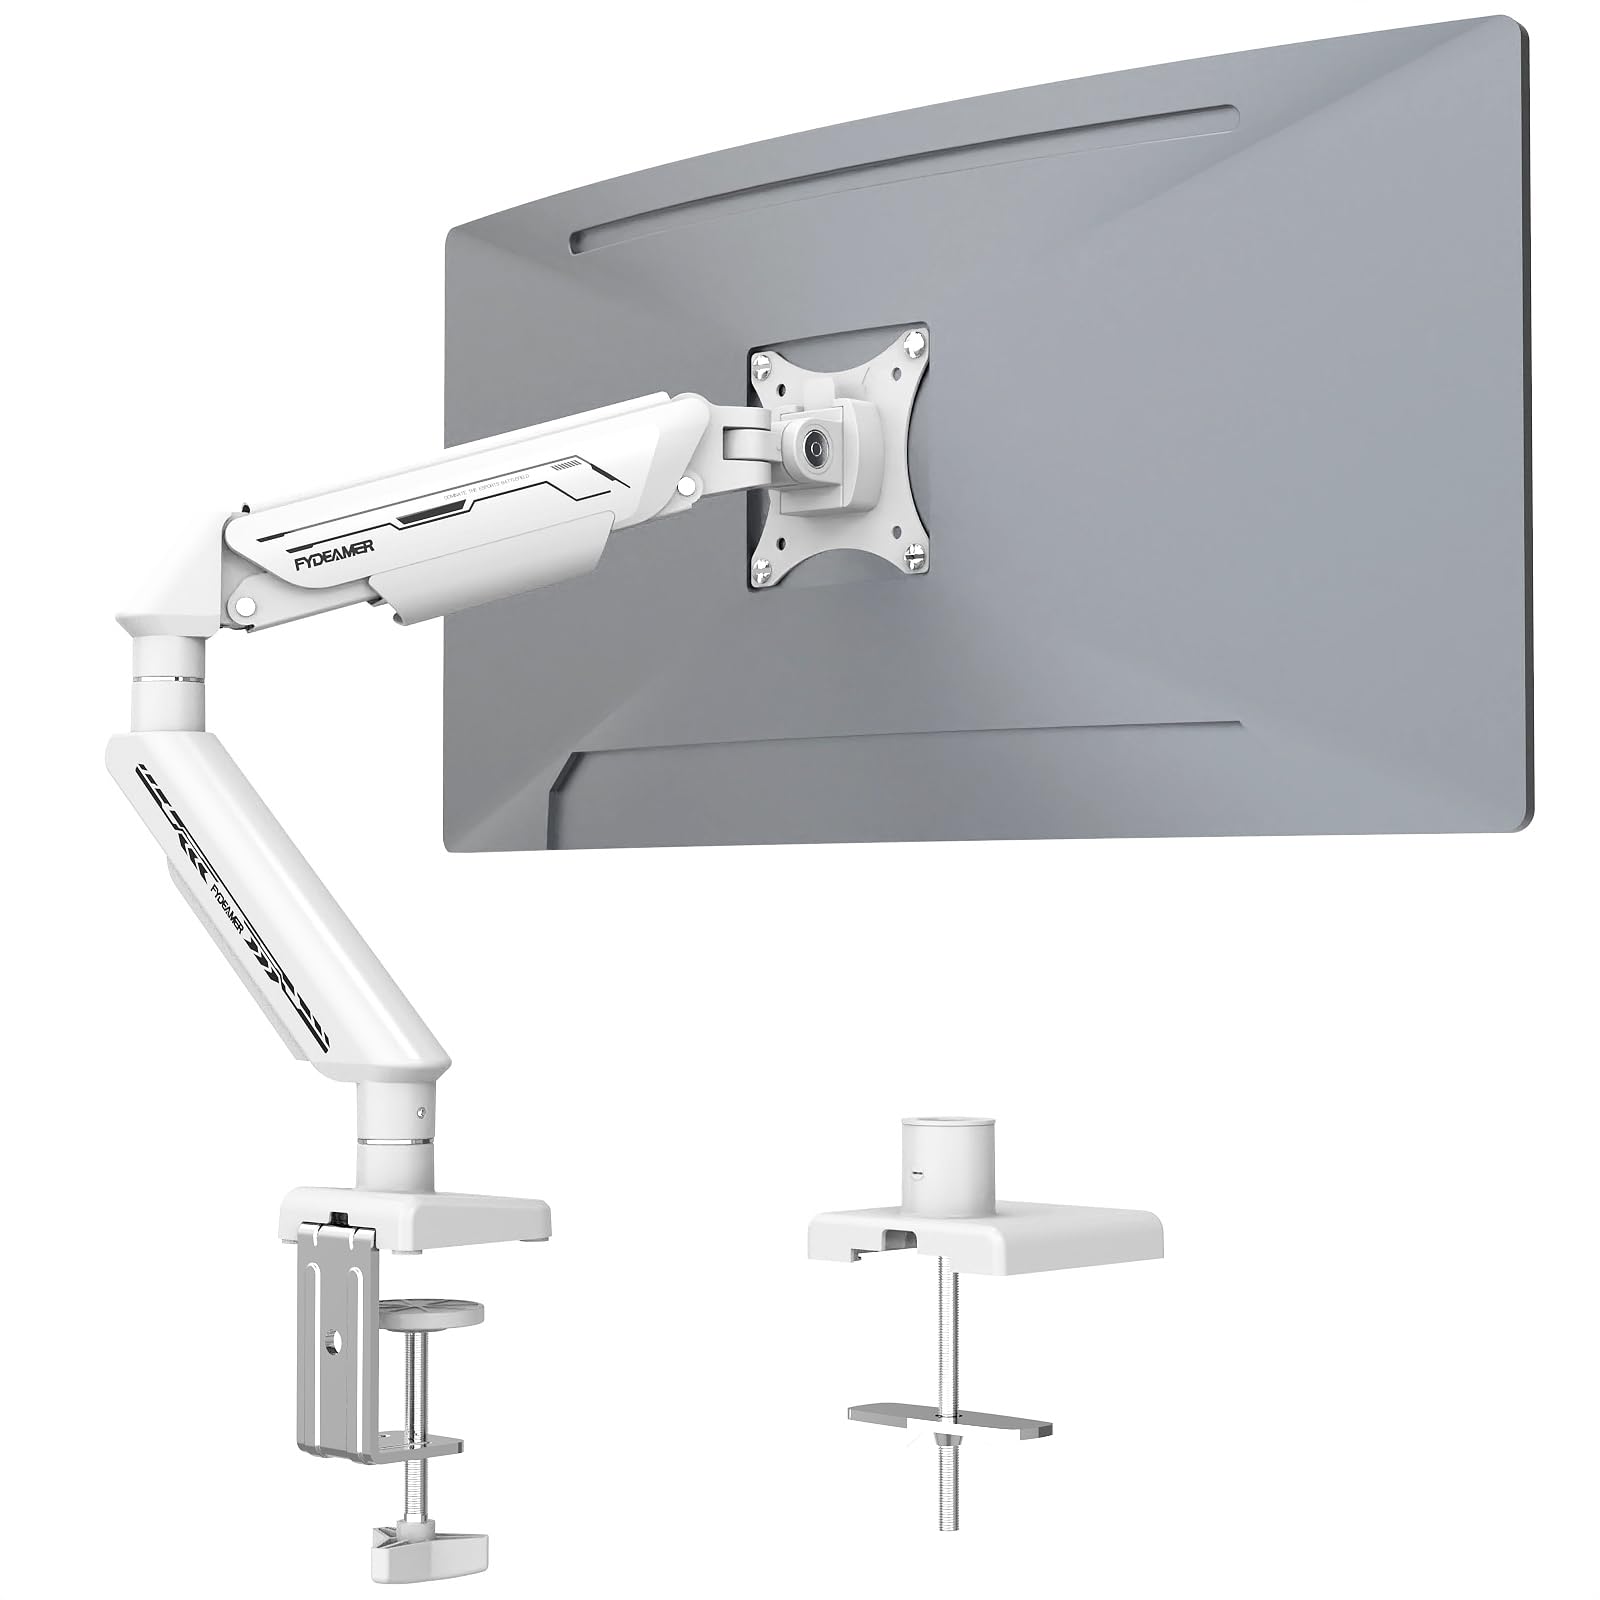
Image 1.1: The Fydeamer Gas Spring Monitor Arm installed in a typical workspace, showcasing its design and functionality.

Image 1.2: The monitor arm demonstrating compatibility with screens up to 35 inches and a load capacity of 4.4-24.3 lbs (2-11 kg).
2. Safety Information
- Read all instructions carefully before installation. Incorrect assembly or use may result in damage or injury.
- Ensure your desk surface is strong enough to support the combined weight of the monitor arm and your monitor.
- Do not exceed the maximum load capacity of 11 kg (24.3 lbs).
- Ensure the VESA mounting pattern of your monitor is 75x75mm or 100x100mm.
- Keep children and pets away during installation.
- Use only the provided hardware. Do not use power tools for assembly unless specified.
- Adjust the gas spring tension only after the monitor is mounted to prevent the arm from springing up unexpectedly.
3. Setup
3.1. Choose Your Mounting Option
The Fydeamer Monitor Arm offers two installation methods: C-Clamp or Grommet Base. Select the method best suited for your desk.
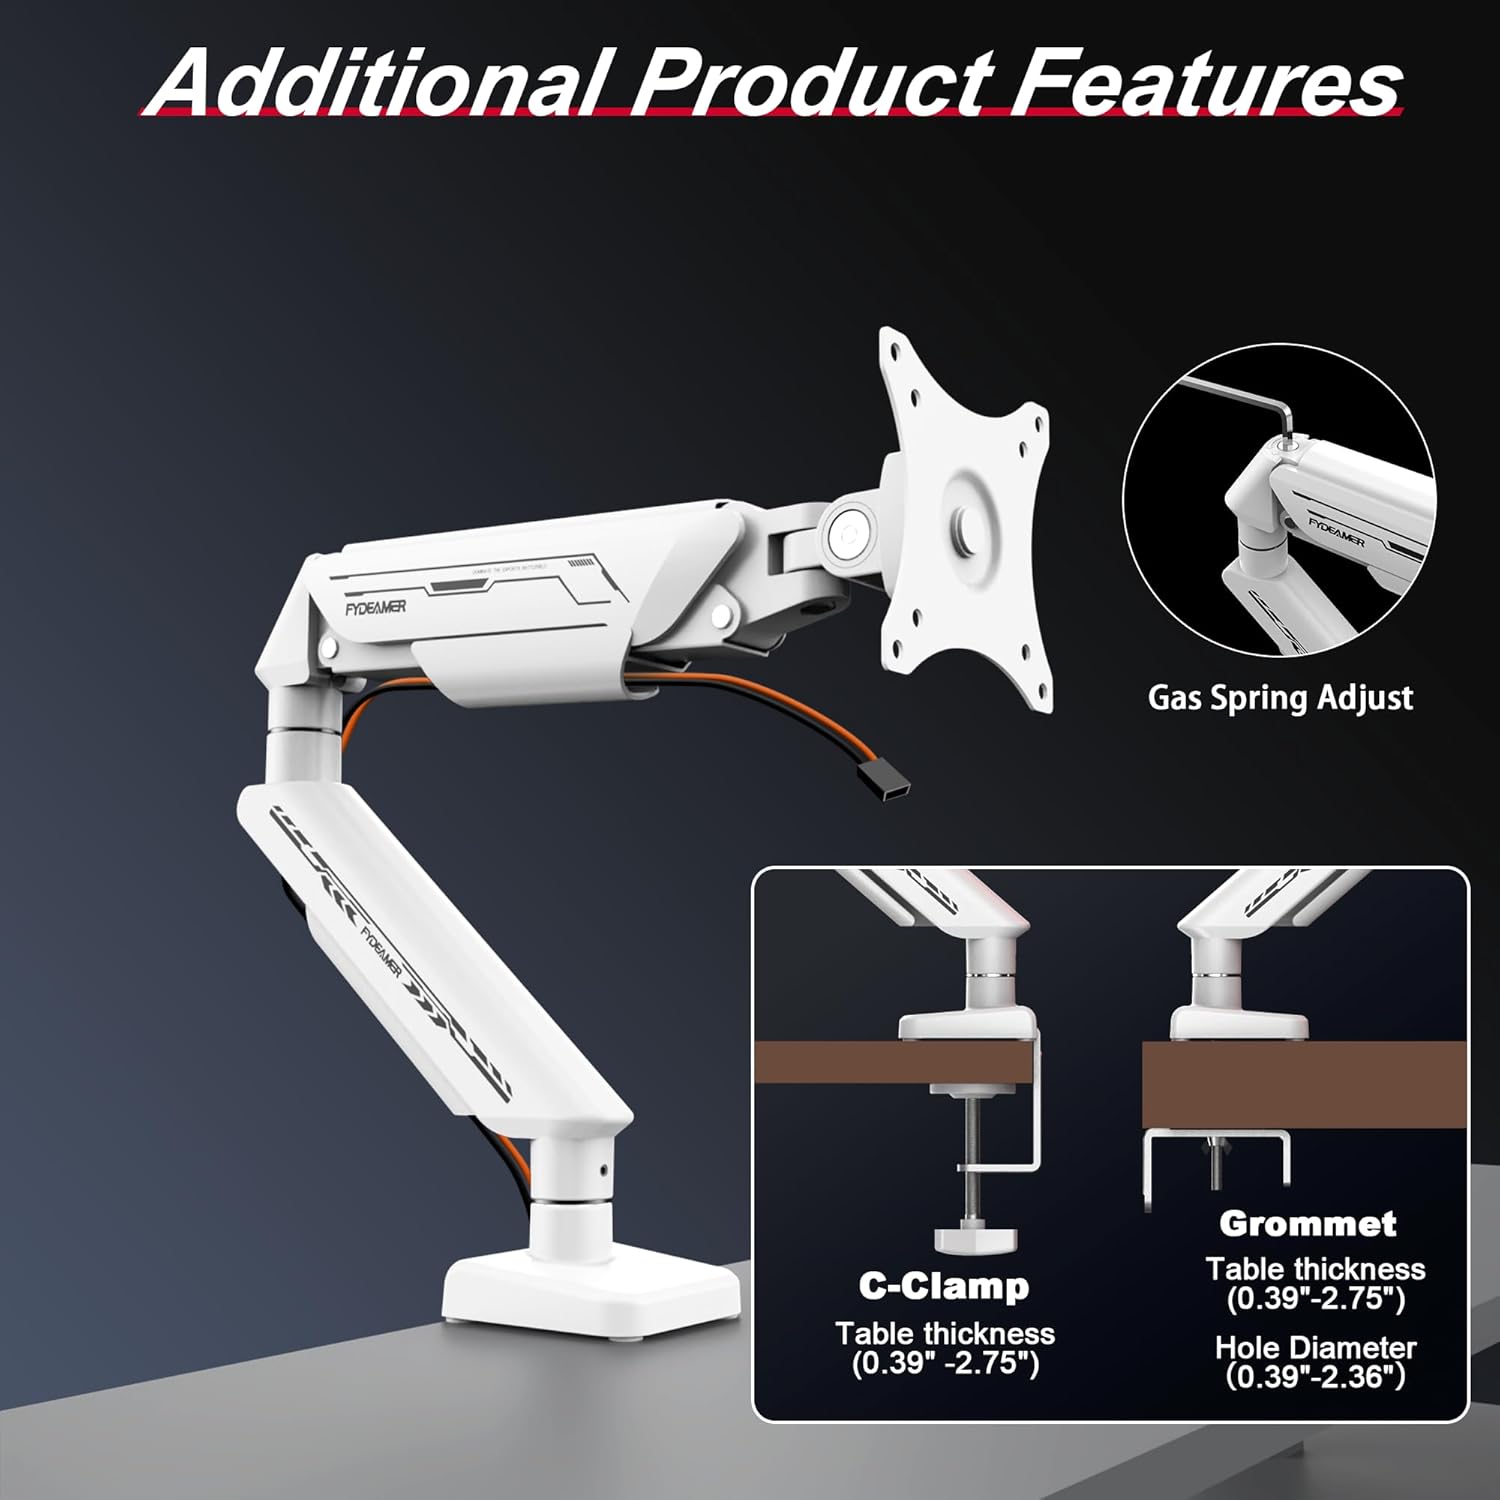
Image 3.1: Illustration of the C-Clamp and Grommet mounting options, detailing compatible table thicknesses and hole diameters.
3.1.1. C-Clamp Installation
- Attach the C-clamp to the base of the monitor arm.
- Position the C-clamp on the edge of your desk (compatible with desk thickness 10-70mm).
- Tighten the clamp securely using the provided knob until the arm is stable.

Image 3.2: Detailed view of the C-Clamp mounting method, showing how it attaches to the desk edge.
3.1.2. Grommet Base Installation
- If your desk has a grommet hole (compatible with desk thickness 10-70mm and hole diameter 10-60mm), disassemble the C-clamp and attach the grommet base components.
- Insert the grommet bolt through the desk hole and secure it from underneath with the provided plate and nut.
- Ensure the base is firmly tightened to prevent movement.

Image 3.3: Detailed view of the Grommet mounting method, illustrating installation through a desk cable hole.
3.2. Attaching the VESA Plate to Your Monitor
- Locate the VESA mounting holes on the back of your monitor.
- Attach the VESA plate from the monitor arm to the back of your monitor using the appropriate screws (M4x12 or M5x12) and washers. Ensure a secure fit.
3.3. Mounting the Monitor to the Arm
- Carefully slide the monitor (with the attached VESA plate) onto the VESA head of the monitor arm.
- Ensure the monitor is fully seated and secured.
3.4. Cable Management
Route your monitor cables through the integrated cable management channels on the arm to maintain a tidy workspace.

Image 3.4: The monitor arm with cables neatly organized through its integrated cable management system.
4. Operating and Adjustments
The Fydeamer Monitor Arm offers extensive adjustability for optimal viewing comfort.

Image 4.1: The monitor arm showcasing its full motion articulating capabilities, including 360° rotation, ±90° swivel, and -45° to +90° tilt.

Image 4.2: Visual representation of the monitor arm's swivel (±90°), tilt (-45° to +90°), and rotation (360°) ranges.
4.1. Gas Spring Tension Adjustment
The gas spring mechanism allows for smooth, one-handed height adjustment. The tension needs to be calibrated to the weight of your monitor.
- Once your monitor is mounted, if the arm sags or springs up too easily, adjust the gas spring tension.
- Locate the adjustment screw on the arm (often covered by a cap).
- Use the provided Allen key: turn clockwise to increase tension (for heavier monitors) or counter-clockwise to decrease tension (for lighter monitors).
- Adjust gradually until the monitor stays at the desired height when released.

Image 4.3: The high-quality gas spring mechanism, tested for over 25,000 fatigue cycles, ensuring durability and smooth operation.

Image 4.4: Illustration of the rigorous testing undergone by the gas spring, highlighting its force value of 800NM and over 25,000 fatigue tests.
4.2. Tilt, Swivel, and Rotation
- Tilt: Gently push or pull the top or bottom of your monitor to adjust the vertical viewing angle (-45° to +90°).
- Swivel: Rotate the monitor horizontally around the arm's pivot point (±90°).
- Rotation: Rotate the monitor 360° from landscape to portrait orientation.
5. Maintenance
- Cleaning: Wipe the monitor arm with a soft, damp cloth. Avoid abrasive cleaners or solvents.
- Periodic Checks: Periodically check all screws and connections to ensure they remain tight and secure. Re-tighten if necessary.
- Gas Spring: The gas spring is maintenance-free. Do not attempt to disassemble it.
6. Troubleshooting
- Monitor Sags or Won't Stay Up: The gas spring tension is too low for your monitor's weight. Increase tension by turning the adjustment screw clockwise.
- Monitor Springs Up Too Easily or Won't Go Down: The gas spring tension is too high. Decrease tension by turning the adjustment screw counter-clockwise.
- Arm is Loose on the Desk: Re-tighten the C-clamp or grommet base screws.
- Monitor Wobbles: Ensure all VESA plate screws are tight and the monitor is securely attached to the arm. Check desk stability.
- Difficulty Adjusting Tilt/Swivel: Some joints may have adjustable tightness screws. Refer to the assembly diagrams for specific locations and adjust as needed.
7. Specifications

Image 7.1: Technical diagram showing key dimensions, VESA compatibility, monitor size, and weight capacity.
| Feature | Specification |
|---|---|
| Brand | Fydeamer |
| Model | Single Arm White |
| Compatible Monitor Size | 17-35 inches |
| Maximum Load Capacity | 11 kg (24.3 lbs) |
| VESA Compatibility | 75x75mm, 100x100mm |
| Tilt Range | -45° to +90° |
| Swivel Range | ±90° |
| Rotation | 360° |
| Height Adjustment | Up to 430 mm from desk surface |
| Mounting Options | C-Clamp (10-70mm desk thickness), Grommet Base (10-70mm desk thickness, 10-60mm hole diameter) |
| Material | Metal |
| Product Dimensions | 24.69 x 9.78 x 39.12 cm |
| Item Weight | 2.49 kg |
8. Warranty and Support
For warranty information or technical support, please refer to the product packaging or contact Fydeamer customer service. Keep your purchase receipt for warranty claims.


