Introduction
This manual provides essential information for the safe and efficient operation, maintenance, and troubleshooting of your SKIL 40V 14-inch String Trimmer Kit. Please read this manual thoroughly before first use and keep it for future reference.
The SKIL 40V 14-inch String Trimmer is a cordless solution designed for efficient trimming of weeds and tough grass. It features a Twist Load™ head for easy line loading, a 14-inch cutting swath, and a dual line bump feed mechanism. The kit includes the 40V string trimmer, a PWR CORE 40™ 2.0Ah battery, and a 60W charger.

Figure 1: SKIL 40V 14-inch String Trimmer Kit components.
Important Safety Information
Always adhere to the following safety guidelines to prevent injury and ensure proper operation:
- Always wear eye protection and gloves when using this product.
- Be aware of potential flying debris and keep bystanders at a safe distance.
- Do not operate in wet conditions to prevent slip hazards and electrical shock.
- Ensure the battery is fully charged before use and removed when not in operation or during maintenance.
- Keep hands and feet away from the cutting line at all times.
- Inspect the trimmer for damage before each use. Do not operate if damaged.
Package Contents
Verify that all items are present in the package:
- SKIL 40V String Trimmer
- PWR CORE 40™ 2.0Ah Battery
- 60W Charger
- Auxiliary Handle
- Operator's Manual (this document)
Setup
1. Charging the Battery
Before first use, fully charge the PWR CORE 40™ 2.0Ah battery using the provided 60W charger. Insert the battery into the charger until it clicks into place. The charger's indicator lights will show the charging status. A full charge typically takes less than 1.5 hours.

Figure 2: The PWR CORE 40™ battery is designed with IPX4 weather resistance.
2. Attaching the Auxiliary Handle
Attach the adjustable auxiliary handle to the trimmer shaft. Loosen the knob on the handle, slide it onto the shaft, and position it for comfortable operation. Tighten the knob securely to fix the handle in place.

Figure 3: Adjusting the auxiliary handle for ergonomic use.
3. Loading the Trimmer Line (Twist Load™)
The Twist Load™ head simplifies line replacement. To load new line, align the arrows on the trimmer head, insert the line through the eyelets until it comes out the other side, and then twist the head to wind the line. No disassembly of the head is required.
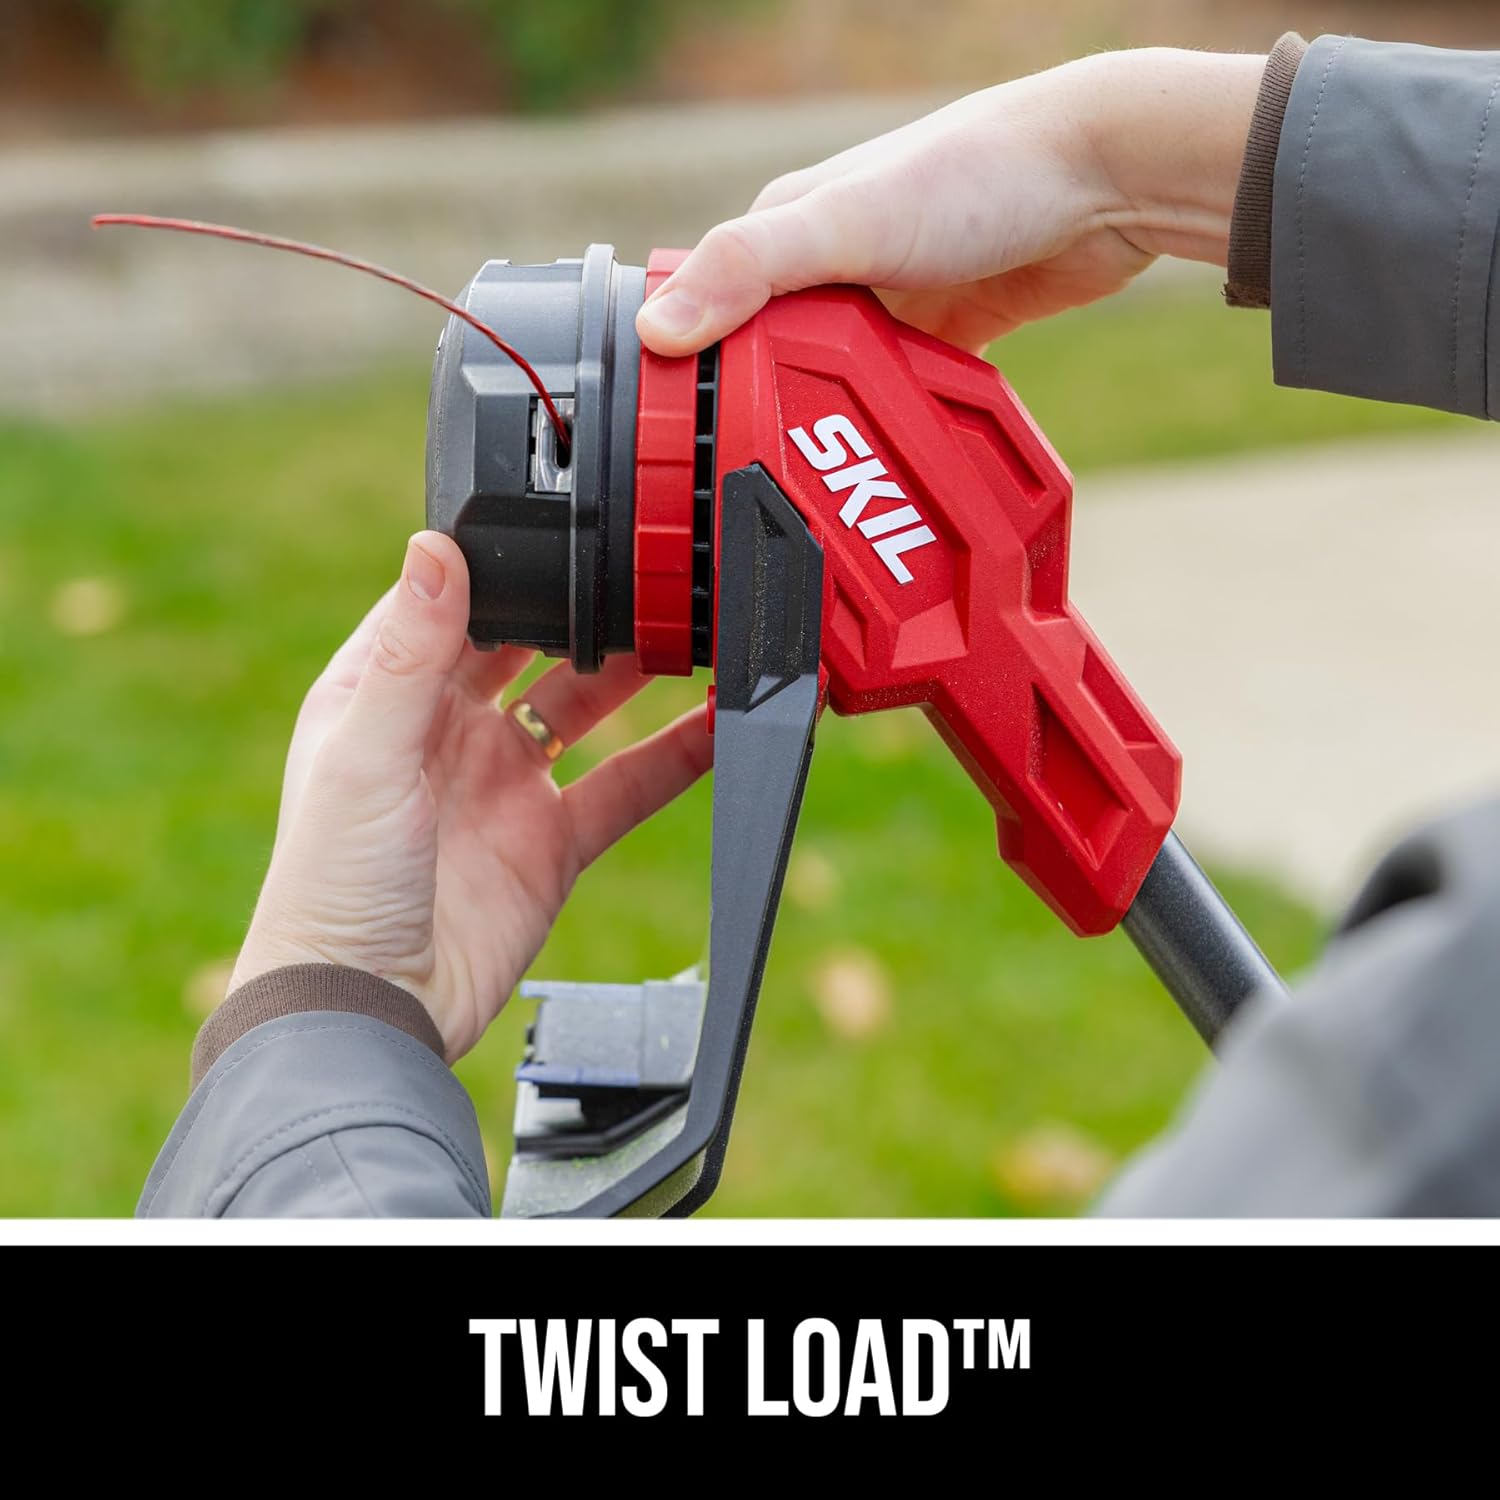
Figure 4: The Twist Load™ system for easy line loading.
Operating Instructions
1. Starting and Stopping
Insert the charged battery into the trimmer until it locks. To start, press the safety lock-off button and then squeeze the trigger. To stop, release the trigger.

Figure 5: Operating the SKIL 40V String Trimmer.
2. Two-Speed Select
The trimmer features a two-speed selector switch. Use the lower speed for extended runtime and lighter trimming tasks, and the higher speed for maximum power when tackling dense or tough vegetation.

Figure 6: The two-speed selector allows for power or runtime optimization.
3. Dual Line Bump Feed
To advance more cutting line, simply tap the trimmer head gently on the ground while the trimmer is running. The dual line bump feed mechanism will release additional line automatically.

Figure 7: Utilizing the dual line bump feed feature.
4. Trimming Techniques
Maintain a steady pace and swing the trimmer from side to side, using the tip of the line to cut. For best results, keep the trimmer head slightly above the ground. The 14-inch cutting swath allows for efficient coverage.

Figure 8: The 14-inch cutting swath provides efficient trimming.
Maintenance
Regular maintenance ensures the longevity and optimal performance of your string trimmer.
- Cleaning: After each use, disconnect the battery and wipe down the trimmer head, guard, and shaft with a damp cloth to remove grass clippings and debris. Ensure the ventilation slots are clear.
- Line Replacement: Replace the trimmer line as needed following the "Loading the Trimmer Line" instructions in the Setup section. Use only recommended line types and diameters.
- Battery Care: Store the battery in a cool, dry place away from direct sunlight and extreme temperatures. Do not store the battery fully discharged for extended periods.
- Storage: When not in use, store the trimmer in a dry, secure location out of reach of children.
Troubleshooting
Refer to this section for common issues and their solutions.
| Problem | Possible Cause | Solution |
|---|---|---|
| Trimmer does not start. | Battery not inserted correctly or discharged. Safety lock-off not engaged. | Ensure battery is fully seated and charged. Press safety lock-off button before squeezing trigger. |
| Line does not advance. | Line is tangled or too short. Trimmer head not bumped correctly. | Check and untangle line, or replace if too short. Ensure trimmer is running and tap head firmly on a hard surface. |
| Reduced cutting performance. | Battery low. Line worn or incorrect type. Debris in head. | Recharge battery. Replace line. Clean trimmer head. |
Specifications
| Feature | Detail |
|---|---|
| Brand | Skil |
| Model Number | LT1400C-11 |
| Power Source | Battery Powered (40V) |
| Cutting Width | 14 Inches |
| Product Dimensions | 42.01"L x 42.01"W |
| Speed | Up to 8000 RPM |
| Battery Type | 1 Lithium Ion battery (included) |
| Item Weight | 13.52 pounds |
| Weather Resistance | IPX4 |
Warranty and Support
For warranty information, product registration, or technical support, please visit the official Skil website or contact their customer service department. Keep your purchase receipt as proof of purchase.
Official Skil Website: www.skil.com


