1. Introduction
This manual provides essential information for the safe and efficient use of your Philips 12-Cup Water Filter Pitcher, Model ADD5902. This rechargeable water dispenser is designed to provide filtered water conveniently, reducing various impurities for improved taste and quality.
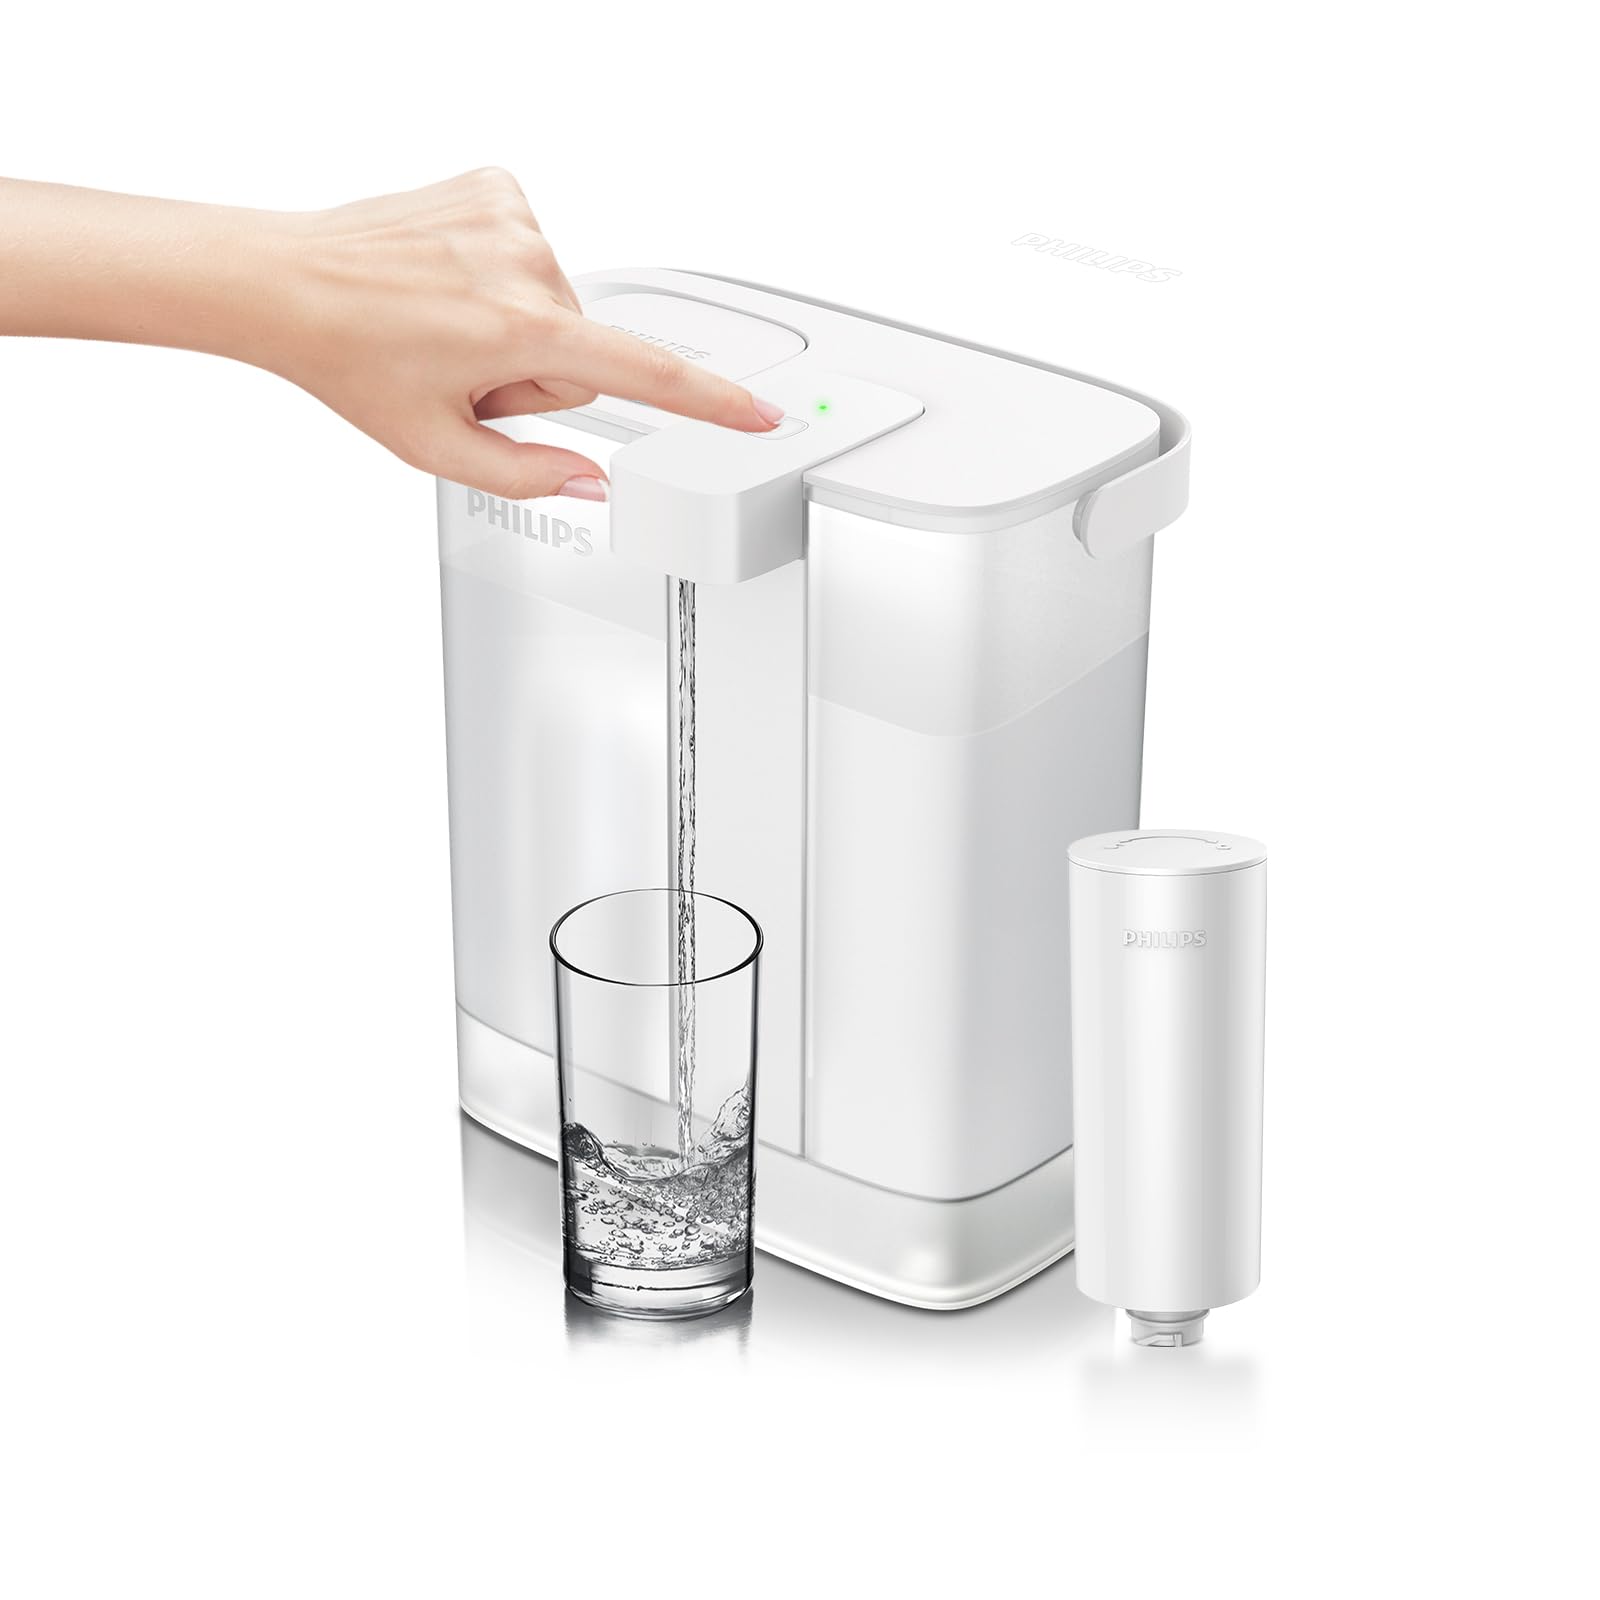
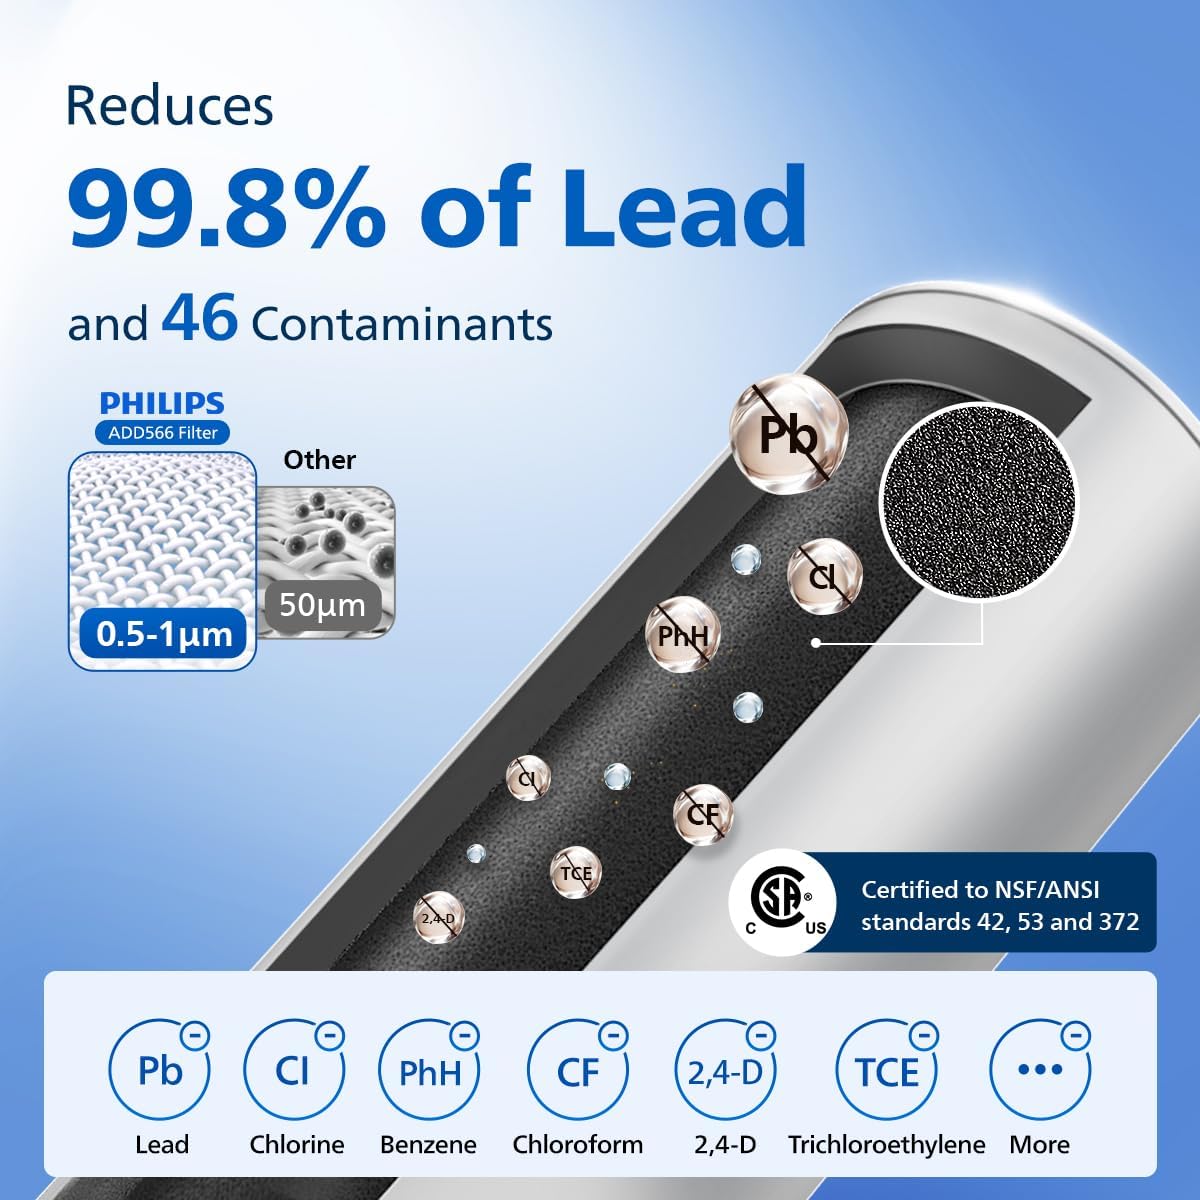
The pitcher features a slim design for easy fridge door placement, a mechanical button for dispensing, and a usage-based filter monitoring system. It utilizes a Plus filter (ADD566) to reduce lead and other contaminants.
2. Important Safety Information
Please read all instructions carefully before using the appliance and save them for future reference.
- Do not immerse the electronic dispensing unit in water.
- Use only the original USB-C charging cable provided. Using other cables may prevent proper charging.
- Ensure the charging port is dry before connecting the charging cable.
- Keep the appliance away from direct heat sources and open flames.
- This appliance is not intended for use by persons (including children) with reduced physical, sensory or mental capabilities, or lack of experience and knowledge, unless they have been given supervision or instruction concerning use of the appliance by a person responsible for their safety.
- Do not use the pitcher with hot water (above 40°C / 104°F).
3. Product Components
Your Philips 12-Cup Water Filter Pitcher package includes the following items:
- 1 x Electric Pitcher (12-cup capacity)
- 1 x Plus Filter (Model: ADD566)
- 1 x User Manual
- 1 x USB-C Charging Cable

4. Setup Guide
4.1. Unpacking
Remove all packaging materials and ensure all components are present and undamaged.
4.2. Filter Installation
- Remove the lid from the pitcher.
- Unpack the Plus filter (ADD566) from its protective packaging.
- Insert the filter into the designated slot in the pitcher's reservoir. Twist it clockwise to secure it in place.
- Replace the lid, ensuring it is properly aligned.
4.3. Initial Use
- Fill the pitcher with tap water through the flip-top lid.
- Press the dispense button to filter and dispense the first full pitcher of water. Discard this water, as it may contain carbon dust from the new filter.
- The pitcher is now ready for regular use.
5. Charging the Pitcher
The Philips Water Filter Pitcher is equipped with a rechargeable battery to power its dispensing mechanism. A full charge can last up to 30 days with typical usage.
- Connect the provided USB-C charging cable to the charging port located on the side of the pitcher.
- Plug the other end of the USB-C cable into a DC5V, ≥1A USB charger (not included).
- The indicator light on the dispenser will flash yellow when the battery is low, signaling that a recharge is needed.
- During charging, the indicator light will flash yellow.
- Once fully charged, the indicator light will turn a constant yellow.
6. Operating Instructions
6.1. Filling the Pitcher
- Lift the small flip-top lid located on the main lid of the pitcher.
- Pour cold tap water into the reservoir. The design allows for easy one-handed refilling.
- Close the flip-top lid securely after filling.

6.2. Dispensing Water
- Place a glass or container under the dispenser nozzle.
- Press the mechanical button on the front of the dispenser. Water will flow instantly.
- Release the button to stop the water flow.
6.3. Filter Life and Battery Indicator
The LED indicator light provides information about the pitcher's status:
- Green Light: Water is being dispensed.
- Flashing Yellow Light: Battery is low; recharge soon.
- Constant Yellow Light: Charging is complete.
- Flashing Red Light: Filter needs to be replaced soon.
- Constant Red Light: Filter has expired; replace immediately.

7. Care and Maintenance
7.1. Cleaning the Pitcher
- Disconnect the charging cable before cleaning.
- Hand wash the pitcher, lid, and reservoir with mild soap and warm water.
- Do not place the electronic dispensing unit in a dishwasher or immerse it in water. Wipe it clean with a damp cloth.
- Rinse all parts thoroughly and allow them to air dry completely before reassembling.
7.2. Filter Replacement
The Philips Plus filter (ADD566) should be replaced every 3 months or after filtering 60 gallons of water, whichever comes first. The filter lifetime indicator will alert you when replacement is due.
- Remove the lid and the old filter by twisting it counter-clockwise.
- Dispose of the old filter responsibly.
- Install a new Philips Plus filter (ADD566) as described in the Setup Guide (Section 4.2).
- Reset the filter lifetime indicator by pressing and holding the dispense button for 5 seconds until the light turns green.

8. Troubleshooting
| Problem | Possible Cause | Solution |
|---|---|---|
| No water dispensed when button is pressed. | Battery is depleted. | Recharge the pitcher (refer to Section 5). |
| Filter is clogged or expired. | Replace the filter (refer to Section 7.2). | |
| Water flow is slow. | Filter is nearing end of life or partially clogged. | Replace the filter (refer to Section 7.2). |
| Indicator light not working during charging. | Non-original or incompatible charging cable/adapter. | Use the original USB-C charging cable and a DC5V, ≥1A USB charger. |
9. Product Specifications
| Feature | Detail |
|---|---|
| Brand | Philips |
| Model Name | ADD5902 |
| Capacity | 12 Cups (6.3 Pounds / 3 Liters) |
| Product Dimensions (L x W x H) | 9.17" x 5.98" x 10.35" |
| Power Source | Battery Powered (1 Lithium Ion battery included) |
| Filter Life Cycle | 3 Months / 60 Gallons (based on 10 cups/day) |
| Purification Method | Carbon Block |
| Contaminant Reduction | Reduces Lead & 46 impurities (e.g., chlorine, mercury, benzene, bisphenol A) |
| Certifications | NSF/ANSI Standards 42, 53, and 372 |
| Special Feature | Portable, Usage-Based Filter Monitoring |

10. Warranty and Support
For warranty information and customer support, please refer to the official Philips website or contact their customer service directly. Keep your proof of purchase for any warranty claims.
You can visit the Philips Store on Amazon for additional products and support: Philips Water Store


