
1. Product Overview
The NB ERGONOMIC G60-New Gaming Monitor Arm is designed to provide a stable and adjustable mounting solution for a wide range of monitors. This heavy-duty arm supports most curved, ultrawide, or flat monitors ranging from 32 to 60 inches in size and weighing between 2 to 20 kg. It is compatible with VESA patterns of 75x75mm and 100x100mm.
Key features include built-in RGB lighting for customizable ambiance, ergonomic adjustability to reduce discomfort during extended use, and a robust construction using premium-grade aluminum with Mechanical ProSpring Technology for easy tension adjustment. The arm also features an advanced gear locking system, tested for durability, and integrated cable management for a tidy workspace.

Image: The NB ERGONOMIC G60-New Gaming Monitor Arm in use, supporting a large curved monitor. The image highlights VESA compatibility (75x75, 100x100) and monitor size compatibility (32"-60" for flat and curved monitors).

Image: A close-up of the monitor arm, emphasizing its heavy-duty design and maximum load capacity of 20 kg.
2. Setup and Installation
The G60-New monitor arm offers two installation methods: a double C-clamp or a grommet hole mount. The quick-release head design facilitates easy installation, often achievable by a single person.
2.1. Confirm Monitor Compatibility
Before installation, ensure your monitor meets the following criteria:
- Screen Size: 32 to 60 inches (curved, ultrawide, or flat).
- Weight: 2 to 20 kg (4.4 to 44 lbs).
- VESA Patterns: 75x75mm or 100x100mm.
Locate the VESA mounting holes on the back of your monitor. If covered, remove the back cover to access them.
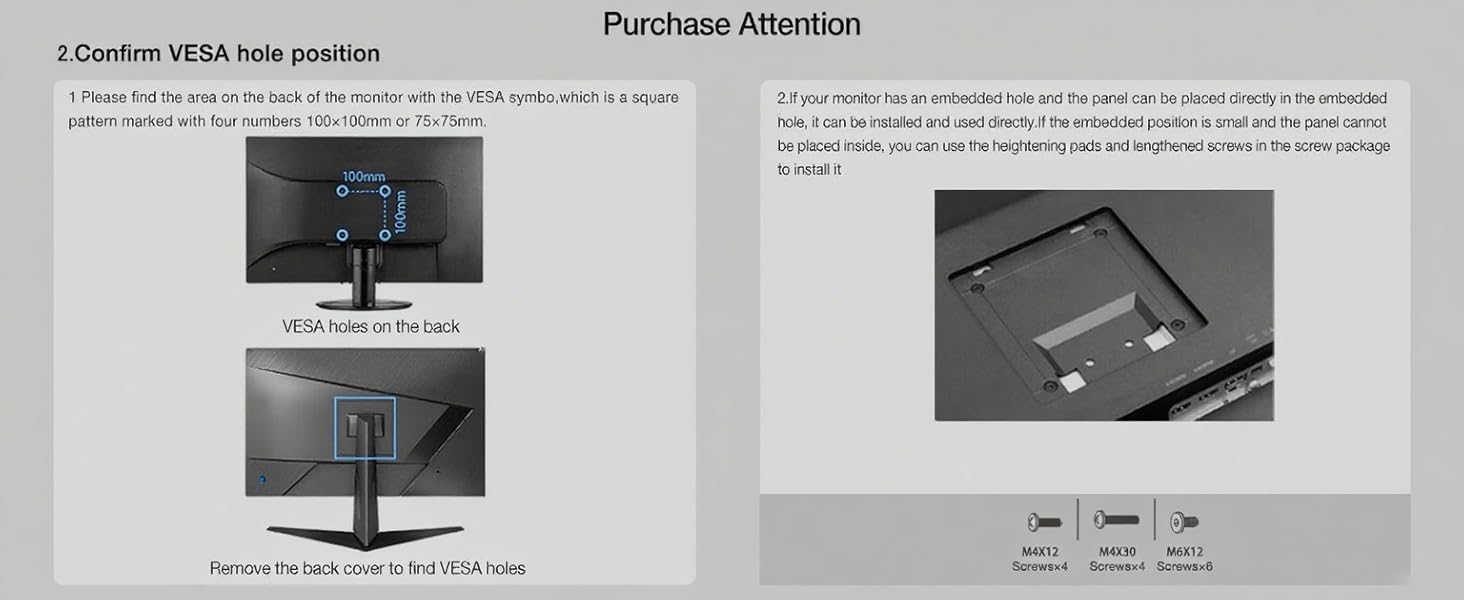
Image: Illustration detailing how to identify VESA mounting holes (75x75mm or 100x100mm) on the back of a monitor, including instructions to remove a back cover if necessary.
2.2. Mounting Options
Choose between C-clamp or grommet hole installation based on your desk type and preference.
- C-Clamp: Suitable for desk thickness between 0.8" - 3.5".
- Grommet Hole: Requires a hole diameter of 0.43" - 0.87".
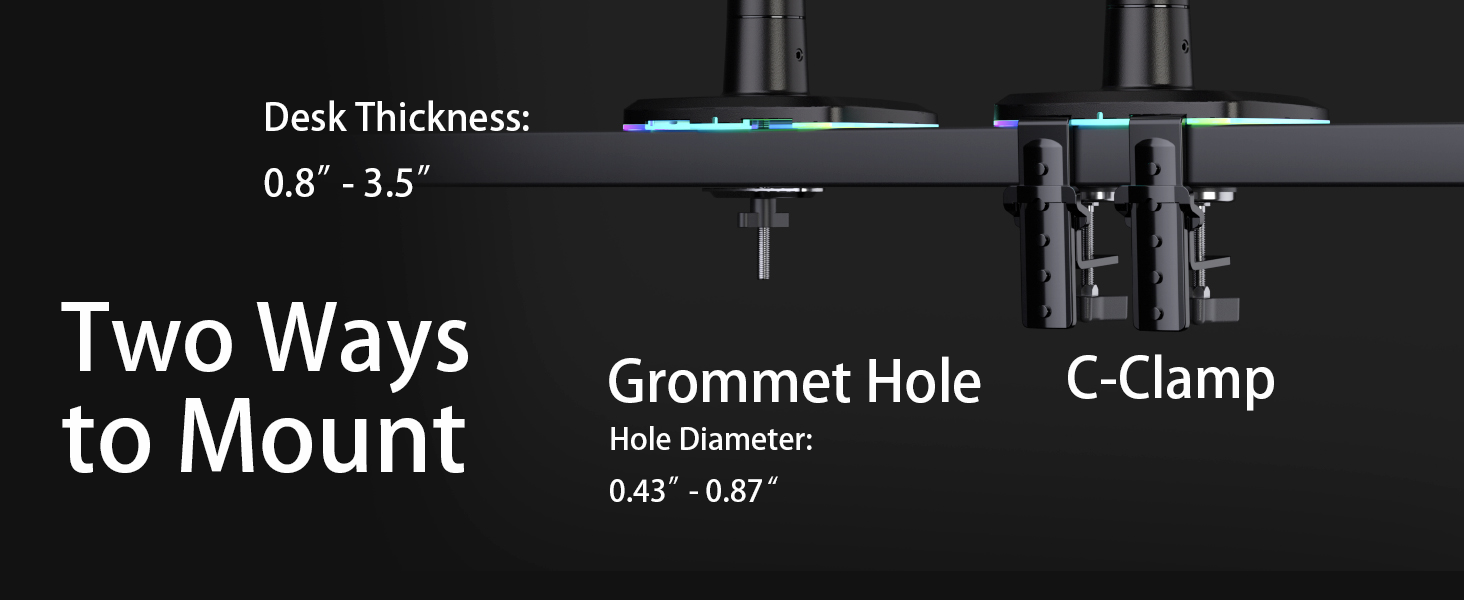
Image: Visual guide illustrating the C-Clamp and Grommet Hole mounting methods, along with compatible desk thickness and hole diameters.
2.3. Attaching the Monitor
The monitor arm features a quick-release head for easy attachment. Secure the VESA plate to your monitor using the provided screws, then slide the monitor onto the arm's quick-release mechanism until it clicks into place.
For monitors with embedded VESA holes or recessed areas, use the included heightening pads and lengthened screws as needed to ensure a secure fit.
2.4. Cable Management
Route your monitor cables through the integrated cable management channels on the arm to maintain a clean and organized workspace.
3. Operating and Adjustments
The G60-New monitor arm offers extensive adjustability to achieve optimal ergonomic positioning for your monitor.
3.1. Monitor Positioning
- Rotation: 360° for landscape or portrait orientation.
- Tilt: -50° to +50° to adjust vertical viewing angle.
- Swivel: -90° to +90° to adjust horizontal viewing angle.
- Arm Extension: Up to 25 inches (630mm) for optimal viewing distance.
- Height Adjustment: Max 19.6 inches (500mm) lift for ergonomic eye-level viewing.

Image: An illustration demonstrating the full range of motion for the monitor arm, including 360° rotation, ±50° tilt, and ±90° swivel.

Image: The monitor arm fully extended, showing its maximum reach of 24.8 inches (630mm).
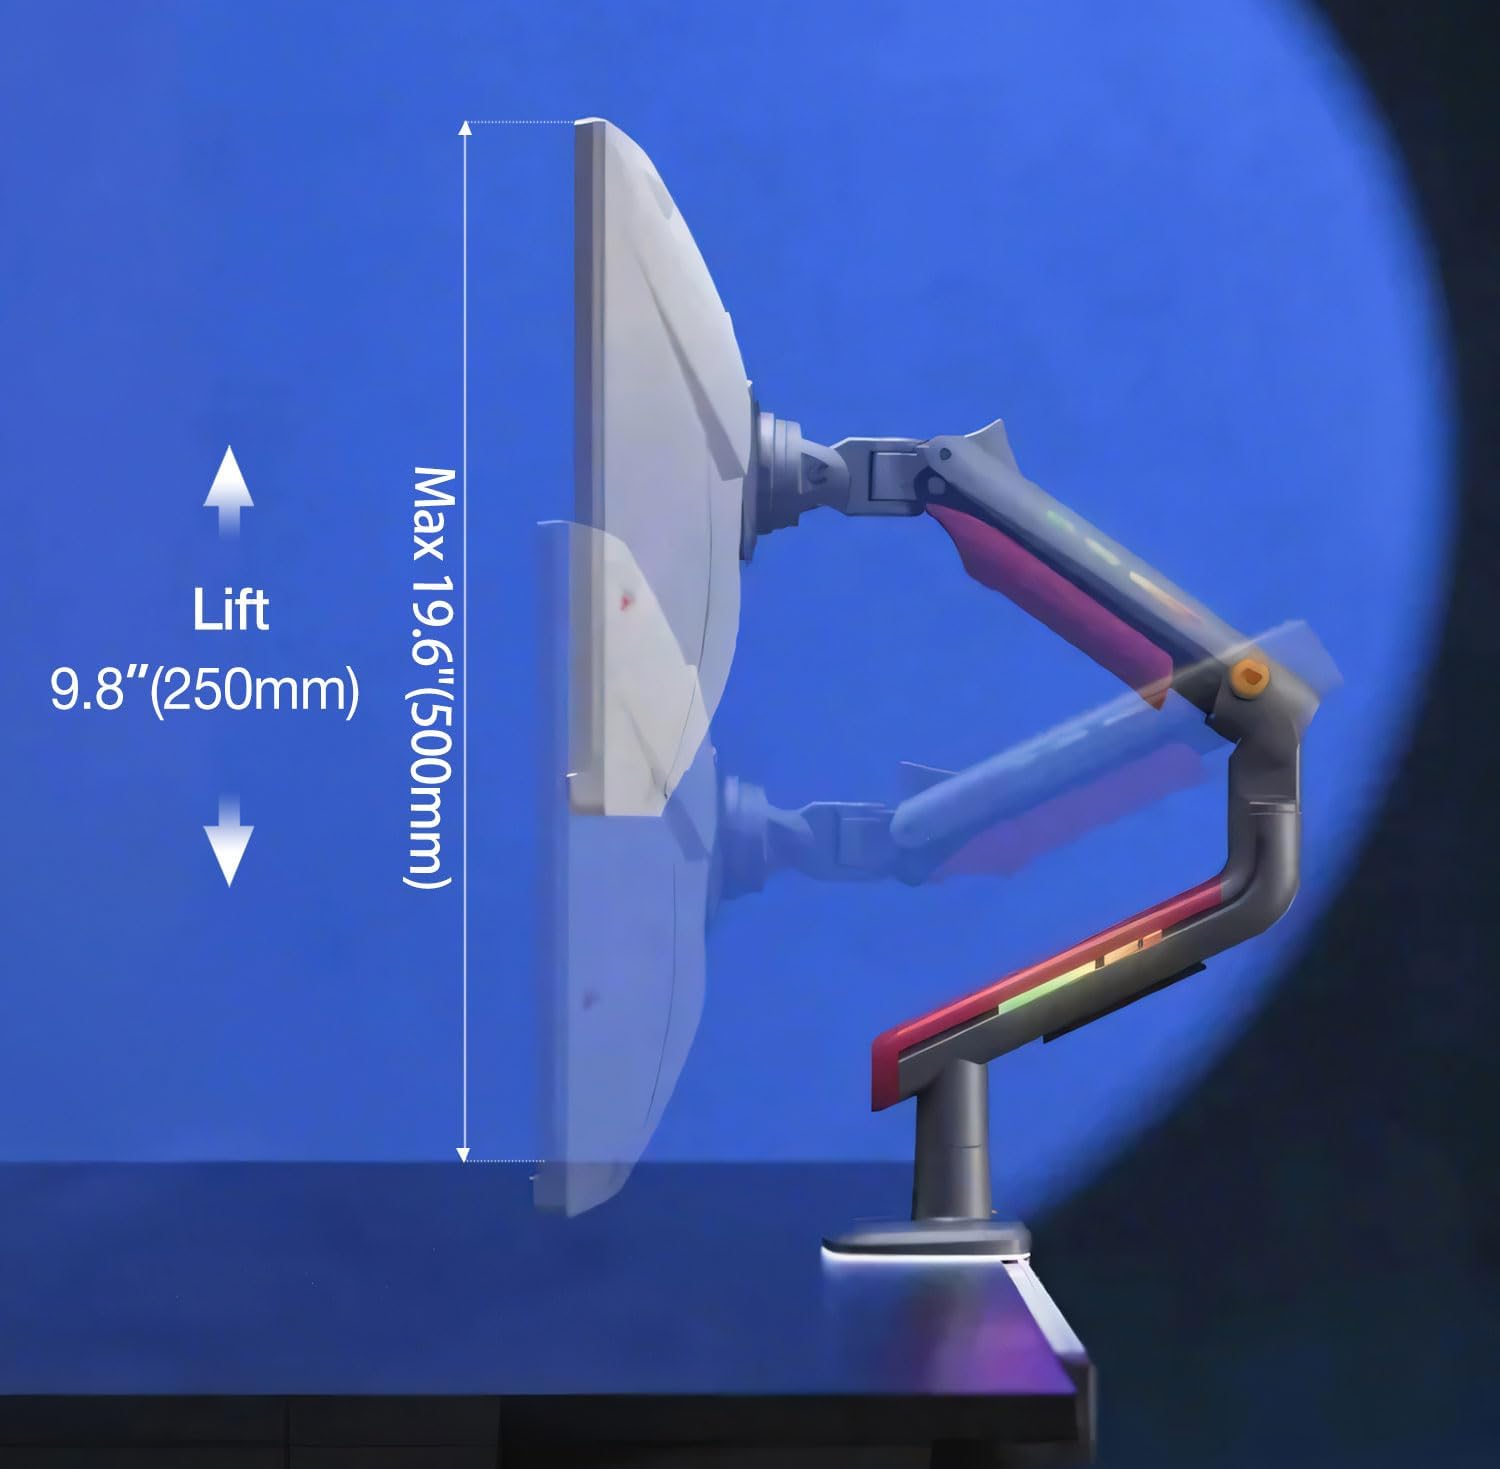
Image: The monitor arm illustrating its vertical adjustment range, with a maximum lift of 19.6 inches (500mm).
3.2. Tension Adjustment
The arm features Mechanical ProSpring Technology for easy tension adjustment. Use the provided Allen wrench to adjust the tension to match your monitor's weight, ensuring it holds its position securely. Adjust the tension for both the arm's vertical movement and the monitor's tilt.
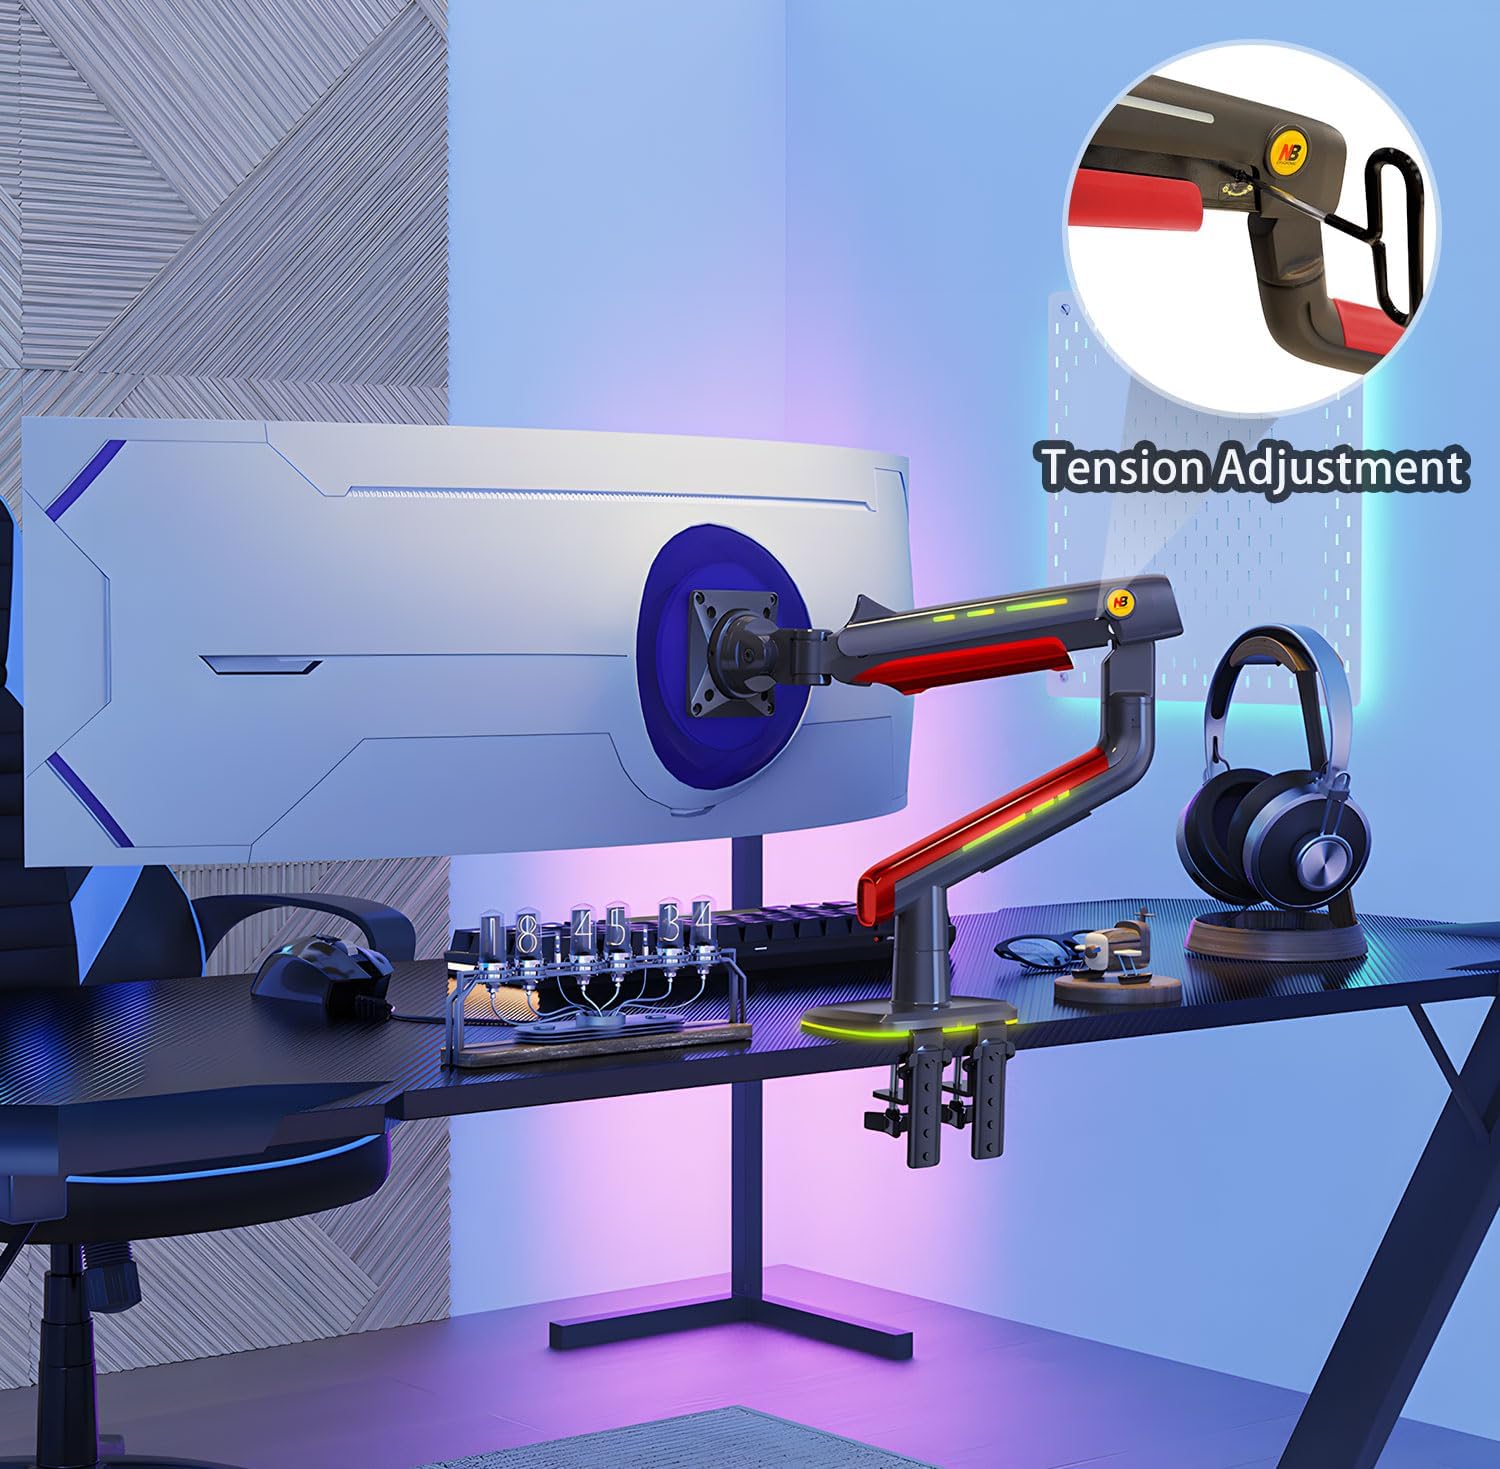
Image: A detailed view of the tension adjustment mechanism on the monitor arm, indicating where to use the Allen wrench.
3.3. RGB Lighting
The monitor arm includes built-in RGB lighting. Use the dedicated button to switch between various color modes and effects, instantly enhancing your gaming or work environment.

Image: The monitor arm displaying its integrated RGB lighting, with an icon indicating a one-click adjustment feature.
3.4. Product Demonstration Video
Video: An official product video from NB ERGONOMIC demonstrating the features and adjustability of the monitor arm.
4. Maintenance
Regular maintenance ensures the longevity and optimal performance of your monitor arm.
- Cleaning: Wipe the arm surfaces with a soft, damp cloth. Avoid abrasive cleaners or solvents that may damage the finish.
- Check Connections: Periodically inspect all screws and mounting points to ensure they remain tight and secure.
- Tension Check: If the monitor does not hold its position or feels too loose/stiff, re-adjust the tension using the provided Allen wrench as described in the Operating section.
- Cable Management: Ensure cables are neatly routed and not pinched or strained within the cable management channels.
5. Troubleshooting
If you encounter issues with your NB ERGONOMIC G60-New Gaming Monitor Arm, refer to the following common solutions:
| Problem | Possible Cause | Solution |
|---|---|---|
| Monitor sags or does not stay in position. | Insufficient tension for monitor weight. | Increase the tension using the Allen wrench at the designated adjustment points until the monitor holds its position. |
| Arm is too stiff to move. | Excessive tension. | Decrease the tension using the Allen wrench until the arm moves smoothly. |
| Monitor wobbles or feels unstable. | Loose mounting screws or improper installation. | Ensure all mounting screws (VESA plate, clamp/grommet) are securely tightened. Verify the monitor is correctly seated on the quick-release head. |
| RGB lights are not working. | Power connection issue or light mode selection. | Check if the RGB light power cable is properly connected. Press the RGB control button to cycle through modes or turn on the lights. |
6. Specifications
| Brand | NB ERGONOMIC |
| Model Number | G60-New |
| Compatible Screen Size | 32 to 60 inches |
| Load Capacity | 2 to 20 kg (4.4 to 44 lbs) |
| VESA Compatibility | 75x75mm, 100x100mm |
| Mounting Type | Tabletop Mount (C-Clamp or Grommet Hole) |
| Movement Type | Articulating (360° Rotation, ±50° Tilt, ±90° Swivel) |
| Max Arm Extension | 25 inches (630mm) |
| Max Height Lift | 19.6 inches (500mm) |
| Material | Aluminum |
| Special Features | Built-in RGB-Light, Mechanical ProSpring Technology, Advanced Gear Locking System, Cable Management |
| Item Weight | 14.52 pounds |
| Package Dimensions | 18.31 x 15.98 x 6.89 inches |
7. Warranty and Support
For detailed warranty information and customer support, please refer to the official NB ERGONOMIC website or contact their customer service directly. Keep your purchase receipt for warranty claims.
Manufacturer: KUNSHAN HONGJIE ELECTRONICS CO., LTD

