
Introduction
This instruction manual provides comprehensive guidance for the installation, operation, and maintenance of your Dasaita 9" Car Stereo. Designed specifically for Honda Civic models from 2007-2011 (without OEM screen), this advanced multimedia receiver enhances your driving experience with modern connectivity and audio features. Please read this manual thoroughly before installation and use to ensure proper function and safety.

Figure 1: Dasaita 9" Car Stereo with included AHD Reverse Camera.
What's in the Box?
Upon opening your Dasaita 9" Car Stereo package, please verify that all the following components are included:
- 1*Head Unit
- 1*AUX input
- 1*Audio output
- 1*USB input
- 1*Reverse Camera
Key Features
Wireless Apple CarPlay & Android Auto
Seamlessly integrate your smartphone with the car stereo. Enjoy wireless and wired connectivity for both Apple CarPlay and Android Auto, allowing you to access navigation, music, calls, and messages directly from the stereo's display. Use voice commands with Siri or Google Assistant for hands-free operation.

Figure 2: Wireless Apple CarPlay and Android Auto integration.
IPS Touch Screen Display
The 9-inch IPS display offers vibrant colors and brilliant visual effects, providing a clear and responsive capacitive touchscreen experience. Navigate menus and control functions with ease.
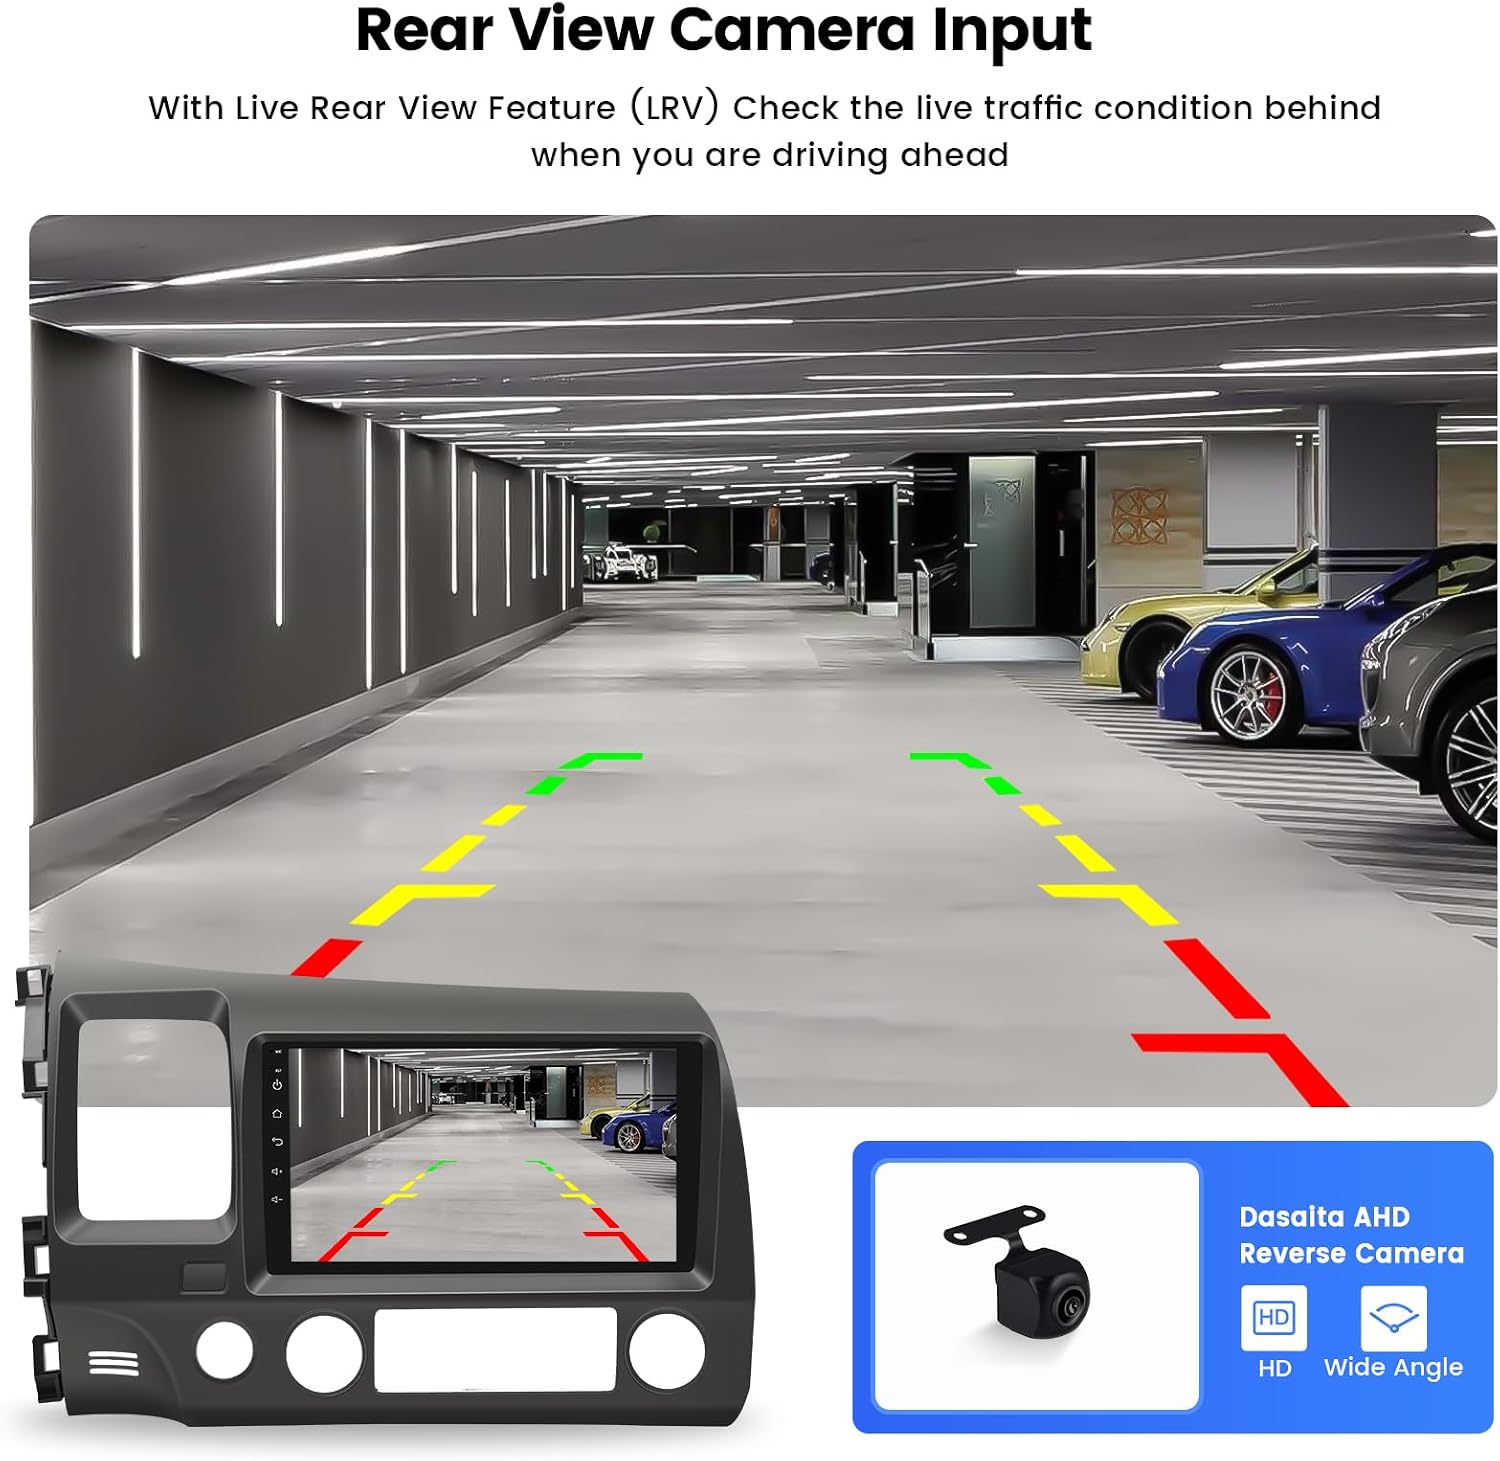
Figure 3: High-resolution IPS touch screen.
AHD Rear View Camera Input
Enhance your parking and reversing safety with the included AHD reverse camera. The stereo supports Live Rear View (LRV) feature, allowing you to check the live traffic condition behind your vehicle while driving ahead.

Figure 4: Rear view camera input with parking guidelines.
Bluetooth 5.0, DSP, and AM/FM Radio
Enjoy hands-free calling and music streaming with Bluetooth 5.0. The built-in Digital Sound Processor (DSP) allows for advanced audio customization, including a 16-band graphic equalizer to fine-tune your sound. The integrated AM/FM tuner provides access to 18 FM and 12 AM stations for your listening pleasure.

Figure 5: Bluetooth phone call interface.

Figure 6: Digital Sound Processor (DSP) settings.
Setup & Installation
This section guides you through the process of installing your new Dasaita car stereo. A complete plug-and-play kit is included for easy installation, retaining factory steering wheel controls and antenna adapter.
Preparation
Before beginning installation, ensure your vehicle's ignition is off and the negative terminal of the car battery is disconnected to prevent electrical shorts. Gather necessary tools, including a panel removal tool, Phillips head screwdriver, and a small socket wrench.
Unboxing the Unit
Familiarize yourself with the components included in your package. The following video provides an overview of the unboxing experience and the items you should expect.
Video 1: What's Inside? Dasaita 9'' Linux System Radio Unboxed! This video demonstrates the contents of the Dasaita car stereo package.
Removing the Existing Unit
Carefully remove the existing car stereo and surrounding trim panels. This process typically involves prying off plastic trim pieces, unscrewing mounting bolts, and disconnecting electrical harnesses. Refer to the detailed installation video below for specific steps for your Honda Civic (2007-2011).
Video 2: How to install Dasaita 9'' car radio on 2010 Honda Civic? This video provides a step-by-step guide for removing the old unit and preparing for the new installation.
Key steps from the video include:
- Remove the lower trim panel on the driver's side using a panel removal tool.
- Unscrew any visible screws securing the main dashboard trim.
- Carefully pry off the main stereo and climate control trim panel.
- Disconnect all electrical connectors from the back of the original stereo unit.
Transferring Components
Transfer essential components from your old stereo's trim panel to the new Dasaita unit's frame. This includes the AC control unit, air vents, and the passenger airbag indicator light. Ensure all screws are securely fastened, but avoid over-tightening to prevent damage to plastic components.
Wiring Connections
Connect the provided wiring harnesses to the new Dasaita head unit and the vehicle's existing wiring. This includes the main power harness, antenna adapter, USB inputs, auxiliary inputs/outputs, and the reverse camera input. Ensure all connections are firm and correctly seated.
Testing the Unit
Before fully reassembling the dashboard, temporarily connect the battery and turn on the ignition to test the basic functions of the new stereo. Verify power, touch screen responsiveness, radio reception, and initial operation of CarPlay/Android Auto. Check all buttons and controls.
Video 3: Dasaita Civic 9'' Radio: How It Works & Why It’s Awesome! This video demonstrates the various functions and responsiveness of the stereo.
Final Assembly
Once all functions are verified, carefully reassemble the dashboard trim panels, ensuring all clips and screws are properly secured. Reconnect the car battery's negative terminal.
Operating Instructions
Basic Navigation
The stereo features an intuitive touchscreen interface. Tap icons to open applications, swipe to navigate between screens, and use the physical buttons on the side for quick access to home, volume, and reset functions.
CarPlay / Android Auto Usage
To use Apple CarPlay or Android Auto, ensure your smartphone's Bluetooth is on and paired with the stereo. For wireless connection, simply select the CarPlay or Android Auto icon on the home screen. For wired connection, connect your phone via a USB cable. Follow on-screen prompts to complete the setup. Once connected, your phone's compatible apps will appear on the stereo display.
Bluetooth Functions
Access the Bluetooth menu to pair new devices, make hands-free calls, and stream audio. The built-in microphone ensures clear call quality. You can manage contacts and call history directly from the stereo.
Radio Operation
Select the "Radio" icon to access the AM/FM tuner. You can manually tune frequencies, scan for available stations, and save your favorite stations as presets for quick access.
Display Settings
Navigate to the "Setup" menu and select "Video Setting" to adjust display parameters such as brightness, contrast, hue, and saturation. You can also switch between day and night modes for optimal visibility.
Maintenance
To ensure the longevity and optimal performance of your Dasaita car stereo, follow these maintenance guidelines:
- Cleaning: Use a soft, dry cloth to clean the touchscreen and exterior. Avoid abrasive cleaners or solvents.
- Software Updates: Periodically check the Dasaita official website for firmware updates to ensure you have the latest features and bug fixes.
- Environmental Conditions: Avoid exposing the unit to extreme temperatures or direct sunlight for prolonged periods.
Troubleshooting
If you encounter any issues with your Dasaita car stereo, refer to the following common troubleshooting steps:
- No Power:
- Check all power connections and ensure they are securely plugged in.
- Verify the vehicle's fuse for the stereo is not blown.
- Ensure the car battery is properly connected and charged.
- No Sound:
- Check speaker wire connections.
- Verify volume levels are not muted or set too low.
- Ensure the correct audio source is selected.
- Touchscreen Unresponsive:
- Perform a soft reset by pressing the RST button (usually a small pinhole, refer to the unit's physical buttons).
- Ensure the screen is clean and free of debris.
- CarPlay/Android Auto Not Connecting:
- Ensure Bluetooth is enabled on both the stereo and your smartphone.
- Try forgetting the device on both ends and re-pairing.
- For wired connections, try a different USB cable.
For further assistance, please refer to the support section.
Specifications
| Feature | Detail |
|---|---|
| Brand | dasaita |
| Model Number | ad067f29-f1a4-43ef-8e82-2d48c2467a87 |
| Screen Diagonal | 9" / 23 cm |
| Connectivity Technology | Bluetooth, Auxiliary, USB |
| Controller Type | Touchscreen |
| Special Features | Touchscreen, Equalizer (DSP) |
| Compatible Devices | Smartphone |
| Audio Output Mode | Stereo |
| Surround Sound Channel Configuration | 2.0 |
| Item Weight | 5.29 pounds |
| Package Dimensions | 17 x 12.2 x 8 inches |
Warranty & Support
For warranty information, technical support, or any inquiries regarding your Dasaita 9" Car Stereo, please contact the official seller directly. The seller, Dasaita Offical Store, is committed to providing excellent customer service and assistance.
You can typically find contact information on their Amazon store page or through your order details.
