
Iceman RJ56-BUL-12
Iceman Dual-Size Ice Maker Countertop Instruction Manual
Model: RJ56-BUL-12 | Brand: Iceman
Introduction
Thank you for choosing the Iceman Dual-Size Ice Maker. This portable countertop ice machine is designed to provide you with fresh ice quickly and efficiently, offering both large and small ice cube options. With its self-cleaning function and compact design, it is ideal for home, kitchen, office, or party use. Please read this manual thoroughly before operating your new ice maker to ensure safe and optimal performance.
Product Overview and Components
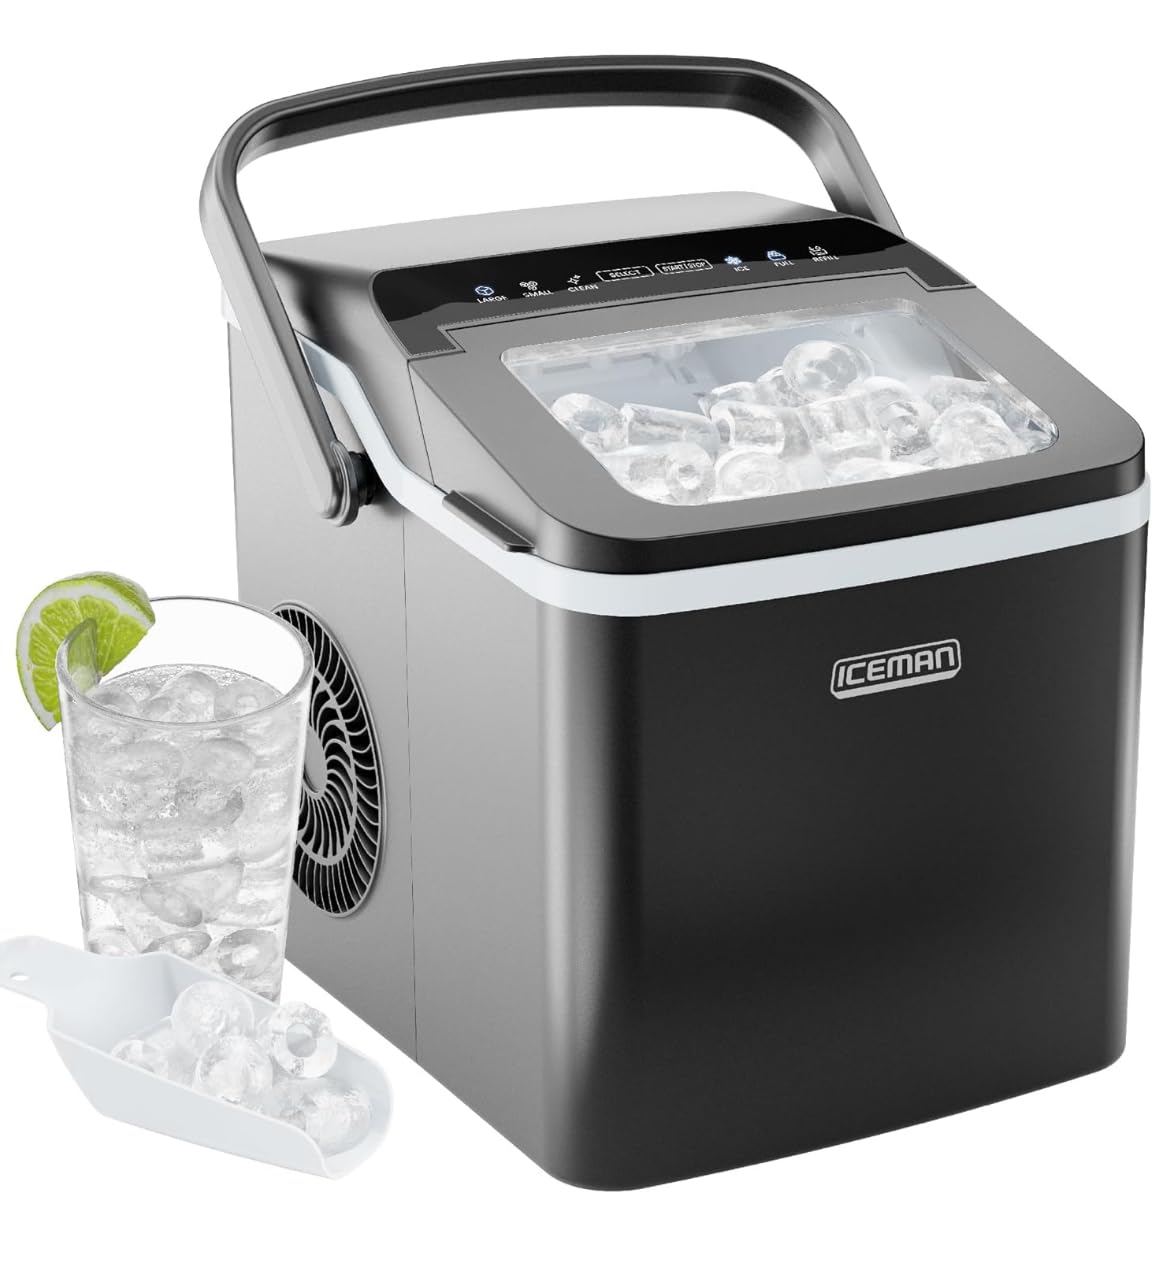


Setup
- Unpacking: Carefully remove the ice maker from its packaging. Retain packaging materials for future storage or transport.
- Placement: Place the ice maker on a flat, stable surface away from direct sunlight and heat sources. Ensure there is adequate ventilation around the unit (at least 4 inches of space on all sides).
- Initial Cleaning: Before first use, clean the interior of the ice maker. Fill the water reservoir with clean water and run the self-cleaning cycle (refer to the Maintenance section for details). Discard the water after the cycle.
- Power Connection: Plug the ice maker into a grounded electrical outlet. Ensure the voltage matches the specifications of the unit (120 Volts).
Operating Instructions
- Fill Water Reservoir: Open the lid and fill the water reservoir with potable water up to the 'MAX' fill line. Do not overfill.
- Select Ice Size: Press the 'SELECT' button on the control panel to choose between 'LARGE' or 'SMALL' ice cube sizes. The corresponding indicator light will illuminate.
- Start Ice Production: Press the 'START/STOP' button to begin the ice making cycle. The 'ICE' indicator light will turn on.
- Monitor Ice Production: The ice maker will produce 9 bullet-shaped ice cubes approximately every 7-10 minutes.
- Ice Full Indicator: When the ice basket is full, the 'FULL' indicator light will illuminate, and the ice production will automatically pause. Remove ice from the basket to resume production.
- Water Refill Indicator: If the water level in the reservoir is too low, the 'REFILL' indicator light will illuminate, and the ice production will stop. Add more water to the reservoir to resume.
- Stop Production: To stop ice production at any time, press the 'START/STOP' button again.
Maintenance and Cleaning
Self-Cleaning Function
The Iceman Ice Maker features a convenient one-touch self-cleaning function:
- Ensure the ice basket is empty.
- Fill the water reservoir with clean water up to the 'MAX' line.
- Press and hold the 'CLEAN' button for a few seconds until the cleaning cycle begins. The 'CLEAN' indicator light will illuminate.
- The cleaning cycle will run for several minutes, circulating water through the system.
- Once the cycle is complete, drain the water from the unit by removing the drain plug located at the bottom or side of the unit (refer to diagram in product manual if available).
- Rinse the interior with fresh water and drain again.
Regular Cleaning
- Wipe the exterior with a soft, damp cloth.
- Clean the ice basket and ice scoop with mild detergent and warm water. Rinse thoroughly and dry before reinserting.
- For optimal performance and hygiene, perform the self-cleaning cycle regularly, especially if the unit has not been used for an extended period.
Troubleshooting
| Problem | Possible Cause | Solution |
|---|---|---|
| Ice maker not producing ice. | No water in reservoir; 'REFILL' light on. | Add water to the reservoir up to the 'MAX' line. |
| Ice maker not producing ice. | Ice basket is full; 'FULL' light on. | Remove ice from the basket. |
| Ice maker not producing ice. | Unit is not powered on or plugged in. | Ensure the unit is plugged into a working outlet and the 'START/STOP' button has been pressed. |
| Ice cubes are too small or clumpy. | Water temperature is too high. | Use colder water. Ensure the unit is in a cool environment. |
| Unusual noise during operation. | Normal operational sounds (compressor, water pump). | This is usually normal. If the noise is excessive or new, contact customer support. |
| Water leakage. | Drain plug not properly sealed. | Ensure the drain plug is securely inserted. |
Specifications
| Brand | Iceman |
| Model Number | RJ56-BUL-12 |
| Manufacturer | Chefman |
| Product Dimensions | 28.7 x 22.86 x 27.94 cm (11.3 x 9 x 11 inches) |
| Item Weight | 6.15 kg |
| Voltage | 120 Volts |
| Wattage | 120 watts |
| Ice Production Capacity | Approx. 9 cubes in 7-10 minutes; 22lbs/24hrs |
| Ice Storage Capacity | 1 lb |
| Included Components | Ice Maker, Ice Scoop |
Warranty and Support
For warranty information and customer support, please refer to the warranty card included with your product or visit the official Iceman website. Keep your purchase receipt as proof of purchase for any warranty claims.
Related documentsRJ56-BUL-12


Ask a question about this manual
Ask about setup, troubleshooting, compatibility, parts, safety, or missing instructions. Manuals+ will review the question and use this page’s manual context to help answer it.