1. Introduction
This instruction manual provides essential information for the proper installation, operation, and maintenance of your CFTGIW AW03-72LE Remanufactured Transmission Valve Body. Please read this manual thoroughly before proceeding with any installation or service to ensure correct procedures and optimal performance.
2. Product Overview
The CFTGIW AW03-72LE Transmission Valve Body is a remanufactured component designed to restore proper transmission function. It is constructed from durable aluminum alloy and is engineered to meet original equipment (OE) specifications.
Key Features:
- Remanufactured Quality: Each valve body undergoes a meticulous refurbishment process, including disassembly, cleaning, inspection, calibration, and testing to ensure performance comparable to new.
- High Reliability: The remanufactured valve body boasts a high operational use rate, ensuring consistent and reliable performance.
- Solenoid Testing: All solenoids are individually tested, inspected, and calibrated to ensure optimal function. Slight wear with oil is considered normal for remanufactured units.
- Durable Construction: Manufactured from high-quality aluminum alloy for longevity.
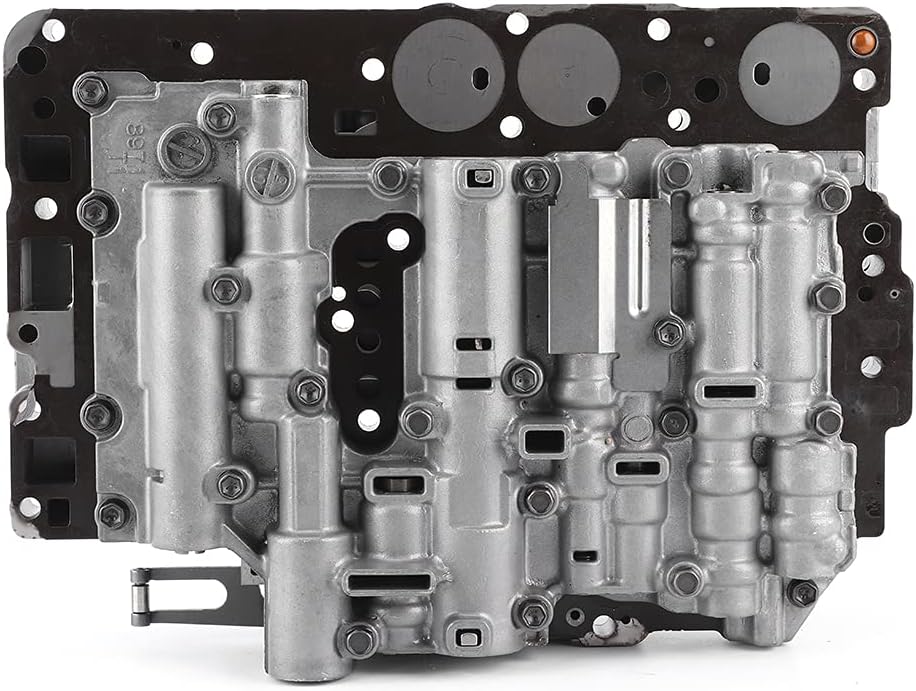
Figure 1: Top view of the AW03-72LE Transmission Valve Body, showcasing its intricate design and components.
3. Compatibility and Fitment
This AW03-72LE Transmission Valve Body is compatible with a range of vehicle models. Please verify the OE part number and consult your vehicle's service manual to confirm compatibility before installation. Matching information is for reference only.
| Manufacturer | Model | Years | Configuration |
|---|---|---|---|
| MITSUBISHI | PAJERO | 00-ON | 4SP R/AWD L4 2.4L |
| MITSUBISHI | PAJERO IO | 00-07 | 4SP R/AWD L4 1.8L 2.0L |
| MITSUBISHI | PAJERO TR4 | 02-11 | 4SP R/AWD L4 2.0L |
| MITSUBISHI | PAJERO WAGON | 00-04 | 4SP R/AWD L4 2.4L |
| MITSUBISHI | SPACE GEAR | 00-07 | 4SP RWD L4 2.4L |
| MITSUBISHI | STRADA | 00-01, 00-08 | 4SP RWD L4 2.5L |
| MITSUBISHI | ADVENTURE | 00-01 | 4SP RWD L4 2.0L |
| MITSUBISHI | DELICA/DELICA SPACE GEAR | 00-04 | 4SP RWD L4 2.0L 2.4L 2.5L |
| MITSUBISHI | L200 | 00-08 | 4SP RWD L4 2.5L |
| MAZDA | ROADSTER | 00-02, 02-05 | 4SP RWD L4 1.6L 1.8L |
| ISUZU | AMIGO | 92-94 | 4SP RWD L6 2.6L |
| ISUZU | PANTHER | 00-11 | 4SP RWD L4 2.5L |
| ISUZU | PICKUP | 88-95 | 4SP RWD V6 3.1L |
| LEXUS | IS | 00-05 | 4SP RWD V6 2.0L |
| CHEVROLET/GAM/AM GENERAL | GRAND VITARA | 05-11 | 4SP RWD/4X4 L4 2.0L |
| CHEVROLET/GAM/AM GENERAL | TRACKER | 98-04 | 4SP RWD/4X4 L4 1.6L 2.0L V6 2.5L |
| HYUNDAI | 1T PORTER | 00-03 | L4 2.4L |
| HYUNDAI | GALLOPER | 00-03 | 4SP R/AWD L4 2.5L |
| HYUNDAI | GRACE | 00-04 | 4SP FWD L4 2.5L |
| HYUNDAI | H1 | 02-07 | 4SP RWD L4 2.4L |
| HYUNDAI | STAREX | 00-07 | 4SP RWD L4 2.4L 2.6L |
| KIA/NAZA | BONGO | 00-03 | 4SP RWD L4 3.3L |
| KIA/NAZA | POTENTIA | 00-01 | 4SP RWD L4 2.0L |
| KIA/NAZA | RETONA | 00-03 | 4SP RWD L4 2.0L |
| KIA/NAZA | SPECTRA/SPECTRA5 | 06-09 | 4SP FWD L4 2.0L |

Figure 2: Angled view of the valve body, highlighting various components and an inset showing a detailed view of an electrical connector.
4. Installation and Setup
Installation of a transmission valve body is a complex procedure that requires specialized tools and automotive knowledge. It is highly recommended that installation be performed by a certified professional mechanic.
General Installation Guidelines (Professional Installation Recommended):
- Safety First: Ensure the vehicle is securely lifted and supported. Disconnect the battery.
- Fluid Drainage: Drain the transmission fluid completely.
- Access: Remove the transmission pan and filter to gain access to the valve body.
- Disconnection: Carefully disconnect all electrical connectors and remove mounting bolts securing the old valve body. Note the position of all components.
- Removal: Gently remove the old valve body.
- Preparation: Clean the transmission case mating surface thoroughly. Ensure no debris remains.
- New Gaskets: Always use new gaskets for the transmission pan and any other seals disturbed during the process.
- Installation: Carefully position the new CFTGIW AW03-72LE valve body. Secure it with the appropriate mounting bolts, tightening to manufacturer-specified torque values. Reconnect all electrical connectors.
- Filter and Pan: Install a new transmission filter and reattach the transmission pan with a new gasket, tightening bolts to specifications.
- Fluid Refill: Refill the transmission with the correct type and amount of transmission fluid as specified by your vehicle manufacturer.
- System Flush (Recommended): A complete transmission fluid flush is often recommended when replacing a valve body to remove any contaminants from the system.
- Initial Check: Start the vehicle and check for leaks. Cycle through all gear positions while stationary.
- Test Drive: Perform a test drive to confirm proper shifting and operation. Monitor fluid levels.

Figure 3: Detailed view of an electrical connector on the valve body, emphasizing the importance of proper connection during installation.
5. Operation
Once correctly installed and the transmission fluid levels are verified, the CFTGIW AW03-72LE Transmission Valve Body should facilitate smooth and responsive gear changes. As a remanufactured part, slight wear of the valve body with oil is considered normal and does not affect performance.

Figure 4: Side angled view of the valve body, showing its profile and various hydraulic channels.
6. Maintenance
To ensure the longevity and optimal performance of your transmission and the newly installed valve body, adhere to your vehicle manufacturer's recommended maintenance schedule for transmission fluid and filter changes. Regular maintenance helps prevent premature wear and ensures proper hydraulic function.

Figure 5: An additional angled view of the valve body, providing a broader perspective of its complex assembly.
7. Troubleshooting
If you experience any issues with your transmission after the valve body replacement, such as erratic shifting, delayed engagement, or warning lights, it is crucial to seek professional diagnosis immediately. Common issues can stem from:
- Incorrect installation procedures.
- Improper transmission fluid level or type.
- Faulty electrical connections.
- Other underlying transmission component failures.
Always double-check the part number of your item against your vehicle's requirements. If you are unsure about any aspect of the installation or troubleshooting, consult a qualified mechanic.

Figure 6: Bottom view of the valve body, showing the underside and mounting points.
8. Specifications
- Item Type: Transmission Valve Body
- Material: Aluminum Alloy
- Color: As pictured
- OE Part Number: AW03-72LE
- Condition: Remanufactured
- Item Weight: 12.87 pounds
- Package Dimensions: 15.75 x 11.81 x 6.69 inches

Figure 7: Another angled view of the valve body, providing a comprehensive look at its structure.
9. Package Contents
- 1 x CFTGIW AW03-72LE Transmission Valve Body
10. Important Notes and Disclaimer
- Please double-check the part number of your item. Matching information is for reference only. If you are unsure of the item's compatibility, please contact the seller or a qualified mechanic before purchasing to avoid unnecessary returns.
- This product is a remanufactured part. While it undergoes rigorous testing, slight cosmetic variations or minor wear consistent with a remanufactured item may be present.
- The manufacturer and seller are not responsible for damages or issues arising from improper installation or misuse of this product.
11. Warranty and Support
For information regarding warranty coverage, terms, and conditions, please refer to the documentation provided with your purchase or contact the seller directly. For technical support or assistance, please reach out to the CFTGIW customer service department or your authorized dealer.
