
1. Safety Information
Please read this instruction manual carefully before using the product to ensure safe operation and optimal performance. Keep this manual for future reference.
- Do not disassemble or modify the flash unit.
- Keep the unit dry. Do not handle with wet hands or immerse in water.
- Do not use in the presence of flammable gases or liquids.
- Avoid direct eye exposure to the flash, especially for infants and children.
- Use only the specified battery and charger.
- Ensure proper ventilation during use to prevent overheating.
2. What's in the Box
Verify that all items are included in your package:
- Flash Body
- Storage Bag
- Lithium Battery
- Adapter
- Mini Stand
- USB-C Charging Cable

Image: The GODOX V100CU flash unit displayed with its standard accessories, including the flash body, battery, charger, mini stand, and storage bag.
3. Product Overview
The GODOX V100CU is a compact and powerful TTL Li-ion round head camera flash designed for Canon cameras. It features a 100Ws output, a 2.3-inch full-color touchscreen, and integrated 2.4G wireless X System for versatile lighting control.

Image: Overview of the GODOX V100CU flash, showcasing its round head, touchscreen interface, and compact design.
4. Setup
4.1. Installing the Flash on Camera
- Press the hot shoe lock button on the flash.
- Slide the flash into the camera's hot shoe.
- Rotate the lock mechanism to the right to secure the flash.
Video: Demonstrates how to install the GODOX V100CU flash onto a camera's hot shoe and secure it.
4.2. Installing the Battery
Insert the lithium battery into the battery compartment according to the indicated direction until it clicks into place.

Image: A hand inserting the battery into the GODOX V100CU flash unit.
4.3. Installing the Detachable Sub Flash (SU-1)
Align and press the detachable sub flash (SU-1) onto the designated slot until it clicks into place.

Image: The GODOX V100CU flash unit with the detachable sub flash (SU-1) installed.
4.4. Initial Camera Setup for Global Shutter Sync (e.g., Sony a9 III)
For cameras supporting global shutter, follow these steps to optimize flash timing and shutter speed:
- Access your camera's menu.
- Navigate to the Flash Timing Setting.
- Set "Wireless Flash" to Off.
- Adjust "Flash Timing" to 160 µs.
- Set the camera's shutter speed to 1/8000.
- Switch to Continuous Shooting: Hi+.
Video: Demonstrates the initial camera setup for global shutter flash sync, including adjusting wireless flash settings, flash timing, shutter speed, and continuous shooting mode.
5. Operating Modes
5.1. Power On/Off
Press the power button until the icon appears, then rotate the dial clockwise to turn on the flash. To turn off, press and hold the power button.
5.2. Touchscreen Navigation
- Swipe right for mode selection.
- Swipe left to return to the previous screen.
- Swipe down for additional functions.
- Swipe up to return from additional functions.
5.3. Manual (M) Mode
In Manual mode, you can adjust the flash power output from 1/1 to 1/256. Use the +/- icons or pull the progress bar for precise adjustments. The dial can also be used for quick adjustments.

Image: The GODOX V100CU touchscreen displaying manual power settings, showing the adjustable power bar.
5.4. TTL Mode
Tap the [Mode] button to switch between TTL and Manual modes. In TTL mode, you can adjust Flash Exposure Compensation (FEC) using the +/- icons or by pulling the progress bar.
5.5. Sub Flash (SU-1) Control
Tap the [SUB] button to adjust the sub flash power. This allows for dual-light setups with a single flash unit.
5.6. Manual Zoom
Tap the [Zoom] button to enter the flash focal length settings. Rotate and press the dial to select the desired focal length (e.g., 28mm, 35mm, 50mm, 70mm, 80mm, 105mm).
5.7. Auto Zoom
The flash zoom will automatically adjust based on the lens focal length when connected to a compatible camera.
5.8. Wireless Modes (Wi-Off, Sender, Receiver)
The V100CU supports various wireless modes through its built-in Godox 2.4G Wireless X System. You can select Wi-Off, Sender, or Receiver mode from the touchscreen menu.
- Sender Mode: The V100CU acts as a master unit to control other Godox wireless flash units. Easily pair with an X3 trigger or other compatible devices. Long press the group button to switch between Manual flash, TTL auto flash, or OFF for each group.
- Receiver Mode: The V100CU acts as a slave unit, triggered by a master unit (e.g., X3 trigger). Tap to switch modes and select focal length. Tap to enter group settings and select the group.

Image: The GODOX V100CU set up as a master unit on a camera, wirelessly controlling an off-camera flash unit.
6. Other Functions
Access additional settings and functions through the menu or by swiping down on the touchscreen.
6.1. Menu Settings
- Power Type: Adjust power steps from 1/1 to 1/256 or from 2.0 to 10.
- Photocell (Optical Control):
- S1: Available in Manual flash mode. The flash fires synchronously with the main flash.
- S2: Available in Manual flash mode. The flash fires in response to the second actual flash from the main flash, ignoring pre-flashes.
- m/ft: Switch between meters and feet for distance display.
- Standby: Enable or disable standby mode.
- Auto Off: Set the auto-off timer (e.g., 30, 60, 90 minutes) or disable it.
- Modeling Lamp:
- Continuous: The light stays on continuously when the flash is firing.
- Interrupt: The light turns off automatically when the flash fires.
- Screen: Adjust screen brightness without steps. Set screen standby time.
- Language: Select the display language (e.g., English, Chinese).
- Factory Reset: Reset all settings to factory defaults.
- Device Info: View firmware version and other device information.
6.2. Sync Mode
The V100CU supports Front Curtain Sync, High-Speed Sync (HSS) up to 1/8000s, and Rear Curtain Sync for various creative effects.
6.3. AF Assist Beam
The AF assist beam helps the camera achieve focus in low-light conditions.
6.4. Beeper
Enable or disable the beeper sound for flash readiness and other alerts.
6.5. Screen Lock
Lock the touchscreen to prevent accidental changes to settings. Press and hold for 2 seconds to unlock.
6.6. Multi Flash
Utilize the multi-flash function for stroboscopic effects, firing a series of rapid flashes.
7. Recycling Indicator
The red light on the flash unit indicates that the flash is ready to fire. A fully charged battery and external power pack can reduce recycling time to as fast as 0.8 seconds.
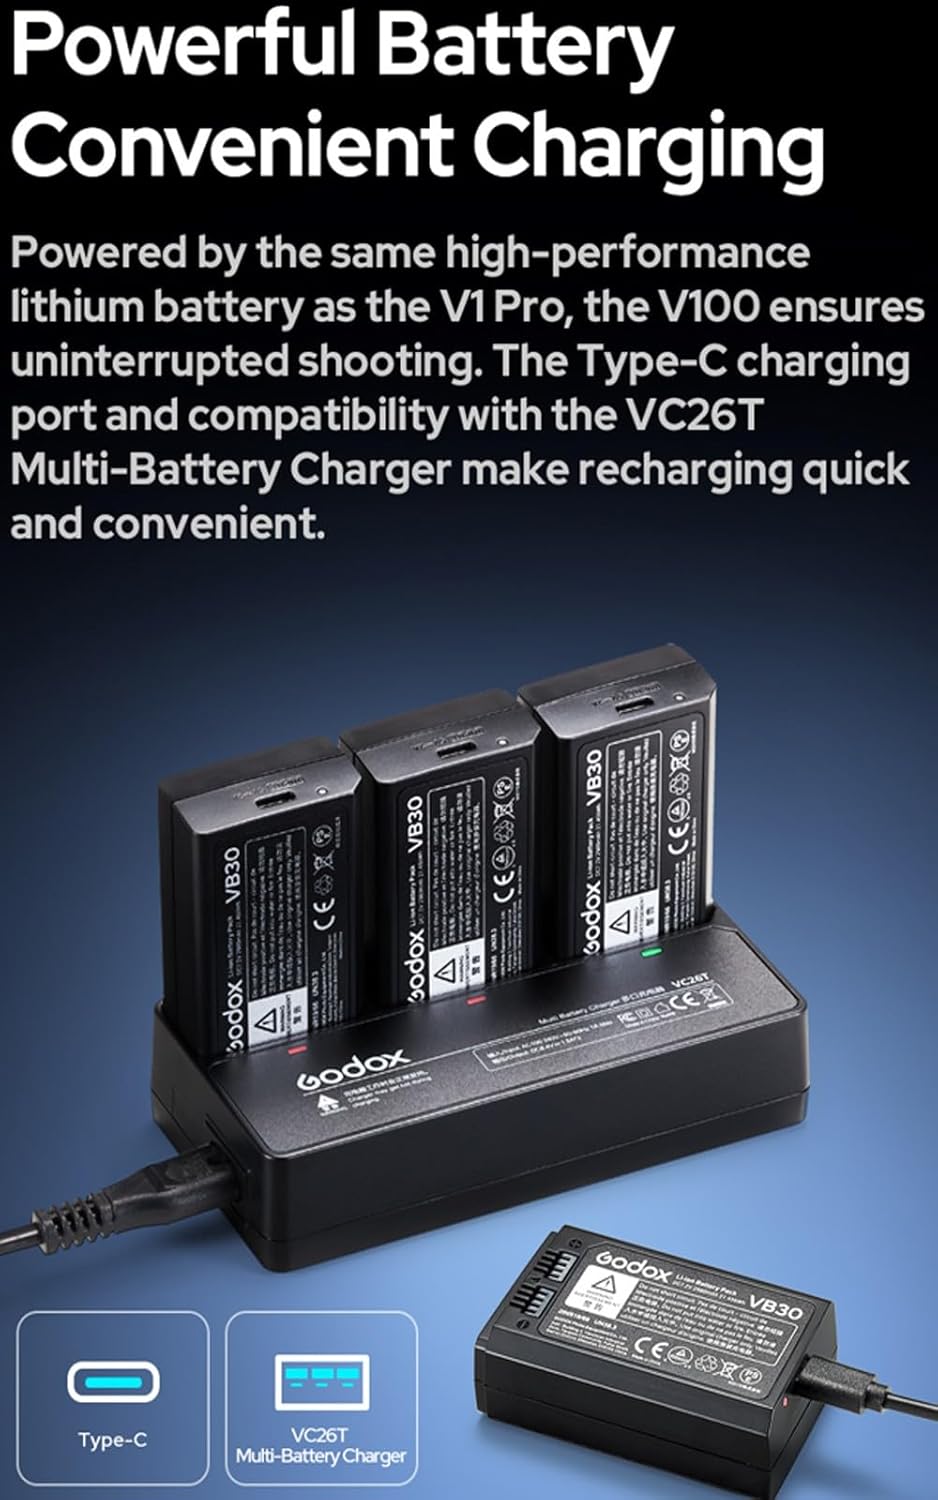
Image: The GODOX V100CU flash unit showing the red indicator light, signifying it is ready for the next flash.
8. Accessories
The GODOX V100CU is compatible with various accessories to enhance its functionality:
- PB960 Lithium-Ion Flash Power Pack: Connects to the V100CU to significantly reduce recycling time for demanding shooting scenarios.
- VC26T Multi-Battery Charger: Provides quick and convenient recharging for the V100CU's high-performance lithium battery.
- X3 Trigger: A wireless trigger for seamless integration and control in multi-flash setups.
- AK-R1 Accessory Kit: (Not included, but mentioned in reviews) Offers various modifiers like dome diffusers.

Image: The GODOX V100CU flash connected to an external PB960 Lithium-Ion Flash Power Pack for enhanced performance.
9. Specifications
| Feature | Detail |
|---|---|
| Model | V100CU for Canon |
| Power Output | 100Ws (Max) |
| Flash Sync Speed | Up to 1/8000 seconds (HSS) |
| Wireless System | Built-in Godox 2.4G Wireless X System |
| Battery | 7.2V/2980mAh Li-ion Battery (VB30) |
| Full Power Flashes | Approx. 400 |
| Recycle Time | 1.7s (normal), 0.8s (with PB960) |
| Modeling Lamp | 2W LED with 10 adjustable levels |
| Display | 2.3'' Full-color Touchscreen |
| Item Weight | 1.17 pounds |
| Package Dimensions | 9.33 x 7.56 x 3.9 inches |
10. Troubleshooting
If you encounter issues with your GODOX V100CU flash, please refer to the following common solutions:
- Flash not firing: Ensure the battery is charged and correctly inserted. Check that the flash is securely mounted on the camera hot shoe or properly synced in wireless mode. Verify camera and flash settings (e.g., flash mode, sync mode).
- Slow recycling time: Ensure the battery is fully charged. If using an external power pack, confirm it is connected and functioning correctly.
- Inconsistent flash output: Check for proper TTL or manual power settings. Ensure no obstructions are blocking the flash sensor or light path.
- Wireless sync issues: Verify that the channel and ID settings match between the master and receiver units. Ensure both units are in the correct wireless mode (Sender/Receiver).
- Screen unresponsive: Try restarting the flash unit. If the screen is locked, press and hold the lock icon for 2 seconds to unlock.
For persistent issues, perform a factory reset via the menu or contact GODOX customer support.
11. Warranty and Support
The GODOX V100CU comes with a manufacturer's warranty. Please refer to the warranty card included in your package for specific terms and conditions. For technical support, service, or warranty claims, please contact GODOX customer service or your authorized dealer.
You can also visit the official GODOX website for additional resources, firmware updates, and FAQs: www.godox.com