
Introduction
Thank you for purchasing the Bestfire 3-Burner Outdoor Propane Stove. This manual provides essential information for the safe assembly, operation, and maintenance of your stove. Please read all instructions carefully before use and retain this manual for future reference.
This outdoor stove is designed for versatile cooking with a high heat output, making it suitable for camping, barbecues, outdoor parties, catering, and RV travel. Its robust construction ensures durability and stable performance in various outdoor conditions.

Image: The Bestfire 3-Burner Outdoor Propane Stove, showcasing its compact and robust design.
Safety Information
WARNING: For outdoor use only. Do not operate this appliance indoors or in an enclosed area. Improper installation, adjustment, alteration, service, or maintenance can cause injury or property damage. Read the installation, operating, and maintenance instructions thoroughly before installing or servicing this equipment.
- Always ensure adequate ventilation when operating the stove.
- Keep children and pets away from the stove during operation.
- Do not store or use gasoline or other flammable vapors and liquids in the vicinity of this or any other appliance.
- Check all gas connections for leaks using a soapy water solution before each use. Never use an open flame to check for leaks.
- Use only the regulator and hose assembly provided with the stove.
- Ensure the propane cylinder is placed on a stable, level surface and is not exposed to excessive heat.
- Never leave the stove unattended while in operation.
- Allow the stove to cool completely before cleaning or storing.
Package Contents
Verify that all components are present before assembly:
- Stove body with three burners
- Removable legs (4)
- Propane regulator and hose assembly
- Control knobs (3)
- Octagonal auxiliary shelf (optional, if included)
- Instruction Manual
Setup and Assembly
The Bestfire 3-Burner Outdoor Propane Stove features removable legs for easy assembly and disassembly, enhancing portability.
1. Attaching the Legs
Carefully invert the stove body. Insert each of the four removable legs into the designated slots on the underside of the stove. Ensure they are securely fastened. The legs provide a stable standing height for comfortable cooking.
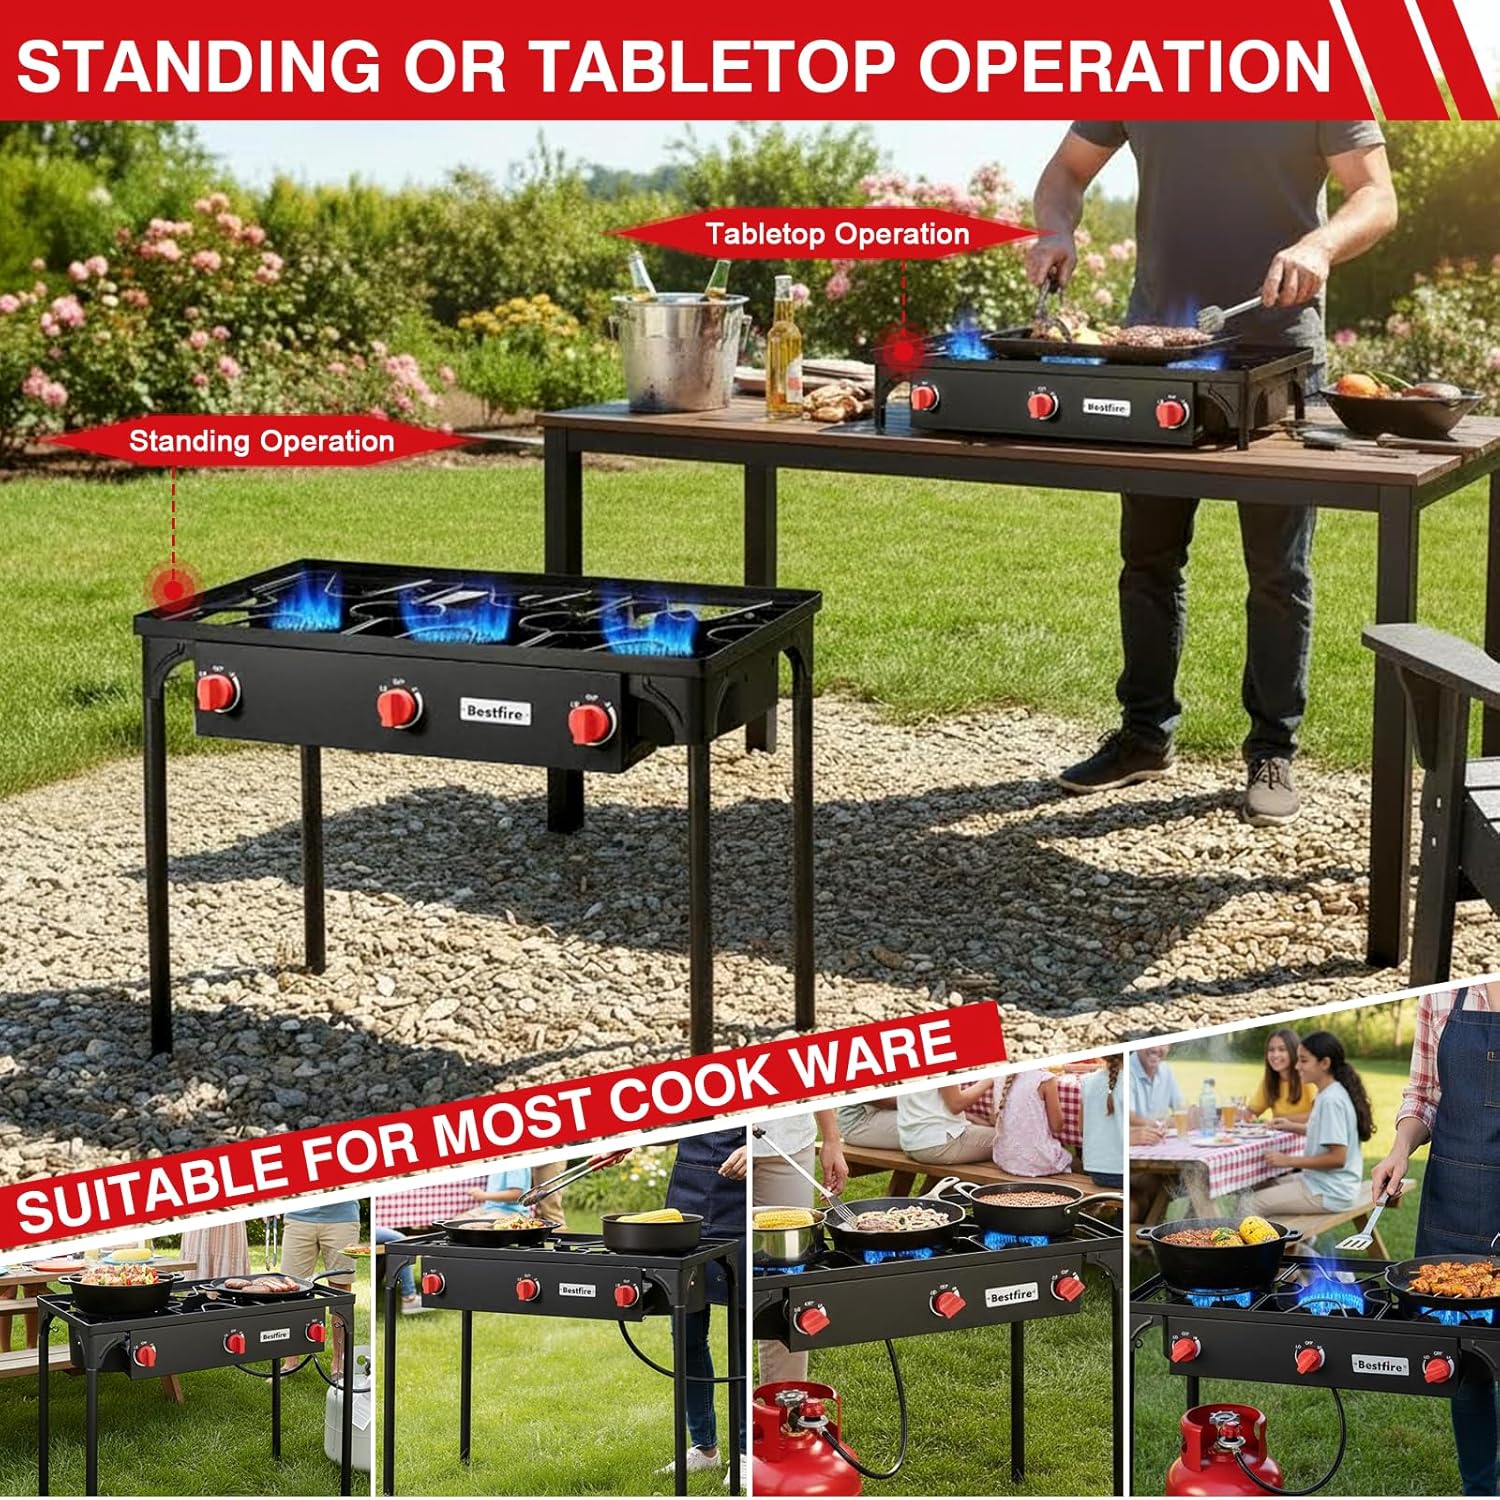
Image: The stove can be used in a standing configuration with its legs or placed on a sturdy tabletop for operation.
2. Connecting the Propane Tank
- Ensure all burner control knobs are in the "OFF" position.
- Connect the regulator hose to the stove's gas inlet. Hand-tighten firmly.
- Connect the other end of the regulator to a standard propane cylinder (not included). Hand-tighten until snug. Do not overtighten.
- Perform a leak test: Apply a soapy water solution to all connections. If bubbles appear, there is a leak. Tighten connections or replace parts as necessary. Do not use the stove if a leak is detected.
Operating Instructions
The stove is equipped with three powerful cast iron burners, each providing up to 75,000 BTU, totaling 225,000 BTU output. Independent control knobs allow precise flame adjustment for each burner.
1. Lighting the Burners
- Ensure the propane cylinder valve is fully open.
- Turn one burner control knob slowly to the "LOW" position.
- Immediately apply a long lighter or match to the burner to ignite the gas.
- Once ignited, adjust the flame to the desired intensity using the control knob (from "LOW" to "HIGH").
- Repeat for other burners as needed.

Image: The stove provides efficient and rapid cooking with its powerful burners. An ignition rod can be used for quick and convenient ignition.
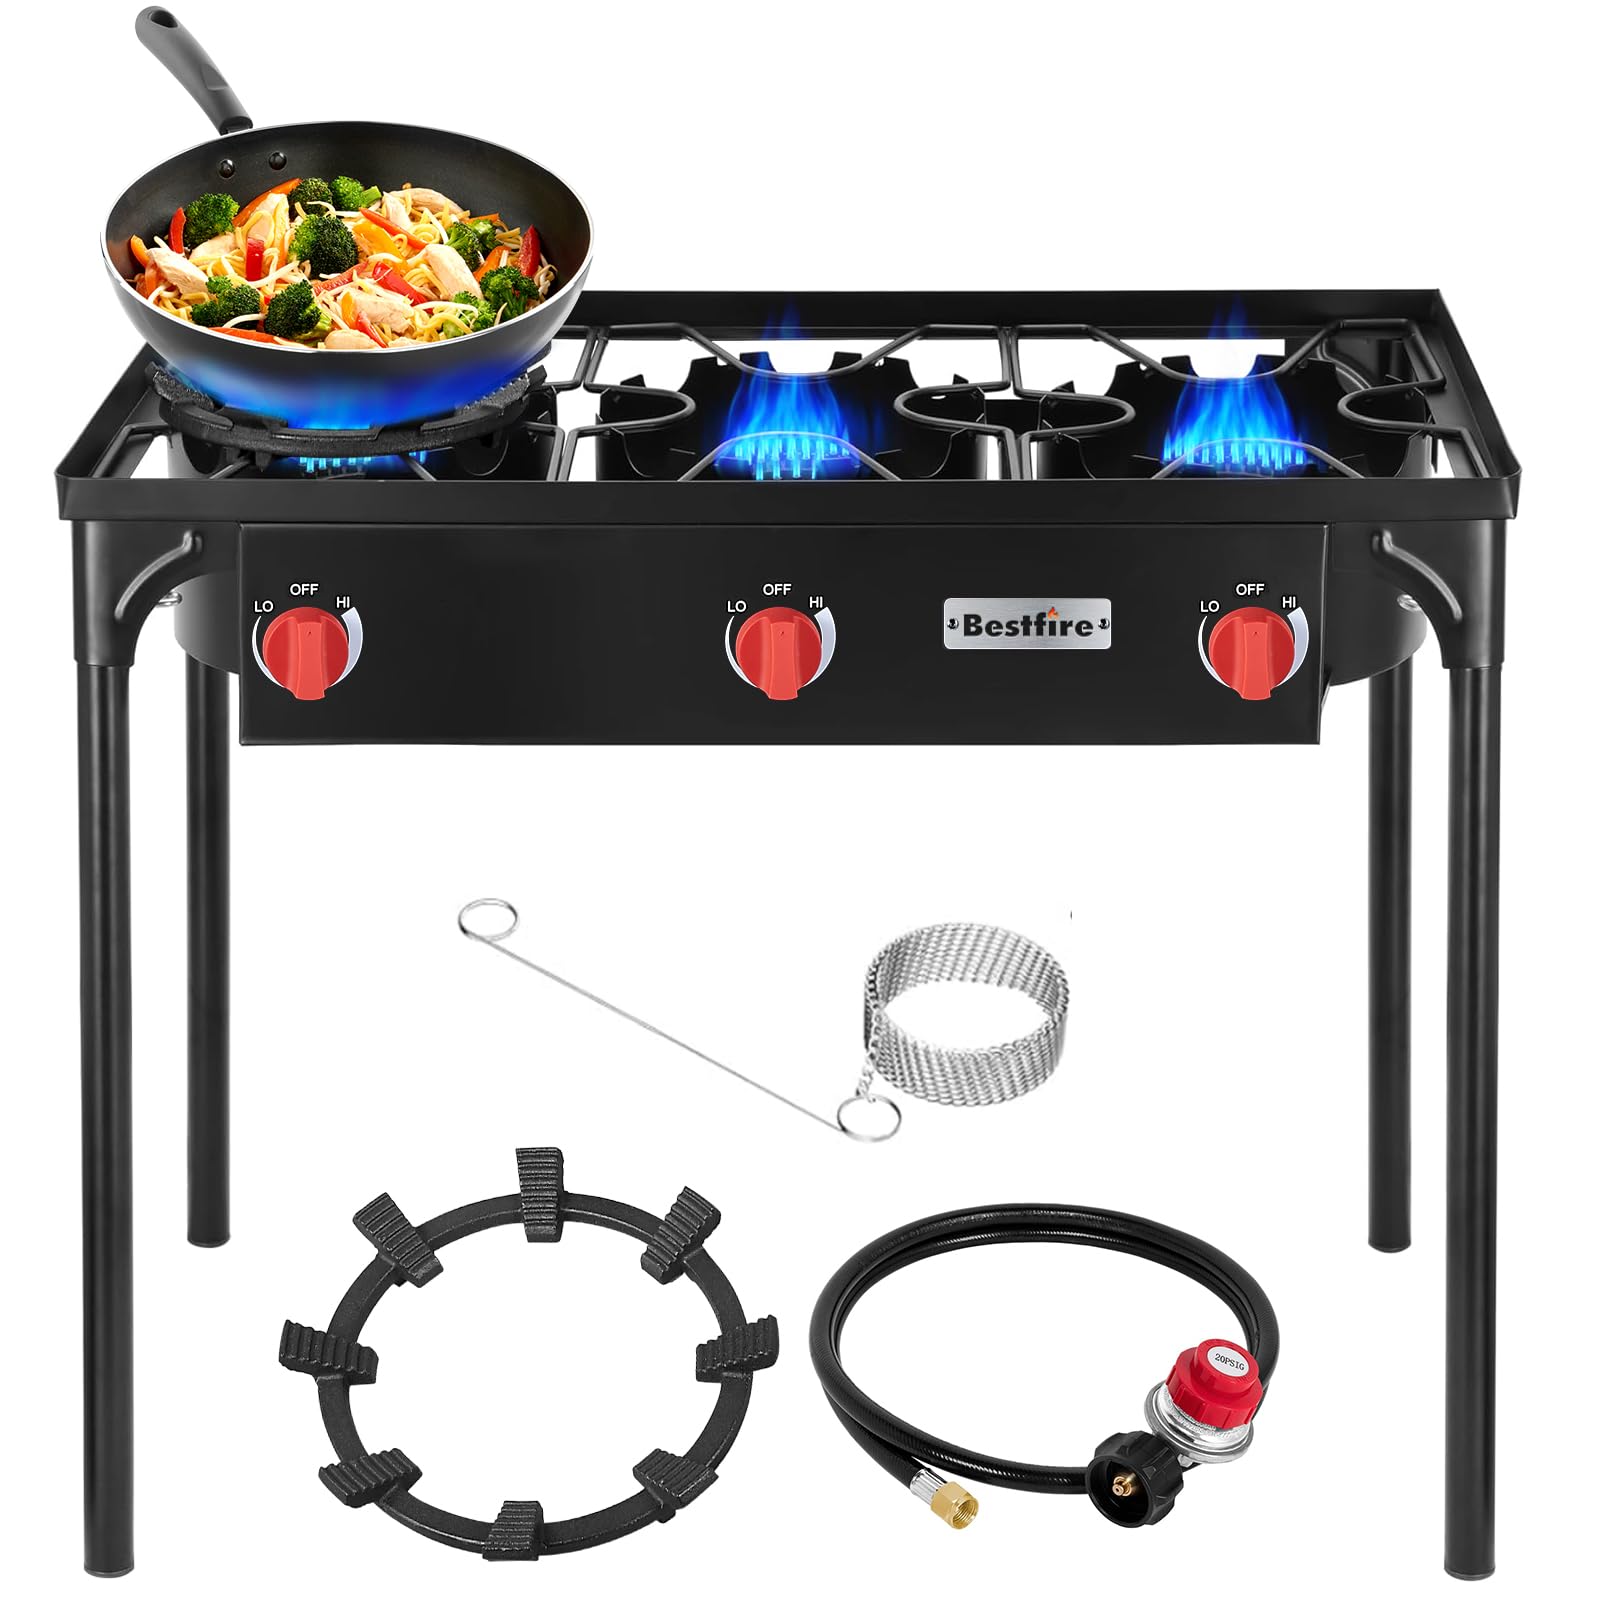
Image: The stove features an air-in control valve to regulate the gas-oxygen ratio for optimal combustion efficiency, ensuring powerful and gas-saving operation.
2. Adjusting Flame and Cooking
Each burner has an independent control knob, allowing you to precisely manage the heat for different cooking tasks. You can boil water on one burner while simmering on another, or fry a steak simultaneously.

Image: High-quality cast iron burners provide durability and high heat output. The octagonal auxiliary shelf is a universal accessory compatible with various gas stove brands and models, designed to prevent pots and pans from slipping.
3. Turning Off the Stove
- Turn all burner control knobs to the "OFF" position.
- Close the valve on the propane cylinder.
- Allow the stove to cool completely before disconnecting the propane tank or moving the unit.
Maintenance
Regular maintenance ensures the longevity and safe operation of your Bestfire outdoor stove.
- Cleaning: After each use, allow the stove to cool. Wipe down the stove body and burner grates with a damp cloth and mild detergent. For stubborn stains, a non-abrasive cleaner can be used. Ensure all parts are dry before storage.
- Burner Care: Periodically check the burner ports for any blockages (e.g., food debris, insect nests). Use a small brush or wire to clear any obstructions.
- Storage: When not in use, store the stove in a dry, protected area. The removable legs allow for compact storage. Disconnect the propane cylinder and store it separately in a well-ventilated area.
- Inspection: Regularly inspect the hose and regulator for cracks, cuts, or signs of wear. Replace immediately if any damage is found.
Troubleshooting
| Problem | Possible Cause | Solution |
|---|---|---|
| Burner does not light |
|
|
| Low flame or inconsistent flame |
|
|
| Gas odor detected |
|
|
Specifications
- Model: BFEX83-51
- Brand: BESTFIRE
- Total BTU Output: 225,000 BTU (3 x 75,000 BTU burners)
- Fuel Type: Propane Gas
- Material: Durable Cast Iron
- Dimensions (L x W x H): 88.9 cm x 43.2 cm x 75.9 cm (35.0 in x 17.0 in x 29.9 in)
- Weight: Approximately 16.28 kg (35.9 lbs)
- UPC: 850067808190

Image: Product dimensions: 87cm (34.25in) length, 45cm (17.72in) width, and 76cm (29.92in) height. Features include a solid metal frame, durability, safety, heat-resistance, and abrasion-resistance.
Warranty and Support
For warranty information or technical support, please contact Bestfire customer service. Refer to your purchase documentation for specific warranty terms and contact details.
For further assistance, please visit the official Bestfire website or contact your retailer.


