
1. Important Safety Instructions
Please read and understand all instructions before using this appliance. Keep this manual for future reference.
- Electrical Safety: Ensure the dryer is connected to a properly grounded 120V electrical outlet. Do not use extension cords.
- Fire Hazard: Do not dry items that have been soiled with cooking oils, flammable chemicals, or other combustible substances. Clean the lint filter before or after each load.
- Hot Surface: The dryer's exterior and interior surfaces can become hot during operation. Avoid touching hot surfaces.
- Ventilation: This dryer requires proper ventilation. Ensure the exhaust pipe is correctly installed and vented to the outside to prevent moisture buildup and potential hazards.
- Child Safety: Keep children away from the dryer during operation. Do not allow them to play on or in the appliance.
- Overload Prevention: Do not overload the dryer. Refer to the capacity guidelines for optimal performance and safety.
2. Product Overview
The Volowoo Portable Clothes Dryer is designed for efficient and convenient drying in compact living spaces.
Key Features:
- Superior drying performance
- Energy saving, high efficiency, and quiet operation
- Easy-to-use control knob
- Portable and space-saving design
- Easy to clean lint filter
Specifications:
| Model | GDZ60-618E |
| Dimensions (L x W x H) | (23.43 x 20.08 x 26.81)" / (59.50 x 51.00 x 68.10)cm |
| Weight | 59.52lb / 27kg |
| Material | Steel, Stainless Steel, ABS |
| Color | White |
| Capacity | 3.5 CUFT / 13.23lbs / 6kg |
| Rated Input Power | 1300W |
| Voltage | 120V |
Product Components:
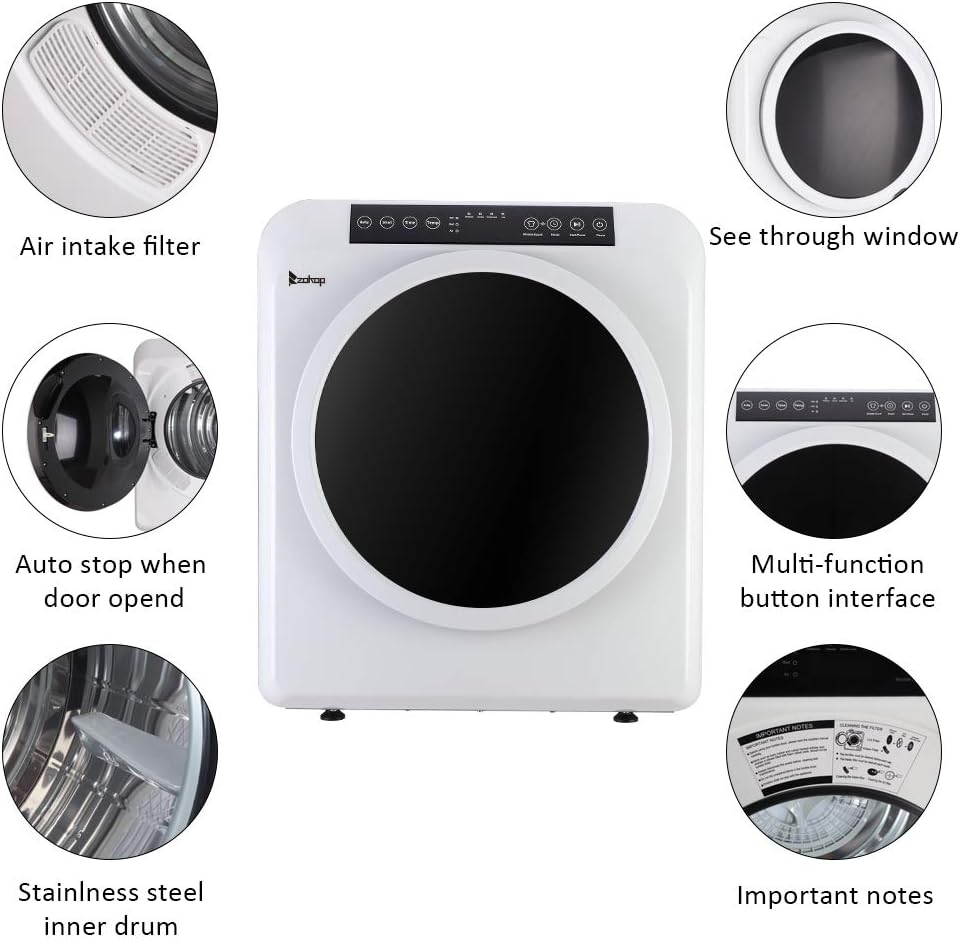
Figure 1: Dryer components including air intake filter, see-through window, auto-stop mechanism, multi-function button interface, stainless steel inner drum, and important notes section.
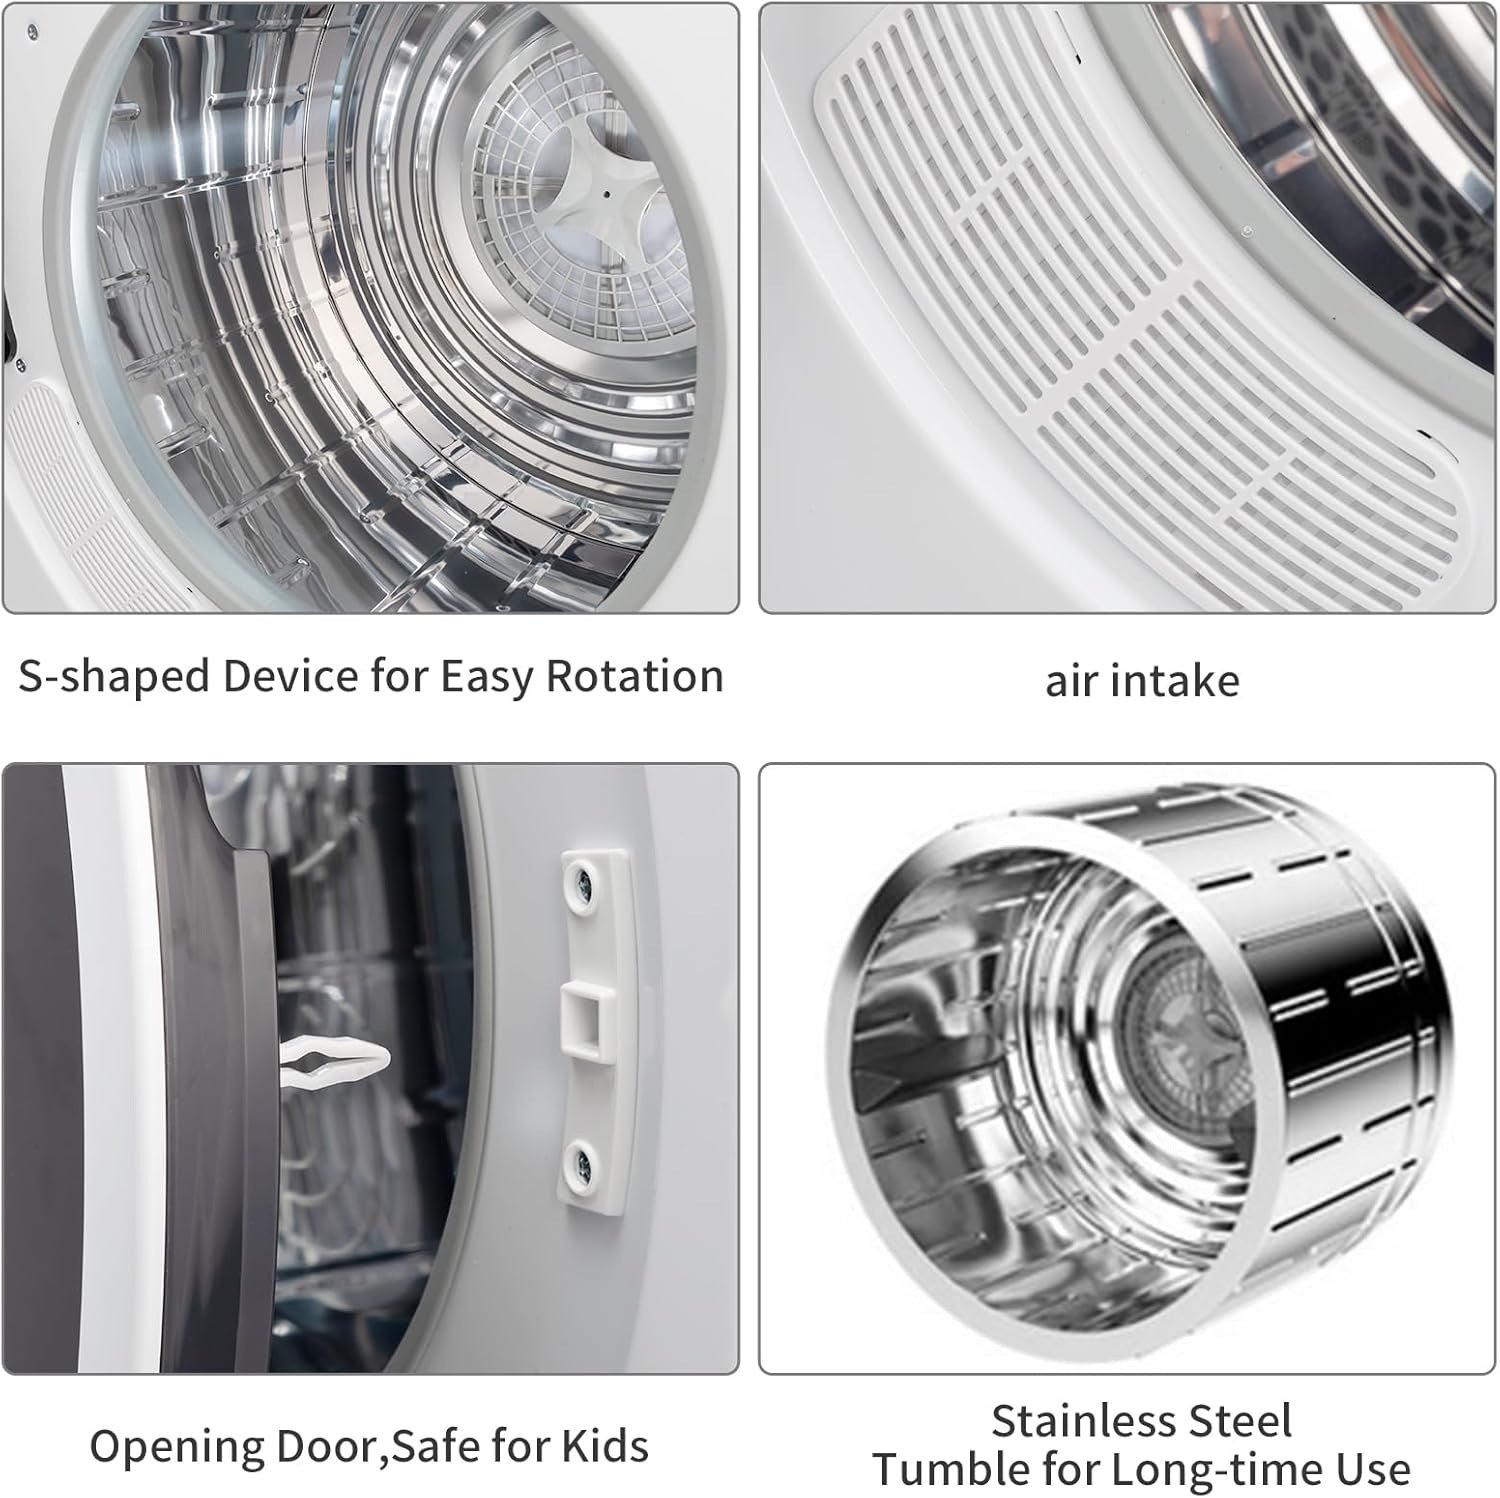
Figure 2: Detailed view of the dryer's interior, showing the S-shaped device for easy rotation, air intake, child-safe door opening mechanism, and durable stainless steel tumble drum.
3. Setup & Installation
Proper setup ensures safe and efficient operation of your dryer.
Placement:
- Place the dryer on a stable, level surface.
- Ensure adequate clearance around the dryer for proper air circulation.
- The compact design allows for freestanding, stacking (with appropriate kit, not included), or wall-mounted installation.

Figure 3: Various installation methods for the portable dryer, including freestanding, stacked on a washing machine, and wall-mounted.
Electrical Connection:
Connect the dryer to a standard 120V, 3-prong grounded electrical outlet. Do not use adapters or extension cords.
Exhaust Pipe Installation:
Attach the included plastic exhaust pipe to the designated outlet at the rear of the dryer. Ensure the pipe is securely fastened and vented to the outside to expel moist air.
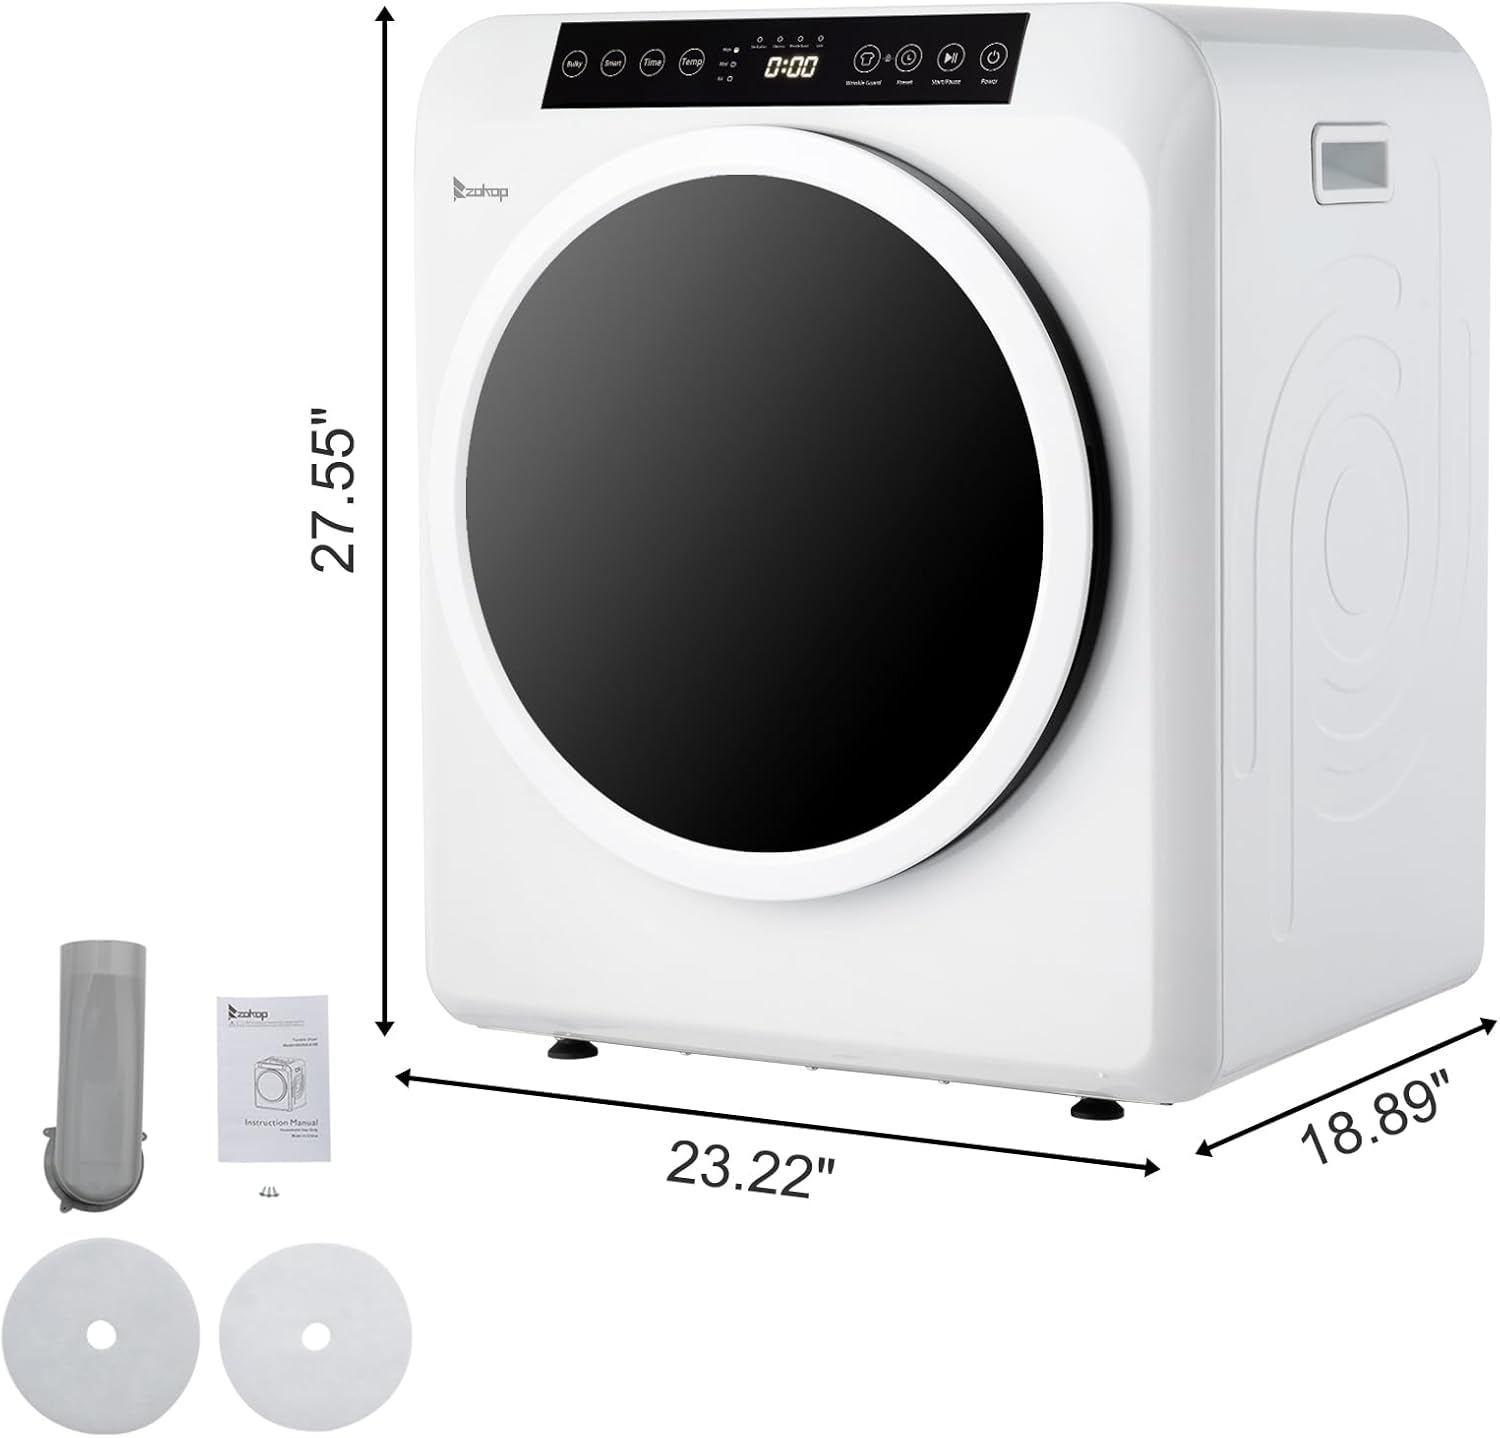
Figure 4: The dryer's dimensions and included accessories, such as the plastic exhaust pipe and additional lint filters.
4. Operating Instructions
Follow these steps for effective drying:
Loading Clothes:
- Open the dryer door.
- Place up to 13.23 lbs (6kg) of wet clothes into the stainless steel drum. Do not overload.
- Close the door securely. The dryer features an auto-stop function if the door is opened during operation.

Figure 5: A user loading laundry into the dryer, demonstrating the front-load design.
Control Knob Settings:
The simple control knob allows you to select drying time and heat level.
- Heat Settings:
- High: For heavy fabrics and large loads.
- Low: For delicate items or smaller loads.
- Cool: For refreshing clothes or reducing wrinkles without heat.
- Hot: Standard drying for most fabrics.
- Air Dry: Dries clothes with ambient air, ideal for very delicate items.
- Timer (Minutes): Rotate the knob to select the desired drying time, up to 200 minutes.
Video 1: Demonstration of the Zynkez Portable Clothes Dryer, highlighting its features and ease of use, including loading clothes and setting the timer.
Video 2: Overview of the VCJ portable clothes dryer, showcasing its compact design and various drying functions.
Drying Performance:
The dryer utilizes a reverse tumble action to ensure clothes are fluffed, wrinkle-free, and dried evenly.
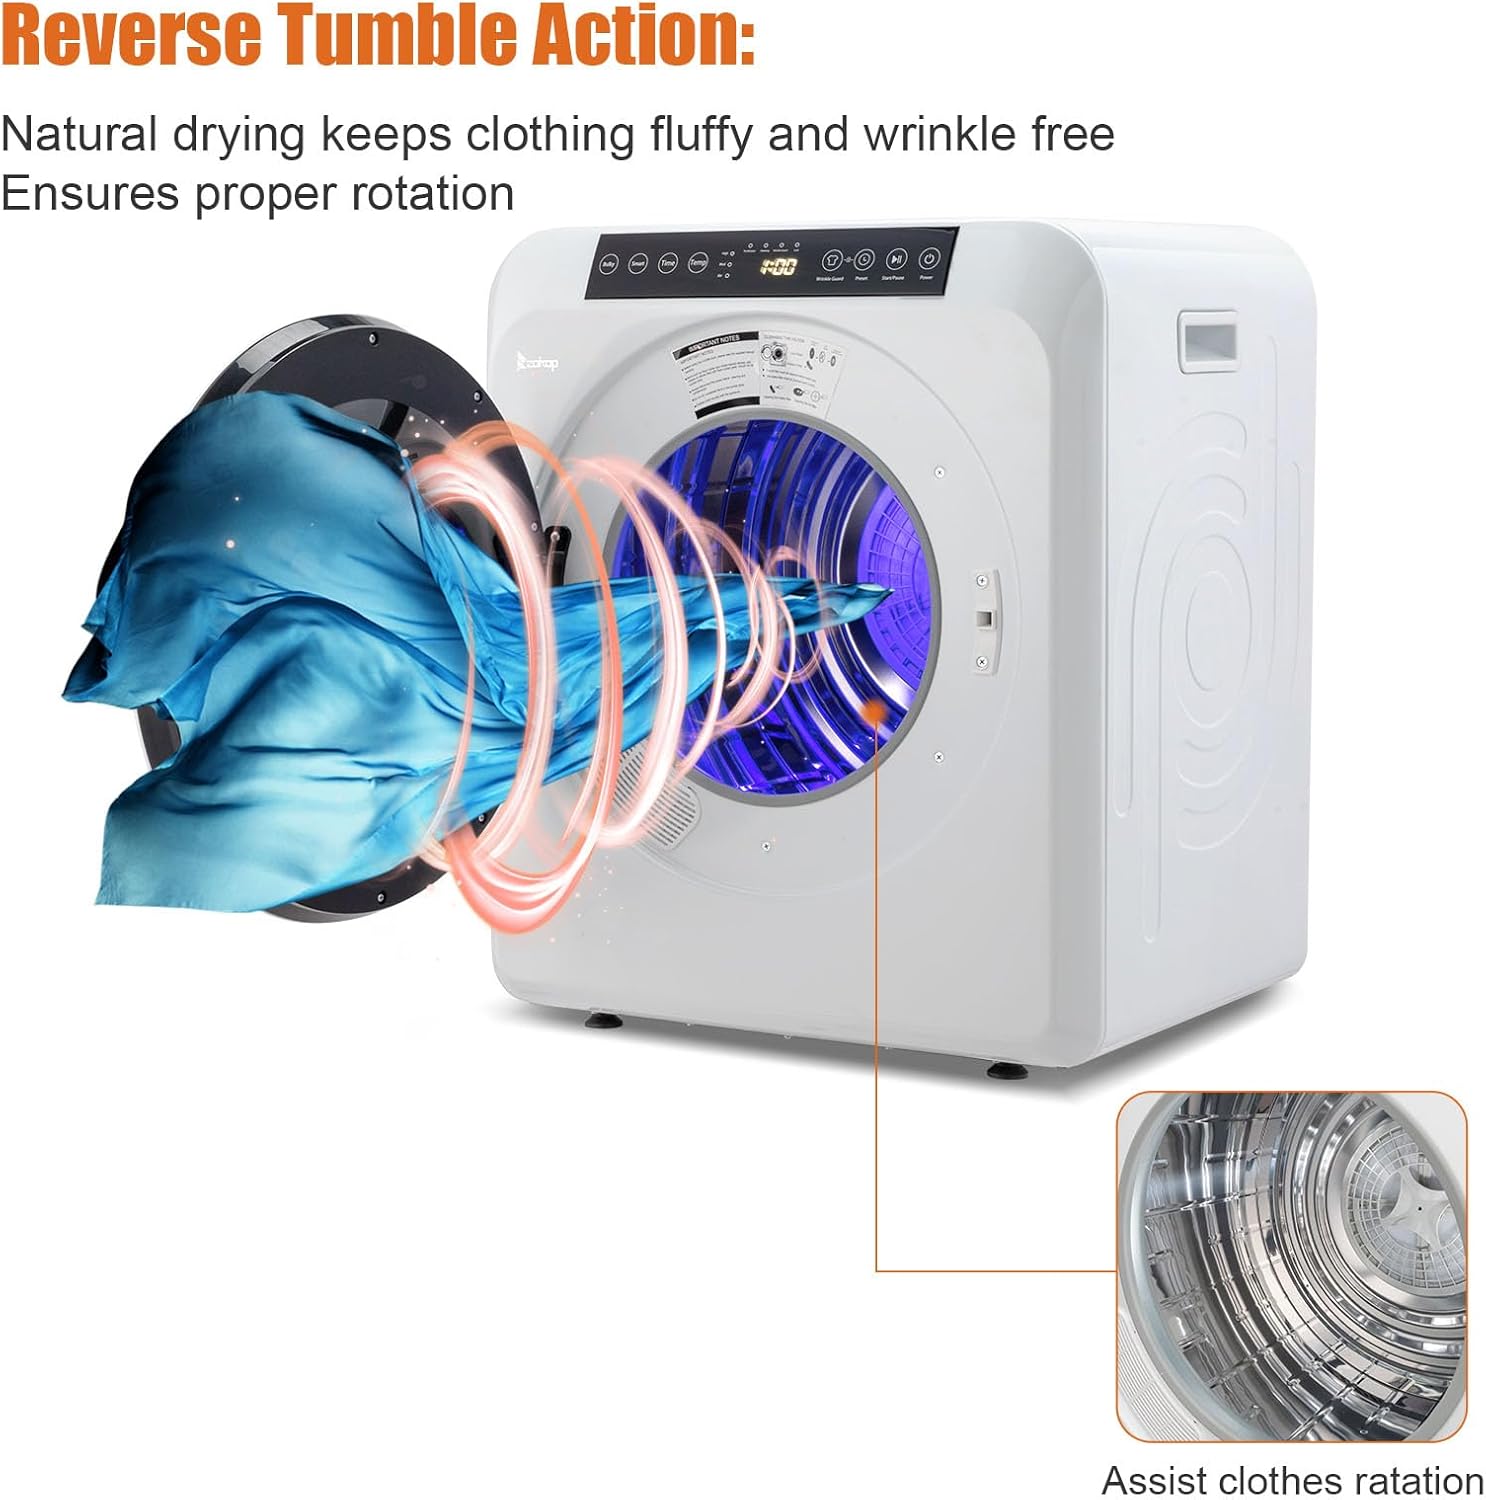
Figure 6: Illustration of the reverse tumble action, which helps prevent tangling and ensures thorough drying, resulting in fluffy and wrinkle-free clothes.

Figure 7: A visual comparison of clothes before and after drying, demonstrating the anti-wrinkle, softening, and fluffing effects of the dryer.
Video 3: Short clip demonstrating the drying process and performance of the dryer.
5. Maintenance
Regular maintenance ensures the longevity and efficiency of your dryer.
Cleaning the Lint Filter:
The detachable lint filter should be cleaned before or after every load to maintain optimal drying performance and prevent fire hazards.
- Open the dryer door.
- Locate the detachable outlet filter at the back of the drum.
- Gently remove the filter.
- Remove any accumulated lint by hand or with a soft brush.
- Reinsert the clean filter securely into its position.
General Cleaning:
- Wipe the exterior of the dryer with a soft, damp cloth.
- Clean the interior of the stainless steel drum periodically with a damp cloth. Do not use abrasive cleaners.
6. Troubleshooting
If you encounter issues with your dryer, refer to the following common problems and solutions:
- Dryer not starting:
- Ensure the power cord is securely plugged into a working 120V outlet.
- Check if the dryer door is fully closed.
- Verify that the timer knob is set to a drying cycle and not 'OFF'.
- Clothes not drying properly:
- Check if the lint filter is clean. A clogged filter reduces airflow.
- Ensure the dryer is not overloaded. Reduce load size if necessary.
- Confirm the selected heat setting and drying time are appropriate for the fabric type and load size.
- Check that the exhaust pipe is not kinked or blocked, allowing proper ventilation.
- Unusual noise during operation:
- Ensure the dryer is on a level surface.
- Check for any foreign objects inside the drum.
If the problem persists after trying these solutions, please contact Volowoo customer support for assistance.
7. Warranty & Support
For warranty information and customer support, please refer to the warranty card included with your product or visit the official Volowoo website. Keep your purchase receipt as proof of purchase.