1. Introduction and Overview
Thank you for choosing the VINGLI 5 FT Outdoor Porch Swing with Frame. This manual provides essential information for the safe assembly, operation, maintenance, and troubleshooting of your new porch swing. Please read these instructions carefully before assembly and retain them for future reference.
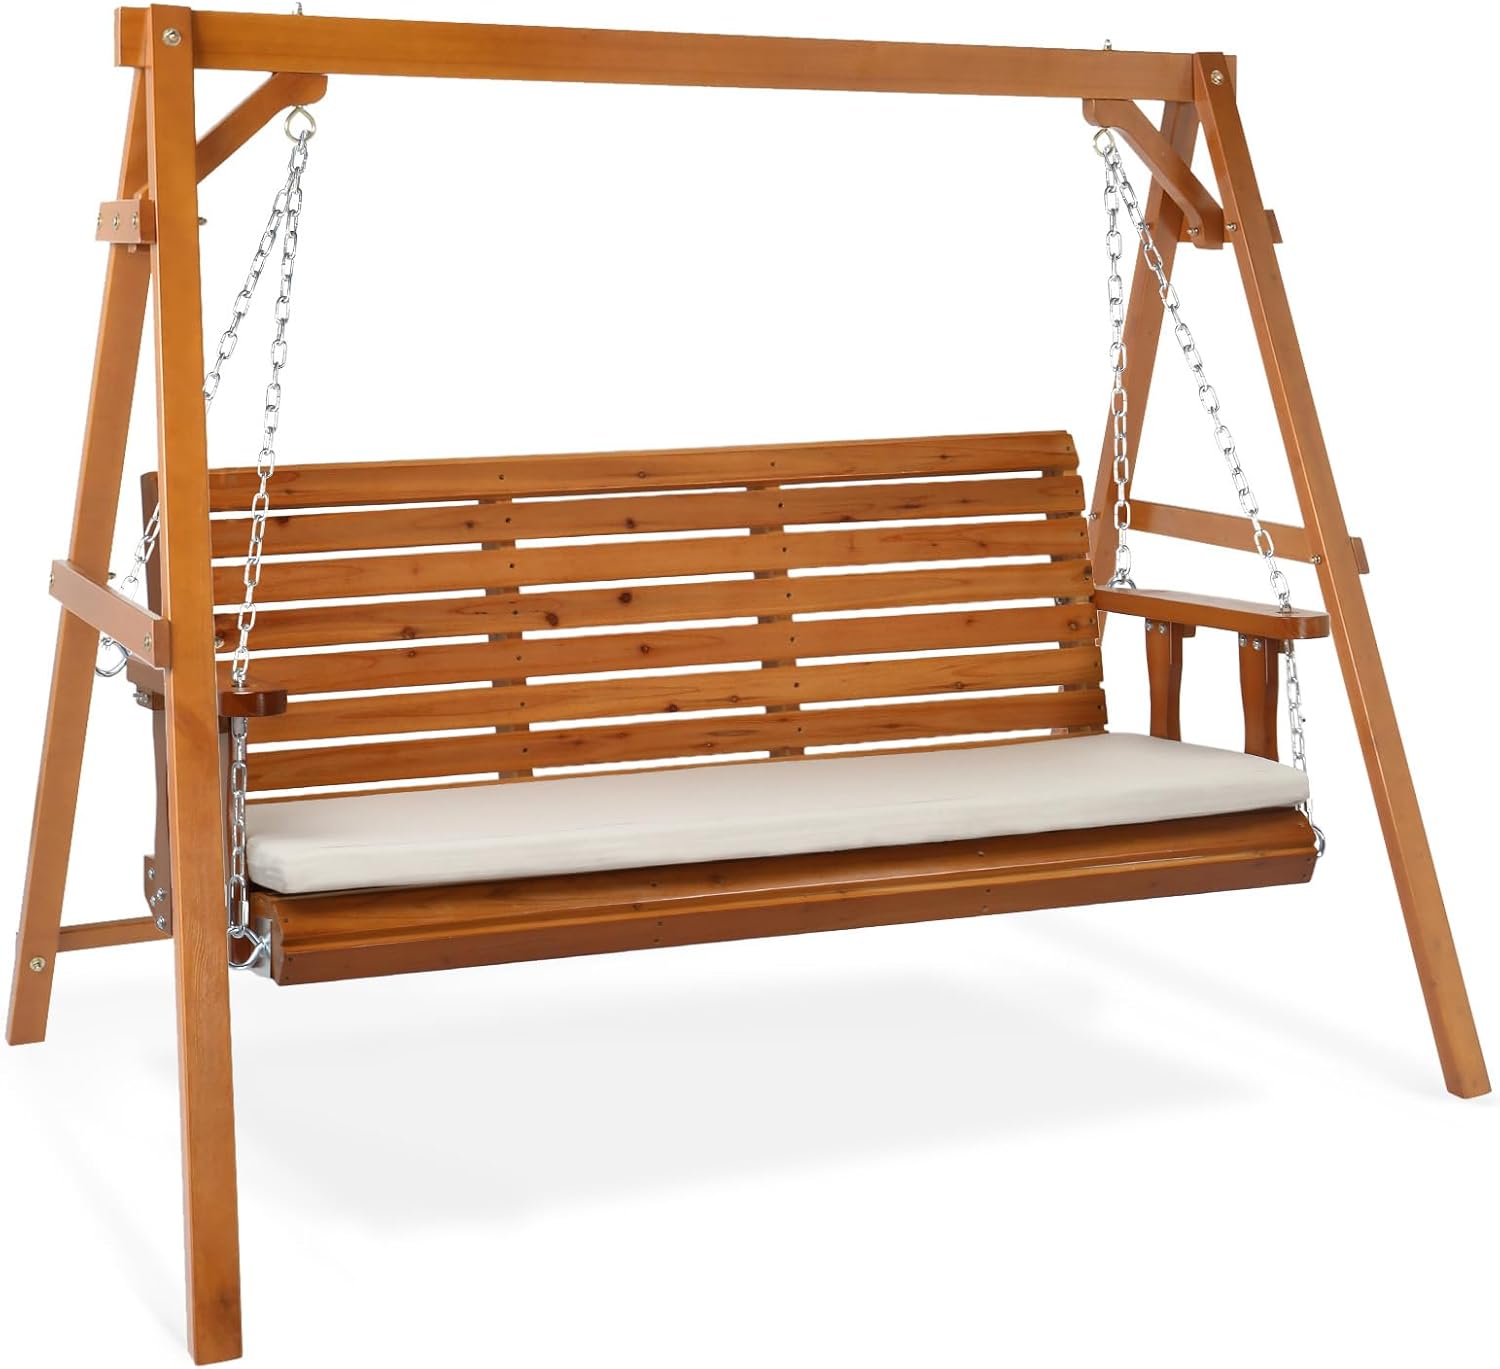
Image 1.1: VINGLI 5 FT Outdoor Porch Swing with Frame (Brown)
This image displays the complete VINGLI 5 FT Outdoor Porch Swing, showcasing its robust wooden A-frame and the comfortable swing seat with an included cushion. The design emphasizes both stability and aesthetic appeal for outdoor spaces.
Key Features:
- Ergonomic Design & Extra Cushion: The swing seat is contoured for optimal comfort, complemented by an additional cushion.
- Flexibility & Security Chains: Features secure carabiner design for easy angle adjustment.
- High Weight Capacity: Designed to support up to 880 lbs, accommodating various body types.
- Well-Coated Surface: Durable PU painted finish for enhanced longevity compared to raw wood.
- Extra Screw Caps: Includes protective caps to cover sharp screw ends, enhancing safety.
2. Safety Information
Your safety is paramount. Please adhere to the following safety guidelines to prevent injury or damage to the product.
- Always ensure all bolts, nuts, and connections are securely tightened before each use.
- Do not exceed the maximum weight capacity of 880 lbs (approximately 400 kg).
- Adult assembly is required. Keep children away during the assembly process.
- Ensure the swing is placed on a level, stable surface to prevent tipping.
- Regularly inspect the swing for any signs of wear, damage, or loose components. Discontinue use if damage is found.
- Utilize the provided extra screw caps to cover any sharp screw ends, minimizing potential hazards.
- Do not stand on the swing or engage in excessive swinging that could compromise stability.
3. Package Contents
Before beginning assembly, verify that all components listed below are present and undamaged. If any parts are missing or damaged, please contact customer support.
- Porch Swing Seat
- Swing Frame (A-frame legs, top beam, support bars)
- Hanging Chains with Carabiners
- Seat Cushion
- Hardware Kit (Bolts, Nuts, Washers, Wrenches, Extra Screw Caps)
- Assembly Instructions Manual
4. Assembly Instructions
Follow these steps carefully for proper assembly. It is recommended to have two adults for assembly.
Step 4.1: Assemble the A-Frame Legs
- Unpack all frame components and lay them out on a soft, clean surface to prevent scratches.
- Identify the A-frame leg pieces. Connect them using the provided bolts and nuts. Ensure the solid A-frame construction is stable.
- Note the leg thickness of 2.4 inches for enhanced stability.

Image 4.1: A-Frame Construction and Details
This image highlights the robust A-frame design, emphasizing its stability. It also details the heavy-duty snap hooks for durability and the 2.4-inch leg thickness, which contributes to the overall sturdiness of the swing stand.
Step 4.2: Attach the Top Beam
- Carefully lift and position the top beam onto the assembled A-frame legs.
- Secure the top beam to the A-frame legs using the designated bolts and nuts. Do not fully tighten yet.

Image 4.2: Swing Frame Dimensions
This image provides a detailed dimensional overview of the swing frame, including its height (72 inches), top beam length (57 inches), and base width (84 inches). These measurements are crucial for proper assembly and placement.
Step 4.3: Assemble the Swing Seat
- Assemble the individual components of the swing seat (backrest, seat base, armrests) according to the included diagrams.
- Ensure all connections are firm.

Image 4.3: Swing Seat Dimensions
This image illustrates the key dimensions of the swing seat itself, including its overall width (60.6 inches), depth (24.4 inches), and backrest height (18.9 inches). These details are important for understanding the seating capacity and fit.
Step 4.4: Attach the Swing Seat to the Frame
- Attach the hanging chains to the designated points on the swing seat.
- Using the heavy-duty snap hooks and carabiners, securely attach the chains to the hanging points on the top beam of the frame. Ensure the carabiners are fully closed for safety.
- The chains are designed to be long enough for various hanging options (ceiling or stand).

Image 4.4: Chain and Carabiner Design
This image highlights the superior design of VINGLI's swing chains, featuring ample length and a secure, adjustable closed carabiner system. This contrasts with less safe designs that may have short, fixed chains with exposed screws.
Step 4.5: Install Cushion and Final Tightening
- Place the extra cushion onto the swing seat for added comfort.
- Go back and fully tighten all bolts and nuts on both the frame and the swing seat. Do not overtighten.
- Install the extra protective screw caps over any exposed screw ends to prevent injury.

Image 4.5: Cushion and Ergonomic Design
This image emphasizes the comfort features of the VINGLI swing, showcasing its extra soft cushion and ergonomically designed seat. These elements are designed to provide a superior sitting experience compared to swings without such features.
5. Operating Instructions
Using your VINGLI porch swing is straightforward. Follow these guidelines for optimal enjoyment:
- Seating: Gently sit on the swing seat. Avoid jumping onto the swing.
- Swinging Motion: Initiate a gentle swinging motion. Do not swing excessively high or vigorously, as this may compromise stability.
- Weight Limit: Always adhere to the 880 lbs weight capacity. Distribute weight evenly.
- Adjusting Angle: The secure carabiner design allows for easy adjustment of the swing's angle to match your sitting needs. Simply unclip, adjust chain length, and re-clip securely.
- Supervision: Always supervise children when they are using the swing.
6. Maintenance and Care
Proper maintenance will extend the life and appearance of your porch swing.
- Cleaning: Clean the wooden frame and seat with a soft cloth dampened with mild soap and water. Rinse thoroughly and dry immediately. Avoid harsh chemicals or abrasive cleaners.
- Cushion Care: The cushion can be spot cleaned with a mild detergent. Allow to air dry completely. Store cushions indoors during inclement weather or prolonged periods of non-use.
- Surface Protection: The swing features a well-coated PU painted surface for durability. Periodically inspect the finish for any signs of wear or chipping. Reapply a suitable outdoor wood sealant or paint if necessary to maintain protection.
- Hardware Inspection: Regularly check all bolts, nuts, and chain connections for tightness. Tighten any loose hardware to ensure stability and safety.
- Seasonal Storage: During harsh winter months or extended periods of non-use, it is recommended to store the swing indoors or cover it with a protective outdoor furniture cover to prevent weather damage.
7. Troubleshooting
If you encounter any issues with your porch swing, refer to the following common problems and solutions:
| Problem | Possible Cause | Solution |
|---|---|---|
| Swing feels unstable or wobbly. | Loose bolts or uneven ground. | Ensure all bolts are securely tightened. Move the swing to a level surface. |
| Squeaking noise during swinging. | Friction at connection points or chains. | Apply a small amount of silicone lubricant to chain links and connection points. |
| Swing seat is not level. | Chains are unevenly adjusted. | Adjust the length of the hanging chains using the carabiners until the seat is level. |
| Wood finish appears dull or faded. | Exposure to elements over time. | Clean the surface and reapply a suitable outdoor wood sealant or paint. |
8. Specifications
| Attribute | Detail |
|---|---|
| Brand | VINGLI |
| Model Number | VL-G57000978+302 |
| Color | Brown |
| Product Dimensions (D x W x H) | 24.4"D x 60.6"W x 18.9"H (Swing Seat) |
| Frame Material | Wood |
| Finish Type | Painted |
| Assembly Required | Yes |
| Item Weight | 71.6 pounds |
| Maximum Weight Capacity | 880 lbs |
9. Warranty and Support
For warranty information, product support, or to inquire about replacement parts, please contact VINGLI customer service directly. Retain your proof of purchase for any warranty claims.
Contact Information: Please refer to the VINGLI official website or your purchase documentation for the most current customer service contact details.