
1. Product Overview
The BSIDE Handheld Oscilloscope OT3 is a portable digital oscilloscope designed for precise signal measurement and analysis. Featuring a 10MHz bandwidth and a 48MSa/s real-time sampling rate, it is suitable for both periodic analog and non-periodic digital signals. Its compact design, 3.2-inch TFT color screen, and robust battery life make it an ideal tool for various applications, including automotive diagnostics and general electronics testing.

Figure 1.1: BSIDE Handheld Oscilloscope OT3 and included accessories.
Key Features:
- Handheld Oscilloscope: 10MHz bandwidth, 48MSa/s sampling rate, measures up to 400V.
- Professional Design: Complete triggering capabilities (single/normal/automatic) for various signal types.
- 3.2" TFT Color Screen: Full-view display for clear signal monitoring and intuitive menu navigation.
- Thin and Light Body: Compact and portable design, includes an EVA organizer bag for convenience.
- Longer Battery Life: Built-in 1000 mAh lithium battery with Type-C interface for charging and data transmission.
2. Package Contents
Verify that all items listed below are present in your package:
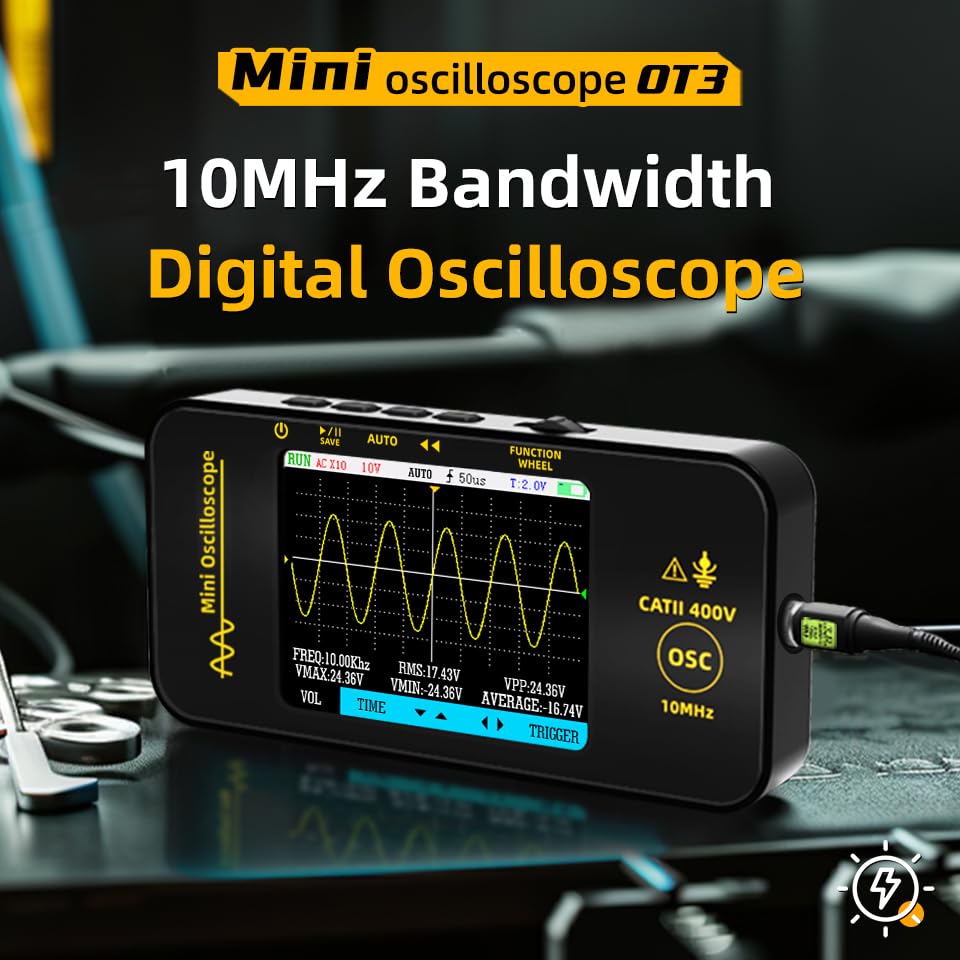
Figure 2.1: All components included in the BSIDE OT3 package.
- 1 × OT3 portable oscilloscope
- 1 × Oscilloscope probe
- 1 × Red and black alligator clip
- 1 × USB Type-C data cable
- 1 × EVA storage bag
- 1 × User's manual
- 1 × Regulating Rod
- 4 × Color ring
3. Initial Setup
3.1 Charging the Device
Before first use, fully charge the oscilloscope using the provided USB Type-C cable and a compatible USB power adapter (not included). The device features a built-in 1000 mAh lithium battery.
3.2 Connecting the Oscilloscope Probe
To connect the oscilloscope probe, align the BNC connector of the probe with the input port on the side of the oscilloscope. Push and twist clockwise until it locks securely. Ensure the probe's ground clip is connected to the circuit's ground reference.

Figure 3.1: Proper connection of the oscilloscope probe.
3.3 Unboxing and Setup Demonstration
Video 3.1: A demonstration of unboxing the OT3 mini oscilloscope and connecting the probe.
4. Operation
4.1 Power On/Off
To power on the oscilloscope, press and hold the power button located on the top left side of the device until the screen illuminates. To power off, press and hold the same button until the device shuts down.
4.2 Navigating the Interface
The oscilloscope features a 3.2-inch TFT color screen for displaying waveforms and measurement data. Navigation is primarily done using the 'FUNCTION WHEEL' and dedicated buttons (AUTO, FUNC, HOLD) located on the top panel.

Figure 4.1: Waveform display on the oscilloscope screen.
4.3 Waveform Measurement and Triggering
The device supports various trigger modes including Auto, Normal, and Single, allowing for stable capture of different signal types. Use the 'AUTO' button for automatic waveform adjustment. The 'FUNCTION WHEEL' allows for fine-tuning parameters such as voltage division (VOL) and time base (TIME).

Figure 4.2: Detailed waveform display with measurement parameters.
4.4 Data Transfer
The oscilloscope supports data transmission via its Type-C interface. Saved waveform images can be exported to a computer for further analysis. Refer to the on-screen menu for data transfer options.

Figure 4.3: The slim and portable design of the oscilloscope.
5. Technical Specifications
| Feature | Specification |
|---|---|
| Display | 3.2-inch TFT color screen |
| Bandwidth | 10MHz real-time sampling |
| Real-time Sampling Rate | 48MSa/s |
| Number of Channels | 1 channel DC AC |
| Input Impedance | 1MΩ, @16pF |
| Probe Attenuation | ×1, ×10 |
| Maximum Input Voltage | ×1 range ±40V, ×10 range ±400V (DC + AC peak) |
| Horizontal Sampling Rate Range | 1.5Sa/s-48MSa/s |
| Vertical Sensitivity | 20mV/div-10V/div |
| Dimensions | 129.2 × 63.0 × 22.3 mm (5.09 x 2.48 x 0.88 inches) |
| Weight | 268g (4.87 ounces) |
| Battery | 1200mA Lithium battery (1000mAh in feature bullets) |
| Model Number | OT3 Digital oscilloscope |
6. Maintenance and Care
To ensure the longevity and optimal performance of your BSIDE Handheld Oscilloscope OT3, follow these maintenance guidelines:
- Cleaning: Use a soft, dry cloth to clean the device. Do not use abrasive cleaners or solvents, as they may damage the screen or casing.
- Storage: Store the oscilloscope in its EVA storage bag when not in use to protect it from dust, moisture, and physical damage. Store in a cool, dry place.
- Battery Care: Avoid fully discharging the battery frequently. For long-term storage, charge the battery to approximately 50% to prolong its lifespan.
- Environmental Conditions: Operate the device within the specified temperature and humidity ranges to prevent malfunction.
7. Troubleshooting
If you encounter issues with your oscilloscope, refer to the following common problems and solutions:
- Device does not power on: Ensure the battery is sufficiently charged. Connect the Type-C cable and attempt to power on while charging.
- No waveform displayed: Check that the probe is correctly connected to the device and the circuit under test. Verify the probe's attenuation setting matches the device's setting. Adjust the voltage division (VOL) and time base (TIME) settings. Use the 'AUTO' function to automatically adjust the display.
- Unstable waveform: Adjust the trigger level and trigger mode (Auto, Normal, Single) to stabilize the waveform. Ensure proper grounding of the probe.
- Screen backlight issues: Check the backlight settings in the system menu.
- Device unresponsive: Perform a soft reset by holding down the power button for an extended period (e.g., 10-15 seconds) until the device restarts.
8. Warranty and Customer Support
This BSIDE Handheld Oscilloscope OT3 comes with a standard manufacturer's warranty. Please refer to the warranty card included in your package or contact your point of purchase for specific warranty terms and conditions.
For technical assistance, troubleshooting beyond this manual, or warranty claims, please contact BSIDE customer support through the official website or the contact information provided with your product documentation. When contacting support, please have your product model number (OT3 Digital oscilloscope) and purchase details ready.