Introduction
Thank you for choosing the SENECESLI Motorcycle Helmet Camera. This manual provides essential information for the proper setup, operation, and maintenance of your device. Please read it thoroughly before use to ensure optimal performance and longevity.
Package Contents
Verify that all items listed below are included in your package:
- 1 x Camera Recorder
- 1 x Charging Cable
- 1 x Bracket
- 1 x Sticker
- 1 x User Manual (this document)

Image: The package contents include the camera, a charging cable, a mounting bracket, and an adhesive sticker.
Setup
1. Initial Charging
Before first use, fully charge the camera. Connect the provided charging cable to the camera's USB port and a compatible USB power source (e.g., computer, wall adapter). The charging indicator light will show the charging status.

Image: A hand opening the protective cover for the USB charging port and memory card slot.
2. Memory Card Installation
The camera supports up to a 128GB memory card (not included). Insert the memory card into the designated slot with the contacts facing the correct direction. Ensure it clicks into place. A high-speed Class 10 or U3 microSD card is recommended for optimal recording performance.
3. Mounting the Camera
The camera is designed for helmet mounting. Attach the provided bracket to your helmet using the adhesive sticker. Ensure the surface is clean and dry before applying the sticker for a secure fit. Once the bracket is secured, attach the camera to the bracket.

Image: The camera mounted on a motorcycle helmet, demonstrating its intended use.

Image: A detailed view of the camera connected to its mounting bracket, ready for installation.
Operating Instructions
1. Power On/Off
- Power On: Press and hold the power button for approximately 3 seconds until the indicator light illuminates.
- Power Off: Press and hold the power button for approximately 3 seconds until the indicator light turns off.
2. Video Recording
Once powered on, the camera typically begins recording automatically. The indicator light will flash to confirm recording is in progress. To stop recording, briefly press the power button. Press it again to resume recording.

Image: The front of the camera showing the lens and control buttons, indicating its readiness for recording.
3. Loop Recording
The camera features loop recording, which means it will continuously record. When the memory card is full, the oldest files will be overwritten by new recordings. This ensures you always have the most recent footage available.
4. Connecting to a Computer
To transfer recorded videos, connect the camera to your computer using the provided USB cable. The camera will appear as a removable disk. You can then access and copy your video files.
Video: A demonstration of the camera's components and basic handling, including how to assemble the mount and handle the device.
Maintenance
1. Cleaning
Wipe the camera body with a soft, damp cloth. For the lens, use a specialized lens cleaning cloth and solution to avoid scratches. Do not use harsh chemicals or abrasive materials.
2. Battery Care
To prolong battery life, avoid exposing the camera to extreme temperatures. If storing for an extended period, charge the battery to about 50% before storage and recharge every few months.
3. Water Resistance
The camera features IP67 water resistance, meaning it is protected against dust and can withstand immersion in water up to 1 meter for 30 minutes. Ensure all ports are securely closed before exposure to water.
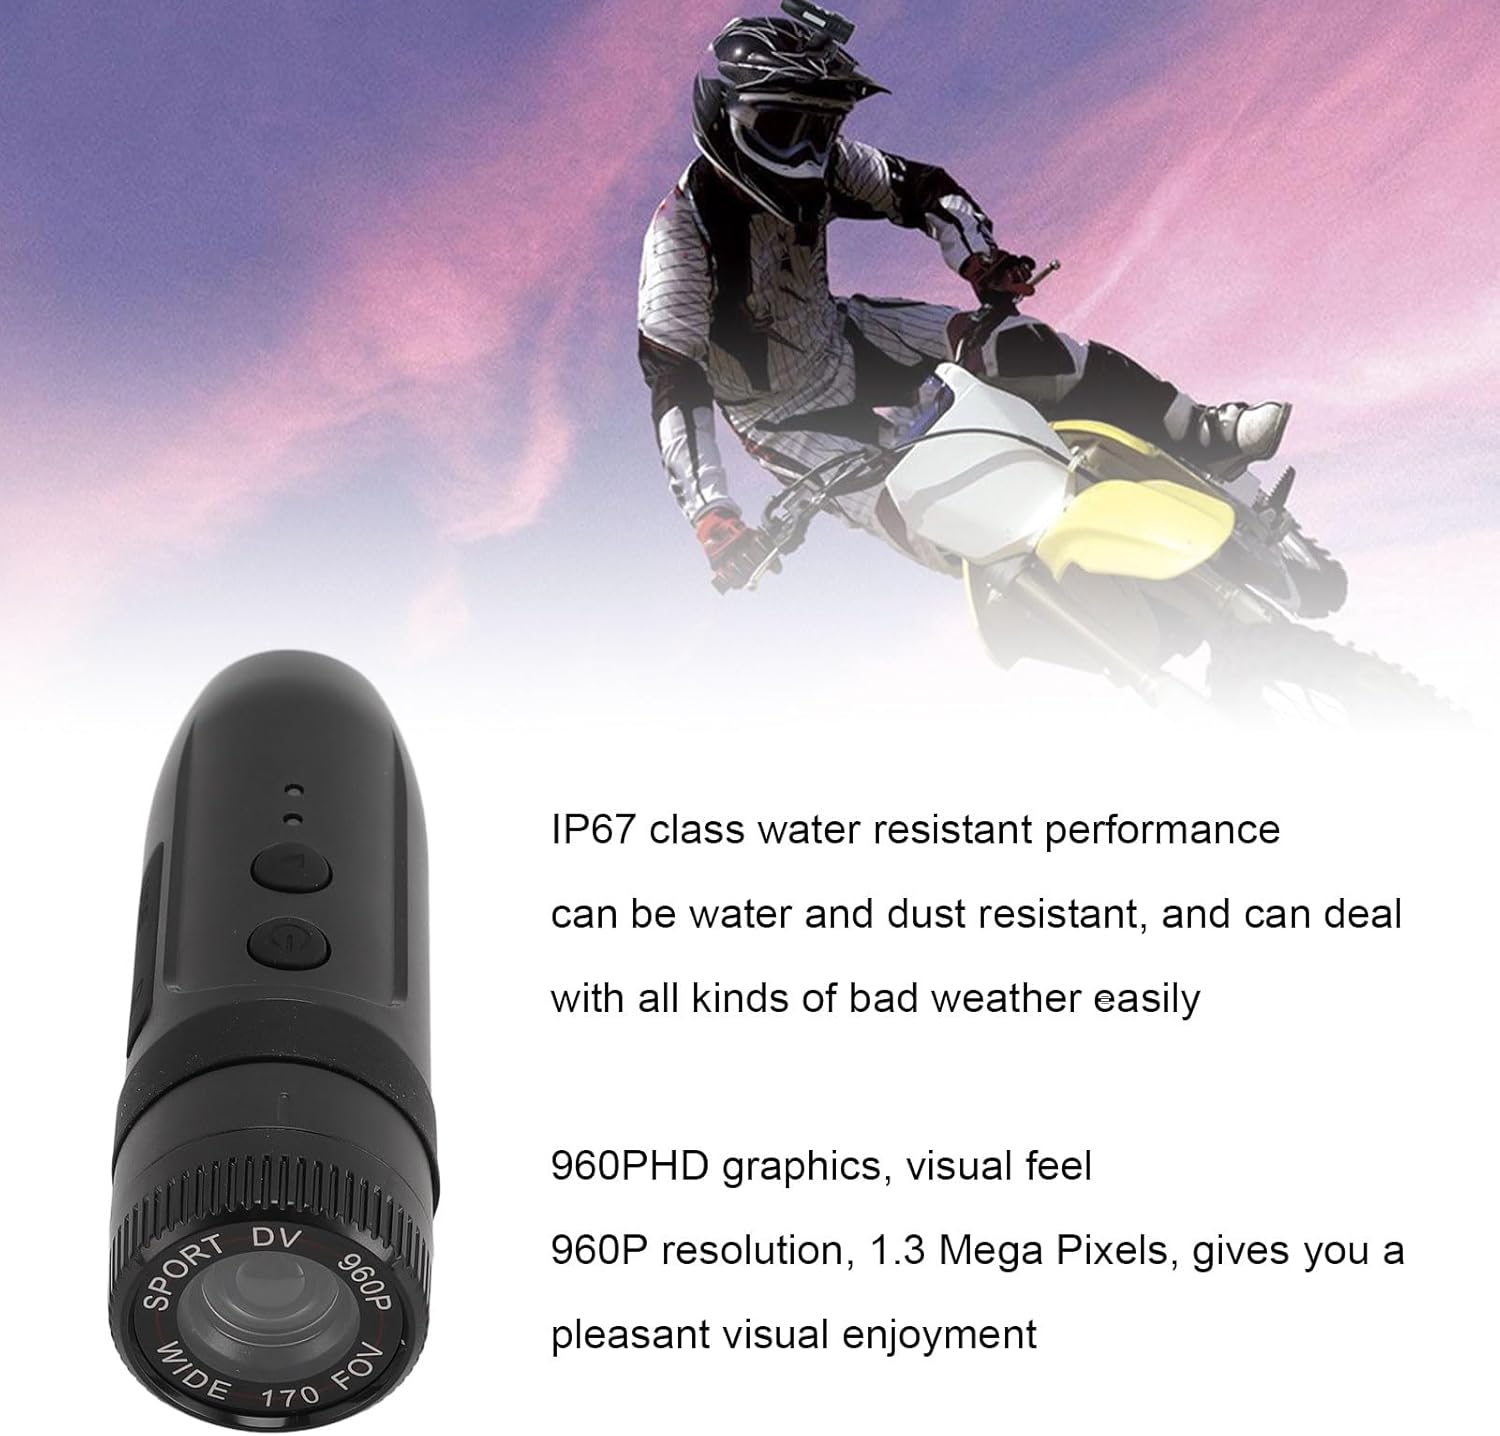
Image: The camera with text indicating its IP67 water resistance and 960P HD video capabilities.
Troubleshooting
| Problem | Possible Solution |
|---|---|
| Camera does not power on. | Ensure the battery is fully charged. Connect to a power source and try again. |
| Camera not recording. | Check if a memory card is inserted and formatted correctly. Ensure the card is not full. |
| Poor video quality. | Clean the camera lens. Ensure sufficient lighting. Check if the camera is set to the correct resolution. |
| Computer does not recognize camera. | Try a different USB port or cable. Ensure the camera is powered on when connected. |
Specifications
| Feature | Detail |
|---|---|
| Lens Angle | 170 degrees |
| Video Pixels | 1280 x 960 (960P) |
| Video Format | AVI |
| Image Resolution | 1280 x 960 |
| Image Format | JPG |
| Built-in Battery | 450mAh |
| Memory Card Support | Up to 128GB (not included) |
| Water Resistance | IP67 |
| Operating System Compatibility | Windows 2000, Vista, Windows 7, OS X 10.3.6 and above |
| Item Weight | 4.7 ounces |
| Dimensions | 4.33 x 3.15 x 2.76 inches (Package) |
| Model Number | SENECESLItfm78nrbso |
Warranty and Support
For warranty information or technical support, please refer to the contact details provided with your purchase or visit the official SENECESLI website. Keep your proof of purchase for warranty claims.