
1. Introduction
Thank you for choosing the Hbada E3 Pro Ergonomic Office Chair. This manual provides essential information for the safe assembly, operation, and maintenance of your new chair. Please read these instructions carefully before use and retain them for future reference.
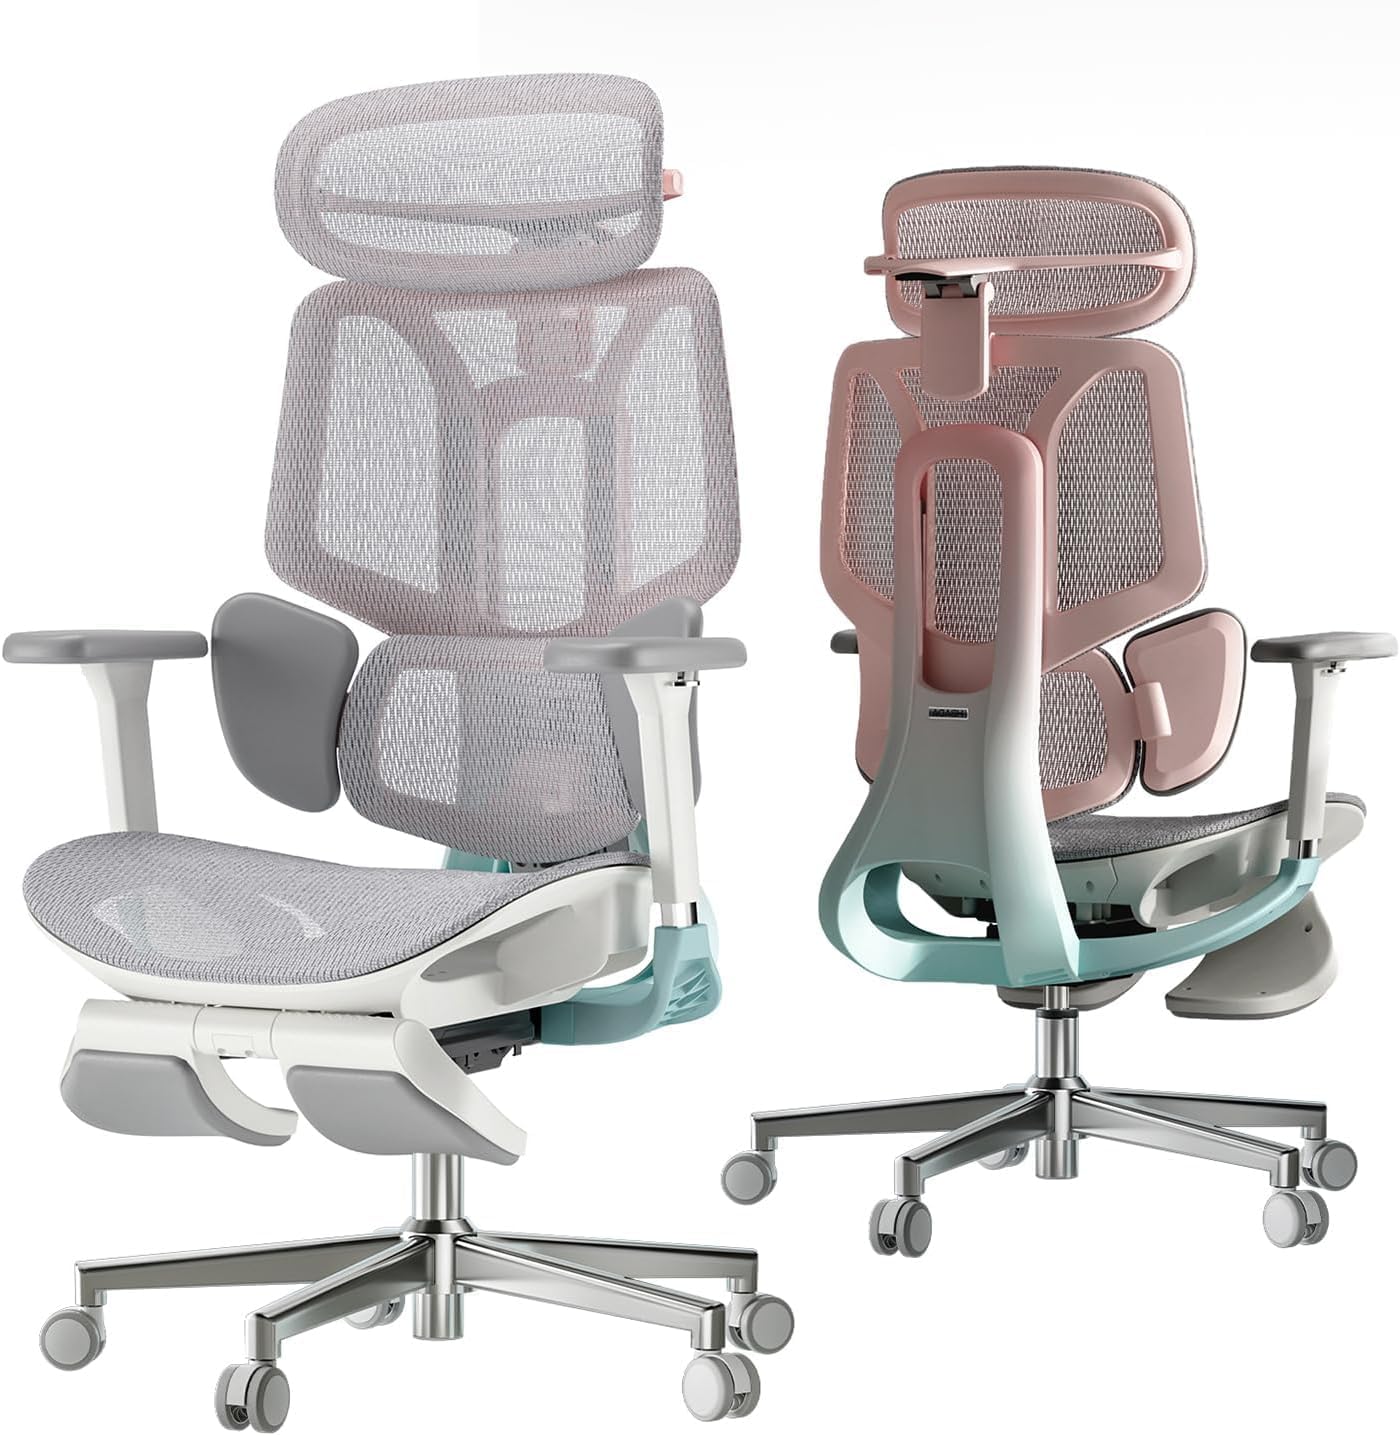
Image: The Hbada E3 Pro ergonomic office chair, showcasing its design and features.
2. Safety Information
- Weight Capacity: Ensure the user's weight does not exceed the maximum capacity specified in the product specifications. Exceeding this limit may cause damage to the chair or injury.
- Assembly: Always assemble the chair strictly according to the provided assembly instructions. Improper assembly can lead to instability and potential hazards.
- Placement: Do not place the chair in a high location to prevent falls. Ensure it is on a stable, level surface.
- Maintenance: Regularly inspect all components for wear and tear. Do not use the chair if any parts are damaged or missing.
- Children: Keep children away from the chair during assembly. Do not allow children to play on or with the chair unsupervised.
3. Setup and Assembly
Your Hbada E3 Pro chair requires assembly. Please refer to the separate assembly guide included in the packaging for detailed, step-by-step instructions. Ensure all components are present before beginning assembly.
Key Assembly Steps:
- Unpack all components and verify against the parts list.
- Attach the casters to the chair base.
- Insert the gas lift into the chair base.
- Assemble the seat, backrest, and armrests according to the diagrams.
- Connect the assembled seat and backrest to the gas lift.
- Attach the headrest and footrest.
It is recommended to have a second person assist with assembly to ensure stability and ease of handling larger components.

Image: Front and rear views of the chair, illustrating its main components before or during assembly.
4. Operating Instructions
The Hbada E3 Pro chair offers multiple adjustment features to customize your seating experience for optimal comfort and ergonomic support.
4.1. Chair Height Adjustment
To adjust the chair height, locate the lever under the seat on the right side. Pull the lever upwards while seated to lower the chair, or stand up and pull the lever upwards to raise the chair. Release the lever at your desired height.

Image: Illustration of the adjustable height mechanism, showing a 4.3 cm measurement mark.
4.2. Dynamic 3-Zone Lumbar Support
The chair features a dynamic 3-zone lumbar support system that adapts to your back's natural curve. This system automatically adjusts to provide continuous support to your lower back.
- Envelopment: The lumbar support provides a 40° envelopment for comprehensive back support.
- Vertical Movement: It can move up and down by 4 cm (1.57 inches) to align with your lumbar curve.
- Horizontal Movement: It adjusts forward and backward by 2.5 cm (0.98 inches) for depth customization.
- Dynamic Support: Offers 14° of dynamic support to follow your movements.

Image: Diagram illustrating the three-zone dynamic lumbar support, highlighting adjustable sections for personalized back support.
4.3. 4D Adjustable Headrest
The headrest is biaxially adjustable to conform to your neck's curve, providing optimal head and neck support.
- Height Adjustment: Adjusts up to 4.5 cm (1.77 inches) vertically.
- Forward/Backward Adjustment: Moves 5.5 cm (2.17 inches) forward and backward.
- Rotation: Offers a full 70° rotation for precise positioning.

Image: Illustration of the adjustable headrest, detailing its elevation and rotation capabilities.
4.4. 4D Adjustable Armrests
The armrests can be adjusted in four dimensions to support your arms and shoulders, reducing strain during work.
- Height Adjustment: Adjusts up to 7.5 cm (2.95 inches) vertically.
- Forward/Backward Adjustment: Moves 4.2 cm (1.65 inches) forward and backward.
- Rotation: Rotates 40° inwards and outwards.
- Angle Adjustment: Tilts 40° for ergonomic positioning.

Image: Technical drawings illustrating the 4D movement capabilities of the adjustable armrests, including height, depth, and rotation.
4.5. Automatic Gravity-Sensing Reclining Chassis
The chair features an automatic gravity-sensing reclining chassis, allowing for easy and smooth recline based on your body weight and posture. This mechanism provides a comfortable recline without complex adjustments.

Image: Diagram showing the chair's automatic recline function, with a technical illustration of its operation.
4.6. Adjustable Seat Depth and Backrest Height
- Seat Depth: The seat depth can be adjusted by 5 cm to accommodate different leg lengths.
- Backrest Height: The backrest height is adjustable by 7 cm, allowing you to position the lumbar support correctly for your spine.

Image: Two panels illustrating the adjustable seat depth (5 cm) and backrest height (7 cm) features of the chair.
4.7. Retractable Footrest
The chair includes a retractable footrest for added comfort during recline or relaxation. Pull the footrest out from under the seat when needed, and push it back in for storage.
5. Maintenance
Proper maintenance will extend the life and performance of your Hbada E3 Pro chair.
5.1. Cleaning
- Mesh Fabric: The chair features breathable mesh. For general cleaning, wipe with a damp cloth and mild soap. Avoid harsh chemicals or abrasive cleaners.
- Frame and Base: Wipe metal and plastic parts with a soft, damp cloth. Dry immediately to prevent water spots or corrosion.
- Casters: Periodically clean hair and debris from the casters to ensure smooth movement.

Image: Cross-section of the breathable mesh material, indicating airflow for comfort.
5.2. Inspection
- Regularly check all screws and bolts to ensure they are tight. Retighten if necessary.
- Inspect the gas lift for any signs of damage or malfunction.
- Ensure all adjustment mechanisms operate smoothly.
6. Troubleshooting
If you encounter any issues with your Hbada E3 Pro chair, refer to the following common troubleshooting tips:
- Chair Squeaks: Check all bolted connections and tighten them. A small amount of silicone lubricant can be applied to moving parts if necessary, avoiding contact with fabric.
- Chair Does Not Adjust Height: Ensure the gas lift lever is fully engaged. If the issue persists, the gas lift may need replacement. Contact customer support.
- Casters Not Rolling Smoothly: Clean any debris (hair, dust) from the caster wheels. Ensure the chair is on a suitable surface (e.g., a chair mat for carpeted floors).
- Chair Feels Unstable: Verify that all assembly screws are securely tightened. Ensure the chair is on a flat, level surface.
For issues not covered here, or if troubleshooting steps do not resolve the problem, please contact Hbada customer support.
7. Specifications
| Brand | Hbada |
| Model Name | E3 Pro |
| Color | Pink |
| Material | E3 Pro (Mesh/Foam) |
| Product Dimensions (D x W x H) | 50 x 71 x 138 cm (approx. 19.7 x 28 x 54.3 inches) |
| Item Weight | 27.75 Kilograms (approx. 61.2 lbs) |
| Back Style | Solid Back |
| Frame Material | Metal |
| Special Features | Adjustable Height, Ergonomic, Adjustable Lumbar Zone |
| Recommended Use | Office |
| Assembly Required | Yes |
| Gas Lift Certification | SGS-4 (tested over 120,000 times) |
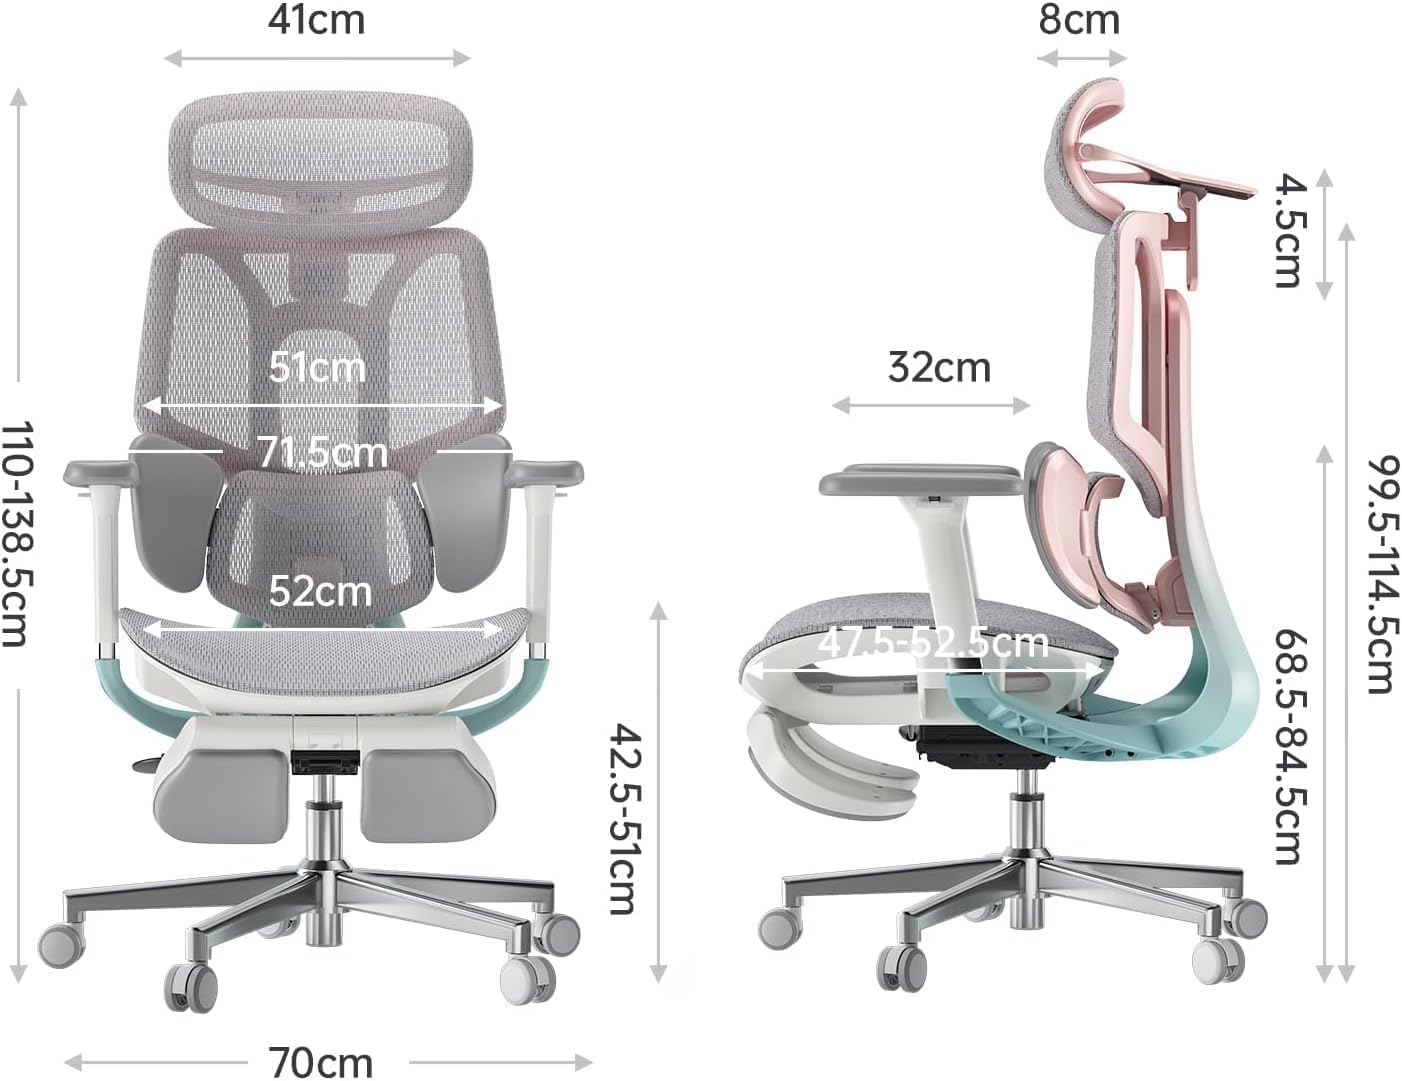
Image: Detailed dimensions of the Hbada E3 Pro ergonomic office chair from front and side views.

Image: Illustration of the SGS-4 gas lift, highlighting its durability with over 120,000 safety tests.
8. Warranty and Support
8.1. Warranty Information
Please refer to your purchase documentation or the official Hbada website for specific warranty terms and conditions applicable to your Hbada E3 Pro chair. The warranty typically covers manufacturing defects and material flaws under normal use.
8.2. Customer Support
For any questions, assistance with assembly, or to report issues, please contact Hbada customer support through the following channels:
- Official Website: Visit the Hbada Store on Amazon or the official Hbada website for contact information.
- Email Support: Refer to your product packaging or the official website for the customer service email address.
When contacting support, please have your purchase receipt and product model number (E3 Pro) ready.

Image: The Hbada E3 Pro chair displayed alongside its IGR ergonomic certification document.

Image: A BIFMA-standardized testing setup for office chairs, with various certification documents displayed.


