
1. Introduction
This manual provides comprehensive instructions for the installation, operation, maintenance, and troubleshooting of your Xigmatek Bano EN44250 computer case. Please read this manual thoroughly before beginning assembly to ensure proper setup and optimal performance.
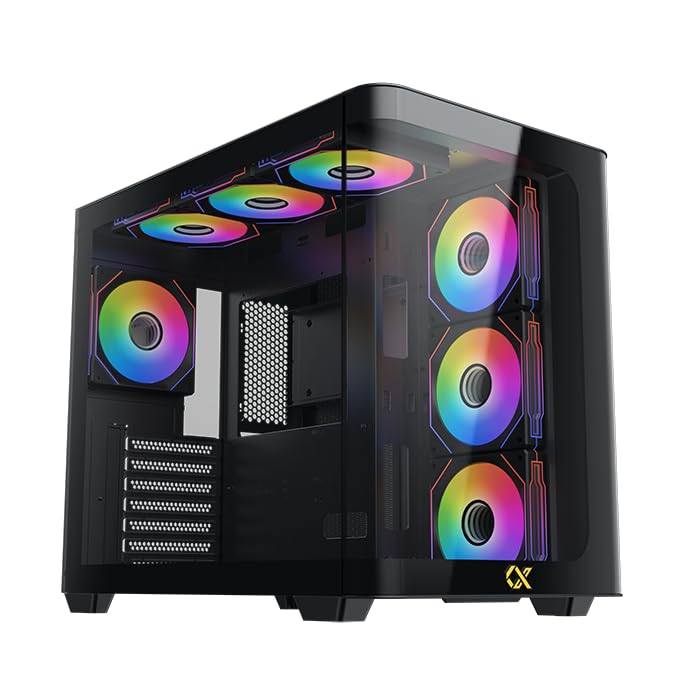
Figure 1: Xigmatek Bano EN44250 Computer Case (Exterior View)
2. Features
- Material: Constructed from high-quality steel alloy for durability and long-term use.
- Motherboard Support: Compatible with E-ATX, ATX, Micro ATX, and Mini ITX motherboards.
- Cooling System: Supports both air and liquid cooling solutions, with multiple fan and radiator mounting options.
- Drive Bays: Features five internal drive bays compatible with both 2.5-inch and 3.5-inch hard drives/SSDs.
- I/O Panel: Equipped with one USB 3.0 port, two USB 2.0 ports, and HD audio jacks for seamless connectivity.
- Design: Stylish black finish with a curved tempered glass panel for showcasing internal components and superior airflow.
- Expansion Slots: Includes 7 expansion slots.
- PSU Mounting: Supports rear-mounted power supplies.

Figure 2: Internal Layout of the Case
3. Setup Instructions
3.1 Preparing the Case
- Unpack the case and remove all packaging materials.
- Carefully remove the tempered glass side panel by unscrewing the thumb screws. Place it on a soft, flat surface to prevent scratches.
- Identify the accessory box inside the case, which contains screws, standoffs, and cable ties.
3.2 Motherboard Installation
- Install the I/O shield (if not pre-installed) into the rear opening of the case.
- Align your motherboard with the pre-installed standoffs. If your motherboard form factor (E-ATX, ATX, Micro ATX, Mini ITX) requires additional standoffs, install them in the appropriate holes.
- Carefully place the motherboard onto the standoffs and secure it with the provided screws.
3.3 Power Supply Unit (PSU) Installation
- Mount the PSU into the designated rear compartment of the case.
- Secure the PSU with screws from the rear of the case.
- Route the necessary power cables through the cable management cutouts to the motherboard and other components.
3.4 Storage Drive Installation (2.5"/3.5" HDDs/SSDs)
- Locate the internal drive bays. The case supports five drive bays compatible with 2.5-inch and 3.5-inch drives.
- For 3.5-inch drives, slide the drive into the tool-less tray (if applicable) or secure it with screws.
- For 2.5-inch drives, secure them to the designated mounting points or adapters.
- Connect SATA data and power cables to each installed drive.
3.5 Cooling System Installation (Fans/Radiators)
The Xigmatek Bano EN44250 supports various fan and radiator configurations for optimal airflow. Refer to the diagrams below for compatible sizes and locations.

Figure 3: Fan and Radiator Mounting Options (Side View)

Figure 4: Fan and Radiator Mounting Options (Top View)
- Install case fans or liquid cooling radiators into the desired mounting positions using the appropriate screws.
- Connect fan power cables to the motherboard fan headers or a fan controller.
3.6 Front I/O Panel Connections
Connect the front I/O panel cables to the corresponding headers on your motherboard. These include:
- USB 3.0 header
- USB 2.0 headers
- HD Audio header
- Power switch, reset switch, HDD LED, and power LED headers

Figure 5: Front I/O Panel
4. Operating Guidelines
Once all components are installed and connected, replace the side panel. Ensure all cables are neatly managed to avoid obstructing airflow. Power on your system using the front panel power button. Monitor temperatures and fan speeds to ensure optimal cooling performance.
5. Maintenance
Regular maintenance helps prolong the life of your computer components and ensures efficient cooling.
- Dust Cleaning: Periodically clean dust filters (if present) and internal components using compressed air. Ensure the system is powered off and unplugged before cleaning.
- Cable Management: Review cable routing periodically to ensure no cables are obstructing fan blades or airflow paths.
- Exterior Cleaning: Wipe the exterior surfaces with a soft, damp cloth. Avoid abrasive cleaners or solvents.
6. Troubleshooting
If you encounter issues during or after assembly, consider the following common troubleshooting steps:
- System Not Powering On:
- Check all power connections, including the PSU to wall outlet, PSU to motherboard (24-pin and CPU 8-pin), and front panel power switch header.
- Ensure the PSU switch is in the 'ON' position.
- No Display Output:
- Verify that your monitor is connected to the graphics card (not the motherboard I/O if using a dedicated GPU).
- Reseat the graphics card and RAM modules.
- Overheating Issues:
- Ensure all case fans are spinning and correctly oriented for optimal airflow (intake/exhaust).
- Check CPU cooler installation and thermal paste application.
- Clean any dust buildup from fans and radiators.
- Front Panel USB/Audio Not Working:
- Verify that the front panel USB and audio headers are correctly connected to the motherboard.
7. Specifications
| Feature | Detail |
|---|---|
| Manufacturer | XIGMATEK Co., Ltd. |
| Model Number | EN44250 |
| Product Dimensions (L x W x H) | 45 x 53.3 x 25.8 cm |
| Weight | 9.44 kg |
| Motherboard Compatibility | E-ATX, ATX, Micro ATX, Mini ITX |
| Case Type | Tower |
| Color | Black |
| Material | Steel Alloy |
| Power Supply Mounting | Rear Mount |
| Cooling Method | Air, Water |
| CPU Cooler Clearance | Up to 16 cm |
| VGA Card Length Support | Up to 41 cm |
| PSU Length Support | Up to 22 cm |
| Expansion Slots | 7 |
| Internal Drive Bays | 5 (compatible with 2.5" and 3.5" drives) |
| Front I/O Ports | 1x USB 3.0, 2x USB 2.0, HD Audio |
8. Warranty and Support
For warranty information and technical support, please refer to the official Xigmatek website or contact your local retailer. Keep your proof of purchase for warranty claims.
Online Resources: www.xigmatek.com