1. Introduction
This manual provides comprehensive instructions for the proper use and maintenance of your SKYBASIC Handheld Digital Microscope, model inskam370B. This device features a fixed-focus lens, a 2-inch IPS display, and up to 500x magnification, designed for easy observation of microscopic details. It is compatible with personal computers for extended viewing and data transfer.
2. Package Contents
Please verify that all items listed below are included in your package:
- 1 x SKYBASIC Handheld Digital Microscope
- 1 x Portable Lanyard
- 1 x USB-C Cable (Adapter Not Included)
- 1 x User Manual
3. Product Overview
Familiarize yourself with the components and features of your digital microscope.

The main unit of the SKYBASIC Handheld Digital Microscope, shown alongside its USB-C and USB-A charging/data cables, and a computer monitor displaying a magnified circuit board image captured by the microscope.

This image highlights the 2.0-inch IPS display, emphasizing its wide field of view (FOV 178°), true colors, portability, and independence from a phone connection.

A diagram illustrating the microscope's fixed focus design, 500x magnification, and 2 MP lens pixels, indicating that no manual focusing is required.

An illustration of the microscope's built-in 8 LED lights, showing how their brightness can be adjusted from 0% to 100% to illuminate the subject for clear observation.

This image demonstrates the 500x magnification capability of the microscope, showing how it can store up to 100 photos internally. It also notes that a memory card is required for video recording.
The digital microscope positioned over a circuit board, illustrating its utility for detailed inspection of electronic components.

A close-up of the digital microscope being used to examine the intricate details of a coin.

The digital microscope used for detailed appraisal of jewelry, highlighting its precision for small objects.

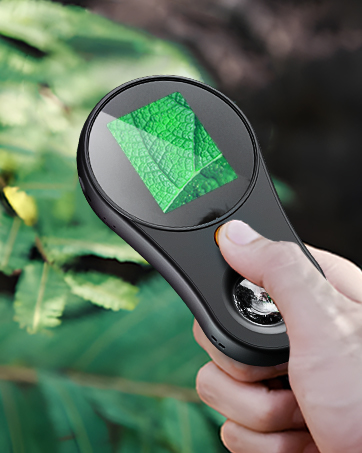
A user observing a plant with the handheld digital microscope, demonstrating its use for examining botanical details.
This video provides a visual overview of the SKYBASIC Handheld Digital Microscope, demonstrating its features and basic operation, including power on, button functions, and connection to a computer for extended viewing.
4. Setup
4.1 Initial Power On
- Press and hold the power button (orange button on the front) for 2-3 seconds to turn on the microscope. The screen will display a 'Welcome' message and then show the live view.
- The microscope is designed with fixed focus, so no manual adjustment is required. Simply place the lens flat on the object's surface for immediate magnified viewing.
4.2 MicroSD Card Installation (Optional for Video Recording)
To record videos, a MicroSD card (not included) must be inserted. The device supports up to 64GB memory cards.
- Ensure the microscope is powered OFF before inserting or removing the MicroSD card.
- Insert the MicroSD card into the TF Card Slot located on the side of the device until it clicks into place.
- It is recommended to format the MicroSD card to the exFAT format using a computer before first use to ensure proper functionality.
5. Operating Instructions
5.1 Basic Observation
- Turn on the microscope by pressing and holding the power button.
- Place the microscope's lens directly and flat against the surface of the object you wish to observe. The fixed-focus technology will provide a clear, magnified image on the 2-inch IPS display.
- Use the '+' and '-' buttons on the side to adjust the digital zoom level (up to 500x magnification).
- Adjust the brightness of the 8 built-in LED lights by long-pressing the '+' button to increase brightness or the '-' button to decrease brightness.
5.2 Photo and Video Capture
- To take a photo: While in observation mode, short press the Capture Button (button with camera icon) on the side. A camera icon will briefly appear on the screen, indicating the photo has been saved. The internal memory can store up to 100 photos without a MicroSD card.
- To record a video: Ensure a formatted MicroSD card is inserted. While in observation mode, long press the Capture Button. A recording indicator will appear. Short press the Capture Button again to stop recording.
5.3 Viewing Captured Media
- Short press the Review Button (button below the Capture Button) to enter gallery mode.
- Use the '+' and '-' buttons to navigate through your saved photos and videos.
- To delete a captured image or video, long press the Review Button to display the delete icon, then short press the power button to confirm deletion.
5.4 PC Connection
The microscope can be connected to a computer for real-time viewing on a larger screen and for transferring files.

The microscope connected to a laptop via a USB cable, demonstrating its compatibility with computers for real-time viewing on a larger display.
- Connect the microscope to your computer using the provided USB-C cable.
- The microscope is compatible with Windows Vista/XP/7/8/10/11 and MacOS X 11.0 or higher.
- Once connected, the computer should recognize the device as a webcam or storage device, allowing you to view the live feed or access stored files.
6. Maintenance
- Do not touch the lens directly with your finger.
- Do not look directly at the LED lights when they are on.
- If the digital microscope screen or lens becomes dirty, wipe them with a dry, soft cloth.
- Do not use or store this product in places with water, high humidity, or excessive dust and oil smoke.
- Do not subject the product to strong vibration, impact, or excessive force.
7. Troubleshooting
Refer to the following solutions for common issues:
Q1: The device cannot be charged.
- A1: Replace with a working Type-C data cable.
- A2: Turn on the main power of the power supply device (e.g., power strip, computer power).
Q2: The device is frozen.
- A1: Press the reset hole on the main unit with a fine needle to force shut down the device.
Q3: Cannot connect to the computer.
- A1: Ensure the data cable is plugged in securely; replace the data cable, or use the original data cable.
- A2: The microscope main unit is not powered on.
- A3: Confirm whether the device is correctly set to memory card reading mode.
- Note: The microscope does not support Bluetooth connection; it only connects to a computer via USB.
- Note: The product buttons will not work in Computer mode; this is normal.
Q4: Unable to capture and save photos/videos.
- A1: If no storage card is inserted, please insert a personal storage card. (The microscope's internal storage space is limited. You will not be able to shoot after the storage space is exceeded. You need to insert a memory card or delete some pictures stored in the internal memory.)
- A2: If a storage card is inserted, replace it with another personal storage card.
- A3: Format the memory card (Note: Formatting will delete all data on the memory card; please remember to back up in time).
Q5: Images appear blurry.
- A1: The microscope has a fixed focal length, with a shallow depth of field, suitable for observing flat objects. The magnification and focus cannot be adjusted.
- A2: Clean the lens to ensure it is free of dirt.
8. Specifications
| Feature | Detail |
|---|---|
| Model Number | inskam370B |
| Brand | SKYBASIC |
| Magnification Maximum | 500x |
| Display | 2.0-inch IPS Color Display |
| Light Source Type | LED (8 adjustable lights) |
| Battery | 1 Lithium Ion battery (included) |
| Charging Port | USB Type-C |
| Storage | Built-in (100 photos), MicroSD card slot (up to 64GB, not included) |
| Compatible Devices | Personal Computer, Laptop |
| Operating System Support | Windows Vista/XP/7/8/10/11, MacOS X 11.0 or higher |
| Item Weight | 3.87 ounces (0.11 Kilograms) |
| Package Dimensions | 5.28 x 3.19 x 1.46 inches |
| Material | Plastic |
| Color | Black |
9. Warranty and Support
For technical support or if you encounter any issues with your SKYBASIC Handheld Digital Microscope, please refer to the contact information provided on the product packaging or the official SKYBASIC website. Our customer service team is available to assist you.


