Introduction
The PATPET GPS Wireless Dog Fence System is designed to create a safe and reliable boundary for your canine companions without the need for buried wires or complex installations. Utilizing advanced GPS technology, this system allows you to define a customizable play area, ensuring your dogs remain within designated safe zones. This manual provides comprehensive instructions for setup, operation, maintenance, and troubleshooting to help you maximize the benefits of your new wireless fence system.
Important Safety Information
- This GPS fence collar is designed for outdoor use only without shelter. GPS signals can be obstructed indoors or in heavily wooded areas, leading to inaccurate boundary detection.
- Ensure the collar fits properly, snug enough for contact points to touch the dog's skin, but not so tight as to cause discomfort or skin irritation. Regularly check for redness or sores.
- Never leave the collar on your dog for more than 12 consecutive hours.
- This system is intended as a training aid and should not be used as the sole means of containment. Always supervise your dog, especially during initial training.
- Do not use this product on aggressive dogs or dogs with known health issues without consulting a veterinarian.
- The stimulation levels should be set appropriately for your dog's temperament and size. Always start with the lowest effective level.
- In rare cases, GPS signal fluctuations can lead to unexpected corrections. Always monitor your dog's reaction and ensure the system is functioning as expected.
Package Contents
Verify that all items are present in your package:
- 2 x GPS Dog Collar Fences
- 1 x Test Light
- 2 x Charging Cables
- 10 x Boundary Flags
- 1 x User Manual
- 1 x Dog Training Guide
- 8 x Contact Points (various sizes)
- 8 x Silicone Caps

Image: All components included in the PATPET GPS Wireless Dog Fence System package.
Product Overview
The PATPET GPS Wireless Dog Fence Collar is a compact and durable device designed for effective pet containment. Each collar features a clear display, intuitive buttons for setting boundaries and modes, and adjustable straps to fit various dog sizes.
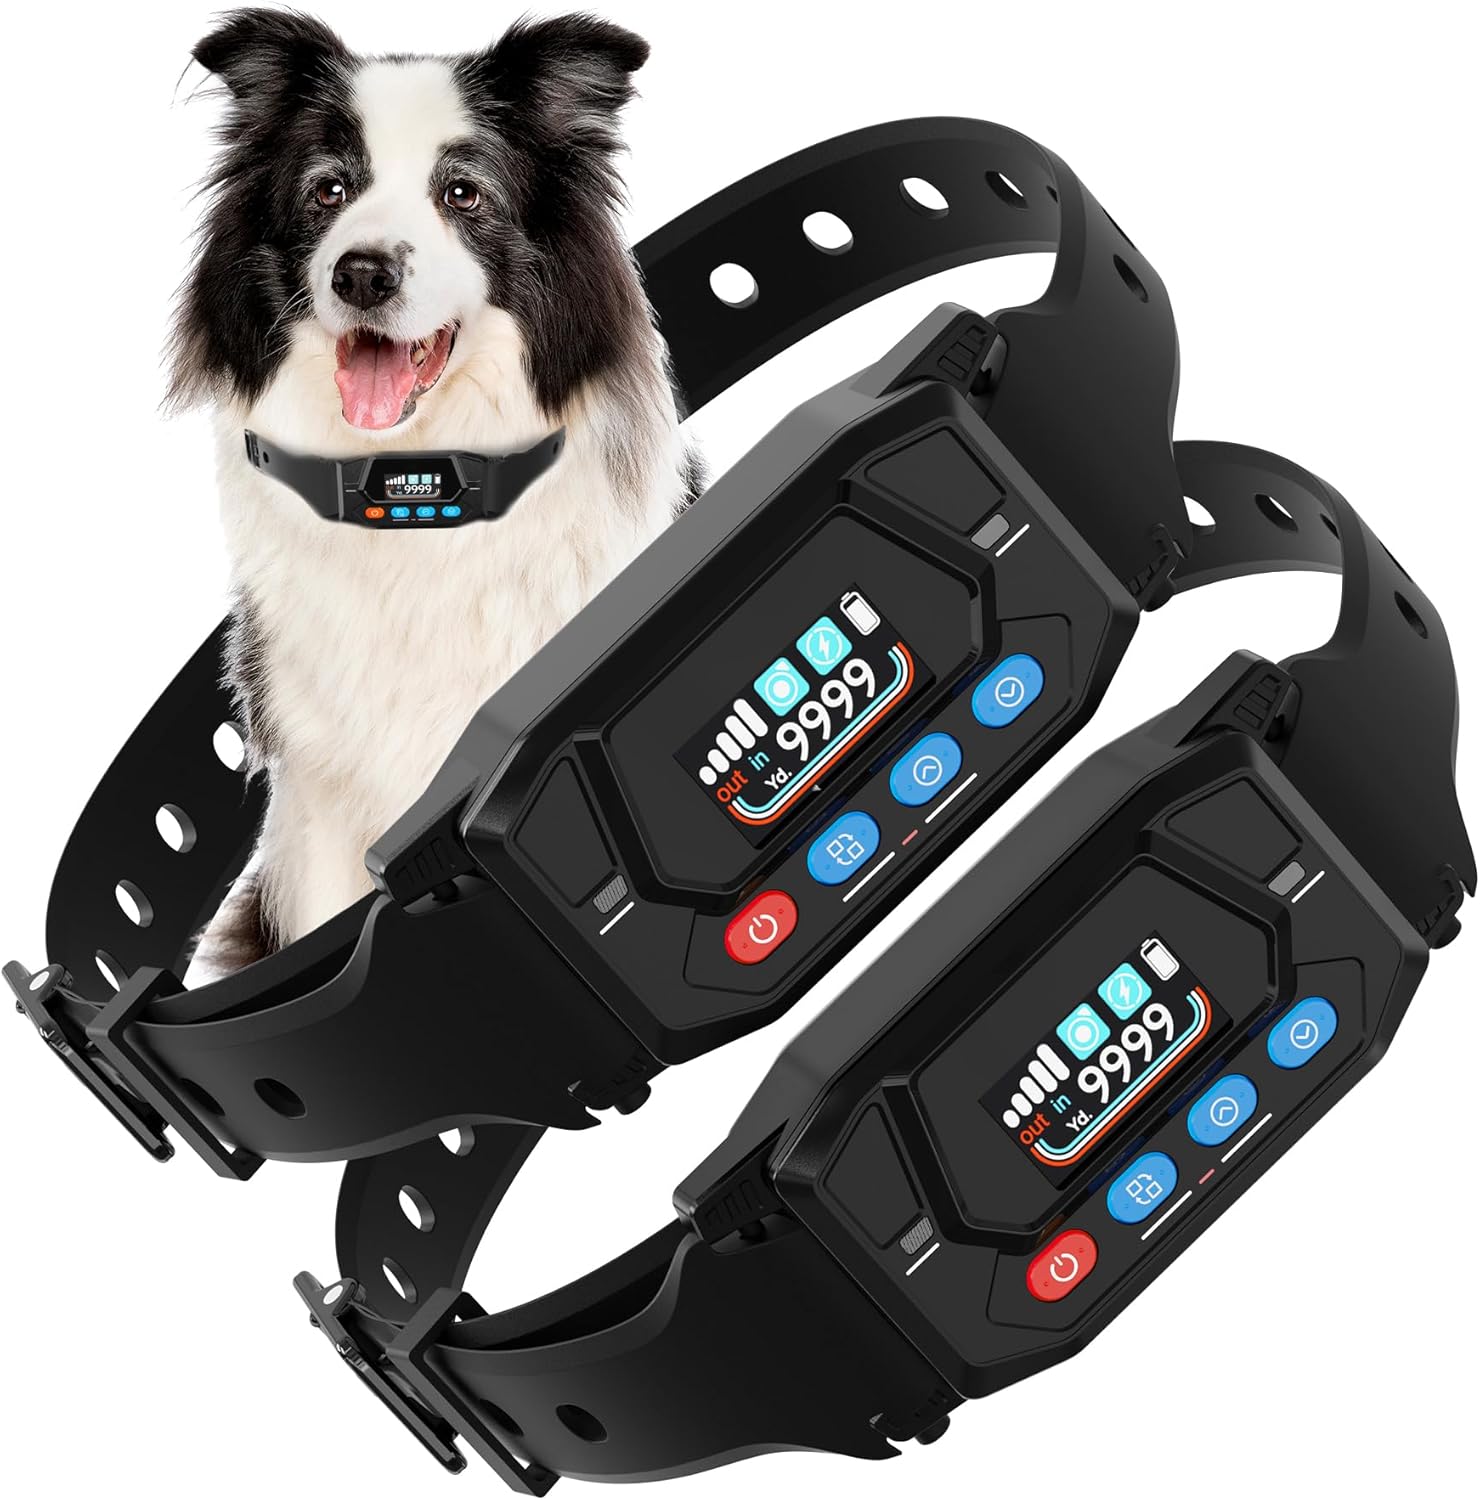
Image: Two PATPET GPS Wireless Dog Fence Collars, showcasing their design and the integrated display.
Collar Features:
- GPS Positioning: Utilizes precise GPS technology for boundary definition, updating twice per second.
- Adjustable Radius: Customizable boundary range from 33 to 9999 yards.
- Training Modes: Three distinct modes (No Shock, General Shock, Enhanced Shock) for varied training needs.
- IPX7 Waterproof: Designed to withstand water exposure, suitable for swimming and rain.
- Rechargeable Battery: Provides up to 24 hours of working time on a 2-hour full charge.
- Adjustable Collar Size: Suitable for dogs weighing 20-140 lbs, with neck sizes 12-25 inches.

Image: Illustration of the latest GPS positioning technology in an outdoor setting, showing its applicability for outdoor and farm use, but not indoor or forest.

Image: The adjustable collar, suitable for dogs from 20 lbs to 140 lbs, with a total length of 29.5 inches and a durable TPU belt.
Setup Guide
Follow these steps to set up your PATPET GPS Wireless Dog Fence System:
- Charge the Collar: Before first use, fully charge the collar. Connect the charging cable to the collar and a USB power source. A full charge takes approximately 2 hours and provides up to 24 hours of working time.
- Turn on the Collar: Press and hold the power button until the display illuminates.
- Set the Center Point: Take the collar to the desired center of your dog's safe area. Press the 'Center Repeat' button to set this location. Ensure you are in an open outdoor area for accurate GPS acquisition.
- Set the Radius Distance: Use the adjustment buttons to set the desired radius for your wireless fence, ranging from 33 to 9999 yards.
- Choose Stimulation Modes: Select the appropriate training mode (No Shock, General Shock, or Enhanced Shock) based on your dog's training needs and temperament.
- Test the Electric Shock: Use the provided test light to verify the shock function is working correctly before placing it on your dog.
- Fit the Collar: Place the collar on your dog's neck, ensuring the contact points make proper skin contact. The collar should be snug but not overly tight.

Image: A visual guide to the six easy setup steps for the PATPET GPS Wireless Dog Fence, from turning on the collar to placing it on the dog.

Image: Two PATPET collars connected to charging cables, highlighting the 2-hour full charging time and 24-hour working time.
Operating Instructions
Understanding Warning Zones and Stimulation:
The system operates with a progressive warning system. As your dog approaches the set boundary, the collar will first issue a warning. If the dog continues towards the boundary, the stimulation intensity will increase.
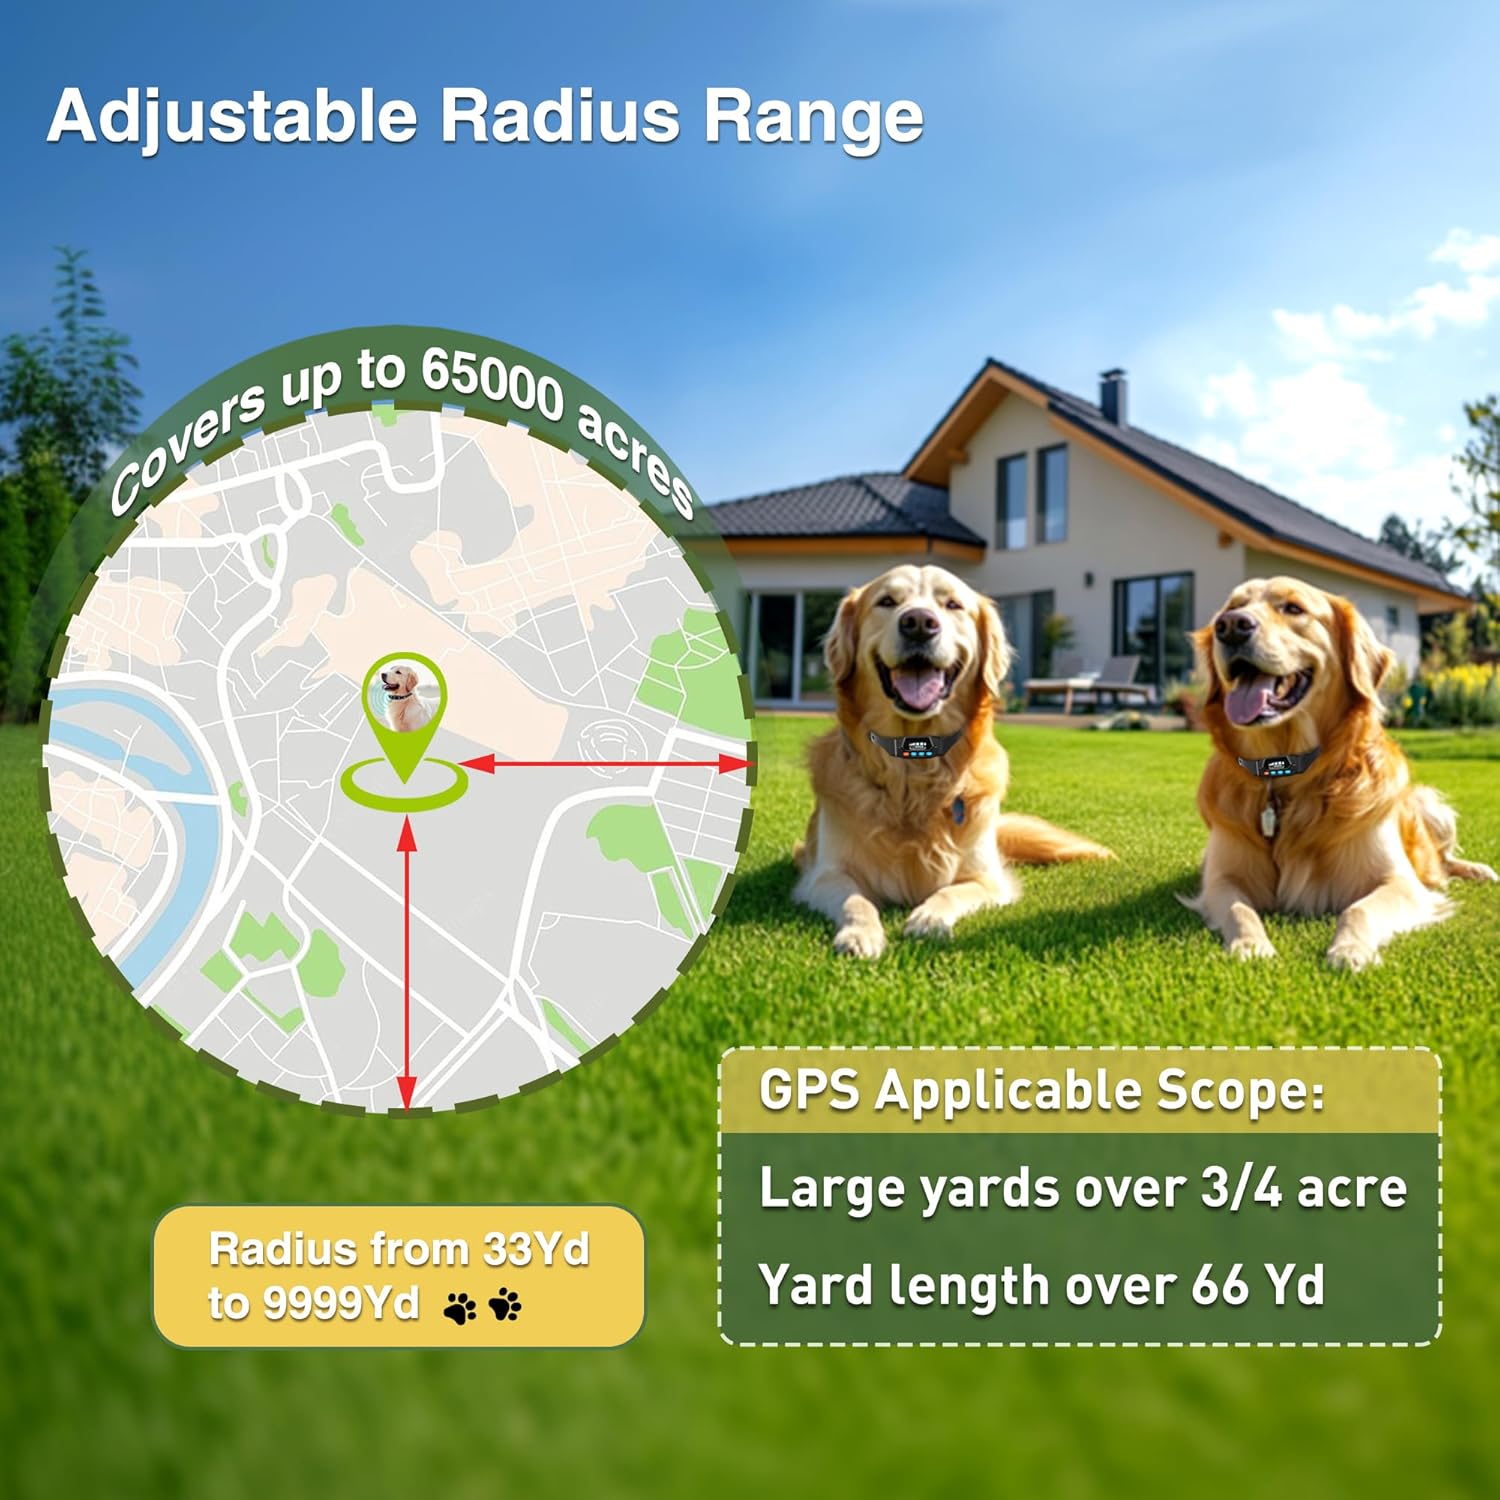
Image: An aerial view illustrating how warning intensity increases as the dog moves further from the center point and closer to the boundary.
Training Modes:
The PATPET system offers three distinct training modes to suit different training phases and dog sensitivities:
- No Shock Mode: Provides a warning beep and vibration only. Ideal for initial boundary awareness training.
- General Shock Mode: Delivers a warning beep, vibration, and a standard level of static correction.
- Enhanced Shock Mode: Provides a warning beep, vibration, and a boosted level of static correction for more stubborn dogs.

Image: A dog running in a field, accompanied by a graphic detailing the three safe and effective warning modes: No Shock (Beep + Vibrate), General Shock (Beep + Vibrate + Shock), and Enhanced Shock (Beep + Vibrate + Boosted Shock).
Adjusting the Radius:
The system allows for a highly customizable boundary radius, from 33 yards up to 9999 yards, covering expansive areas up to 65,000 acres. Use the collar's controls to precisely set your desired safe zone.

Image: A map graphic illustrating the adjustable radius range of the GPS fence, from 33 yards to 9999 yards, suitable for large yards over 3/4 acre or yard lengths over 66 yards.
Training Guide
Effective training is crucial for your dog to understand and respect the wireless boundary. Follow this multi-stage training program for optimal results:
Stage 1: Border Awareness (Day 1-3)
- Set the collar to No Shock Mode (Beep + Vibrate).
- Place boundary flags around the perimeter of your desired safe zone.
- Walk your dog on a leash towards the flags. When the collar activates (beep/vibrate), gently guide your dog back into the safe area.
- Praise and reward your dog when they return to the safe area.

Image: Illustration for Stage 1 of training, showing a person walking a dog on a leash near the boundary flags with the collar set to No Shock Mode.
Stage 2: Respect Border (Day 4-6)
- Switch the collar to General Shock Mode (Beep + Vibrate + Shock).
- Continue walking your dog on a leash towards the boundary flags. Observe your dog's reaction (e.g., lifting ears, stopping) when the collar activates.
- Immediately guide your dog back into the safe area and reward them.

Image: Illustration for Stage 2 of training, showing a person walking a dog on a leash near the boundary flags with the collar set to General Shock Mode.
Stage 3: Distraction Stage (Day 7-9)
- With your dog on a leash, throw a toy or treat just outside the safe area to tempt them to cross the boundary.
- Observe if your dog attempts to cross and reacts to the collar's correction.
- If they cross, immediately bring them back into the safe area and reinforce the boundary.
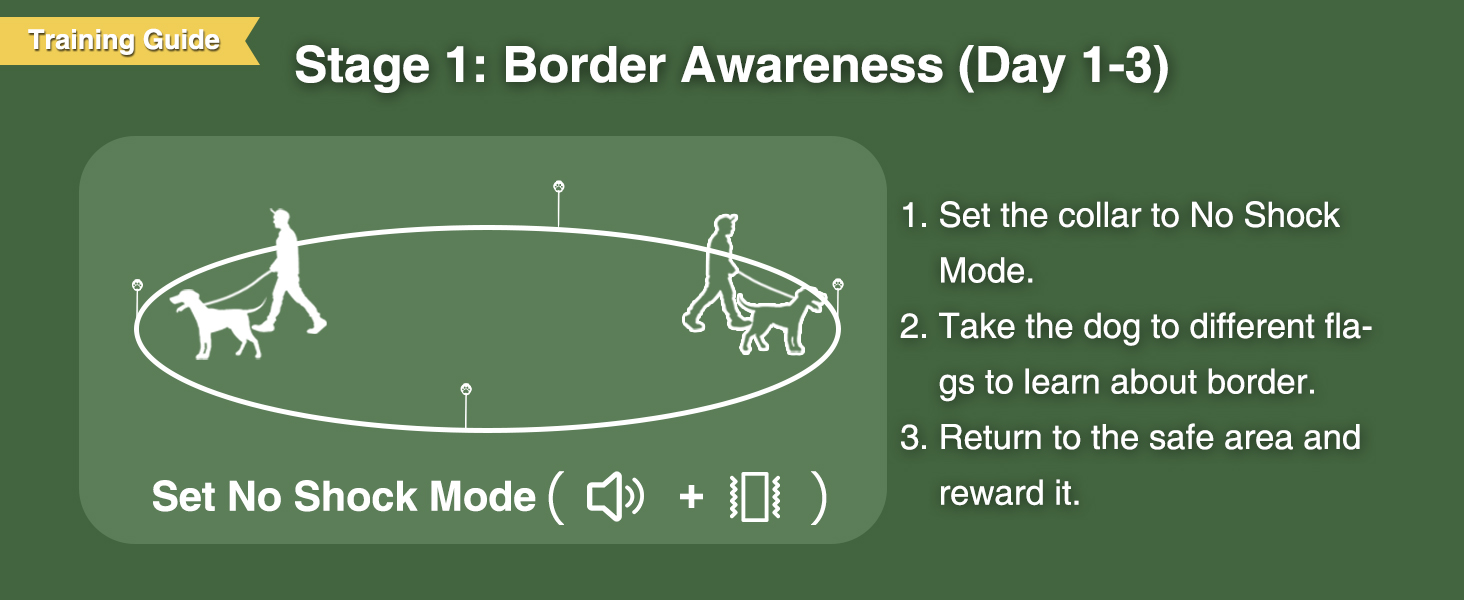
Image: Illustration for Stage 3 of training, showing a person throwing a toy outside the safe area to test the dog's understanding of the boundary.
Stage 4: Supervision & Inspection (Day 10-14)
- Gradually remove the leash and allow your dog to roam freely within the defined area, wearing only the GPS collar.
- Continue to observe your dog's behavior. If they do not approach the boundary or respond correctly to corrections, the training is complete.
- Periodically test the boundary and reinforce training as needed.

Image: Illustration for Stage 4 of training, showing a person and dog within the safe area, indicating the dog can now be off-leash.
Maintenance
- Cleaning: Regularly clean the collar and contact points with a damp cloth. Ensure the contact points are free of dirt or debris to maintain proper conductivity.
- Battery Care: Charge the collar fully when the battery indicator is low. Avoid completely draining the battery for extended periods to prolong its lifespan.
- Storage: When not in use for an extended period, store the collar in a cool, dry place. Charge it periodically to maintain battery health.
- Water Resistance: The collar is IPX7 waterproof, meaning it can withstand immersion in water up to 1 meter for 30 minutes. It is safe for swimming and use in rain.

Image: Two Golden Retrievers splashing in water, demonstrating the IPX7 waterproof capability of the receiver, suitable for bathing, swimming, rain, and splash proofing.
Troubleshooting
| Problem | Possible Cause | Solution |
|---|---|---|
| Collar not turning on. | Low battery; power button not held long enough. | Charge the collar fully. Press and hold the power button for 3-5 seconds. |
| Dog not responding to correction. | Collar fit is too loose; contact points not touching skin; stimulation level too low; dog is desensitized. | Adjust collar for snug fit. Ensure contact points are appropriate length. Increase stimulation level gradually. Re-evaluate training. |
| Inaccurate boundary/random corrections. | Poor GPS signal (indoors, heavy tree cover, tall buildings); center point not set accurately. | Ensure use in open outdoor areas. Re-set the center point in a clear location. Avoid using near large structures or dense foliage. |
| Collar not charging. | Faulty charging cable or adapter; dirty charging port. | Try a different charging cable/adapter. Clean the charging port gently. |
If you experience persistent issues not covered here, please contact customer support.
Specifications
| Feature | Detail |
|---|---|
| Model Number | GF400-BB1 |
| Item Weight | 1.19 pounds |
| Item Package Dimensions | 7.8 x 6.85 x 1.89 inches |
| Batteries | 1 Lithium Ion battery required (included) |
| Waterproof Rating | IPX7 |
| Adjustable Radius Range | 33 to 9999 yards |
| Coverage Area | Up to 65,000 acres |
| Collar Length | 29.5 inches |
| Neck Sizes Supported | 12-25 inches |
| Dog Weight Supported | 20-140 lbs |
| Working Time | Up to 24 hours |
| Charging Time | 2 hours (full charge) |
Warranty and Support
The PATPET GPS Wireless Dog Fence System comes with a 1-Year Warranty from the date of purchase, covering manufacturing defects. Please retain your proof of purchase for warranty claims.
For technical support, troubleshooting assistance, or warranty inquiries, please visit the official PATPET website or contact their customer service department. Contact information can typically be found on the product packaging or the PATPET brand store online.


