1. Product Overview
The REPTITRIP PT02A Reptile Dimming Thermostat is an advanced temperature control device designed to maintain precise and stable temperature conditions for reptile habitats. Utilizing PID (Proportional-Integral-Derivative) algorithms, it smoothly adjusts the power output to heating elements, preventing sudden temperature fluctuations and mimicking natural day/night cycles. This thermostat is suitable for various reptile species requiring specific thermal environments.

Key Features:
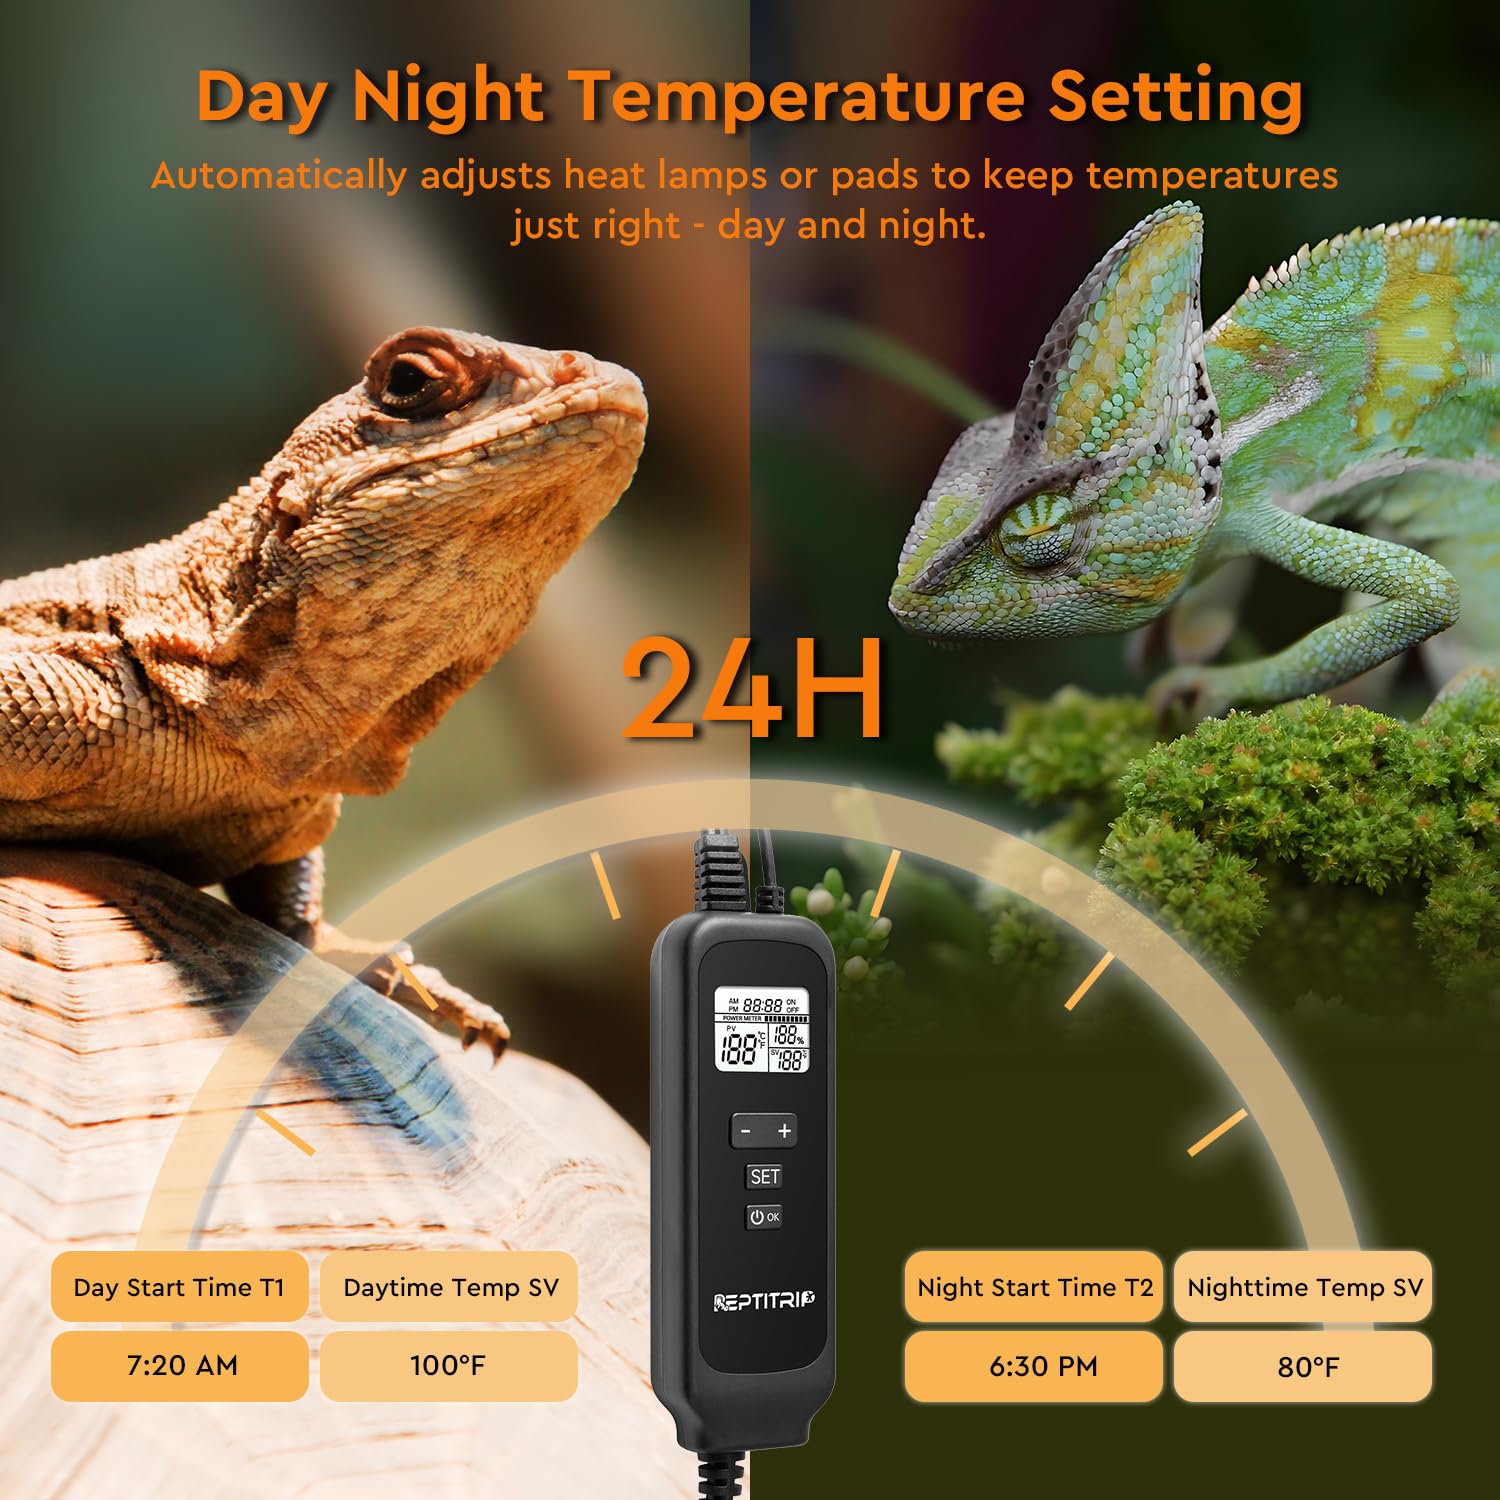
- Smart Day/Night Cycle Automation: Program separate day and night temperatures for dual presets, allowing the thermostat to automatically adjust heat lamps/mats for smooth transitions.
- PID Precision Control: Maintains habitat temperatures within ±1°F accuracy by continuously adjusting the heating element's output.
- Energy-Saving Efficiency: Smoothly dims heat sources, reducing wear on bulbs and potentially lowering energy consumption compared to on/off thermostats.
- Easy Setup & Clear Display: Features a large screen showing real-time temperature and power output, with user-friendly controls.
- Universal Compatibility: Works with various heating devices such as heat mats, ceramic emitters, and heat lamps (up to 260W).
2. Setup Instructions
Follow these steps to set up your REPTITRIP Dimming Thermostat:
- Unpack the Device: Carefully remove the thermostat, temperature probe, and power cables from the packaging.
- Connect Heating Device: Plug your reptile's heating device (e.g., heat lamp, heat mat, ceramic emitter) into the thermostat's output socket. Ensure the heating device's wattage does not exceed 260W.
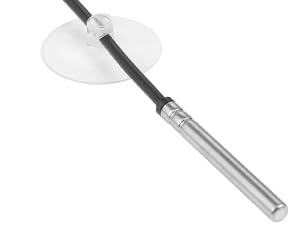
- Position the Temperature Probe: Place the temperature sensor probe in the reptile's basking area or the desired temperature monitoring location within the enclosure. The probe can be mounted using the included suction cup. Ensure the probe is not directly touching the heating element or submerged in water.
- Connect to Power: Plug the thermostat's power cord into a standard 120VAC, 60Hz electrical outlet. The display will illuminate.


3. Operating Instructions
The REPTITRIP Dimming Thermostat offers precise control over your reptile's environment. Familiarize yourself with the display and buttons:

Setting Day and Night Temperatures:
This thermostat allows you to program distinct day and night temperature settings to simulate natural environmental cycles.
- Enter Setting Mode: Press the SET button. The display will show the current time setting.
- Set Current Time: Use the + and - buttons to adjust the current time. Press SET to confirm and move to the next setting.
- Set Day Start Time (T1): Adjust the time when the daytime temperature setting should begin. Press SET.
- Set Daytime Temperature (SV1): Adjust the desired temperature for the daytime period. Press SET.
- Set Night Start Time (T2): Adjust the time when the nighttime temperature setting should begin. Press SET.
- Set Nighttime Temperature (SV2): Adjust the desired temperature for the nighttime period. Press SET.
- Exit Setting Mode: Continue pressing SET until the display returns to the main screen, or wait for it to automatically exit after a few seconds of inactivity.


Switching Temperature Units (°F/°C):
To switch between Fahrenheit (°F) and Celsius (°C), press and hold the OK button for a few seconds until the unit changes on the display.
PID Dimming Function:
The thermostat uses PID control to gradually increase or decrease the power to the heating element, ensuring stable temperatures without sudden on/off cycles. This dimming action is similar to a sunrise/sunset effect, which is beneficial for light-sensitive reptiles and extends the lifespan of heating bulbs.

Compatibility with Heating Devices:
The REPTITRIP Dimming Thermostat is compatible with various heating devices. Refer to the table below for recommended sensor placement.

Dimming Thermostat vs. On/Off Thermostat:
Understand the advantages of a dimming thermostat over traditional on/off models:

4. Maintenance
Proper maintenance ensures the longevity and accuracy of your thermostat:
- Cleaning: Wipe the thermostat unit and probe with a soft, dry cloth. Do not use abrasive cleaners or immerse the unit in water.
- Probe Care: Regularly check the temperature probe for any damage or debris. Ensure it remains securely positioned in the desired monitoring area.
- Cable Inspection: Periodically inspect all cables for signs of wear, fraying, or damage. Replace if necessary.
5. Troubleshooting
If you encounter issues with your thermostat, refer to the following common problems and solutions:
- Temperature Not Reaching Set Point (SV):
If the current temperature (PV) consistently fails to reach your set temperature (SV), the heating bulb or element may be of insufficient wattage. Replace the heating bulb with one of higher wattage, ensuring it does not exceed the thermostat's maximum supported power of 260W.
- Clock Resets After Power Loss:
The thermostat's internal clock may reset to a default time (e.g., 8:00 AM) if power is lost or the unit is unplugged. This is a known characteristic. You will need to reset the current time manually after a power interruption to ensure accurate day/night cycle transitions.
- Inaccurate Temperature Readings:
Ensure the temperature probe is correctly placed in the basking area and is not directly touching the heating element or any surfaces that might skew readings. Verify the probe cable is not damaged.
- Display Not Working:
Check if the thermostat is properly plugged into a live power outlet. If the issue persists, contact customer support.
6. Specifications
Detailed technical specifications for the REPTITRIP PT02A Dimming Thermostat:

| Specification | Value |
|---|---|
| Model Name | PT02A |
| Input Voltage | 120VAC, 60Hz |
| Output Load | Max 260W |
| Temperature Setting Range | 68-113°F / 20-45°C |
| Temperature Control Mode | PID Thermostatic Control |
| Temperature Accuracy | ±1°F |
| Probe Length | 5.8 ft |
| Power Cord Length | 5 ft |
| Socket Length | 0.9 ft |
| Display Type | Digital LCD |
| Outer Material | Plastic |
| Indoor/Outdoor Usage | Indoor |
| Included Components | Thermostat Unit, Temperature Probe, Instruction Manual |
7. Warranty and Support
This product comes with an instruction manual for guidance. For any further assistance, technical support, or warranty inquiries, please refer to the contact information provided with your purchase or visit the official REPTITRIP website.
Manufacturer: REPTITRIP
Please retain your proof of purchase for any warranty claims.

