1. Introduction
The AutoSky 2-in-1 Jump Starter with Air Compressor is a versatile and compact emergency tool designed for vehicle owners. This device integrates a powerful jump starter, a high-pressure air compressor, an LED flashlight with multiple modes, and a USB power bank into a single unit. It is engineered to provide reliable assistance for common roadside emergencies such as dead batteries and flat tires.
This manual provides detailed instructions for the safe and effective use of your AutoSky 2-in-1 Jump Starter with Air Compressor. Please read it thoroughly before operation and retain it for future reference.

Figure 1: AutoSky 2-in-1 Jump Starter with Air Compressor and included accessories.
2. What's in the Box
Verify that all items listed below are present in your package:
- AutoSky Jump Starter with Tire Pump (Main Unit)
- Air Hose
- Battery Booster Cables (Jump Cables)
- Storage Bag
- USB Cable

Figure 2: All components included in the AutoSky 2-in-1 Jump Starter with Air Compressor package.
3. Setup
3.1 Initial Charging
Before first use, fully charge the AutoSky 2-in-1 Jump Starter. Connect the provided USB cable to the unit's USB-C input port and to a suitable USB power adapter (not included). The display will indicate charging progress. Ensure the unit is fully charged for optimal performance, especially before attempting to jump-start a vehicle.
3.2 Understanding the Interface
The unit features an intuitive interface with a digital display and control buttons.
- USB-C Input: For charging the device.
- USB-A Output Powerbank: For charging external devices.
- Current Pressure Reading: Displays real-time pressure during inflation.
- LED Light: Activates the flashlight and SOS modes.
- Hose Connector: For attaching the air hose.
- Unit Switch: To change pressure units (PSI, BAR, KPA, Kg/cm²).
- +/- Buttons: To adjust target pressure for inflation.
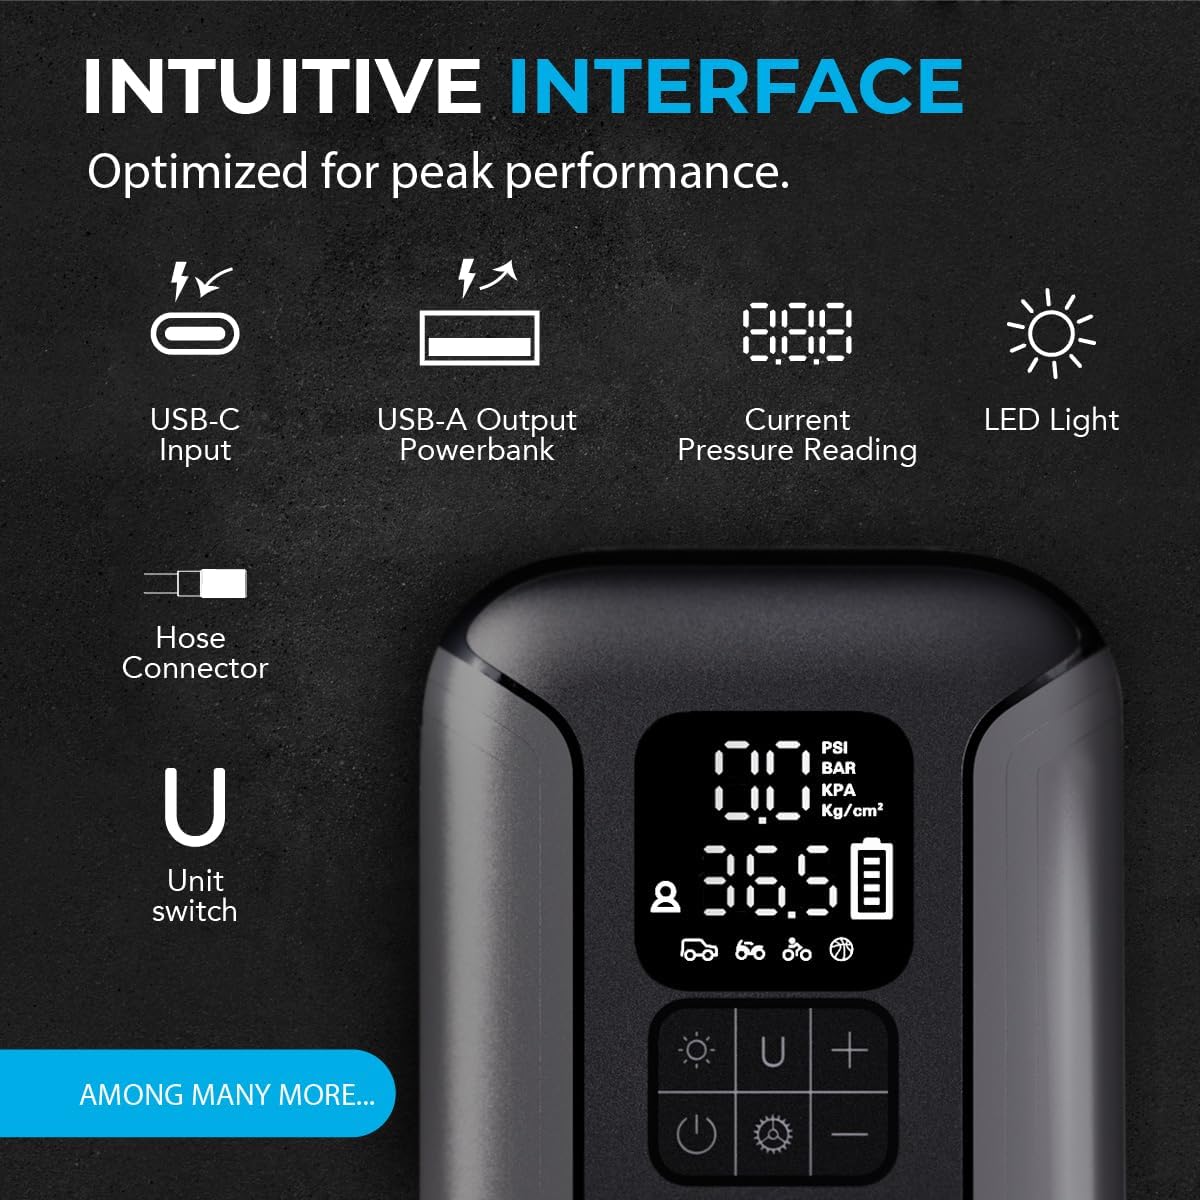
Figure 3: Detailed view of the device's intuitive interface.
4. Operating Instructions
4.1 Using the Jump Starter
The jump starter function is designed for gas engines up to 6.0L and diesel engines up to 4.0L.
- Ensure the jump starter unit is adequately charged (at least 75% recommended).
- Connect the battery booster cables to the jump starter unit.
- Attach the red (positive) clamp to the positive (+) terminal of the vehicle's battery.
- Attach the black (negative) clamp to the negative (-) terminal of the vehicle's battery.
- Once connected, the unit will automatically detect the battery status.
- Start the vehicle's engine. If it doesn't start immediately, wait 30 seconds before trying again. Do not crank for more than 3 seconds per attempt.
- Once the vehicle starts, immediately disconnect the black (negative) clamp, then the red (positive) clamp, and finally disconnect the cables from the jump starter unit.
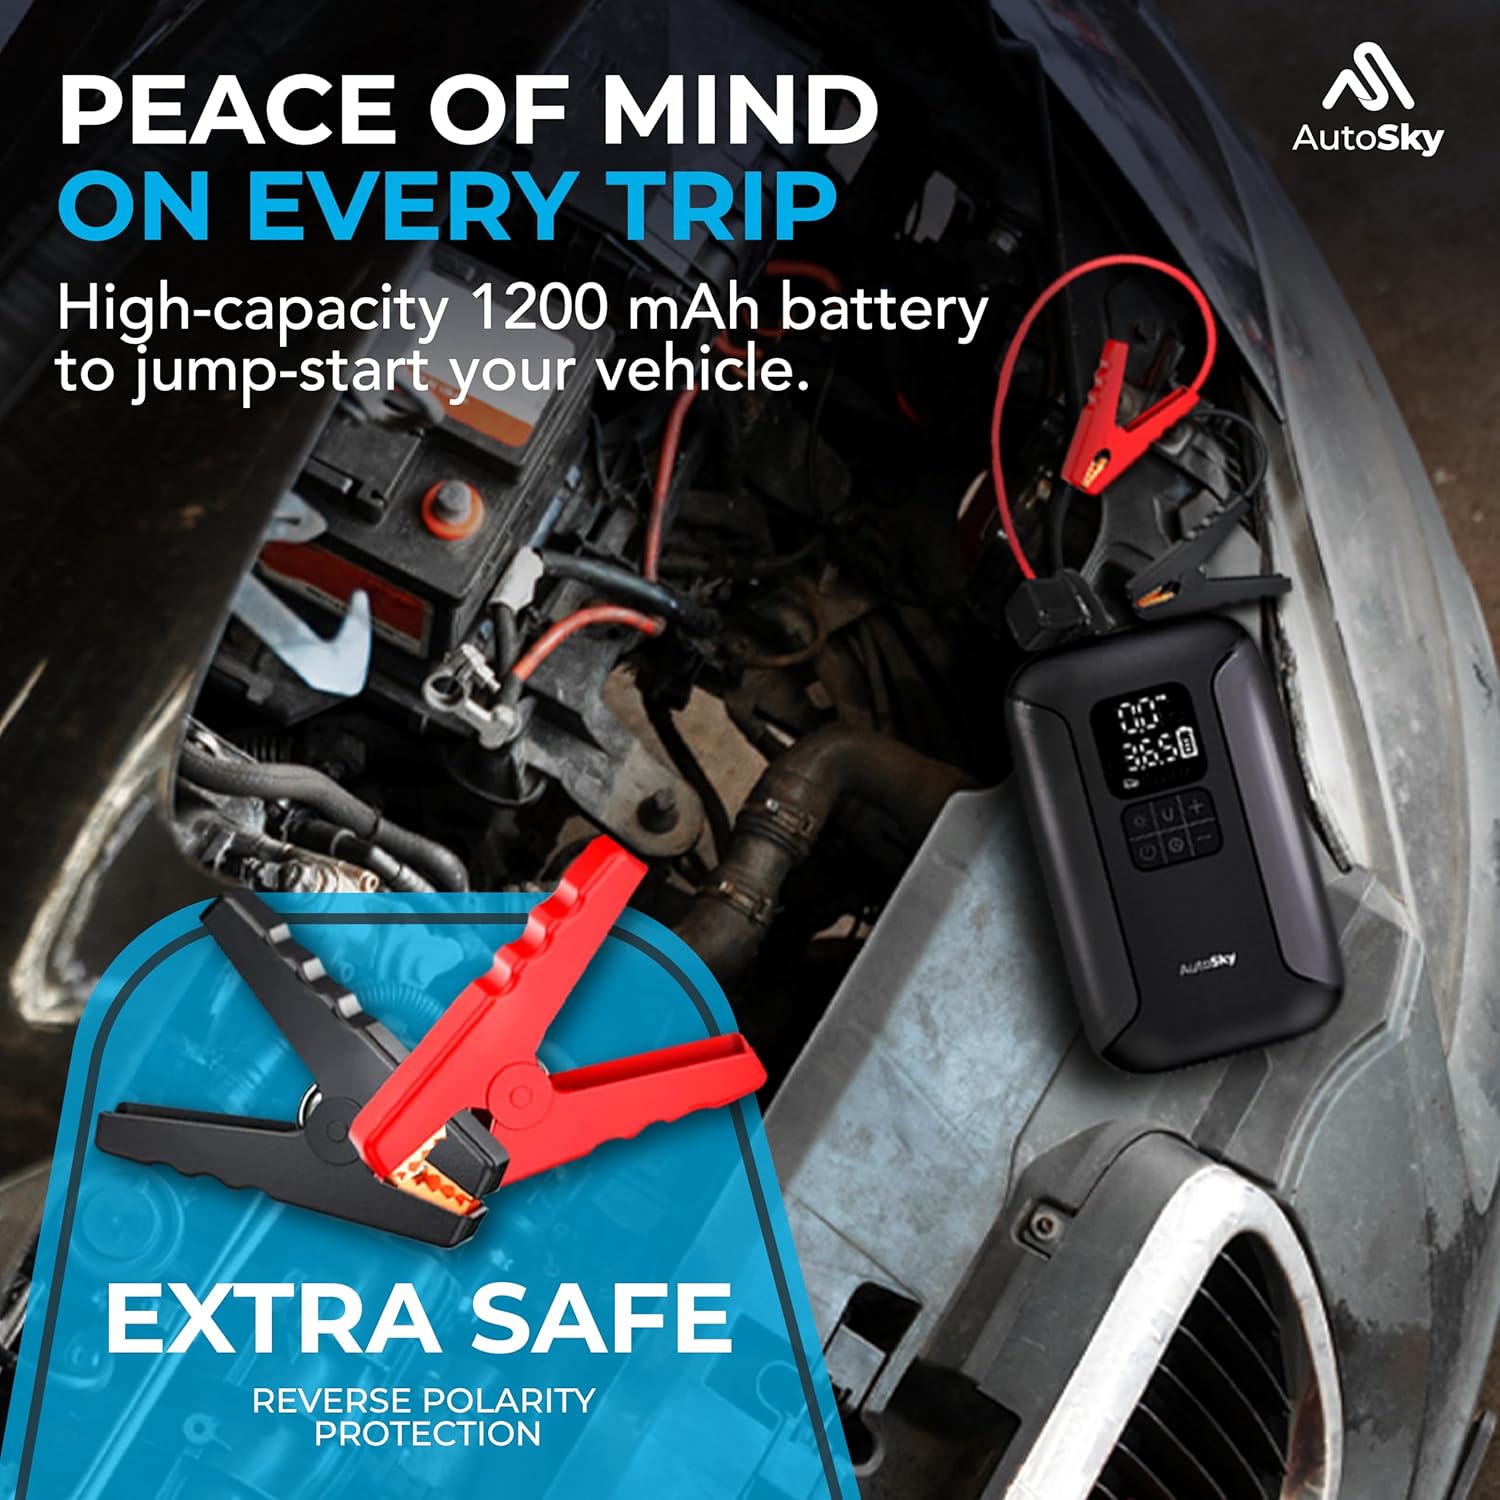
Figure 4: Jump starter connected to a vehicle battery.
Video 1: Demonstration of the AutoSky 2-in-1 Jump Starter in action, showing how to connect the cables and start a vehicle.
4.2 Using the Air Compressor
The built-in air compressor can inflate tires up to 160 PSI.
- Attach the air hose to the unit's hose connector.
- Screw the air hose nozzle onto the tire valve stem. Ensure a secure connection to prevent air leakage.
- Press the power button to turn on the unit. The digital display will show the current tire pressure.
- Use the 'On/Unit' button to select your desired pressure unit (PSI, BAR, KPA, Kg/cm²).
- Use the '+' and '-' buttons to set the target pressure.
- Press the power button again to start inflation. The compressor will automatically stop once the target pressure is reached.
- Disconnect the air hose from the tire valve and the unit.
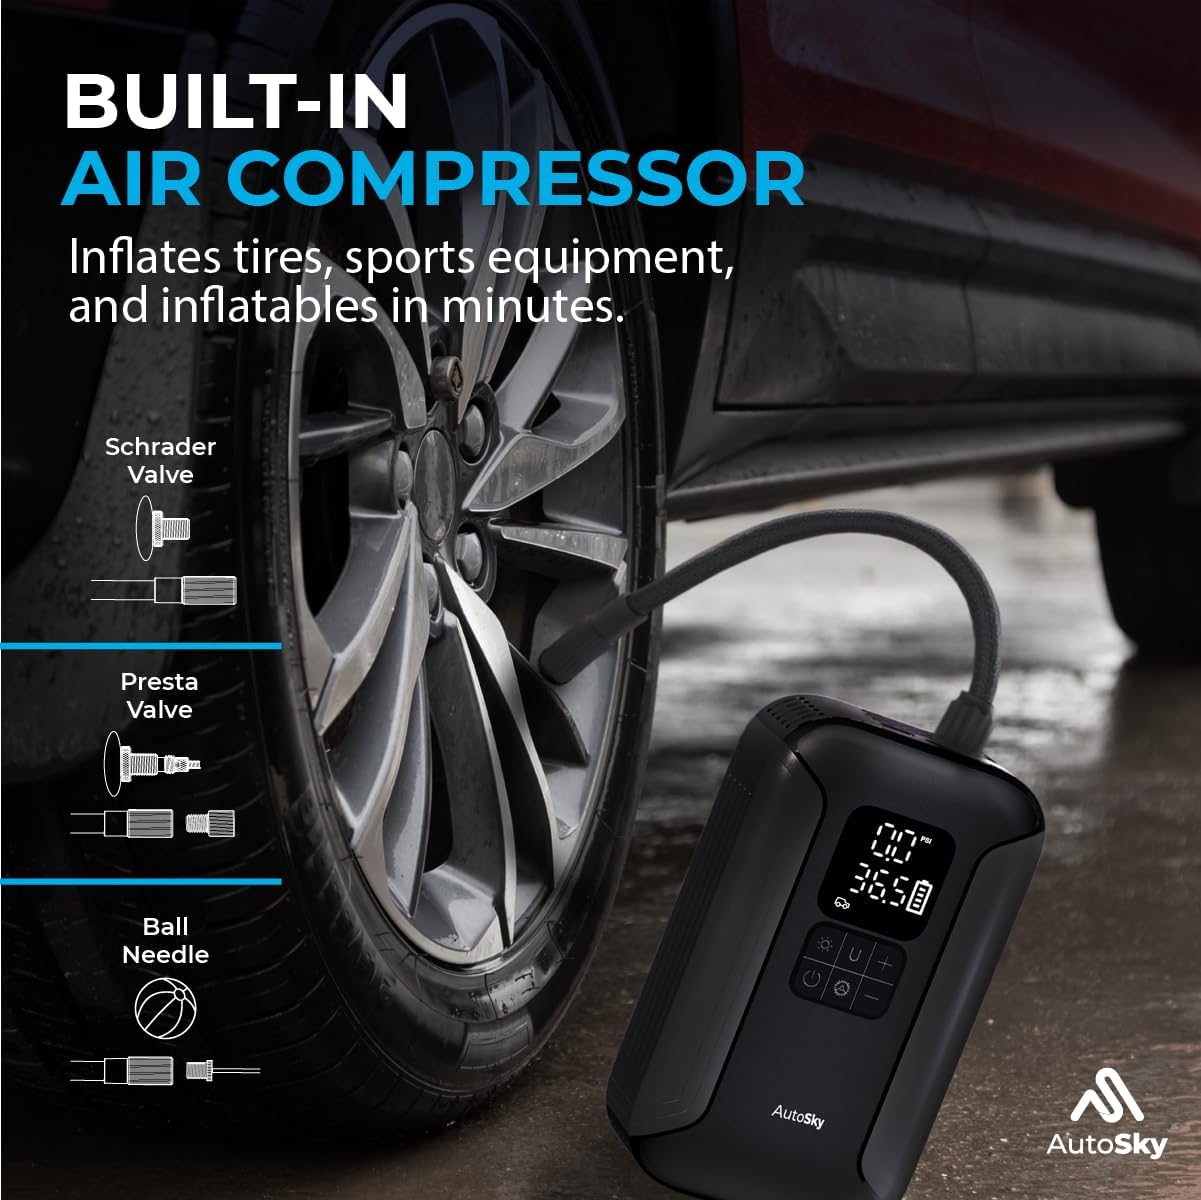
Figure 5: Air compressor in use for tire inflation.
4.3 LED Flashlight
The integrated LED flashlight offers multiple lighting modes for emergencies.
- Press the LED light button once for a steady light.
- Press again for a flashing light mode.
- Press a third time for SOS mode.
- Press a fourth time to turn off the light.

Figure 6: Multiple light settings for the LED flashlight.
4.4 Power Bank Function
Use the USB-A output port to charge your electronic devices.
- Connect your device's USB charging cable to the USB-A output port on the AutoSky unit.
- The unit will automatically begin charging your device.
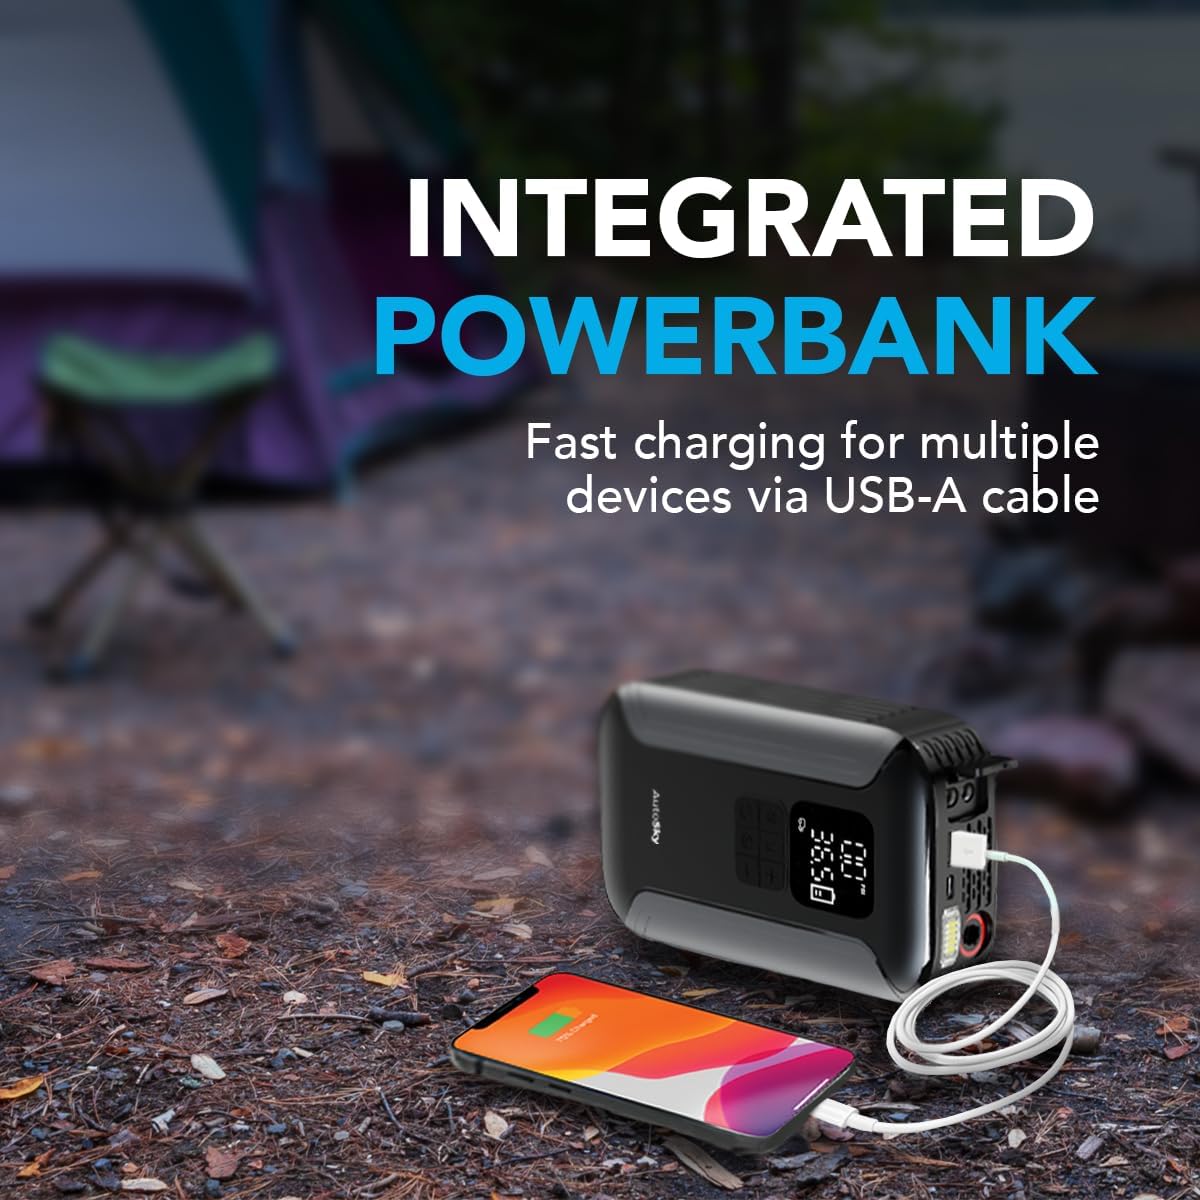
Figure 7: Using the power bank function to charge a smartphone.
5. Maintenance
- Regular Charging: To prolong battery life, fully charge the unit every 3 months, even if not in use.
- Cleaning: Wipe the unit with a soft, dry cloth. Do not use harsh chemicals or abrasive materials.
- Storage: Store the unit in its provided bag in a cool, dry place away from direct sunlight and extreme temperatures.
- Cable Inspection: Periodically inspect the battery booster cables and air hose for any signs of damage or wear. Replace if necessary.
6. Troubleshooting
| Problem | Possible Cause | Solution |
|---|---|---|
| Unit does not turn on | Low battery | Charge the unit fully. |
| Vehicle does not jump-start | Unit battery too low; Incorrect connection; Vehicle battery severely damaged | Ensure unit is fully charged; Check cable connections (positive to positive, negative to negative); Consult a mechanic if vehicle battery is beyond jump-starting. |
| Air compressor not inflating | Hose not securely attached; Target pressure not set; Unit not powered on | Ensure air hose is tightly screwed onto valve stem; Set target pressure using +/- buttons; Power on the unit before starting inflation. |
| USB device not charging | USB cable faulty; Unit battery too low | Try a different USB cable; Charge the unit fully. |
7. Specifications
| Feature | Detail |
|---|---|
| Model | AJS-200 |
| Product Dimensions | 2"D x 4.5"W x 7"H |
| Item Weight | 2.53 pounds |
| Amperage | 2 Amps |
| Peak Output Current | 1500 Amps |
| Max Air Compressor Pressure | 160 PSI |
| Gas Engine Compatibility | Up to 6.0L |
| Diesel Engine Compatibility | Up to 4.0L |
| Battery Type | 1 P76 batteries (included) |
| Manufacturer | Promaster Electronic LLC |
8. Warranty and Support
8.1 Warranty Information
This product comes with a one-year warranty against any manufacturing defects. Please retain your proof of purchase for warranty claims.
8.2 Customer Support
For technical assistance, troubleshooting not covered in this manual, or warranty inquiries, please contact AutoSky customer support through the retailer where the product was purchased or visit the official AutoSky website.


