
1. Product Overview
The GODIAG GT110 is a specialized test platform cable designed for automotive diagnostic and key programming tasks on VW, Audi, Skoda, and Seat vehicles. It supports CAN-Bus UDS 4th Generation IM-MO systems, enabling offline POGO PIN data reading and writing for dashboards and key programming. This device is essential for professionals performing advanced immobilizer functions and key matching.

Image 1.1: GODIAG GT110 Test Platform Cable and Components
2. Package Contents
- GODIAG GT110 Test Platform Unit
- POGO PIN Cable
- IMMO IV UDS Cable
- Key Sensor Adapter with Light
- Power Adapter Cable
- OBD2 Extension Cable
3. Key Features
- Supports VW, Audi, Skoda, Seat: CAN-Bus UDS 4th Generation IM-MO system test platform cable.
- Enables offline POGO PIN data reading and writing for dashboards, including boot probe for key programming.
- Supports CANH UDS communication indication.
- Features CR2032 remote key battery detection.
- Facilitates key and IM-MO instrument synchronization test.
- Includes intelligent IM-MO system emergency start area induction detection.
- Supports IM-MO combination instrument offline diagnosis.
- Allows instrument IM-MO data reading and writing, and key matching functions.
- Displays current working voltage and current.
- Equipped with a power switch and a simulation ignition switch.
- Buzzer provides prompts for ignition start and shut down.
- Offline connection to the dashboard to convert to standard OBD2.
- Equipped with an independent ignition switch and key sensor adapter with light.
- Compatible with most mainstream automotive diagnostic tools, such as VVDI2, Key Tool Plus, etc.

Image 3.1: Diagram illustrating key features of the GODIAG GT110.
4. Setup Guide
4.1 Connecting the Diagnostic Tool
- Connect the OBD2 extension cable to your compatible diagnostic tool (e.g., Autel IM508).
- Connect the other end of the OBD2 extension cable to the GODIAG GT110 unit.

Image 4.1: Full setup showing connections between Autel diagnostic tool, GT110, and dashboard.
4.2 Connecting to the Instrument Cluster (Dashboard)
- Identify the appropriate connector on the back of the vehicle's instrument cluster.
- Connect the blue connector from the GT110 cable assembly to the instrument cluster. Ensure it is securely latched.
- For POGO PIN data reading/writing, use the provided POGO PIN probe to connect to the designated points on the dashboard.
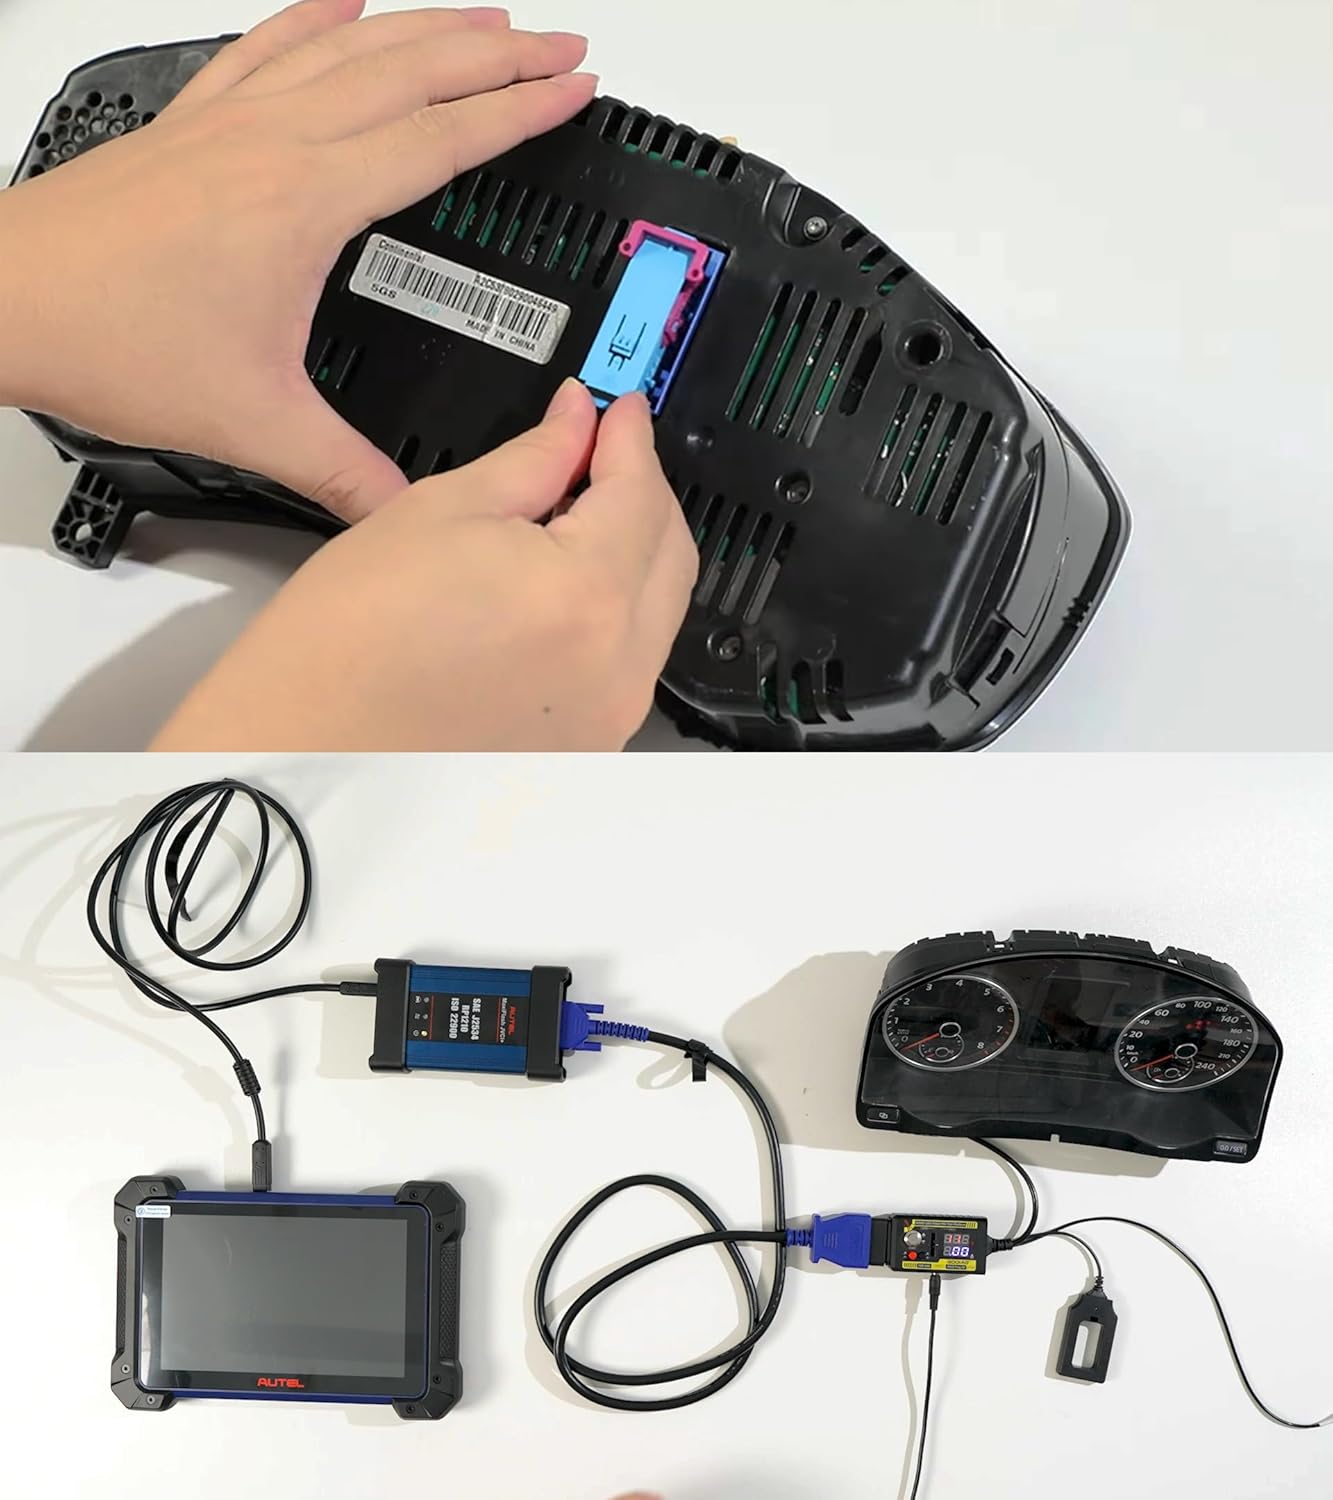
Image 4.2: Inserting the blue connector into the instrument cluster.
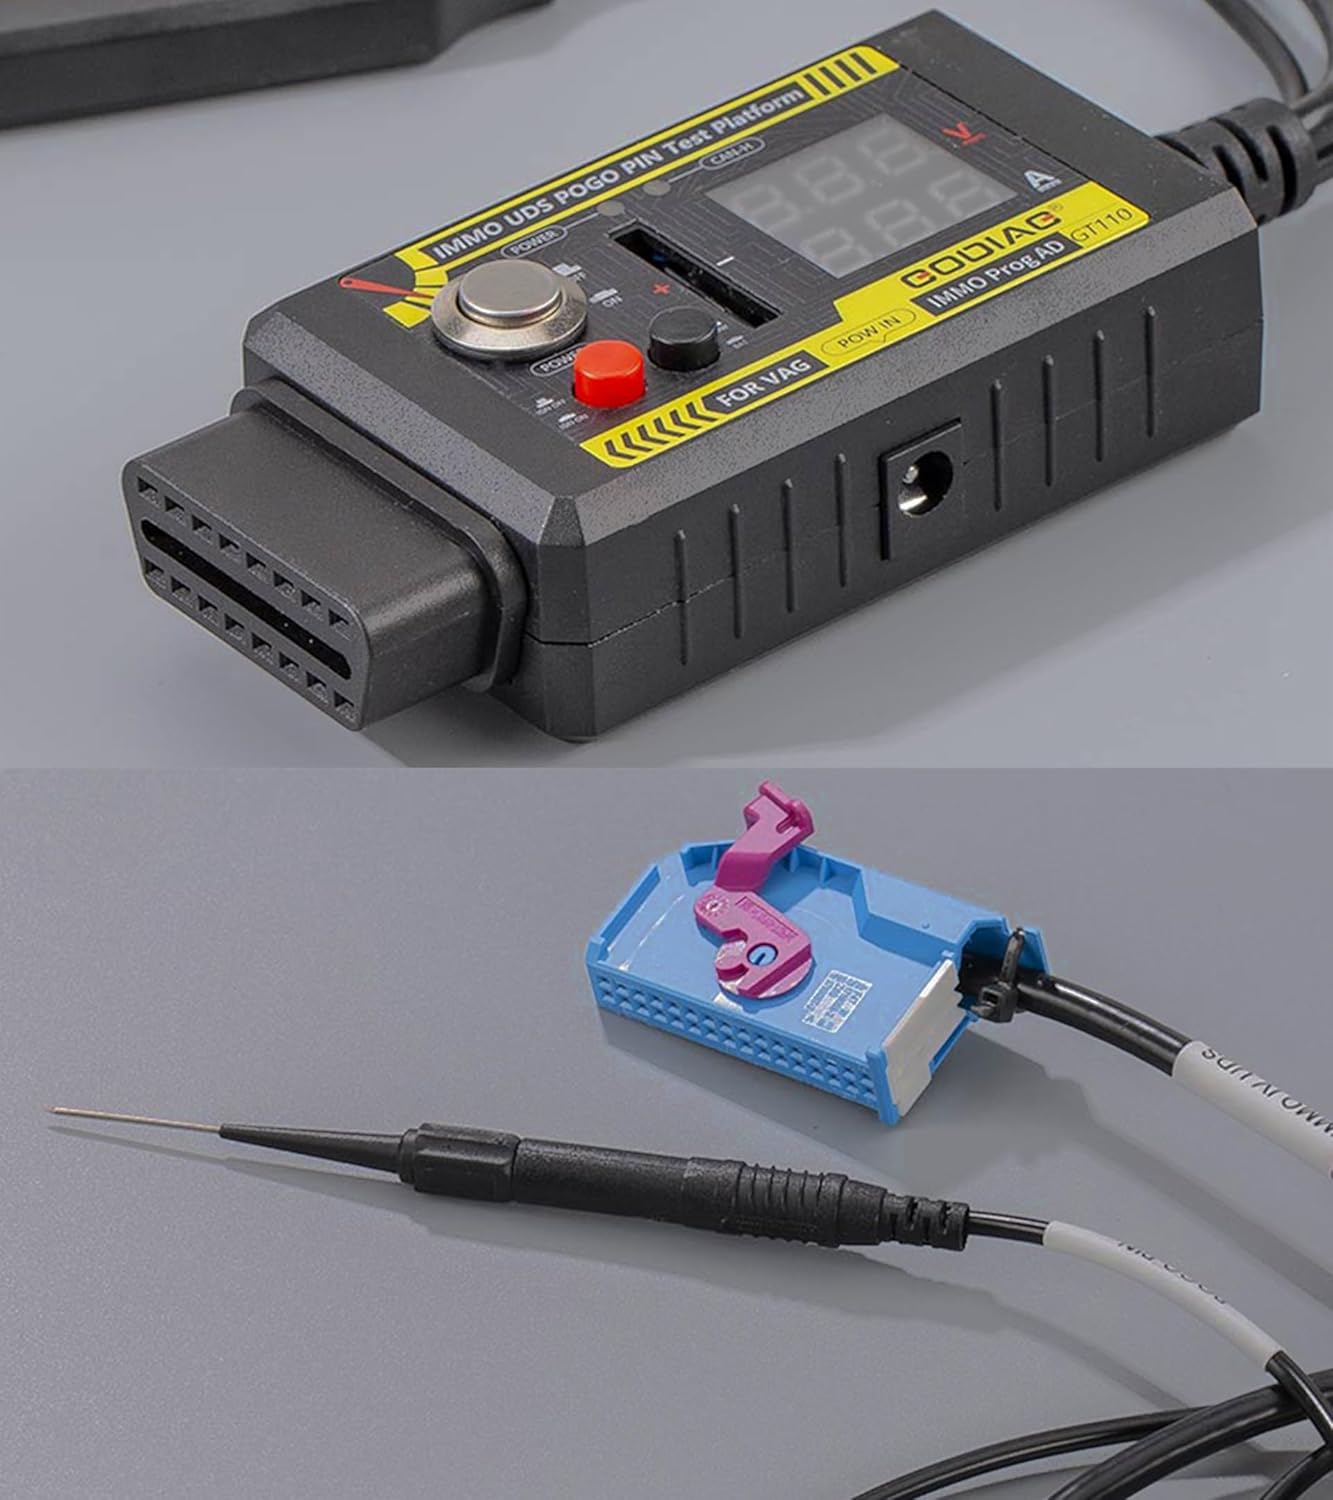
Image 4.3: Close-up of the GT110's OBD port and POGO PIN connection.
4.3 Powering the GT110
- Connect the power adapter cable to the GT110 unit.
- Ensure the GT110 is receiving power, indicated by the display lighting up.

Image 4.4: Powering on the GT110 and observing the dashboard.
5. Operation Guide
5.1 Understanding Key Indicator Lights
The key identification light on the GT110's key sensor adapter provides crucial feedback:
- Flashes and then goes out: Indicates that the IMMO chip and the chip key are working properly and a key has been successfully matched.
- Flashes for a long time: Indicates that the chip key and the vehicle's IMMO system do not match, and the chip key needs to be re-matched.
- Does not flash: Means that the vehicle's IMMO system is faulty. Please check the vehicle's IMMO system.
5.2 Performing IMMO Data Read (Example with Autel IM508)
- On your diagnostic tool, navigate to the IMMO function.
- Select the vehicle manufacturer (e.g., Volkswagen), then the region (e.g., Europe), model (e.g., UP!), and year (e.g., 2012-).
- Confirm the vehicle profile.
- Select "IMMO status scan" to read the immobilizer data. The tool will display the status of the IMMO system and any related Diagnostic Trouble Codes (DTCs).
5.3 Key Generation and Testing
- Place the key to be programmed into the key sensor adapter of the GT110.
- Initiate the key generation or matching process through your diagnostic tool.
- Observe the key identification light on the GT110. A successful match is indicated by the light flashing briefly and then turning off.
5.4 In-Vehicle Key Sensor Test
- Connect the key sensor adapter to the vehicle's OBD port or designated key slot.
- Insert the key into the key sensor adapter.
- Attempt to start the vehicle or turn the ignition. Observe the key identification light and vehicle's dashboard for proper recognition.
Video 5.1: Demonstration of GODIAG GT110 working with Autel IM508 to read VAG IMMO data and generate keys.
6. Technical Specifications
| Specification | Detail |
|---|---|
| Brand | GODIAG |
| Model | GT110 |
| Power Source | Corded Electric |
| Automotive Fit Type | Vehicle Specific Fit |
| UPC | 889327085460 |
| Item Weight | 5.9 ounces |
| Package Dimensions | 5.79 x 4.13 x 1.69 inches |
| Date First Available | December 12, 2024 |
Note: The 'Operating System: Android' listed in some product specifications refers to compatible diagnostic tools, not the GT110 itself.
7. Troubleshooting
- Key Not Recognized: If the key identification light flashes for a long time, it indicates a mismatch between the chip key and the vehicle's IMMO system. Re-match the chip key using your diagnostic tool.
- IMMO System Faulty: If the key identification light does not flash at all, it suggests a fault within the vehicle's IMMO system. Further diagnosis of the vehicle's immobilizer system is required.
- No Communication: Ensure all cables are securely connected to the GT110, diagnostic tool, and instrument cluster. Check for any visible damage to the cables or connectors. Verify power supply to the GT110.
- Incorrect Readings: Confirm that the correct vehicle make, model, and year are selected on your diagnostic tool. Ensure POGO PIN connections are accurate and stable.
8. Maintenance and Care
- Keep the GT110 and its accessories clean and dry. Avoid exposure to moisture, dust, and extreme temperatures.
- Store the device in a safe place when not in use to prevent physical damage.
- Regularly inspect cables and connectors for wear, fraying, or damage. Replace any damaged components immediately to ensure safe and reliable operation.
- Do not attempt to disassemble or modify the GT110 unit, as this will void the warranty and may cause damage.
9. Warranty and Support Information
For specific warranty details and technical support, please refer to the documentation provided with your purchase or contact GODIAG customer service directly. Keep your proof of purchase for warranty claims.